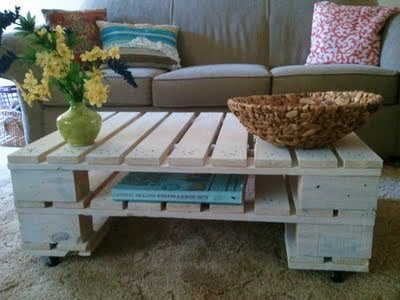


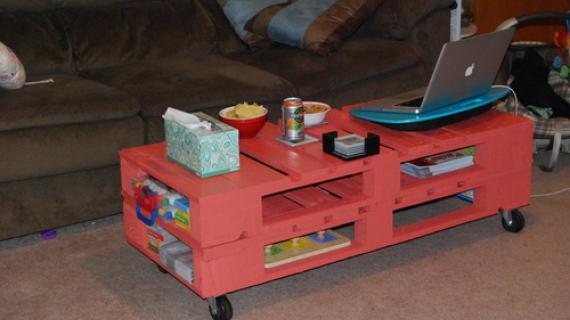
I had some left over pallets that I needed to do something with. My wife had found a picture on pinterest of a pallet table and I figured I could build it in under one hour. I used watered down white paint to white wash the pallets. I added them together using 3 inch wood screws and then added caster wheels to the bottom for easy moving for my daughter's impromptu dance parties. See more at http://www.makeitlovely.com/2011/04/pallet-able-home-decor.html

Preparation
Pallets
Paint
2 in screws
Caster wheels
Cut the pallets to make two equal smaller sections


Please read through the entire plan and all comments before beginning this project. It is also advisable to review the Getting Started Section. Take all necessary precautions to build safely and smartly. Work on a clean level surface, free of imperfections or debris. Always use straight boards. Check for square after each step. Always predrill holes before attaching with screws. Use glue with finish nails for a stronger hold. Wipe excess glue off bare wood for stained projects, as dried glue will not take stain. Be safe, have fun, and ask for help if you need it. Good luck!
Instructions
Step 1
Cut the pallets into equal sections, or just use two small pallets
Step 2
Paint the pallets.
Step 3
Stack the pallets on top of each other and screw the pallets together. Screws can show and give this a more rustic look.
Step 4
Add caster wheels to the bottom. That's it. Bring it in and you have a great easy to make coffee table.
It is always recommended to apply a test coat on a hidden area or scrap piece to ensure color evenness and adhesion. Use primer or wood conditioner as needed.

Comments
Guest (not verified)
Fri, 07/15/2011 - 13:40
toxins
Make sure your pallet wood is not treated! Pallets used to be routinely chemically treated and I expect many are still in circulation. According to Wikipedia:
Due to the International Plant Protection Convention (abbreviated IPPC), most pallets shipped across national borders must be made of materials that are incapable of being a carrier of invasive species of insects and plant diseases. The standards for these pallets is specified in ISPM 15.
Pallets made of raw, untreated wood are not compliant with ISPM 15. To be compliant the pallets (or other wood packaging material) must meet debarked standards,[24] and must be treated by either of the following means under the supervision of an approved agency:
Heat treatment The wood must be heated to achieve a minimum core temperature of 56 °C (132.8 °F) for at least 30 minutes. Pallets treated via this method bear the initials HT near the IPPC logo.
Chemical fumigation The wood must be fumigated with methyl bromide. Pallets treated via this method bear the initials MB near the IPPC logo. From 19 March 2010 the use of Methyl Bromide as an acceptable treatment according to ISPM15 [25] has now been phased out.
http://en.wikipedia.org/wiki/Pallet
otherwise, great project!
green terror cichlid (not verified)
Tue, 01/22/2013 - 20:49
Pallet coffee table | Ana White
I absolutely love your blog.. Excellent colors & theme.
Did you build this website yourself? Please
reply back as I'm trying to create my very own blog and would love to find out where you got this from or exactly what the theme is named. Many thanks!
stuffontheporch
Fri, 08/12/2011 - 08:59
I think I might be able to do this!
I actually have enough tools to do this I think. And I know I have access to pallets. I think this is fabulous!!!
Julie h (not verified)
Mon, 12/31/2012 - 07:13
Outside furniture
Hi Ana! First of all, I love your furniture! Im a novice builder and your website is getting me excited to start building!
What type of finish do you suggest for outside furniture? Say I make this pallet coffee table and use it outdoors.
Thanks!!
ChropistpaieloB
Mon, 04/29/2013 - 22:05
nice picture well i really
nice picture well i really like your spirit and your mind excellent work done by you.
Culver City Locksmith
kongk
Tue, 05/21/2013 - 06:26
useful information on topics
useful information on topics that plenty are interested on for this wonderful post.Admiring the time and effort you put into your b!..
Tips by A1 Direct Casket
GINGERELLA
Thu, 10/17/2013 - 13:15
pallet coffee table
Is it possible to make it with four pallets so that it would be longer?