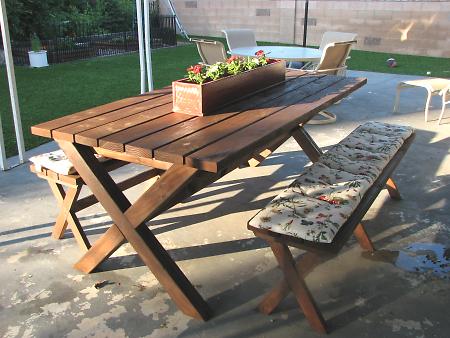


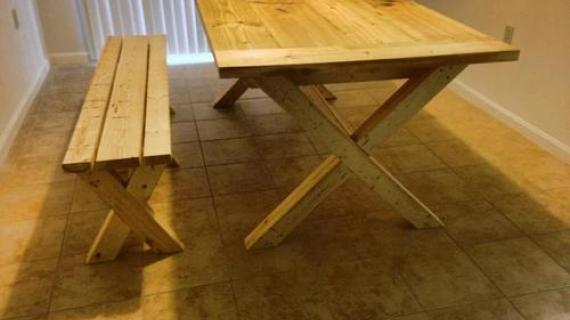
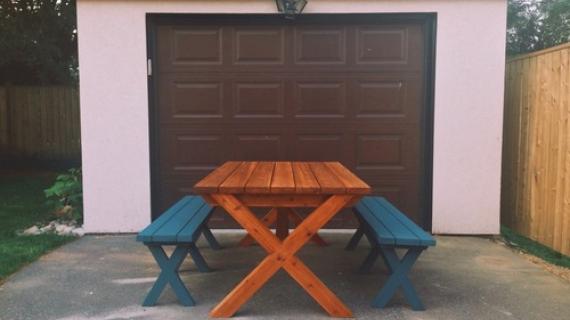
Free simple step by step project plans to do it yourself and build a x bench, inspired by Pottery Barn's Chesapeake Rectangle bench. Features modern or contemporary picnic table styling, these sturdy x benches are easy to build and stylish.

Preparation
- 3 - 1x3 @ 8 feet long
- 2 - 2x2 @ 8 feet long
- 2 - 2x4 @ 8 feet long
- 1 - 2x6 @ 8 feet long
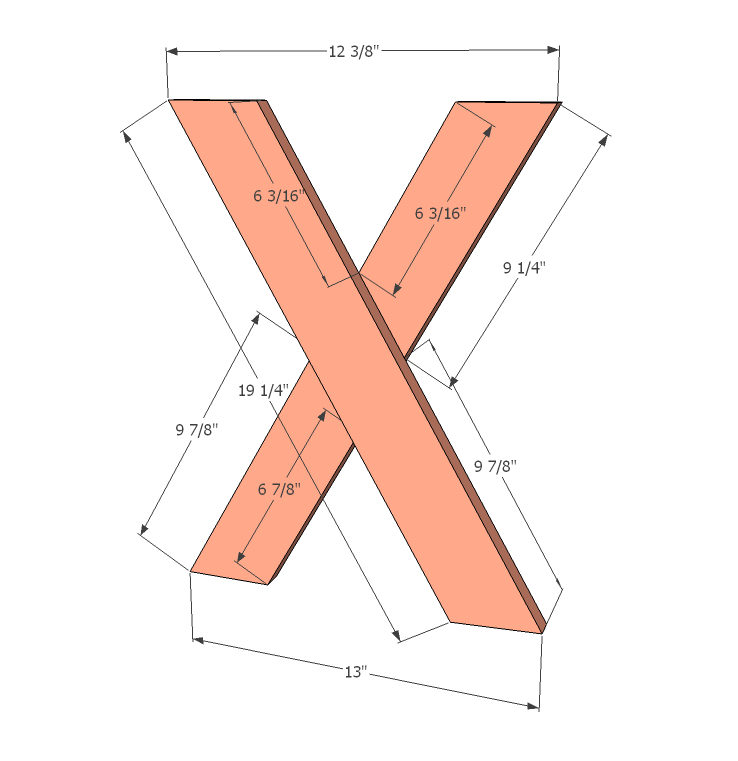
- 6 - 1x3 @ 19 1/4" with both ends cut at 30 degrees off square, ends parallel to each other
- 6 - 1x3 @ 9 1/4" long point to long point, both ends cut at 30 degrees off square, ends NOT parallel to each other
- 6 - 1x3 @ 9 7/8" long point to long point, both ends cut at 30 degrees off square, ends NOT parallel to each other
- 6 - 2x2 @ 12 3/8" long point to long point, both ends cut at 30 degrees off square, ends NOT parallel to each other
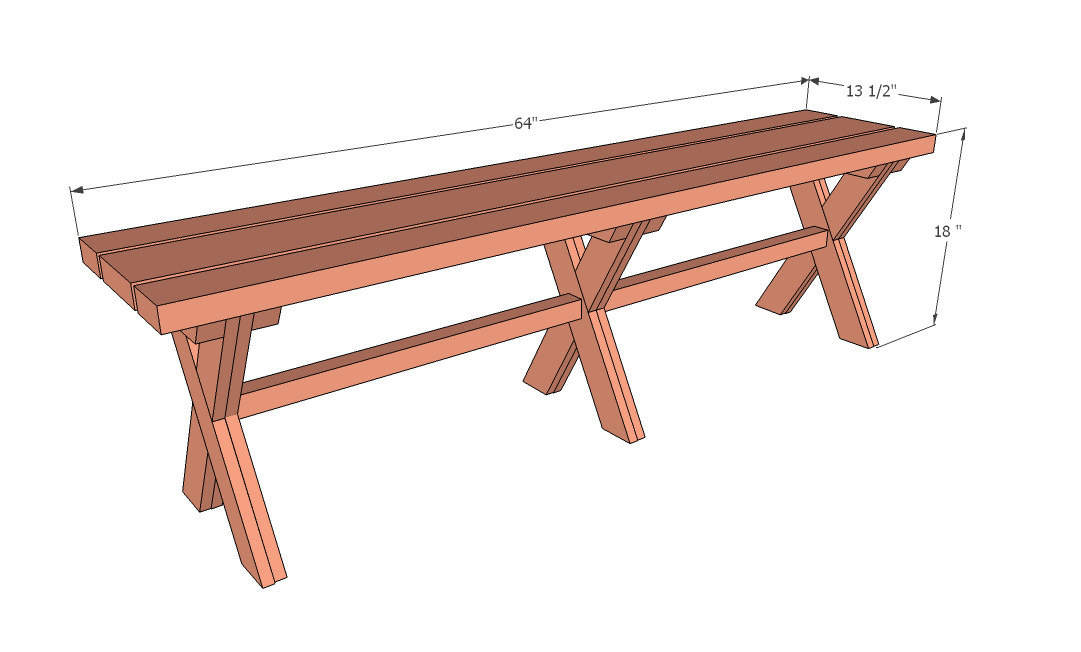
- 2 - 2x4 @ 64"
- 1 - 2x6 @ 64"


Please read through the entire plan and all comments before beginning this project. It is also advisable to review the Getting Started Section. Take all necessary precautions to build safely and smartly. Work on a clean level surface, free of imperfections or debris. Always use straight boards. Check for square after each step. Always predrill holes before attaching with screws. Use glue with finish nails for a stronger hold. Wipe excess glue off bare wood for stained projects, as dried glue will not take stain. Be safe, have fun, and ask for help if you need it. Good luck!
Instructions
Step 1
Use the smaller leg pieces to guide you here . . . attach the two longer leg pieces with 1 1/4" fasteners and wood glue.
Step 2

Fill in the spaces with the smaller leg pieces, using 1 1/4" fasteners and wood glue.
Step 3

Attach top blocks with 2 1/2" screws and wood glue.
Step 4

Attach the legs to the tabletop boards with 2 1/2" screws and wood glue.
Step 5

It is always recommended to apply a test coat on a hidden area or scrap piece to ensure color evenness and adhesion. Use primer or wood conditioner as needed.
Comments
AlexE (not verified)
Wed, 05/09/2012 - 13:14
Outdoor projects!
Hello Ana, I would like to know what type of wood you use for your outdoor projects. Thank you!