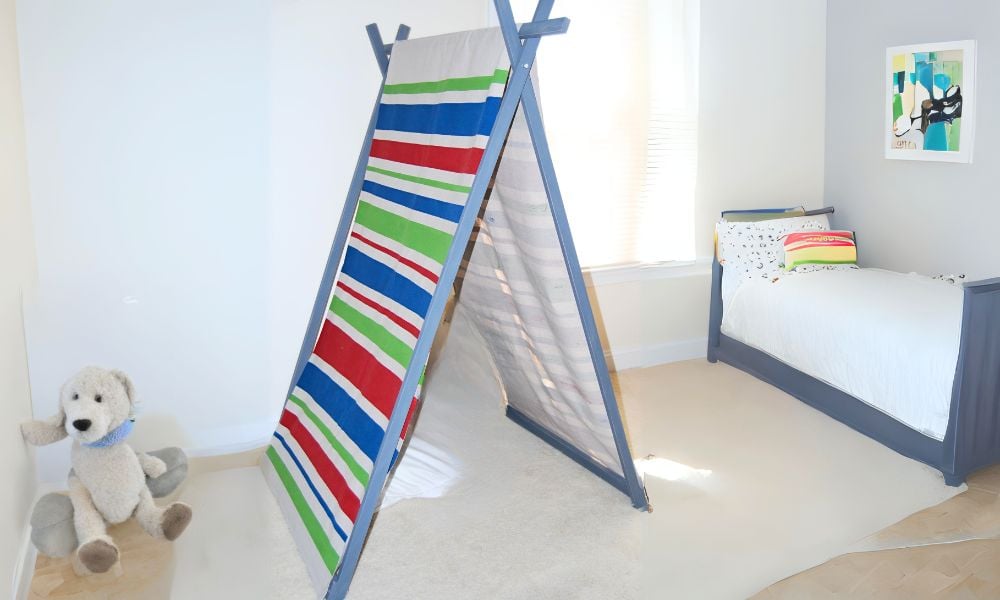


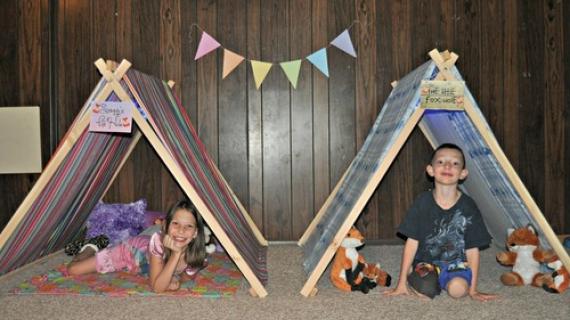
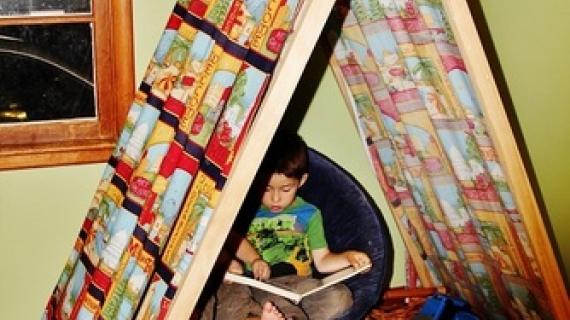
Only one cut and easy-to-follow instructions make for a kid-sized reading nook that you can build today! This is a simple project that comes together in an hour or less. You need recycled material for the panels and approximately $20 worth of supplies, assuming you own a drill, staple gun and wrench. Questions: Please send me a message anna{AT}lawrencegirls{DOT}com
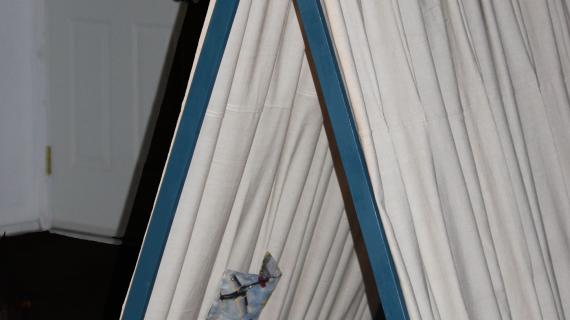
My girls are 6 and 5 years old, and they will not pull this over on themselves. It's not very heavy, but please make sure you do securely attach the nook to the wall if you have more playful children or younger crawlers. :) If you want to store the nook, the top 1x2x6 will slide out. You can loosen the top two bolts, and fold the tent up to a much smaller size. If you don't have 84" curtain panels, feel free to substitute 36"+ width fabric for the sides. You will need to hem your exposed edges. The tab top panels allow more light into the top of the nook.
Preparation
5, 1x2x6 Select Pine Boards 1, 1x3x6 Select Pine Board 2, 8mm hex head bolts - 50mm long 4, 8mm hex head bolts - 60mm long 6, 8mm hex nuts 2, tab top curtain panels 84" long
Ask for the 1x3x6 to be cut in half, so you will have two 1x3x3 pieces.


Please read through the entire plan and all comments before beginning this project. It is also advisable to review the Getting Started Section. Take all necessary precautions to build safely and smartly. Work on a clean level surface, free of imperfections or debris. Always use straight boards. Check for square after each step. Always predrill holes. Be safe, have fun, and ask for help if you need it. Good luck! If you need help along the way, feel free to contact me at http://www.lawrencegirls.com
Instructions
Step 1

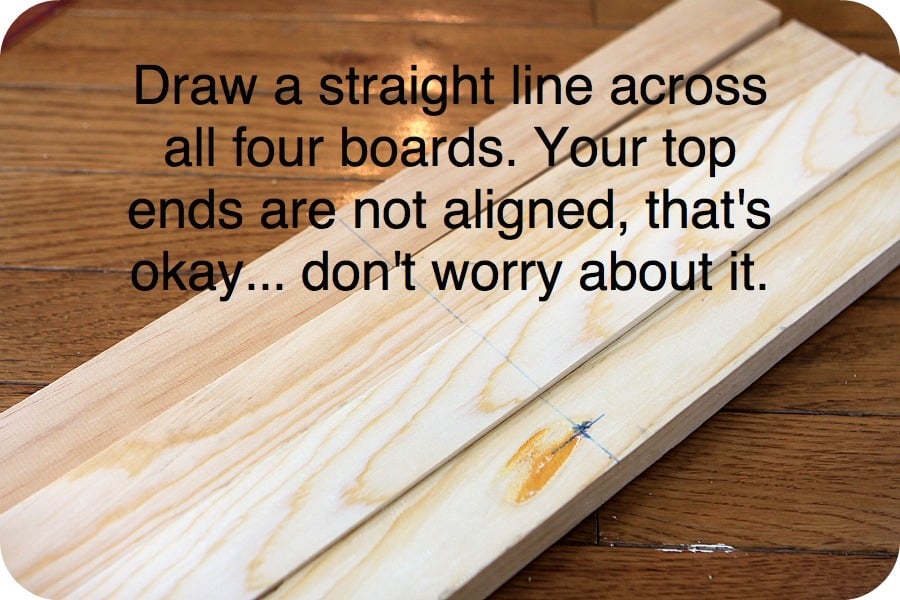
Line up four of the 1x2x6s, and run a piece of blue painters tape around them to keep the boards flush with one another.
Step 2

Working at the non-taped end of the boards, measure a straight line across all four boards. The line should be approximately 8" from the top.
Step 3
Step 4

Using your straight line as a reference, mark the center of each 1x2x6. This will be your drill point on each board.
Step 5

Step 6
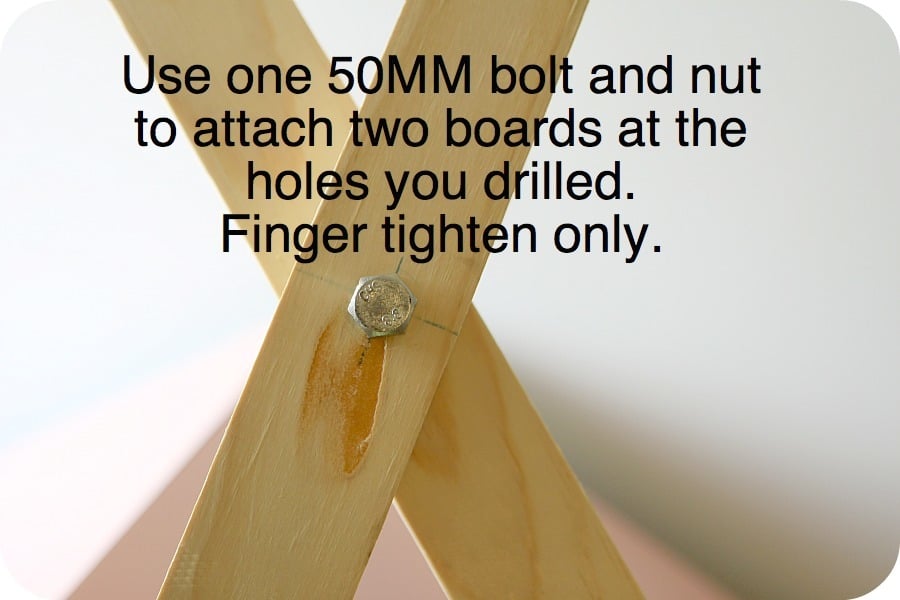
Use one 50mm bolt and nut to attach two boards together. Finger tighten only at this point.
Step 7

Repeat with remaining two drilled 1x2x6 boards.
Step 8

Place the 1x3x3 board about 1/4" off the ground and mark your drill spot 1/2" from the board edge. Mark a second drill spot 1/2" from the edge of your 1x2x6. Drill through both boards separately.
Use one 60mm bolt per corner to attach the 1x3x3 boards to opposite, outside 1x2x6 boards.
Step 9

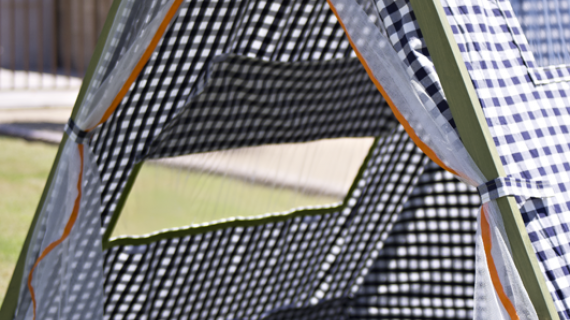
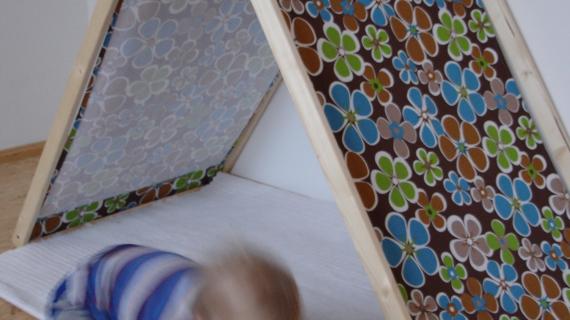
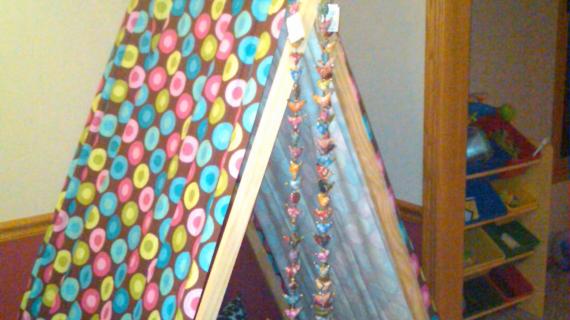
Use your last 1x2x6 board as the "roof" of your nook. Thread the board through alternating curtain tabs from two separate panels. Make sure the right side of the curtain is facing out.
Step 10

Panels are ready to attach now.
Step 11

Place the tent on the ground to have easier access to the underside of your 1x3x3 boards.
Pull the fabric tight, down and around the 1x3x3 board. Staple all the way across keeping the fabric pulled tight.
Cover the staples with a strip of felt, if desired. The tent does not rest on this board, but little fingers may creep under the tent.
Step 12
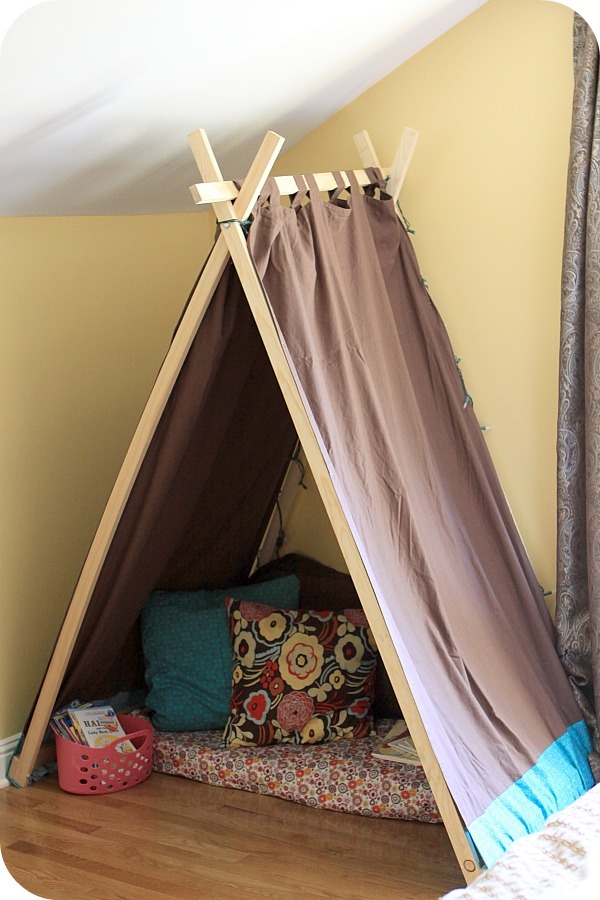
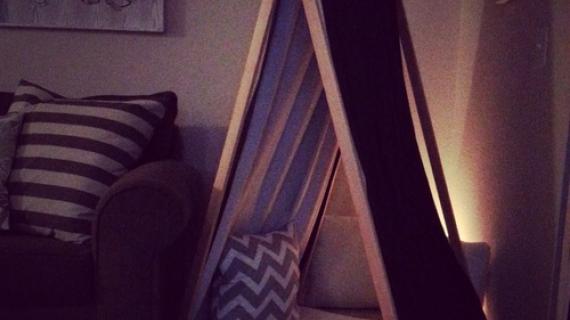
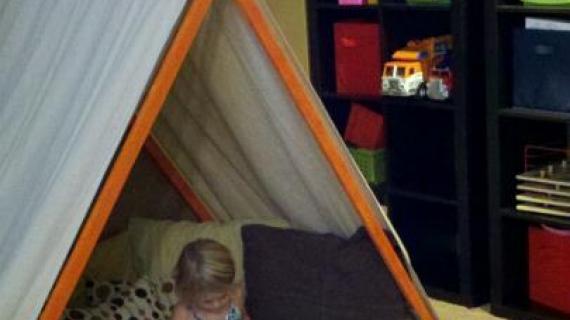
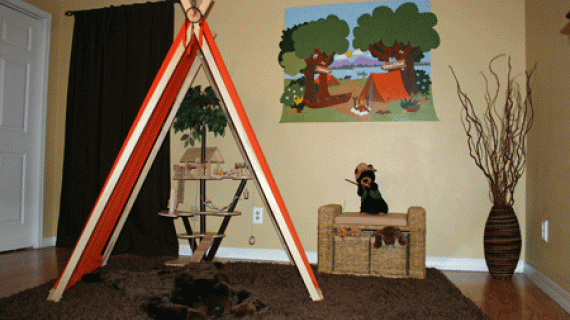
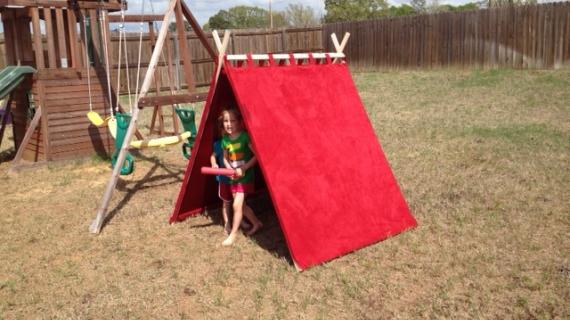
Set-up tent where you desire, tighten nuts with a wrench, and secure back legs to the wall if you want a permanent location.
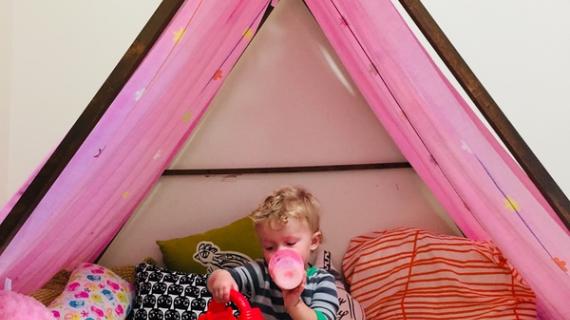
Load in comfy pillows, lights and books for a reading nook that will be fun, cozy and relaxing.
It is always recommended to apply a test coat on a hidden area or scrap piece to ensure color evenness and adhesion. Use primer or wood conditioner as needed.

Comments
Amanda H. (not verified)
Thu, 06/02/2011 - 10:09
Perfect!
After dismantling the make shift tent area for my kids for the 73rd time I decided I should just build them something that can be taken down if necessary. This fits the bill perfectly. Thanks so much for the plans!
linux blog (not verified)
Tue, 06/26/2012 - 12:29
Reply to comment | Ana White
Hi there it's me, I am also visiting this site on a regular basis, this site is really fastidious and the viewers are actually sharing pleasant thoughts.
blessednest
Thu, 06/02/2011 - 11:42
OH!
My girls would LOVEEE this! What a cute, simple & super fun thing to make!
debandtom25
Thu, 06/02/2011 - 12:10
LOVE
Just love this. Off to add to my "to do" list!
shannyshack
Thu, 06/02/2011 - 12:28
LOVE IT!!
Oh, I can't wait to make this!! My kids are going to love, love, love it!! :)
Georgia M
Thu, 06/02/2011 - 12:38
Yay!
Just added this to my to-do list! Love it! Thanks!
Audre (not verified)
Thu, 06/02/2011 - 12:43
AWESOME
I Can't wait to make this for my girls!!!
Megan Shannon (not verified)
Thu, 06/02/2011 - 12:48
just a thought
Just a thought...
if you added a few more inches to the bottom on the fabric you could have it wrap under the board and then add a strip a velcro so you could velcro it into place.
then on the top have straps that you could tie instead of looping through the board
I believe that doing it this way would make the panels removable and washable.
Guest (not verified)
Fri, 06/03/2011 - 07:15
Great suggestions!
Great suggestions!
Jami H
Thu, 06/02/2011 - 12:49
Excellent directions!!
Your directions and illustrations are very well done. Love it!
Tsu Dho Nimh
Thu, 06/02/2011 - 13:16
What keeps the A-Frame from
What keeps the A-Frame from flattening out?
I don't see any side-to-side bracing
Guest (not verified)
Thu, 06/02/2011 - 13:33
wouldnt that be the bolts at
wouldnt that be the bolts at the top? I guess they are tight enough that it doesnt collapse
KevsWife, RN (not verified)
Thu, 06/02/2011 - 13:40
If I understand your question
If I understand your question correctly, I believe it would be the tightening of the top bolts. The tighter they are, the more secure it would be. If you're concerned about safety, I'm sure you could add the side-to-side bracing you mentioned, especially to the back for the best aesthetic look. Also, to keep it functioning as a fold-up, you could make the bracing with the same styling as a ladder, with said bracing being in 2 separate parts overlapped. I'm not sure what you'd secure the pieces together with, to make it hinge like. We don't have kids [yet], but I'd be happy with one of these for myself, to use outside on a nice day, maybe much larger, to use over a hammock!! Happy building!!
jenhastert
Sun, 06/19/2011 - 04:23
I made this last week for my
I made this last week for my kids. Mine did "flatten out" so I added a piece of webbing (like dog collars are made from) right below the top cross area. I used a coordinating color to the tent fabric and just stapled it on the front and back. This enables it to still be folded up and put away and has prevented the sides from ending up five feet apart!
Ana White
Thu, 06/02/2011 - 13:39
Clever to Use Curtains!
I LOVE that you used tab top curtains for this project - clever, cheaper and way easier!
gabbiegal
Thu, 06/02/2011 - 16:45
We Attempted this Today!
I saw this post this after noon and remembered that I have curtains from our old house in the basement. I got them out and make a quick rip to the blue. I had problems finding the hardware because it gives them in mm, but after speaking with several associates, one had a conversion chart. However the size it calls for was 5/16 and in order to get the right lengths we had to go with a 3/8. When We only spent 13 dollars. and I even bought my boards eight feet long because it was cheaper. ( and I have another project in mind for the scraps) Came home, made the few extra cuts to have the pieces she requested. All was good until it was time to put the board in the nook. It says to use a 1x2x6, but i am pretty sure you need to cut that down. I guessed 3 ft like the bottoms, but I should have done more like 3 1/2. Also I didn't staple the bottoms on, I think I am going to make a hem with a pocket so that I can detach the sides and slide it onto the bottom like a curtain rod. One last thing... either the guys sold me the wrong bolts, or I should have bought washers.
Guest (not verified)
Fri, 06/03/2011 - 08:20
Love it. I need a trellis
Love it. I need a trellis for some vegetables. It would be easy to make the stand and use string instead of cloth. The veggies could grow up the string. Thanks for the post!
Angie Witt (not verified)
Fri, 06/03/2011 - 08:39
loving this idea...
Love it. What a fun and easy idea. Thanks! Definitely going to make this for my two girls for their birthdays coming up in the summer.
Just wondering about the blue section at the bottom of the curtains...did you add this just to get a little extra color and make it cuter or did the curtains need a little extra length at the bottom to help them get all the way to the floor?
I might try adding extra fabric at the bottom anyhow and wrap it around the bottom and up several inches to create a pocket of sorts for books...maybe with snaps or buttons or something.
Thanks for the fabulous idea!
Chair
Fri, 06/03/2011 - 12:30
The Gears Are Turning Now
I think I'm going to make a pair of these for my kids to use outside -our house is too small for an inside version.
I agree with the suggestions for making the fabric removable for washing (especially if it's going to go outdoors) and a ladder-like brace for support (bolts with washers and wing nuts would work great, easy to open up when necessary -and I'd try make it so it's bolted/locked folded when not in use). A section of tarp sewn under a heavy cloth for the bottom would also ensure that any dew still in the grass would keep books, cushions, blankets nice and dry.
It's quite a simple plan -which is really great, the customization possibilities are endless!
JanaE (not verified)
Fri, 06/03/2011 - 22:28
Brilliant!
Like so many ideas and plans on Ana's site, this is brilliant. My daughters would love it. I think it's a great idea to use the tent outside too. A lot of plastic play tents don't have proper ventilation and get way to hot.
This will be my weekend build. Best part is I have everything for this project! I love having a well stocked wood supply! All I have to do is tell my husband "there's no money involved" and he's all for it. Well done thelawrencegirl.
Jenn Hoff (not verified)
Thu, 06/23/2011 - 13:01
Wow, I love how easy those
Wow, I love how easy those steps were to follow! Coolio! Can't wait to make this!
Tucker (not verified)
Sat, 07/16/2011 - 14:51
Fabulous! I am an elementary
Fabulous! I am an elementary teacher and a few friends of mine and I are making these to add to our classrooms this year! What a fun way to get kids reading! (I'm planning to use a see-thru material so that I can have and eye on whoever is in that center no matter where I am in the room!
Shay Twilling (not verified)
Tue, 08/02/2011 - 18:56
Made it this afternoon! My
Made it this afternoon! My kiddos love it! I added a brace to the bottom to keep the sides from slipping apart over time. I also needed 70 mm bolts for the bottom pieces, rather than 60 mm - because I'm new to building stuff and my drilling abilities aren't that great. The longer bolts gave me a little wiggle room. It's done though - and filled with books and happy kids now!!!
Guest (not verified)
Wed, 09/28/2011 - 04:23
Home
I am looking forward to making this over the weekend! Thanks for the inspiration.
Ronda (not verified)
Sat, 11/12/2011 - 20:09
Hideout
I LOVE THIS!! I have two boys, 5 and 2 1/2. They are always building "forts" or "hideouts." This is perfect and I am going to try and build it myself tomorrow. Thank you so much!!
Guest (not verified)
Wed, 02/01/2012 - 12:07
My kids love making "blanket
My kids love making "blanket tents"...I want to build the frame and leave it blank. Then I can store it when not in use, and have them help build their fort with sheets when the mood strikes.
tj (not verified)
Tue, 02/28/2012 - 12:49
easy kids tent reading nook quick question
love this cute idea.
my kids do a lot of sports and we are often baking at baseball, football swimming, etc. where there is very little shade and we live in HOT arizona. i was thinking if i could make this, and it was light weight we could take it and use it at sporting events. :-)
can you tell me how much this weighs - approx.?
Guest (not verified)
Tue, 03/06/2012 - 01:33
weight
it couldn't weigh more than a couple of kilos.. .
kristad
Mon, 03/05/2012 - 17:23
WOW!!
This was so easy and my two daughters spend hours in it reading and writing their own books.
Jodie (not verified)
Sat, 07/07/2012 - 13:22
love!
love!
Elvie (not verified)
Sat, 08/18/2012 - 07:38
Adult Size?
Hi! I'm moving into my first home and I wanted to make this for myself since I remember making tents as a kid and love crawling up into small spaces to read. (Why should the kids have all the fun?!?! Haha) Would you suggest making the bottom boards/top board longer for a more adult size or is this size adult-friendly?
Jennifer Hicks (not verified)
Thu, 12/20/2012 - 20:31
Thank You!
I loved this idea and your plans so much! I wanted a tent that was not a cheap plastic one and couldn't spend the hundreds the cloth ones cost - a friend made me a beautiful one of yours and stained it white for me. I found an awesome cotton duvet cover and we actually put the whole frame inside of it, so it has a bottom too. I made the original opening a bit wider and added slits for the top cross bar. My friend also reinforced it a bit more too. So for less than 50.00, I have an AMAZING Christmas present! Thank you for a wonderful website, you are very inspiring!
kplicanic
Thu, 01/03/2013 - 18:26
Brag Post
Hi Ana! Love this project and made three (3!) of these tents for my nephews. I went online and submitted a brag post, but it doesn't show up here. I can't figure out what I did wrong. Here's the link to the post I created: http://ana-white.com/2012/12/making-painted-frame-tent-and-reading-nook
Keep up the great work!
Rabear
Sun, 08/25/2013 - 13:18
Why bolts?
Read these instructions a few times and went and purchased lumber and bolts with no issues. Looking at putting bolts in those very skinny bottom sections and wondering if I can do that. Why bolts over wood screws or something?