

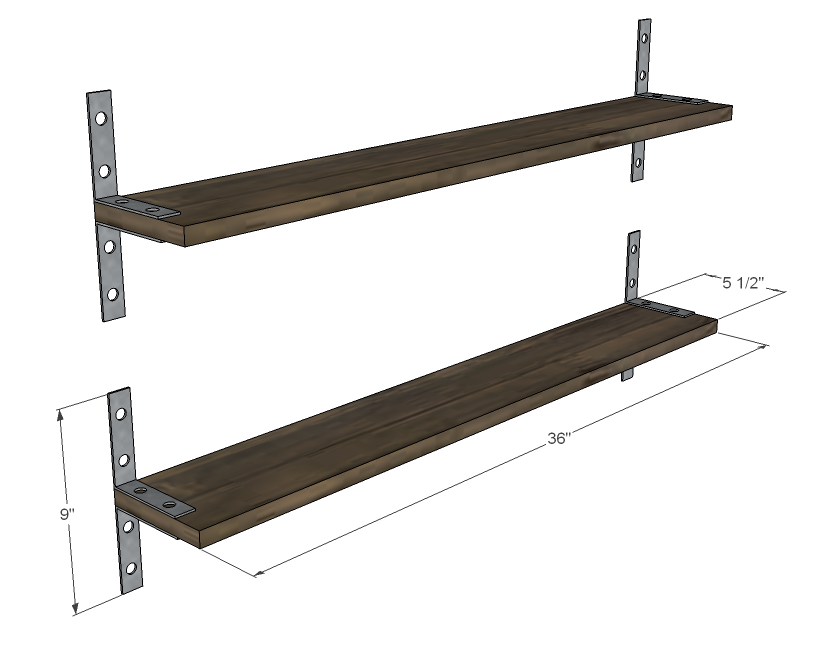
Industrial chic shelves made of reclaimed wood, inspired by Pottery Barn Blacksmith shelf. Save money by building your own shelves from reclaimed pallet boards and brackets.
This week, following our vacation, I've really been in "okay, things just need to get DONE already!" mode.


Preparation

1 - 1x6 @ 36"


Please read through the entire plan and all comments before beginning this project. It is also advisable to review the Getting Started Section. Take all necessary precautions to build safely and smartly. Work on a clean level surface, free of imperfections or debris. Always use straight boards. Check for square after each step. Always predrill holes before attaching with screws. Use glue with finish nails for a stronger hold. Wipe excess glue off bare wood for stained projects, as dried glue will not take stain. Be safe, have fun, and ask for help if you need it. Good luck!
Instructions
Step 1

Attach brackets to shelves as shown above. I placed mine on the ends, but there is no reason why you couldn't place your brackets inset.
Step 2

Then position your shelves on the wall and mark the screw hole locations. Use either a drywall anchoring system or screw into studs in the wall (just like you are hang a photo) to hang the shelves.
It is always recommended to apply a test coat on a hidden area or scrap piece to ensure color evenness and adhesion. Use primer or wood conditioner as needed.
Comments
Guest (not verified)
Wed, 06/01/2011 - 16:30
Okay
With all due respect Mrs Anna, this project is like a chef teaching me how to make a peanut butter sandwich. LOL....
In reply to Okay by Guest (not verified)
Ana White
Wed, 06/01/2011 - 16:43
LOL!
You know, I just wanted these shelves for myself, and hadn't intended to post, but they just turned out so good, thought I'd share! Thanks for the laugh! And I do make a mean PB&J LOL!
Guest (not verified)
Wed, 06/01/2011 - 16:49
It's nice to have projects for all levels
I don't think you have to bust out all the stops with each project you feature. Some people need something simple with which to start.
Keep up the good work - I personally like PB&J myself. ;)
Lori E. (not verified)
Wed, 06/01/2011 - 18:05
I love these shelves!!
I love these shelves!! Thanks for sharing, Ana!
Guest (not verified)
Wed, 06/01/2011 - 20:06
Simple - Great Look
Thanks for the photos. I don't have a place for these but I am going to look for one. Thanks for the inspiration.
whitney_smith
Thu, 06/02/2011 - 04:45
Oh Ana, you had me LOL at the
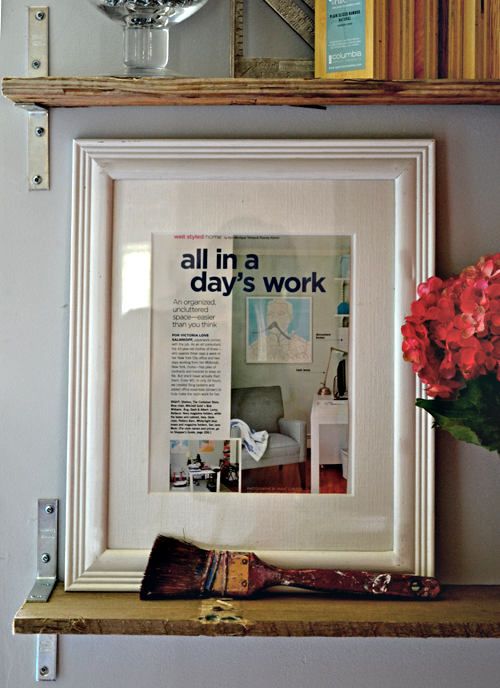
Oh Ana, you had me LOL at the Russia backyard comment. And the shelves are so simple yet stunning. And I love the jar of screws!
Guest (not verified)
Thu, 06/02/2011 - 06:01
Blacksmith...
You can easily just spraypaint the brackets and the screwheads with some flat black paint to make them look like the "blacksmith" part of the Blacksmith Shelf. Thats highway robery to charge $70.00 for that shelf. And people will pay that too.. what ultramaroons (as bugs bunny used to say..) Keep the ideas coming Ana!!
blessednest
Thu, 06/02/2011 - 11:37
LOVE! Yes, highway robbery
LOVE!
Yes, highway robbery that price for those shelves! I love to spraypaint metal things with my oil rubbed bronze spray paint. love love that stuff...I have a perfect place for these shelves. Thanks for the PB&J! SO needed and the photos are inspiring. As always, you & your plans pretty much rock my stars! THANK YOU!
Tsu Dho Nimh
Thu, 06/02/2011 - 13:14
YIKES! Forest Fire?
Ana - Russia or not, something is burning over there! You have forest fires?
And I love the unapologetically industrial look of the shelves.
Pam the Goatherd
Thu, 06/02/2011 - 22:15
I thought I was the only
I thought I was the only person on the planet who believes screws in a jar are an attractive decoration!
jacnjill
Fri, 06/03/2011 - 09:53
sweet and simple!
Thanks for the simple projects! Summer is so busy, it is nice to have something less complicated.
Guest (not verified)
Sat, 06/04/2011 - 16:57
Elementary Question
Just so that I'm not over thinking, when you attach the boards to the brackets, you're only screwing down through the top right? It's probably a dumb question since the screws would run into each other on a properly aligned set of brackets.
Just answered my own question. LOL oh deductive logic..
:) (not verified)
Thu, 06/09/2011 - 08:53
I would actually put a couple
I would actually put a couple screws in the boards to be safe, because if someone bumped into a corner it could push the board out from between the brackets and everything would come tumbling down! There are usually two screw holes per bracket so to keep the screws from running into each other I would either screw one from the top and one from the bottom or you could do them just from the bottom or just from the top. Just my two cents!
Love ~*it*~ here (not verified)
Thu, 07/28/2011 - 08:38
I like this idea it reminds
I like this idea it reminds me of the IKEA metal shelf going for 25-30 bucks great idea
diana (not verified)
Wed, 09/21/2011 - 16:34
I LOVE these.
I've been wanting to take all my bookcases apart and use the sides and shelves on the wall, about a foot or so from the ceiling. I've been trying to find the most economical way of doing it. I've looked into wall brackets, wall upright standards and brackets- all very expensive (for me) but this is perfect. Not only economical but very cool looking. Now to decide on surface treatment for the shelves to age them- or brighten them! maybe crinkled kraft paper- leather look treatment.
I guess I'll have to spend more time here hunting.
Thanks for this- glad I found you.
Guest (not verified)
Sun, 10/23/2011 - 04:37
brackets for blacksmith shelves
Just an idea here....
Use "Hammerite" spray to pre-spray the aluminium brackets. They will look like wrought iron and have the oldey-worldey feel some might prefer in their living rooms (think Restoration Hardware)
Just an idea.... let you know - I'm about to try it myself!
D-