


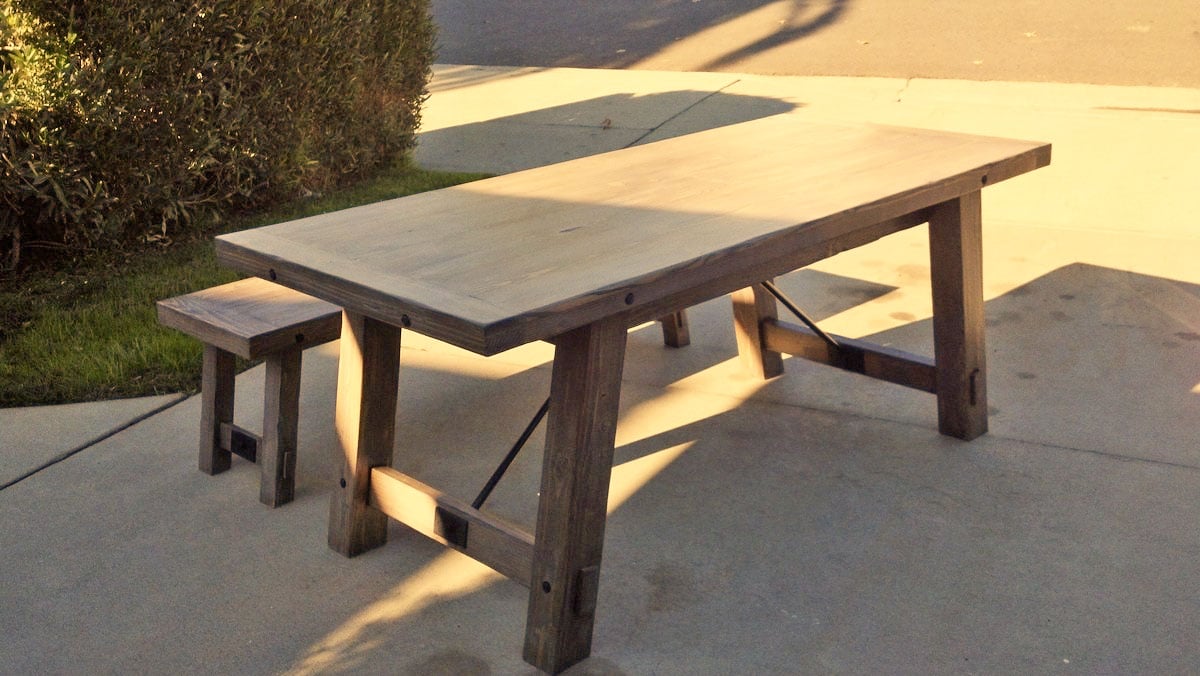
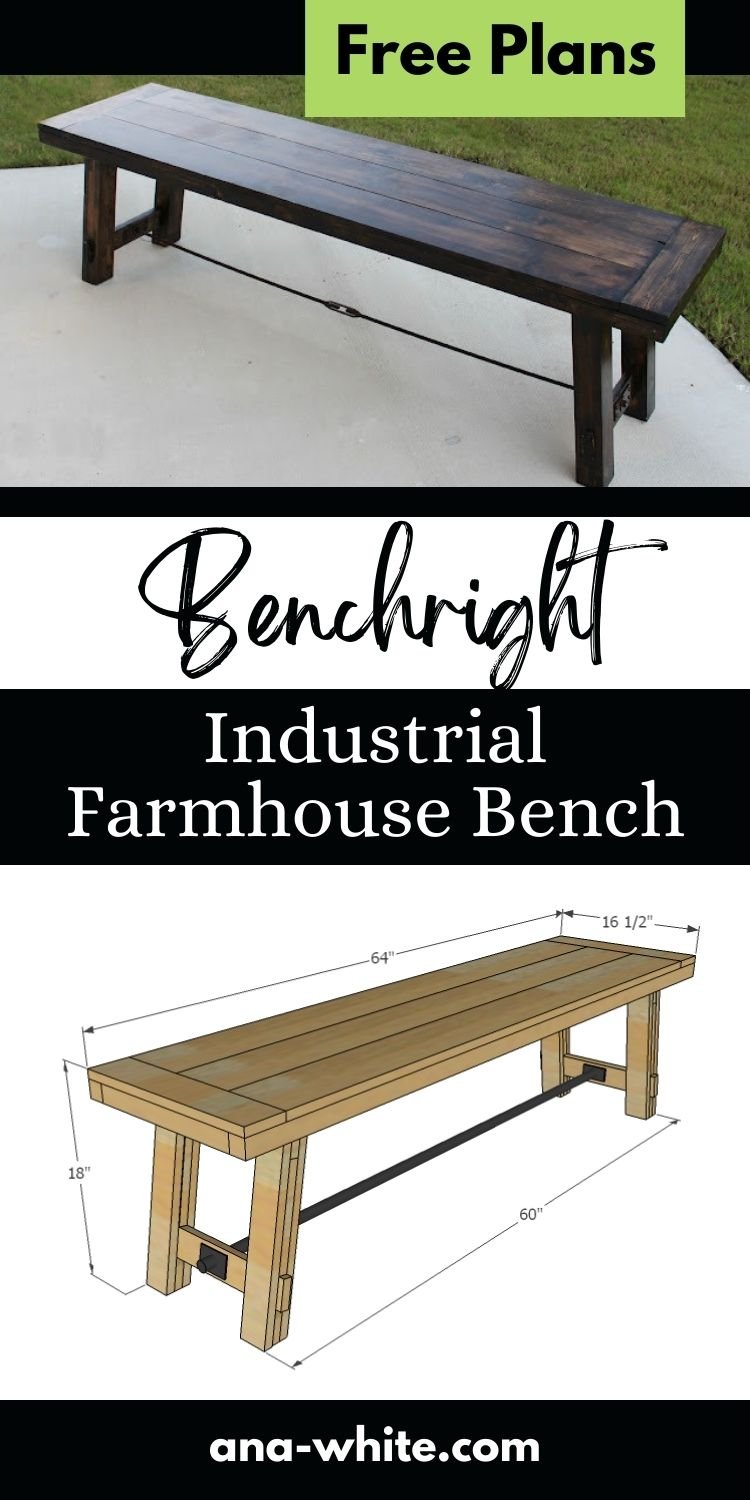
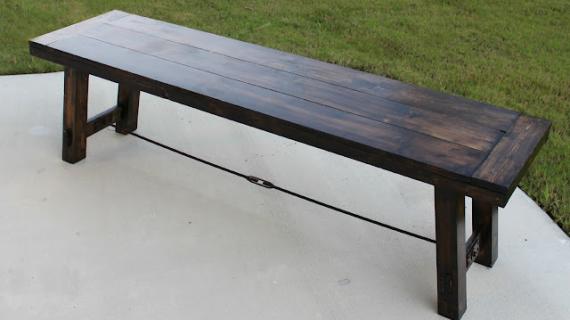
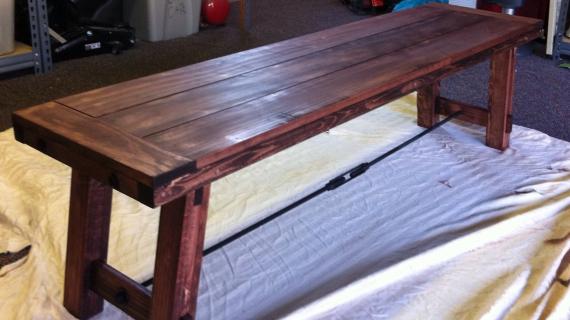
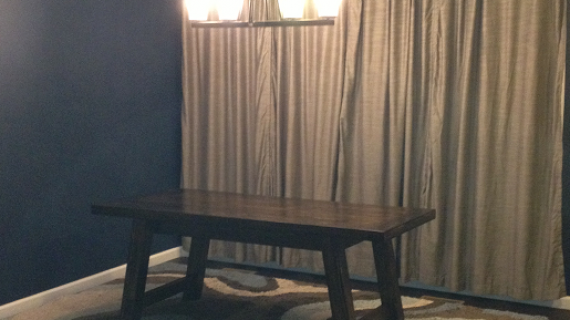
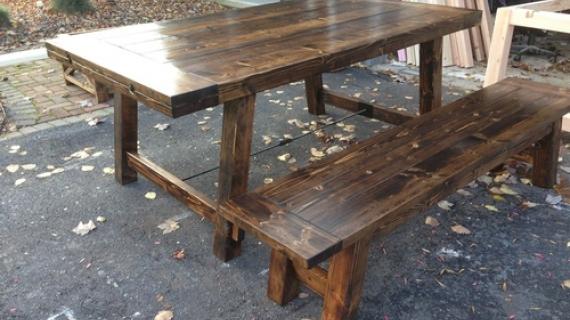
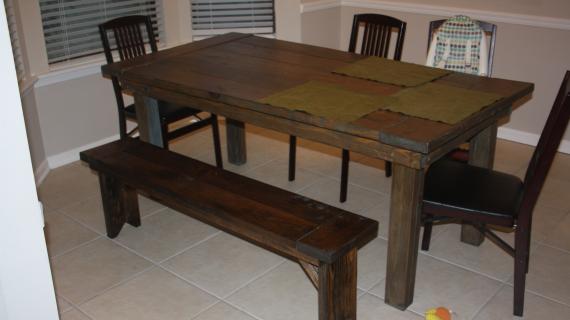
This farmhouse style bench is industrial chic with the addition of a metal bar. This free woodworking plan is easy to build, with step by step instructions, and you will only need simple basic tools, lumber like 2x4 boards, and pine boards. You can leave your pine furniture unfinished, or paint bench in any finish including a distressed or antiqued finish.
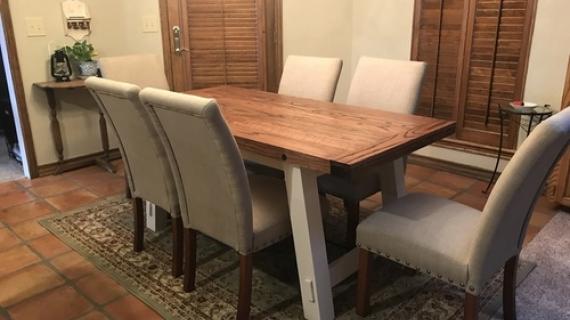
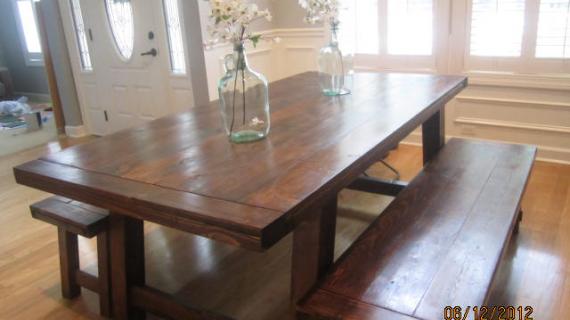
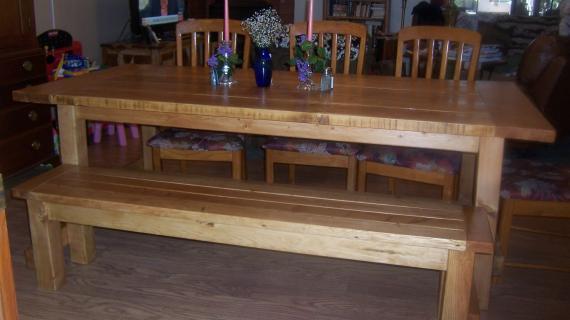
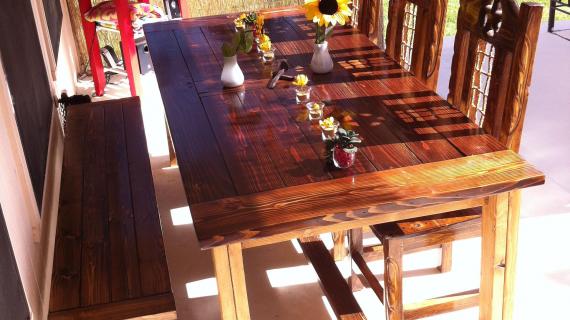
We also have plans for a matching dining table.
Reader submitted photo by HUTHBERT

Pin For Later!
Preparation
- 3 - 1x6 @ 6 feet long
- 1 - 1x4 @ 6 feet long
- 3 - 1x3 @ 8 feet long
- 1 - 2x4 @ 10 feet long
- 2 - 2x2 @ 8 feet long
- 8 - 1x3 @ 17 1/2" (both ends beveled at 10 degrees off square, ends are parallel to each other)
- 2 - 1x4 @ 13 1/2" (End Aprons)
- 2 - 1x3 @ 14 1/2" (Stretcher)
- 4 - 1x3 @ 8 1/2" (Spacer)
- 4 - 1x3 @ 2 7/8" (Longest Point, one end beveled at ten degrees off square)
- 2 - 2x4 @ 52 1/4" (Short Point to short point, both ends cut at 10 degrees off square, NOT parallel to each other)
- 2 - 2x2 @ 64"
- 2 - 2x2 @ 13 1/2"
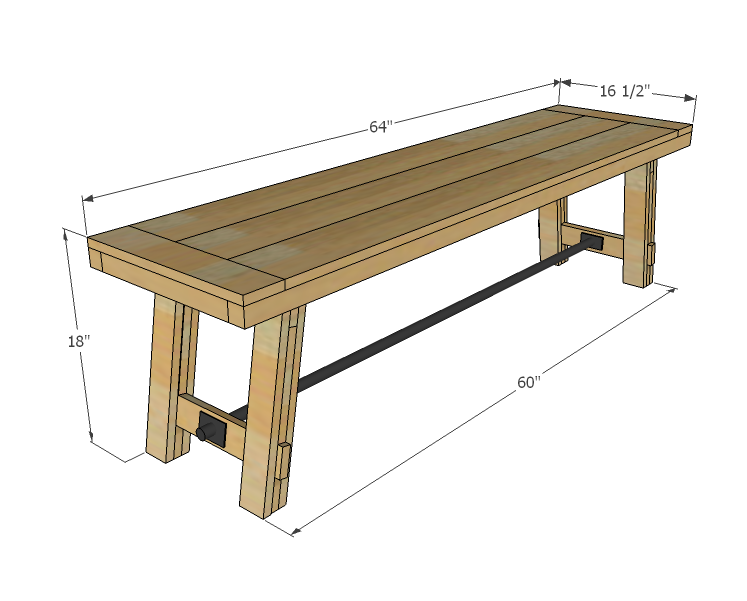
- 2 - 1x4 @ 16 1/2"
- 3 - 1x6 @ 57"


Please read through the entire plan and all comments before beginning this project. It is also advisable to review the Getting Started Section. Take all necessary precautions to build safely and smartly. Work on a clean level surface, free of imperfections or debris. Always use straight boards. Check for square after each step. Always predrill holes before attaching with screws. Use glue with finish nails for a stronger hold. Wipe excess glue off bare wood for stained projects, as dried glue will not take stain. Be safe, have fun, and ask for help if you need it. Good luck!
Instructions
Step 1
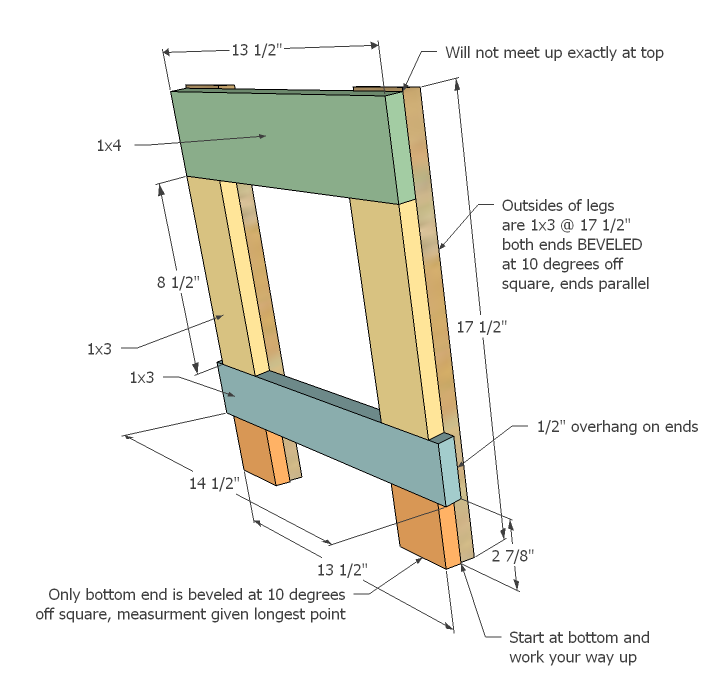
The most difficult part of this bench is surely getting these legs built square. Make sure you take diagonals and check for square. Construct with glue and 1 1/4" finish nails. Keep your outside edges as flush as possible, to give the illusion of a solid wood leg. Work from the bottom upward.
Step 2

Work again from bottom upward and sandwich remaining leg pieces to the legs.
Step 3

Measure inside the aprons 3/4" and attach the 2x4 aprons as shown in diagram using 2 1/2" screws and wood glue. These are the main supports of the table.
Step 4

Now attach the 2x2 sides as shown above.
Step 5

Step 6

Breadboard ends - this should be cake at this point!
Step 7

Cut these to fit for the best fit.
Step 8

Shown with a 1" diameter 60" long iron pipe, like this one from Lowes.
It is always recommended to apply a test coat on a hidden area or scrap piece to ensure color evenness and adhesion. Use primer or wood conditioner as needed.

Comments
benfoldsfivealive
Fri, 07/22/2011 - 13:59
YAAAAY!!
You rock my world!
Doug Sand (not verified)
Sat, 11/12/2011 - 22:31
All your plans
Wow Anna!
Great website ! I was going through just some of the plans that you have in the furniture dept., and couldn't believe you had so many different ideas out there.
So tell me, are you doing this on your own, or is your husband helping you out? Ha, Ha, ha, it doesn't matter anyway, I think you are doing a great job.
To all your successes in life,
Doug Sand
WesleyJack (not verified)
Sat, 12/10/2011 - 10:16
Would they bench fit...
Ana,
Do you know if the bench would be able to slide under the table? I'd like to be able to push them together like a nesting doll so that it can take up less space. Also what type of pipe fitting would you use to get that rectangled end piece?
Thanks
Guest (not verified)
Sat, 01/21/2012 - 15:44
I wonder if the legs were
I wonder if the legs were made to square and then once assembled given the beveled edges on a table saw that would make the whole process easier for these and the table.
Just a thought.
Also it becomes quite clear to me on another look at the dimensions that the benches will not fit under the table, which is okay.
Guest (not verified)
Thu, 02/02/2012 - 13:46
second to last item on cut list
Is that dimension right? should it be 13 1/2 to match the diagram?
claydowling
Thu, 02/02/2012 - 14:36
Getting the dimensions right
Cut lists are usually recommended as starting points, and I wouldn't recommend cutting all your parts to final size at once. Slight inaccuracies will creep in as you build, and it's best to cut the final dimension just as the piece is needed. The usual advice is to cut your parts to rough size about 1" longer than needed, which is usually enough to allow for reasonable adjustments to get a good fit.
wesleyjack
Tue, 02/21/2012 - 08:58
One of those projects
Well Ana,
It took one of those projects to get you to post these and they started out being one of those projects for me. I got my hands on some reclaimed wood to do the tops of the benches and future table to match and thought I would try to get those together first so I could adjust the widths of the legs to match, well every board is just a little crooked, they vary in thickness and are over all being a royal pain. We'll try again today and see how it goes, taking a new approach this time, going to go bottom up like the plans and just measure the stops extra extra carefully to make sure my legs are not too wide.
So excited to get them all together.
Phil B (not verified)
Tue, 08/28/2012 - 07:06
What is the weight limit for
What is the weight limit for this bench?