tweets >>

my other projects >>

  • Pallet coffee table
  • Rustic spindle bench

Rustic spindle bench

Printer-friendly versionPrinter-friendly versionSend to friendSend to friendPDF versionPDF version
Rustic spindle bench

Additional Photos

Rustic spindle bench

About Project

I recently lengthened the legs to an art table for my daughter. I decided to reuse the original legs in another capacity. While my wife was on pinterest she came across a large solid piece of wood with spindle legs attached to it to make a bench. I had recently picked up some large pieces of wood from the burn pile at a nearby sawmill. I cut one of the pieces in half after bringing it home and here is how to easily make a unique bench.

Dimensions

Dimensions: 
60 inches long, width varies due to wood 16-19 inches wide, 1 inch thick

Materials and Tools

Shopping List: 

Spindle legs (thrift store or garage sale, or reuse from something you already own)
Wood Stain
Poly

1 1/2 inch screws
wood glue
120 grit sandpaper
paint
paint brush
Tools: 
measuring tape
safety glasses
hearing protection
drill
circular saw
sander

Cut List

Cut List: 

Spindles- 17 in
Wood top- 60 in

Cutting Instructions: 
*Cut spindle legs to height desired. For my bench, I cut the legs to 17 inches each. *Cut solid wood to length desired for table. I am making a 7ft table soon, so I wanted my bench about 1ft short on each end 84-24= 60 inches

Step 1

Once pieces were cut, I first drilled my jig holes in the spindles. I used a clamp and my pocket Kreg jig to drill one hole on each side that I used to attach the legs to the bench top. You could always drill from the top as well and then fill with wood filler.

Step 2

Rustic spindle bench

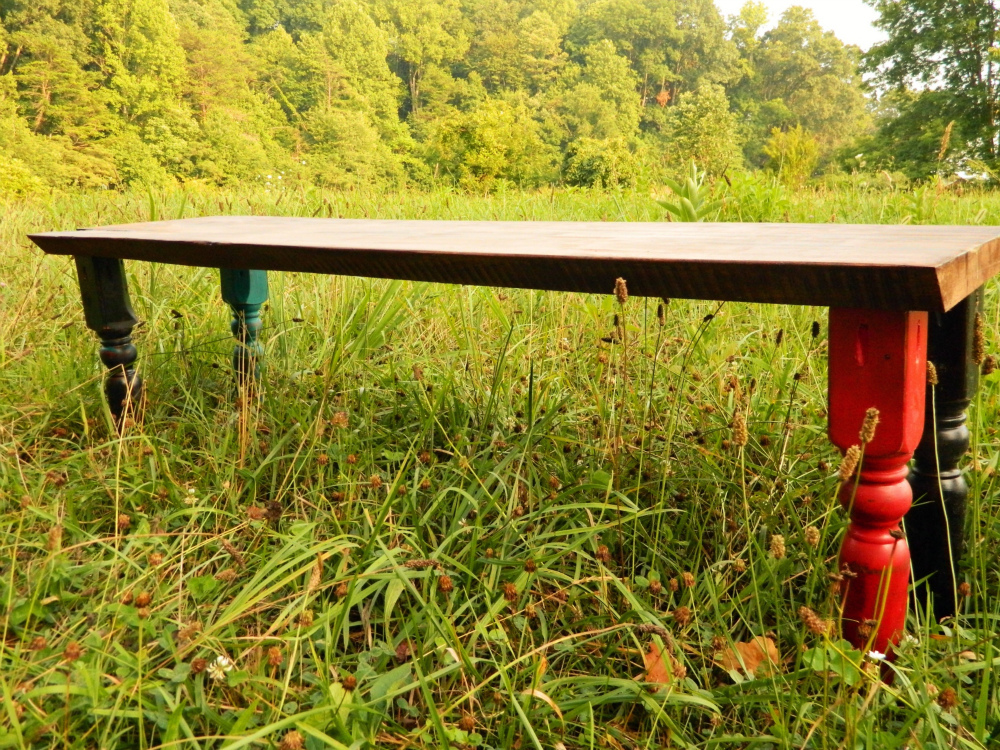
After the holes were made, I painted each leg a different color. One red, one teal, one red & teal that I then covered with black, and one black.

Step 3

I used some 100 grit sandpaper to rough up the legs and antique them a bit.

Step 4

Attach the legs to the outside edges of the bench bottom using wood glue and screws.

Finishing Instructions

Preparation Instructions: 
After glue has set, it's time to finish the wood. I already sanded my piece using a belt sander with 40, 80, then 120 grit. I bought Rustoleum wood stain and poly. Their products say that you only need one coat of stain and three coats of poly with no sanding in between coats. I was skeptical but gave it a try and I am very happy with my results.
Finish Used: 
Rustoleum Early American Wood Stain Rustoleum poly

Local sawmills are a great resource. This piece was about 12 ft long and I literally climbed atop the burn pile to fish this out. I grabbed a few more that I will be using in some projects soon.

Pin it
 #
Nothing should be burned.

Nothing should be burned. Everything should be used.

 
dmcarwin's picture
 #
Awesome!

I LOVE this! It is so great that you can make something beautiful from left over wood. Thanks for the inspiration!

 
 #
Rustic

This rustic bench is awesome! I've recently bought a ranch in a small village and I want to give it a rustic appearance. I've already bought a ranch fence and I created a place where to keep my horses. Now I am thinking to make some rustic benches like this one in the photo and to invite my friends to spend an outside weekend. I still have to work on the interior design and I hope to get finish until march.


Post new comment

The content of this field is kept private and will not be shown publicly.
  • Web page addresses and e-mail addresses turn into links automatically.
  • Lines and paragraphs break automatically.

More information about formatting options

By submitting this form, you accept the Mollom privacy policy.

Not Much >>

What's going on up here in Alaska.

Momplex Cam >>

We are DIYing our moms a Duplex in Alaska! Check out our progress so far as we owner build a home, step by step. Read the Momplex blog here.

Recent comments

User login

Connect with Facebook
Sign in using Facebook

I'm Speaking At:

Haven Conference 2012

Please Visit Our Sponsors!


Pin It