


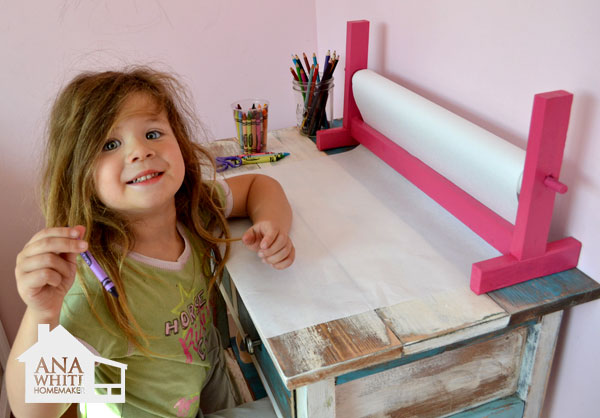
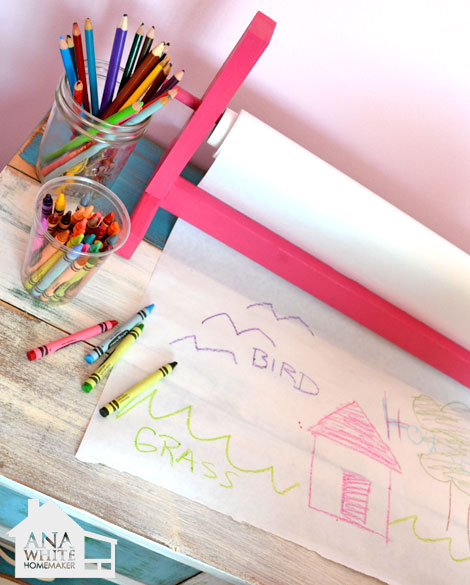
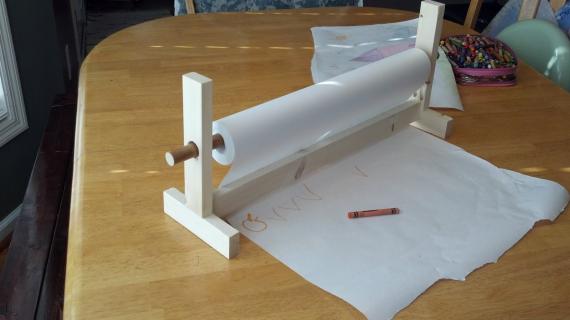
Make a craft paper roll holder! Free step by step diy plans to build your own craft paper roll holder.
Tell me I'm not the only frugal Momma who uses freezer paper for craft paper rolls.


Preparation
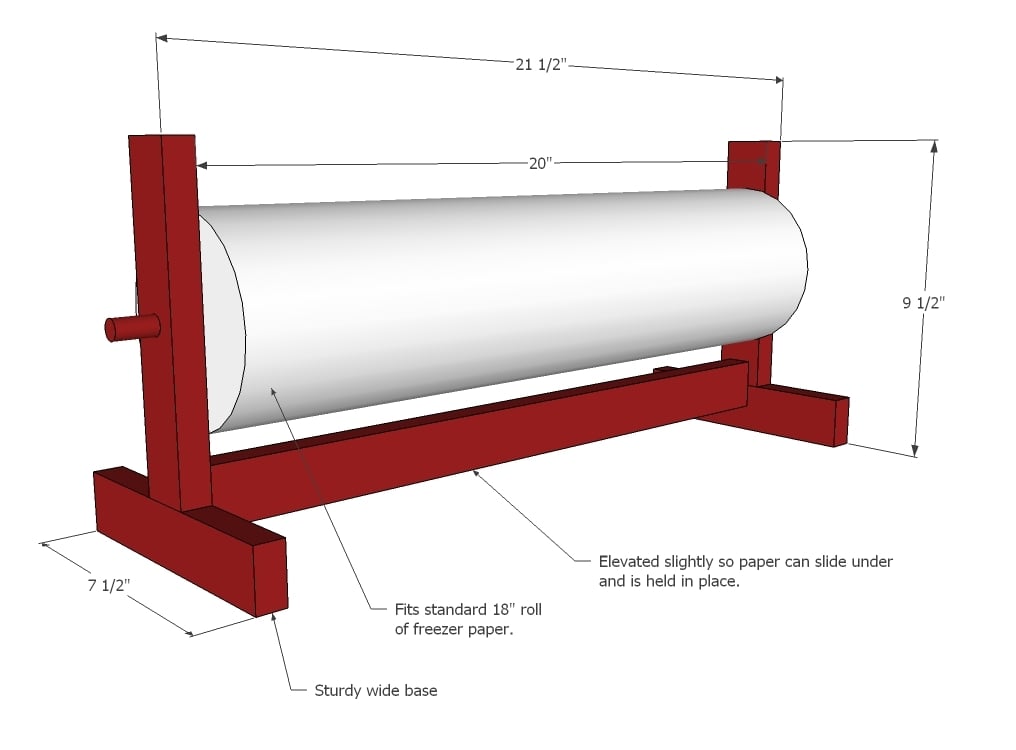
- 1 - 1x2 @ 4 feet long
- 1 - 1/2" diameter wood dowel
- 1-1/4" pocket hole screws (8)
2 - 1x2 @ 6"
2 - 1x2 @ 8"
1 - 1x2 @ 20"
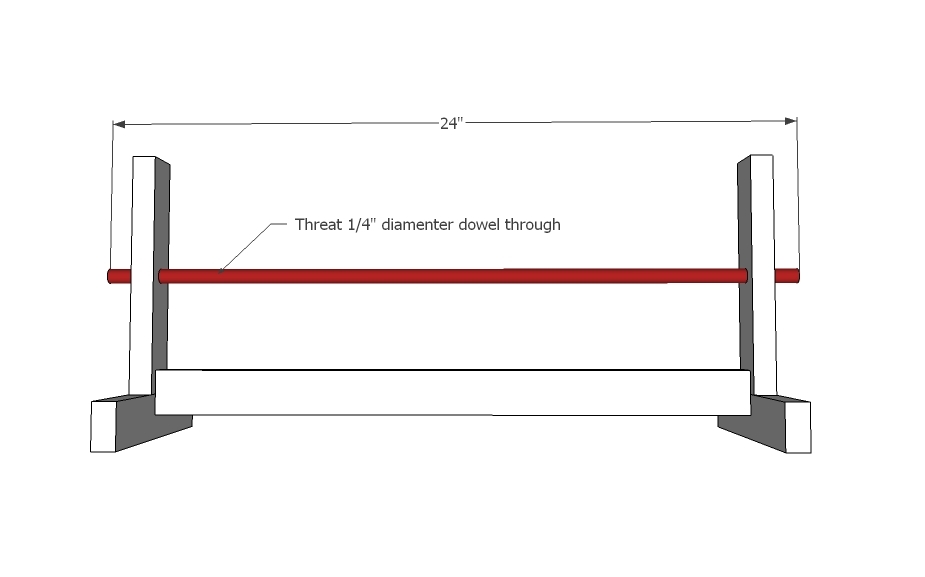
1 - 1/4" Diameter Dowel @ 24"


Please read through the entire plan and all comments before beginning this project. It is also advisable to review the Getting Started Section. Take all necessary precautions to build safely and smartly. Work on a clean level surface, free of imperfections or debris. Always use straight boards. Check for square after each step. Always predrill holes before attaching with screws. Use glue with finish nails for a stronger hold. Wipe excess glue off bare wood for stained projects, as dried glue will not take stain. Be safe, have fun, and ask for help if you need it. Good luck!
Instructions
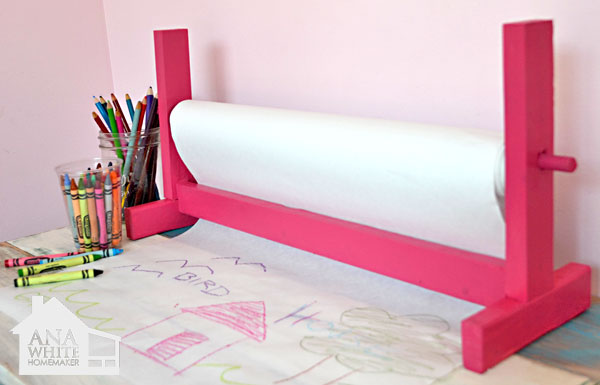
Step 1

Build your ends as shown above, either with 3/4" Kreg Jig Pocket Holes and 1 1/4" pocket hole screws or 2 1/2" screws and a countersink bit.
Drill holes for dowel as shown in diagram with 3/8" spade bit.
Step 2

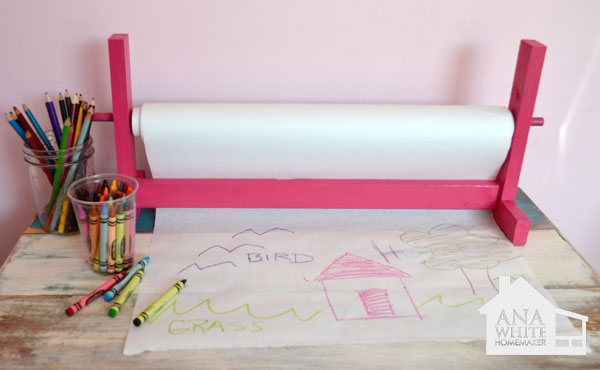
Once both sides are complete, join with bottom board. Leave a 3/4" gap under bottom board to allow paper to pass under.
Step 3
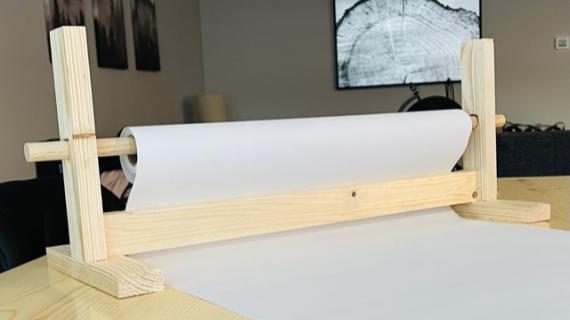
Simply insert your dowel and you're done building!
It is always recommended to apply a test coat on a hidden area or scrap piece to ensure color evenness and adhesion. Use primer or wood conditioner as needed.
Comments
Guest (not verified)
Tue, 08/09/2011 - 04:41
Awesome! I ALWAYS use
Awesome! I ALWAYS use freezer paper with the kid's art projects. It doesn't allow paint to soak through and the kids can make the paper as big as they want (within reason). Thanks for the great idea!
SingleMomThriving
Tue, 08/09/2011 - 06:00
I wanna make this for Christmas Paper
add a bit of more Height to hold one or two more roles. It will so make my life easier for Christmas... and then during off season, but on Birthday Paper rolls. Stop wasting money on Birthday bags.
What a great idea!
AbsoluteAspiring (not verified)
Tue, 08/09/2011 - 07:02
Ooooooh!!!
I want to make this for my daughter's second birthday(in less than a month)!!!
Do you think I can do it with minimal tools/supplies, and zero experience? :D
I'm pretty sure my husband has a drill, hand saw, sand paper, wood glue, measuring tape... and we have some extra paint in the garage. So, all I would really need to get is the wood, maybe some wood filler and screws(unless he already has them), and freezer paper... that's it, right?
Will the hand saw due for this project?
In reply to Ooooooh!!! by AbsoluteAspiring (not verified)
Ana White
Tue, 08/09/2011 - 14:11
ABSOLUTELY! This would be a
ABSOLUTELY! This would be a great project to try out! Can you ask your local home improvement store to make the cuts for you? Have them cut extra of the 6" and 8" pieces from the scraps in case you split a board at home. And then if you have a drill, you will need to predrill pilot holes as shown in diagram and assemble.
And yes, you could use a handsaw - won't take much to cut a 1x2! Good luck, I'm excited for you!
r0semary (not verified)
Tue, 08/09/2011 - 09:24
I loved this, how bout taking
I loved this, how bout taking the serrated edge from your discarded waxpaper or aluminum foil boxes and attaching them to the backside of the bottom rail?
In reply to I loved this, how bout taking by r0semary (not verified)
Ana White
Tue, 08/09/2011 - 14:09
This is a great idea! I
This is a great idea! I don't know if I'd trust my preschooler with a serrated edge yet, but your child could be less accident prone than mine!
Laura Fama
Wed, 08/10/2011 - 16:39
Cutting edge
You can always attach a ruler with a metal edge!!
Catrin (not verified)
Tue, 08/09/2011 - 10:10
I love this... This might be
I love this... This might be the first wood thing I make...
Want to know a funny thing? Here in Germany you can hardly get freezer paper, but when you do it's like seriously expensive... So I had to smile whe you wrote your're a frugal mom ;-)
osuzannesky
Wed, 08/10/2011 - 19:04
craft idea
I like the craft paper idea! I don't think I could make the holder though, because my preschooler would figure out how to take it apart and would then proceed to unravel the roll completely. Better for me to keep the roll up on a high shelf out of his reach. I wish I could do wood working like you do, but again, my son would be taking apart the house if I left him alone for any length of time.
In reply to craft idea by osuzannesky
Ana White
Wed, 08/10/2011 - 19:55
I hear ya! I swear for every
I hear ya! I swear for every hour I work, I gotta spend two cleaning up after our little lady!
mltdblack
Thu, 08/18/2011 - 07:14
Measurements
After cutting the pieces for this yesterday. I started putting it together. Should the cut list be 2 - 1x2 @ 7 1/2"? All I need to do is prime and paint.
Guest (not verified)
Sat, 03/24/2012 - 14:08
Cut list
Definitely need to change the cut list.
from: 2 - 1x2 @ 6"
to: 2 - 1x2 @ 7 1/2
:) Making this today. Need to recut this set of pieces, now:)
l o v e l y t … (not verified)
Wed, 11/28/2012 - 10:38
thank you for this great idea!
I was doing an online search for a holder for my black kraft paper that I just ordered and couldn't find the right size...and then i saw your post about your project along with darling photos! I'm going to give this a go! Thanks!!
annie
caf.koedel
Sat, 09/28/2013 - 09:02
any way to modify this for a craft table?
I saw a very expensive craft table on Pottery Barn Kids where the paper roll was actually attached to the table on the underside. http://www.potterybarnkids.com/products/carolina-craft-table-simply-whi…-
Any way to modify this design to fit on the underside of a small table like this one from Ikea? http://www.ikea.com/us/en/catalog/products/10201673/