
Yes, I did.

1 - Wood Project
3-5 Different Paint Colors
Paint Brush
Clear Top Coat
120 Grit Sandpaper
Glaze

Choosing a Project to Paint
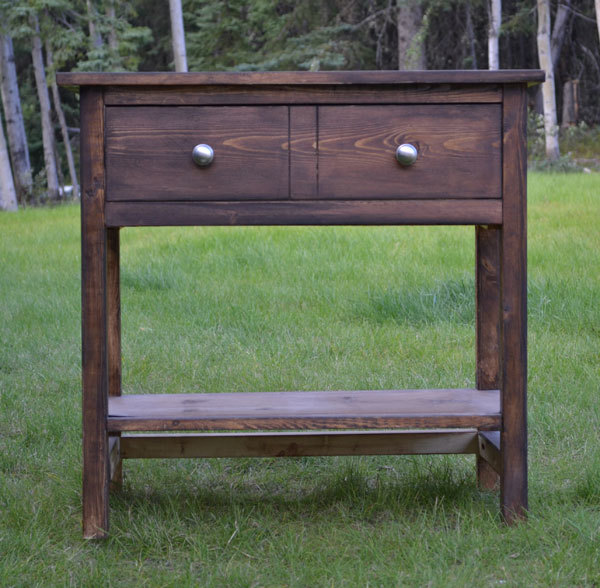
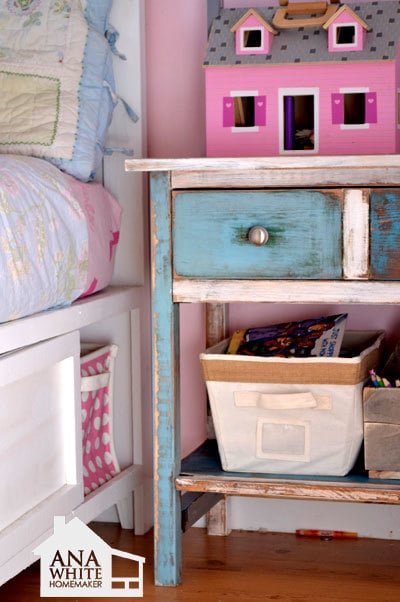
Choose a piece of furniture with lots of different boards and planking. Notice how this piece is a planked top. The more different boards you have, the more opportunities you have to paint different colors and finishes. You can build my Farmhouse Bedside Table with these step by step plans.

Finding the Right Paint Colors and Types
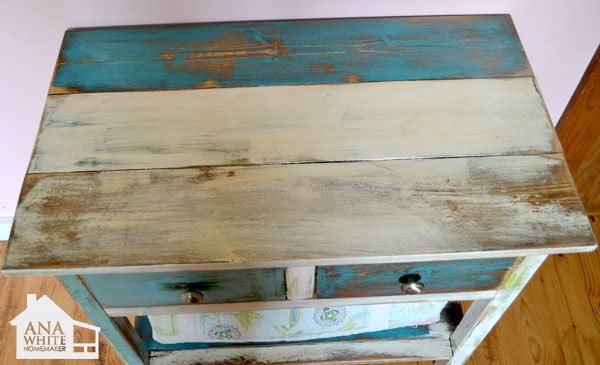
If I had to do this finish again, I'd pull colors from the room, for example, this quilt, and use those colors for the finish.


Painting Board by Board
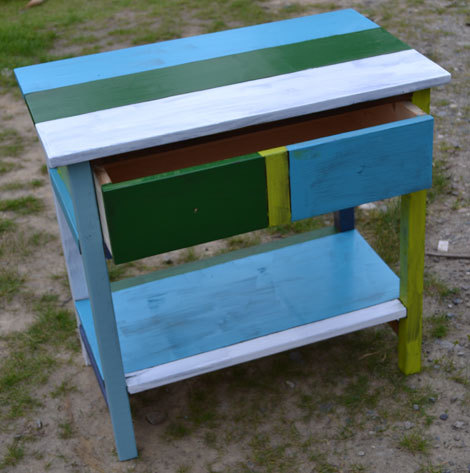
Then just start painting, painting the entire board as if you reclaimed each board individually. You can either make a plan and stick with it, or just paint random boards.
I thought of painting board types each color, for example, all the 2x2s would be white, the 1x6s would be blue, the 1x12 green and so on. But really, it's up to you and what you want.

Perfectionist Need Not Apply . . . Paint that Is

It's Okay to Make Mistakes
And here's where I thought bright green would work . . . but again, my mistakes are going to save you time.

The Hardest Step . . . Waiting for Paint to Dry
This step was truly the hardest step. And one of the most important. You have to wait the full 24 hours (as directed on the paint cans) for the paint to fully dry.
If you are not using gloss paints (semi gloss or high gloss or anything that is non porous when dry) you will want to apply a clear top coat to protect your paint from picking up the glaze.

Distressing
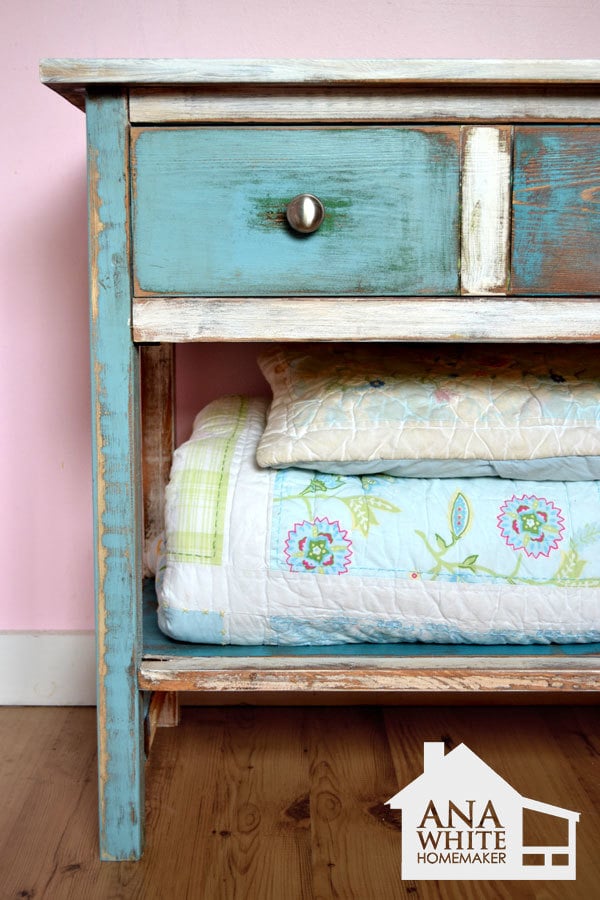
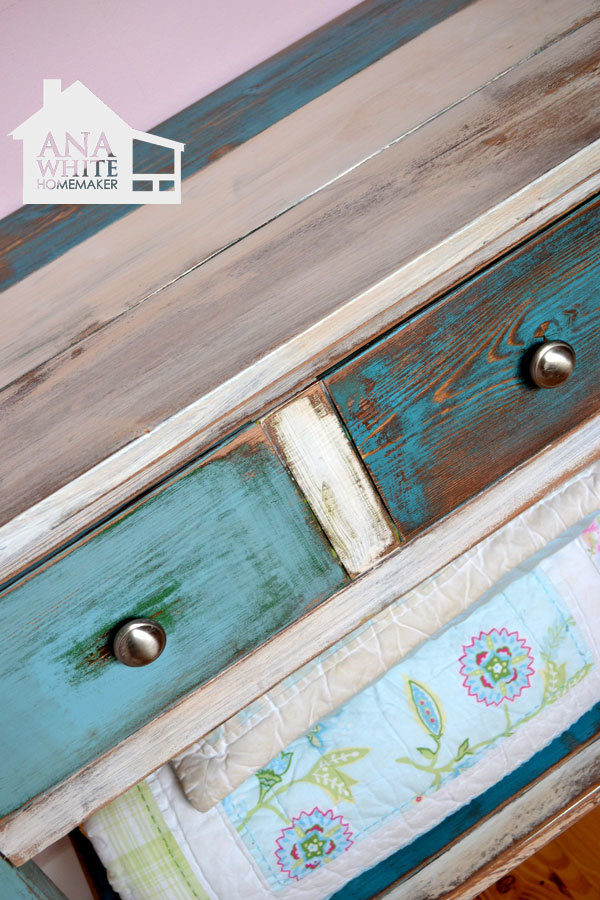
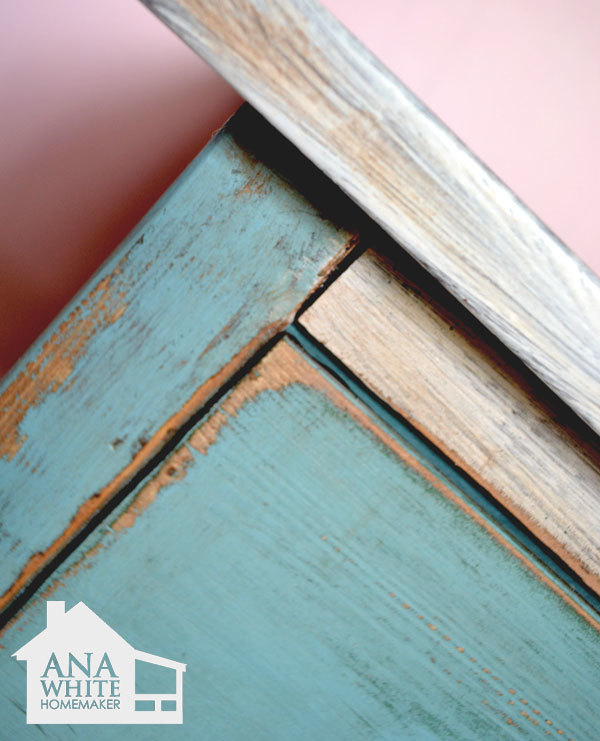
When you are sure the entire project is dry, begin distressing the finish. Make sure the paint comes off even, like the finish is time worn. If your paint is not dry, it will come off in clumps, not resembling natural wear.
Distress to the point that you like, avoid over distressing. Concentrate on spots that would be more susceptible to natural wear, most likely edges.
Notice that despite my bedside table being a walnut stain, the sander takes the wood down to the natural wood. We are going to need a glaze to stain the wood.

Easy Glazing
Once you are happy with the distressing, apply a glaze (you can either use the specialty stuff or I've used Minwax Express Colors with success to save money) to the exposed wood. The glaze will stain the wood and deposit itself into wood joints, creating the ever so coveted "hand glazed finish."
This process is very easy and quick - don't be intimidated.

What Happens if You Hate It?
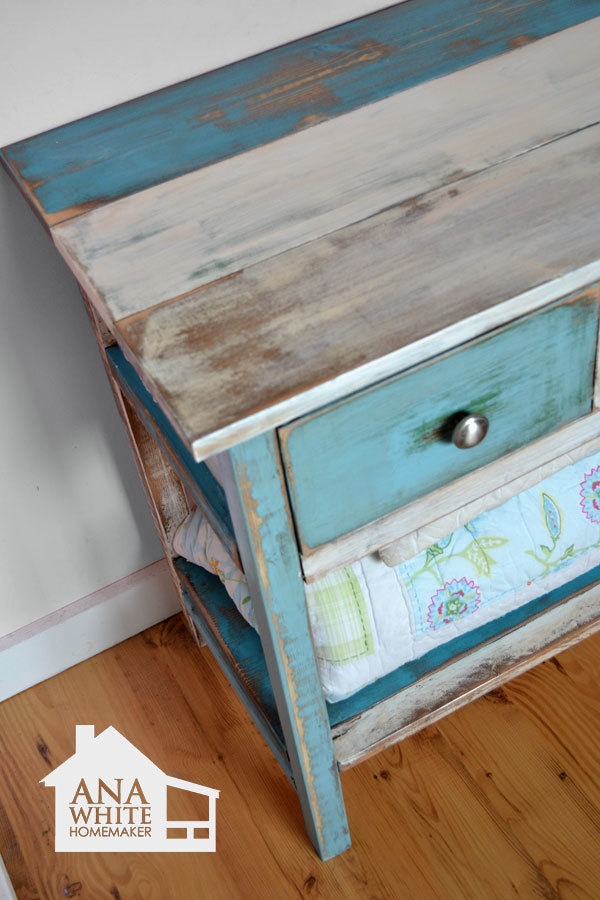
But after all that work . . . I just did not like the results of my hard labor. No worries though, the beauty of this finish is in layers of color, so I just picked out what I did not like (the green and bright green) and replaced it with what I did like (the blue and white), followed with distressing and glazing.

More Layers = More Character
You can see the green showing through in the left door face where I added a coat of turquoise. This was of course followed by distressing and glazing.

High Wear Areas

Protecting Your Finish

Comments
Jaime (not verified)
Sun, 08/07/2011 - 17:41
Love your patchwork
In reply to Love your patchwork by Jaime (not verified)
Ana White
Sun, 08/07/2011 - 17:43
Thank you so much! After
nicolae
Fri, 01/04/2013 - 14:10
I did the same with my old
sgilly
Sun, 08/07/2011 - 19:35
Beautiful, beautiful!
Elisabeth Fox (not verified)
Sun, 08/07/2011 - 20:11
Love, Love, Love this! I
Jayme (not verified)
Sun, 08/07/2011 - 20:15
The table (and the quilt) are
HomeSpun-Threads (not verified)
Sun, 08/07/2011 - 20:17
Breath Taking
leigh7911
Sun, 08/07/2011 - 20:43
Gorgeous!
Carol Cranford (not verified)
Sat, 12/29/2012 - 11:32
I loved this and so glad I
Hillary (not verified)
Sun, 08/07/2011 - 21:08
perfect
Anneke McConnell (not verified)
Sun, 08/07/2011 - 22:08
REAL HONESTY
Vicki (not verified)
Sun, 08/07/2011 - 22:12
LOVE! Perfect for my 100+
heidi s. (not verified)
Sun, 08/07/2011 - 22:48
Gorgeous! Love it!
Guest (not verified)
Sun, 08/07/2011 - 22:59
Wow!
mrgreen
Mon, 08/08/2011 - 00:43
Distressed Wood
debandtom25
Mon, 08/08/2011 - 04:00
I'm in love
Spring
Mon, 08/08/2011 - 04:35
Oh be still my beating heart!
Heather @Simpl… (not verified)
Mon, 08/08/2011 - 05:57
Saving this post!
Guest (not verified)
Mon, 08/08/2011 - 06:45
I just love it! Thank You
Guest (not verified)
Mon, 08/08/2011 - 06:46
I just love it! Thank You
Guest (not verified)
Mon, 08/08/2011 - 07:15
Prefer the brown...
Shelly Gonczar (not verified)
Mon, 08/08/2011 - 07:17
love this!
Sheela (not verified)
Mon, 08/08/2011 - 07:40
Looks great!
Ana White
Mon, 08/08/2011 - 08:45
Thanks everyone! You totally
Darrell from M… (not verified)
Mon, 08/08/2011 - 11:07
Farmhouse bed side table
Patty (not verified)
Mon, 08/08/2011 - 17:21
I love your bed side table!
mrsstacygreen
Mon, 08/08/2011 - 18:08
I've basically (accidentally)
peaches76
Mon, 08/08/2011 - 19:03
Absolutely love it!
Maura (not verified)
Mon, 08/08/2011 - 19:35
Love It!
Sonnet (not verified)
Mon, 08/08/2011 - 22:05
great inspiration!
I Play Outside…
Tue, 08/09/2011 - 00:54
AWESOME!
Pam the Goatherd
Tue, 08/09/2011 - 12:59
This has totally changed my
Jessiraynedesign (not verified)
Sat, 08/27/2011 - 11:47
Question about glazing
handygirl59
Tue, 09/06/2011 - 05:21
Trying this today on $15 Habitat for Humanity restore bookcase
In reply to Trying this today on $15 Habitat for Humanity restore bookcase by handygirl59
Ana White
Tue, 09/06/2011 - 08:34
Best of luck! Looking
Guest (not verified)
Sat, 03/10/2012 - 14:30
paint color
washington4x4
Sat, 06/02/2012 - 21:21
Awesome Job!!!
Kimmy (not verified)
Wed, 09/12/2012 - 18:36
question
Kimmy (not verified)
Wed, 09/12/2012 - 18:36
question
Stephanie Satt… (not verified)
Fri, 09/28/2012 - 02:31
Farmhouse Bedside Table
Randy D. (not verified)
Mon, 10/01/2012 - 14:37
Multi Paint
Randy D. (not verified)
Mon, 10/01/2012 - 14:38
Multi Paint
Karen Lindsey (not verified)
Sun, 10/14/2012 - 19:48
I really like the distressed
brianstephen (not verified)
Sun, 11/04/2012 - 19:08
success
Paula VanDuynhoven (not verified)
Wed, 11/14/2012 - 19:33
bedside table
Oli (not verified)
Sat, 01/19/2013 - 14:11
Lovely! thanks a lot
BeachBum
Fri, 05/31/2013 - 11:58
Patchwork Multi-Color
kmacaitis13
Mon, 07/08/2013 - 15:47
Adore this!
elkeheather
Fri, 09/19/2014 - 16:09
Glazing paint
I am using this technique for a picture frame. I used white paint, sanded, and then used stain rather than glaze. I have found that the stain has stained the paint as well and it is very, very dingy. I noticed that your colors have largely remained intact. Any insight as to why? Is glaze less "adherent" to paint that stain? Is it the white paint that is the issue? Is it the type of paint? I used Behr paint from Home Depot.
Thanks for any help! Looking much forward to your response.
elke
In reply to Glazing paint by elkeheather
Stephen Peters
Sat, 09/20/2014 - 12:06
Stain or Glaze over Paint
Hi Elke,
I found the answer to your question:
Ana says "One other note on paints, I used gloss paints because it creates a seal, and then when you apply the glaze, it won't discolor the paint. But you can also apply a clear coat for flat paint."
One other note on "stain" and "glaze".......... Stain is meant for bare wood to soak into............. Glaze meant to go over a finish and adhere to it. -Hope that helps with your project.