


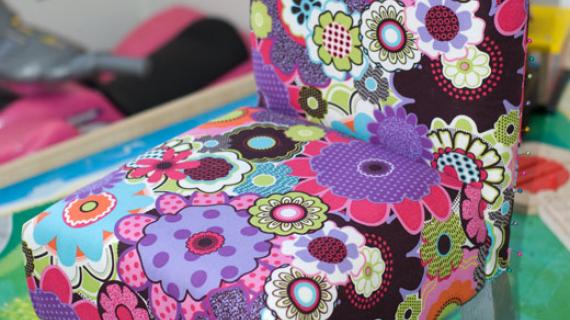
Slipper chairs have been eluding us DIYers for some time, but I sat down and analyzed a set of chairs I bought from Target, and I think I've figured it out! This plan is for BUILDING the slipper chair. I will share how *I* upholstered mine on my blog (will link here when tutorial is complete), but I'm sure you amazing people will know better ways of doing it.
I'm having issues listing one of my plans as "intermediate" - because I don't think that I'm an intermediate builder yet - but the front legs on this gave me some issues. You absolutely have the option of screwing the legs in either to the frame using pocket hole joinery, or attaching without the support I'll show in steps 6 & 7, but I NEED all the support I can get with climbing kids (and, I hate to mention this, but very overweight family).
*I altered the dimensions of the plan to make cushion-buying easier. There are CHEAP 22" foam cushions at Hobby Lobby (especially if you use the 40% off coupon). So I am giving you a 22" chair instead of a 24" chair (I cannot remove the photo in the


I am in the process of building my 18 month old a slipper chair (meaning that I'm gathering scraps, but haven't done anything else :-p), and will document how I upholster it as I do so. I REALLY winged it with the full-sized chair, and didn't stop to take photos of the process. If any of you amazing builders think you've "got this," please document it for us, in the meantime!

Preparation
1 - 2 x 4 x 8
1 - 1 x 4 x 8
1 - 2 x 2 x 8
1 - 1 x 2 x 8 (or at least a 40" scrap)
1 - 3/4" MDF or Ply wood @ 24" x 24"
(A) 2 - 2 x 4 @ 31" (back legs)
(B) 1 - 2 x 4 @ 19" (back apron)
(C) 1 - 2 x 2 @ 19" (top of back)
(D) 2 - 1 x 2 @ 19 (back supports)
(E) 2 - 1 x 4 @ 20 1/2" (front & back of seat)
(F) 2 - 1 x 4 @ 22" (sides of seat)
(G) 4 - 2 x 2 @ 6" - ends cut 40 degrees NOT parallel (seat supports)
(H) 2 - 2 x 2 @ 13 1/2 (Front legs)
(I) 1 - 3/4" MDF or ply wood @ 20 1/2" x 20 1/2"


Please read through the entire plan and all comments before beginning this project. It is also advisable to review the Getting Started Section. Take all necessary precautions to build safely and smartly. Work on a clean level surface, free of imperfections or debris. Always use straight boards. Check for square after each step. Always predrill holes before attaching with screws. Use glue with finish nails for a stronger hold. Wipe excess glue off bare wood for stained projects, as dried glue will not take stain. Be safe, have fun, and ask for help if you need it. Good luck!
Instructions
Step 1

Draw the above pattern onto your legs (A). It's best to draw it onto one leg, cut out, and trace onto the other. Then clamp them together and sand until they're perfectly matched.
Cut out with either a jig saw or circular saw.
Step 2

Attach (B) and (C) to the legs (A) using either pocket holes or pre drilling through the sides. The top (C) should be angled to match the angle of the chair. You can sand or cut off the excess at the top of the legs (A) created by the angle, if desired.
Step 3

Add your back supports (D). I didn't measure mine, but make sure you space them where somewhat evenly so that they'll support your cushion (OPTIONAL: You can add a piece of 1/4" plywood if you feel that your cushion may not have all the support needed - I didn't find it necessary, but you may).
Step 4

Created a box using your (E) and (F) boards, as shown above. The (F) boards should be on the OUTSIDE of the (E) boards, as pictured. You can either drill through your (F) board or use pocket hole screws through your (E) board.
Step 5

Step 6

Mark your front legs 1 1/2" down from the top. Now place in the corner of the chair and trace the opening created by the seat supports. You'll cut out the area that is NOT in the opening. What you're doing is creating a notch in the front leg that will fit in the triangle opening between the seat supports and the seat.
(This part gave me some grief. Let me tell you, if you have a circular saw or a table saw, USE IT! I was able to do this part with a jig saw, but I would not recommend it!)
Step 7

This is what your leg should look like once you've cut the area that does NOT fit in the opening between the seat support and the seat.
Step 8

Insert the notch that you just cut out into the gap between the seat supports and the seat, and drill. I drilled from the outside of the seat and through the seat support (using 5 screws, total)
Step 9

Now's a good time to dry fit both of your components. DO NOT GLUE! Screw from the inside of the seat, measuring 11" up from the bottom of the back legs. If everything is level here, move on to the next step.
Step 10

Attach your 3/4" Ply or MDF. You can do so by using pocket holes along the perimeter, or by screwing it to your seat supports. I found this easier to do while the chair was still assembled.
Step 11
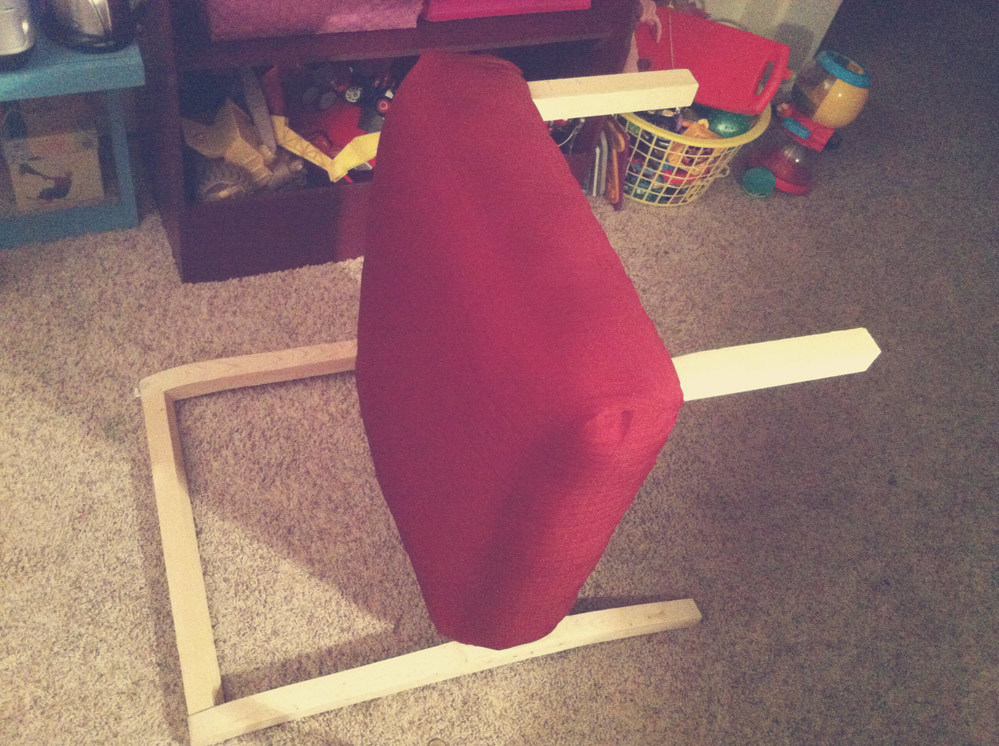
Disassemble your chair, and cut your foam to fit. You will be upholstering the pieces separately. I was able to upholster the entire chair using a single 84" long curtain panel.
Some things to note:
- Upholster the seat first, use that as a reference for where to cut the foam on the back (since the seat will take up a couple more inches, you can't use foam down the entire back)
- bring the fabric on the back all the way down to 11" from the bottom of the leg. That's where the seat is going to start, and you want it to start uniformly.
- there should be no fabric where the seat will be screwed together. Upholster the seat and back completely, then cut the fabric from the area you will be screwing through.
It is always recommended to apply a test coat on a hidden area or scrap piece to ensure color evenness and adhesion. Use primer or wood conditioner as needed.

Comments
Ana White
Tue, 09/06/2011 - 11:27
Thank you Gina for sharing
Thank you Gina for sharing with us all!
Laura Fama
Tue, 09/06/2011 - 13:20
I Love This Chair!!!
I Love This Chair!!!
Lady Goats
Wed, 09/07/2011 - 22:07
UPHOLSTERING INSTRUCTIONS ARE UP!
Over at my blog - http://www.ladygoats.com/2011/09/dont-do-as-i-say-or-do-unless-you-wann…
mydeen (not verified)
Tue, 01/03/2012 - 02:53
Thanks
Hello sir, i realy happy about your website because i got some useful ideas from your web side for my furniture projects.
Thank you with kindness.
moonhopping
Sun, 01/15/2012 - 23:36
Why one piece for the back?
I am wondering why would you shape the back with a jig and not use an angled cut? I love the chair but i am not confidant enough inmy jig saw skills to try it
Thanks
claydowling
Mon, 01/16/2012 - 04:24
Back shaping choices
Shaping the back with a jig saw or other turning saw is quite traditional, and makes for the strongest back. If you have access, a band saw would be even better, and the ideal would be to make one leg, make it perfect, and then duplicate it with a router and pattern bit. Lady Goats' method is perfect though for a small shop that doesn't have a fortune to invest in tools.
I hadn't paid much attention to this post before, but I'm really impressed with the construction. I haven't done a full chair yet, just a couple of stools. Some day, I'll build cool chairs.
moonhopping
Mon, 01/16/2012 - 22:09
Thanks
Thanks guys. Gonna get myself a box of fresh blades for my jig saw and a stack of wood, then practice, practice, practice. Lucky for me i am going to make the toddler size. Only way to improve is to do.
Lady Goats
Mon, 01/16/2012 - 18:08
Back of chair
Clay's absolutely right (of course). Using an angled cut and joining the boards would definitely affect the integrity of the chair. If you'd prefer, you can use your circular saw for most of the cut, and use the jig in the small area to finish it off (I just realized there's really no way to completely use the circular saw on that). Or... PRACTICE! :-) Get an extra board or two (maybe an extra $3?) and practice before giving your final "go"!