
Now that the walls are all up in the Momplex, we can work on putting the upstairs floor (and downstairs ceiling!) in.


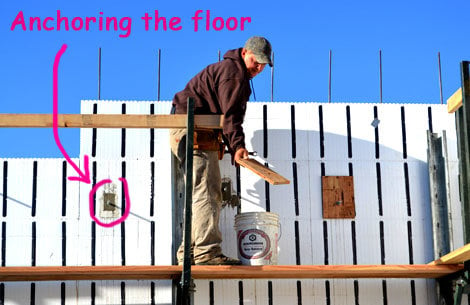
First things first, we chalked a line around the entire inside of the Momplex at the height of the first floor. Concrete slabs are notoriously not perfectly level, but the <a href="http://ana-white.com/2011/07/new-boss" title="" target="_blank">boss is always right.</a> You can see this line at the bottom of the photo. This will be the bottom of the floor joists.<div><br></div><div>Are you doubting just how we are going to line boards up with those bolts? </div><div><br></div><div>Me too.</div>
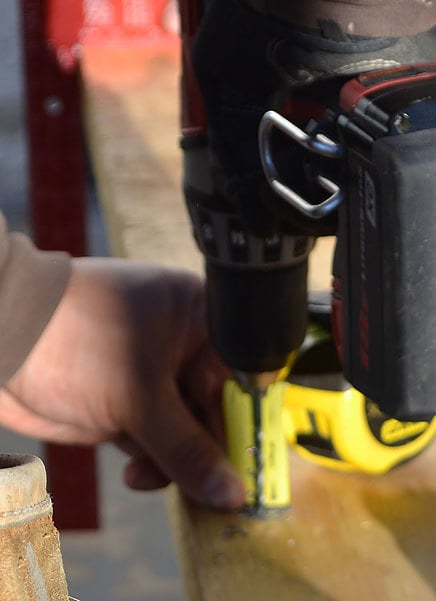
A little surgery was performed on a tape measure.
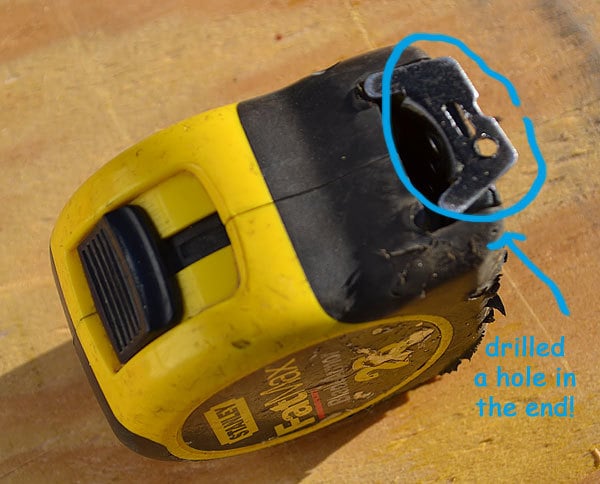
Stanley really should come with a few predrilled holes for applications like this!
For consistency and accuracy over all the bolts, Stanley is screwed right to the end wall. That way we can get an accurate measurement of the placement of all bolts horizontally.
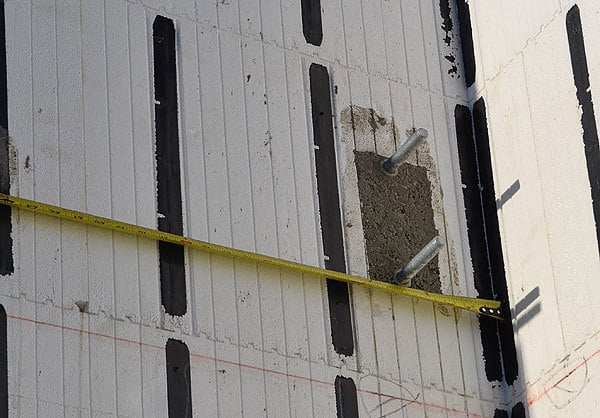
The bolt placement is measured on the tape very precisely and called out.

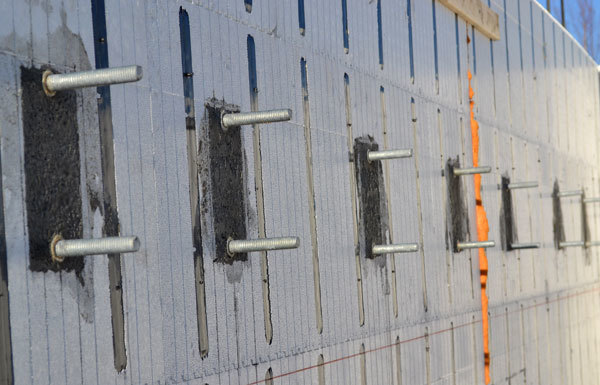
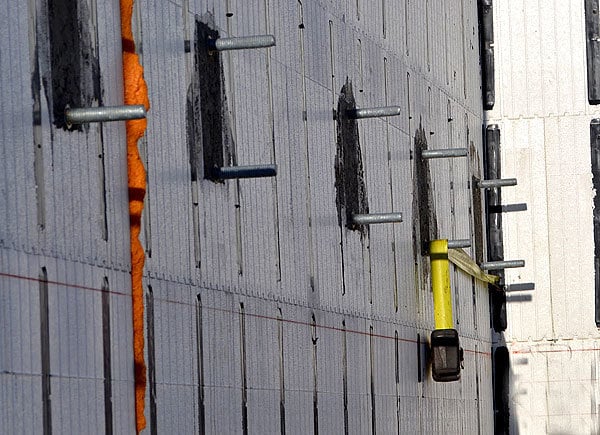
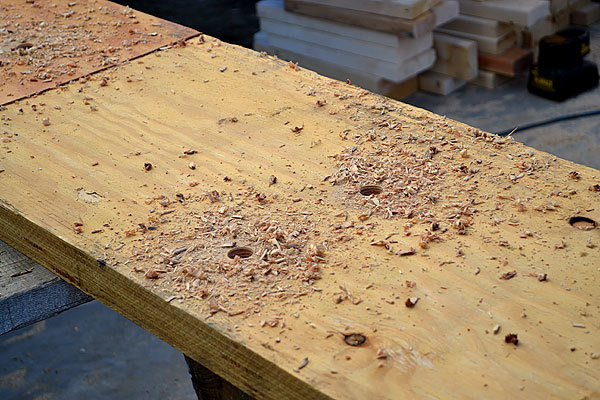
We will be hanging this massive board - called an LVL for Laminated Veneer Lumber and weighing hundreds of pounds - on the anchor bolts. So holes need to be drilled to match the anchor bolts placed in the wall.
<div><br></div><div><img src="http://ana-white.com/sites/default/files/floor-inside-icf-wall-7.jpg " alt="" align="none"></div><div><br></div><div>The horizontal measurements are marked on the LVL. This is then followed by vertical measurements taken off of the string line to find the precise location of all anchor bolts, transferred to the LVL.</div>

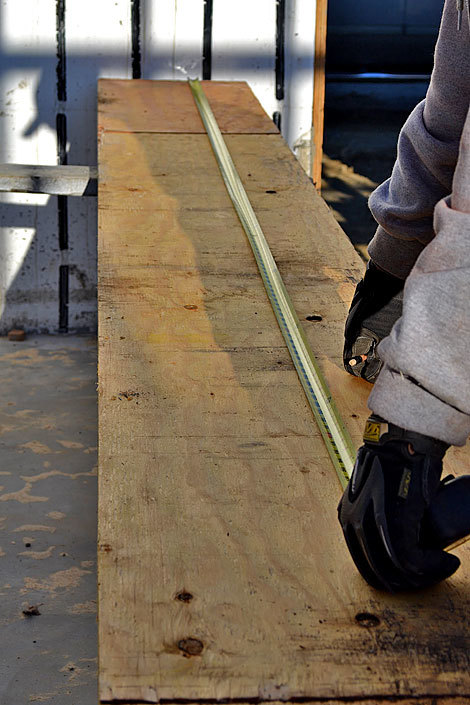
A spade bit with a precise point is used to start the holes. We finished drilling the holes with a Forstner bit - much easier on both me and the drill. The main thing here is to keep your drill level and plumb as you drill so the holes line up just right with the anchor bolts.
<div><br></div><div><img src="http://ana-white.com/sites/default/files/floor-inside-icf-wall-10.jpg " width="470px" alt="" align="none"></div><div><br></div><div>And just keep on drillin'!!!</div><div><br></div>
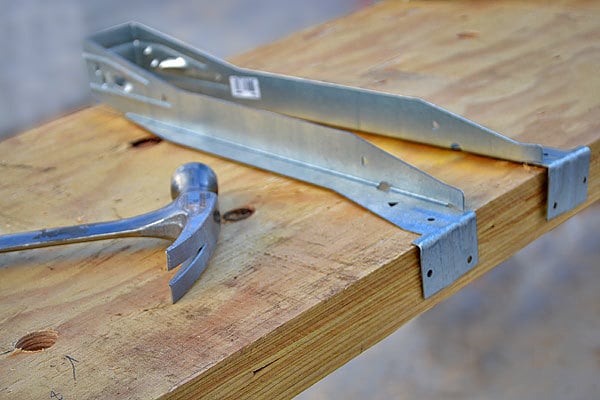
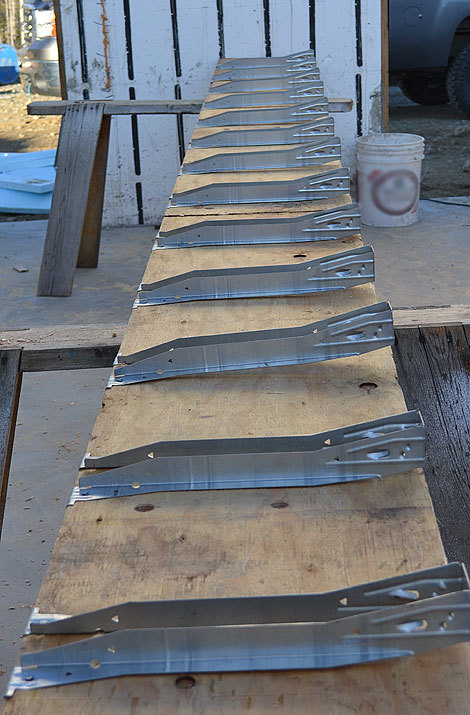
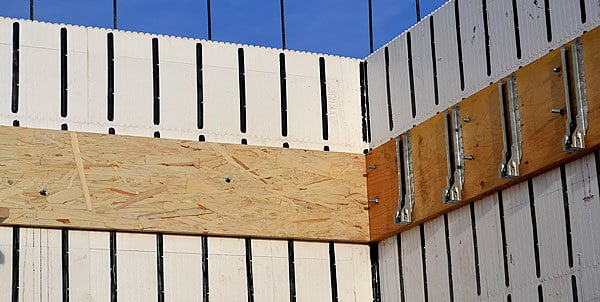
Before we hang the LVLs, we decided to hang the hangers. Because pounding nails on a flat surface at work height is WAAAAAAAAY easier than pounding nails on a ladder over your head. So the joists are marked at 16" on center, starting on the inside corner, and we nailed the hangers on.<div><br></div><div><img src="http://ana-white.com/sites/default/files/floor-inside-icf-wall-12.jpg " alt="" align="none"></div><div><br></div><div>If you are ever in a funk or just need to clear your mind of stress, grab a hammer - not a nailer, a real hammer - and start pounding. There is something intensely satisfying about using a hammer and nails. </div><div><br></div><div><br></div>

Justin and I built supports that are just below the height of the chalk line. That way, we have something to rest this monster on while getting the bolts and drilled holes lined up.
The supports are just screwed to the black fastening strips, and run to the concrete, so the weight of the beam is transferred directly to the slab. We can easily move these supports for hanging all the LVLs.

Instead of just hauling the hole beam up, we got one side on the support and then slid it down, pivoted it and got the other side on the support. We are all about working smart.
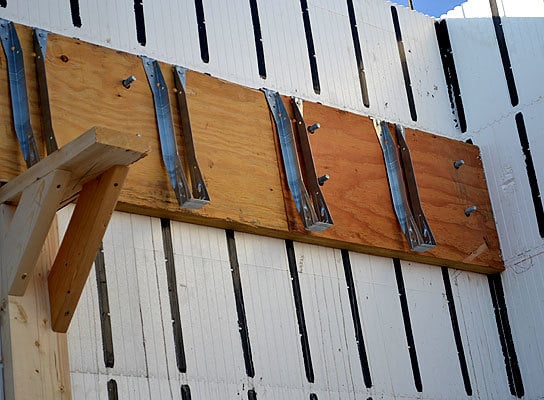
And the bolts slide right through the holes!

And of course we dig out an impact driver normally used for changing tires and other mechanical needs to tighten up nuts on the ends of the bolts.
Once the LVLs are up, we put the rim boards up on the sides that only have single bolts. Rim boards take the place of your first and last floor joist and are part of the flooring system.
The excitement over another step - and a big heavy one! - being completed is short lived. Because now of course I can't wait to see floor joists being dropped into those already set hangers!
Happy Building!
Ana
Comments
Jenn Zynn (not verified)
Thu, 10/06/2011 - 11:05
Sweet!
Guest (not verified)
Thu, 10/06/2011 - 11:15
Love your blog!
Karla (not verified)
Thu, 10/06/2011 - 11:31
Tape Measure
loniwolfe
Thu, 10/06/2011 - 11:44
That is so cool! I can't wait
Guest (not verified)
Thu, 10/06/2011 - 13:02
Love Love Love reading this
Sara (not verified)
Thu, 10/06/2011 - 14:53
Another Momplex post!!!
Guest (not verified)
Thu, 10/06/2011 - 21:55
Great progress......
Brian Forbes Colgate (not verified)
Thu, 10/06/2011 - 23:09
How to Frame a Floor Inside ICF Walls
UlrikeDG
Fri, 10/07/2011 - 09:13
If half of HGTV's shows were
Matthew (not verified)
Fri, 10/07/2011 - 12:31
Why LVLs for ledger boards?
In reply to Why LVLs for ledger boards? by Matthew (not verified)
Ana White
Mon, 10/10/2011 - 14:07
Hi Matthew, thank you for
Matthew (not verified)
Tue, 10/11/2011 - 10:22
Why LVLs for ledger boards?
In reply to Why LVLs for ledger boards? by Matthew (not verified)
Ana White
Tue, 10/11/2011 - 14:24
Hi Matthew, these are such
redhead_61
Sun, 10/09/2011 - 09:50
It's so funny how I read
loniwolfe
Mon, 10/10/2011 - 22:38
I have a question about the
In reply to I have a question about the by loniwolfe
Ana White
Tue, 10/11/2011 - 14:43
Hi Loni, the black fastening
Robinkanters
Thu, 10/31/2024 - 02:42
ICF thank you
Hi Ana, I am from Down Under- Australia, for those who are wondering. I am a 66 year young woman, completed my Cert III Carpentry last year with the Apprentices and just about to start building my dream home using ICFs. I am so excited to have found your site. I have been researching ICF construction information for about 5 years. ICF is not well known here at all. I had so many concerns, but thanks to your honest and detailed explanations of all your procedures, I feel like I will be able to manage now. Thank you so very much!