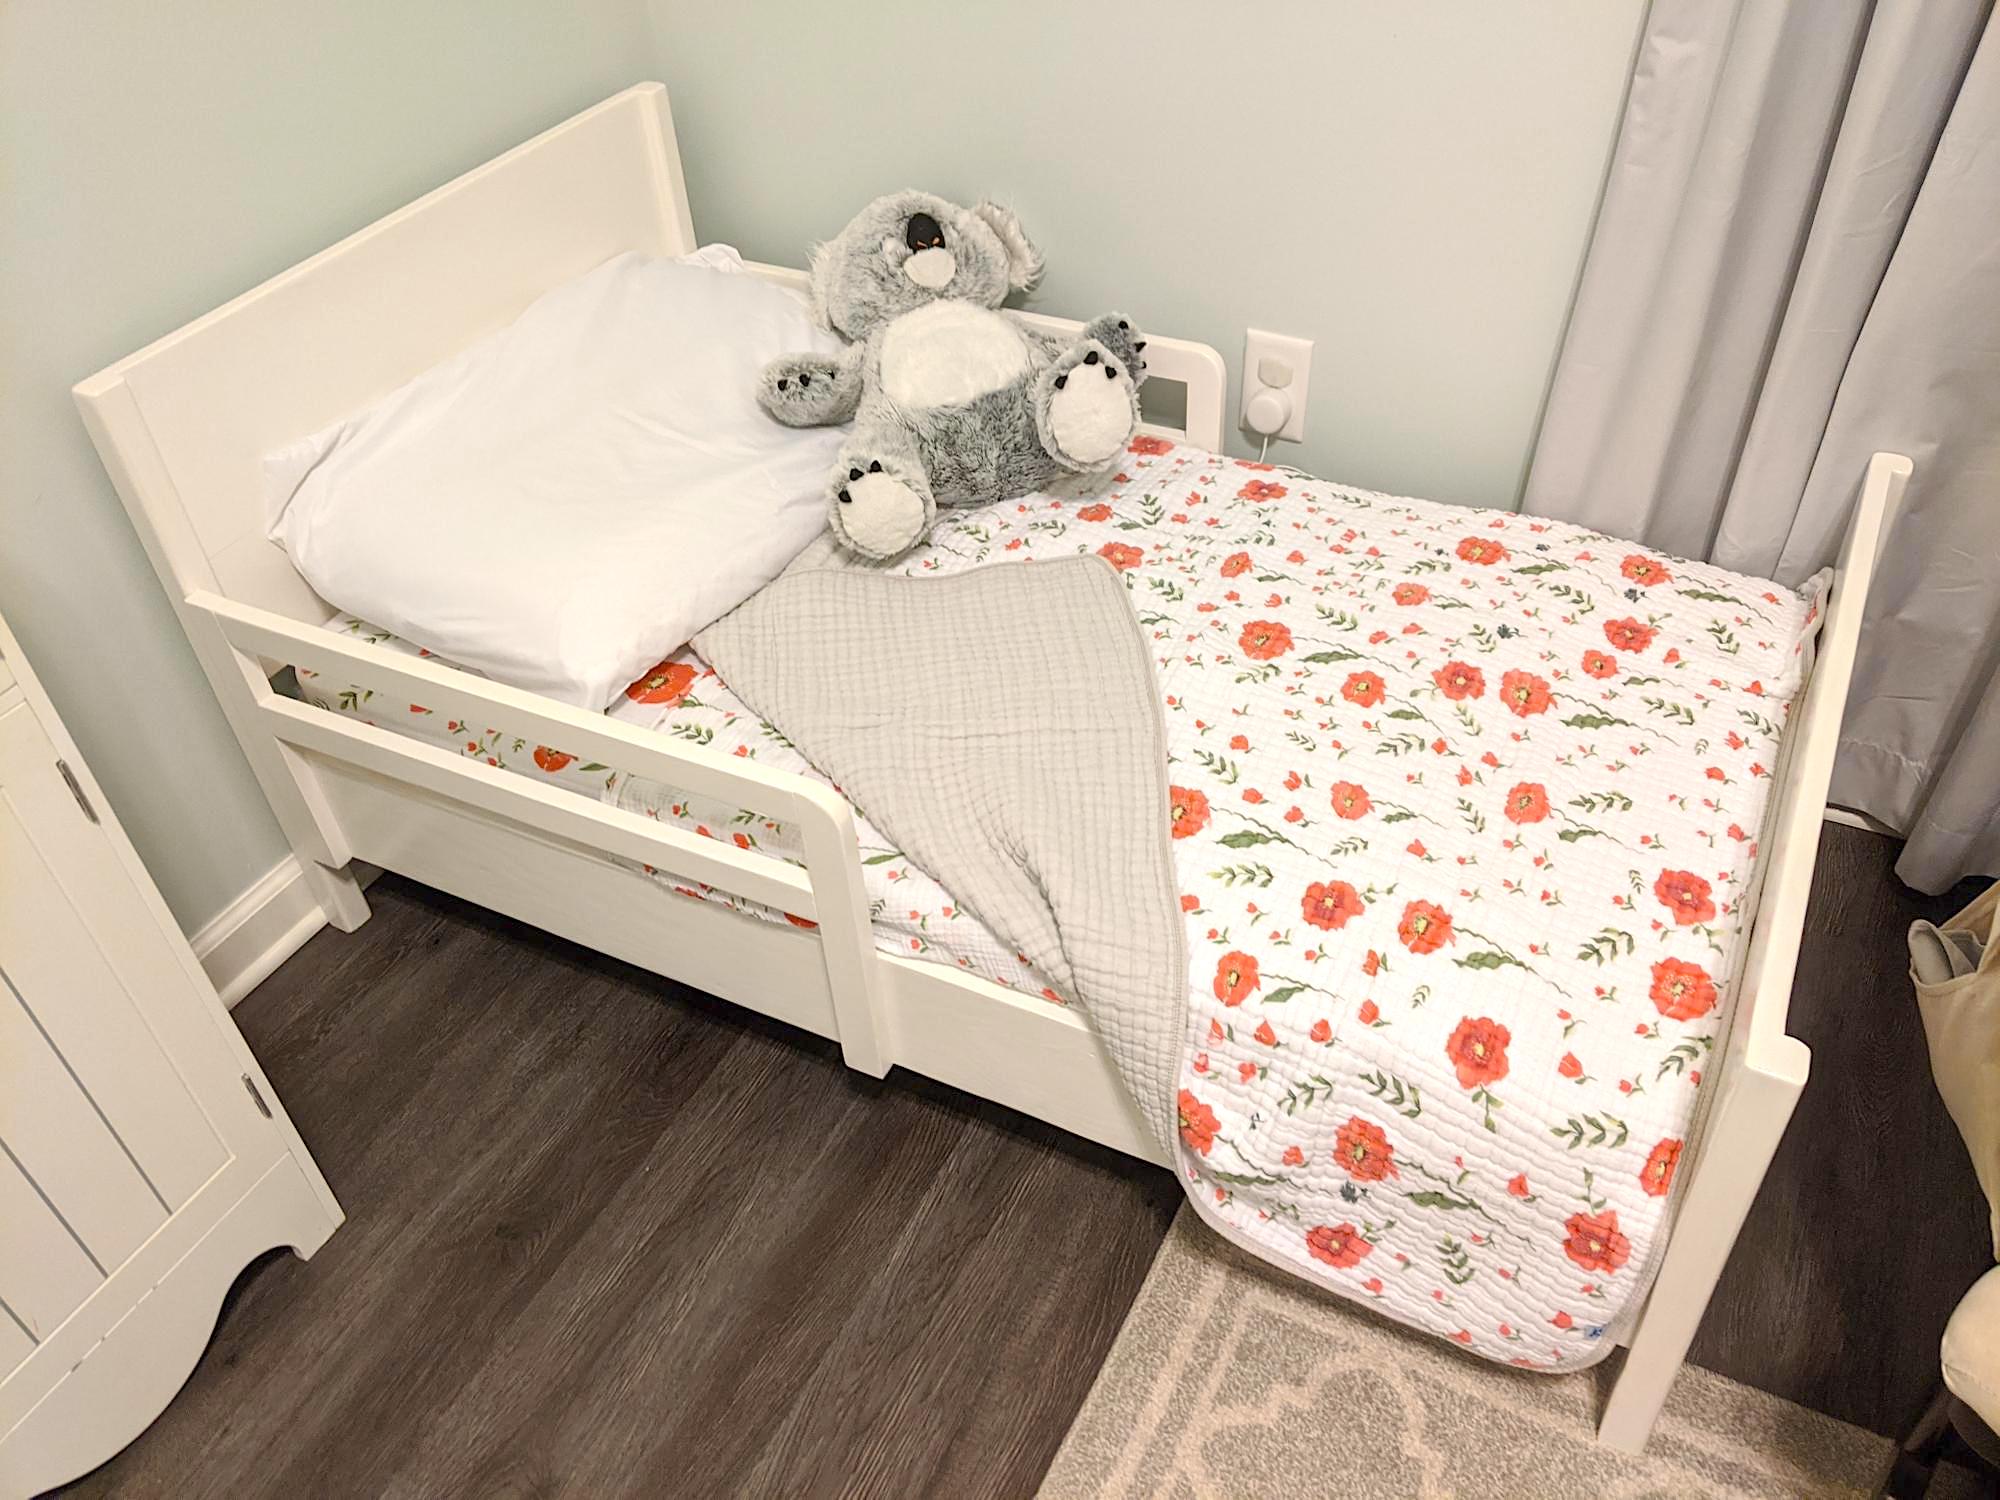


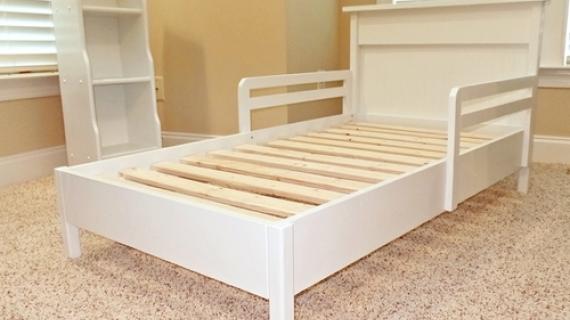
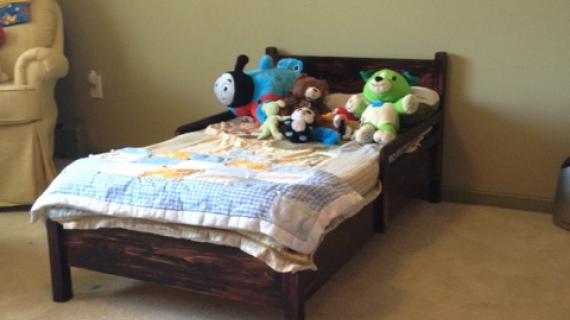
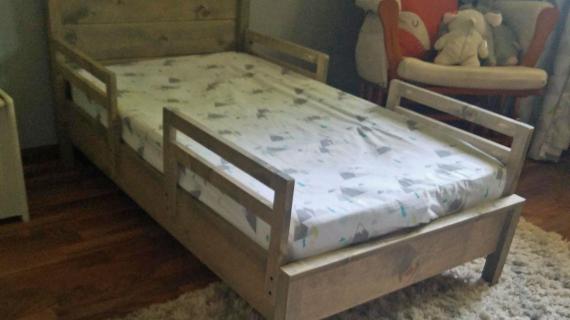
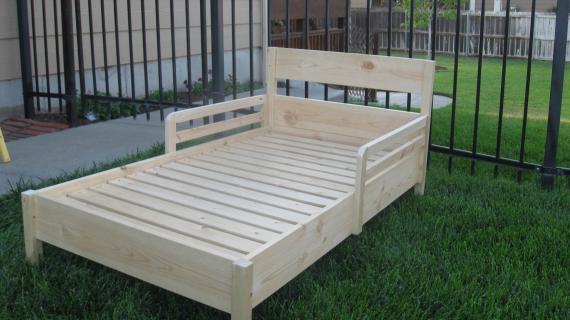
Build your own toddler solid wood bed - This do it yourself free plan is easy to build and can save you hundreds off the retail!
Preparation
- 2 - 2x2 @ 8 feet long
- 1 - 1x6 @ 8 feet long
- 1 - 1x6 @ 10 feet long
- 5 - 1x3 @ 8 feet long
- 2 - 1x2 @ 8 feet long
- 1 - beadboard wainscoting like this from Lowes
- 1" finish nails
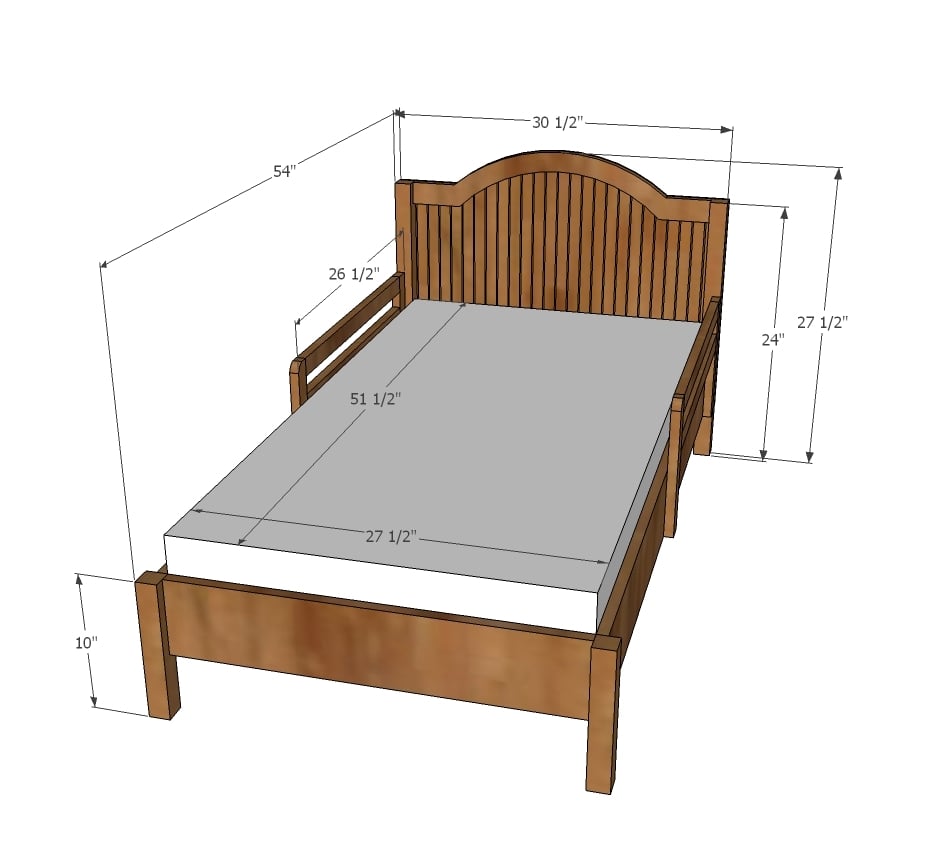
- 3 - 1x6 @ 27 1/2"
- 2 - 2x2 @ 24"
- 1 - Beadboard Paneling @ 23" high x 30 1/2" wide - cut to fit
- 2 - 2x2 @ 10"
- 2 - 1x6 @ 50 3/4"
GUARDRAILS
- 4 - 1x2 @ 11"
- 4 - 1x2 @ 24 1/2"
SLATS
- 2 - 2x2 @ 51 1/2"
- 15 - 1x3 @ 27 1/2"


Please read through the entire plan and all comments before beginning this project. It is also advisable to review the Getting Started Section. Take all necessary precautions to build safely and smartly. Work on a clean level surface, free of imperfections or debris. Always use straight boards. Check for square after each step. Always predrill holes before attaching with screws. Use glue with finish nails for a stronger hold. Wipe excess glue off bare wood for stained projects, as dried glue will not take stain. Be safe, have fun, and ask for help if you need it. Good luck!
Instructions
Step 1

With one of the 1x6 boards, cut out the header shape as shown above. I recommend using a piece of legal sized paper to create a pattern, and trace that pattern on both sides so both are identical. Use a jigsaw and carefully cut. Follow by sanding until you are satisfied.
Step 2
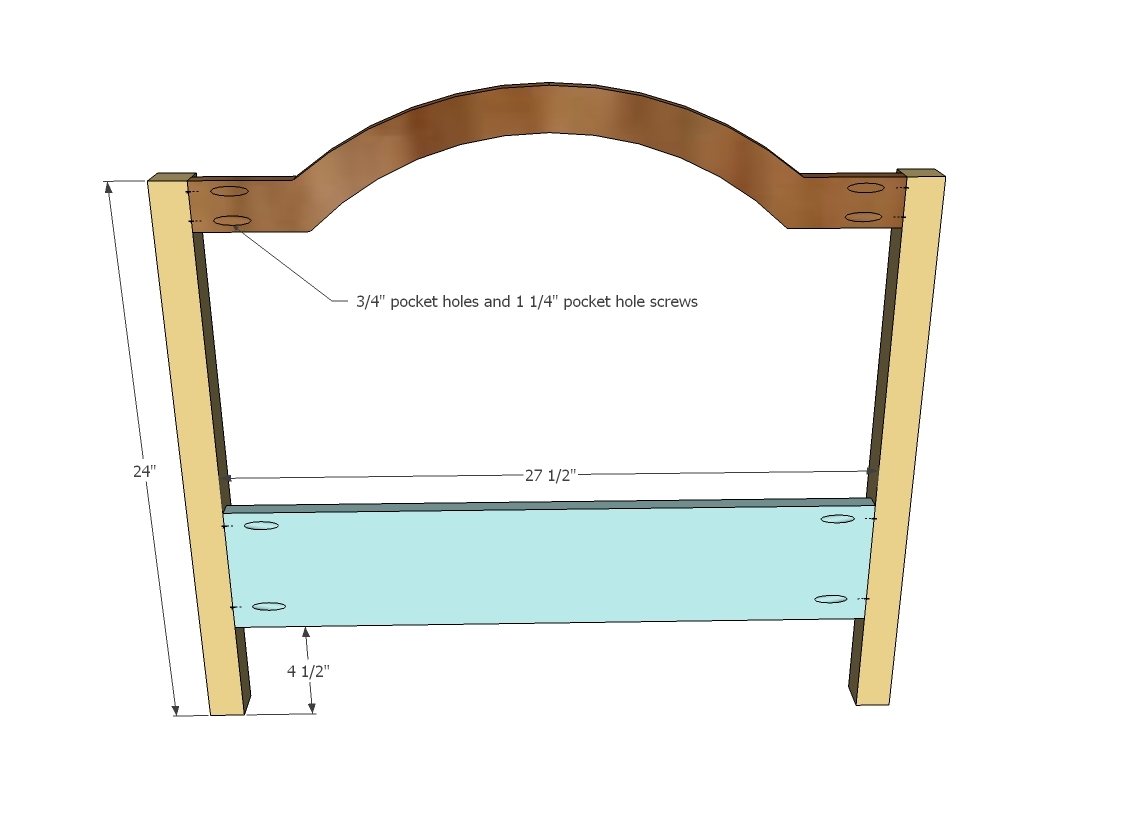
With the header cut, go ahead and drill Kreg Jig pocket holes on ends and attach to legs as shown in diagram.
Step 3

Trace the shape of the headboard on to your beadboard paneling. Cut shape out slightly smaller so your edges are not visible from front. Tack on with 1" finish nails and wood glue.
Step 4

Build your footboard as shown above.
Step 5

Step 6
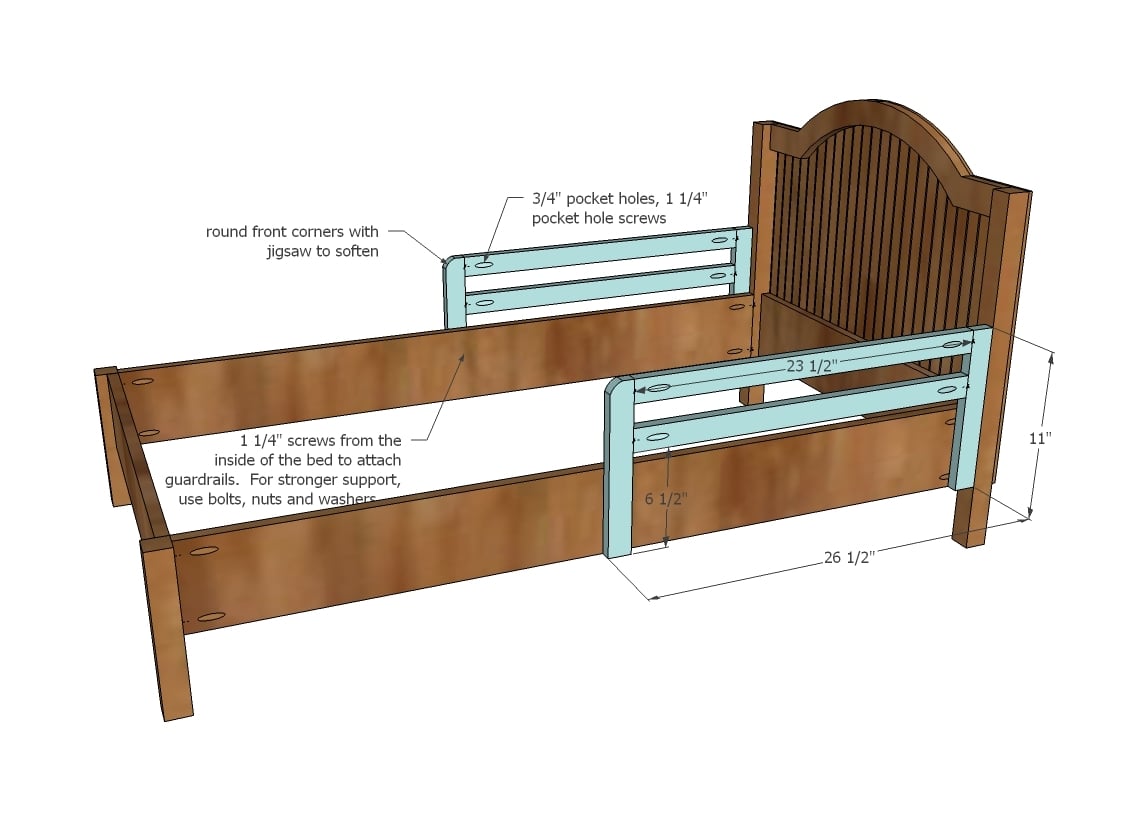
Guardrails should be a piece of cake. Just make sure you round the front corner. For stronger guardrail attachment, use 1/4" bolts, 2" long, with nuts and washers through predrilled 1/4" bolt holes.
Step 7

Now the cleats. Measure and mark the insides of your siderails 2" down. Attach cleats with 2" screws and wood glue.
TIP: Predrill holes with your countersink bit every 6-8" with the cleats on your work surface. Then screw in place.
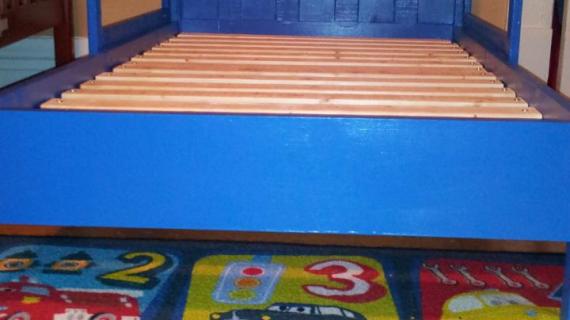
Step 8

Now add the slats! I found that closer slat spacing is better for crib mattresses because the mattresses themselves are so flimsy. Plus, a little foot could slip through wider spacing.
Using 1x3 boards - which are about $1.50 each - you will only need 5 total 1x3s. The difference between wider spaced slats and narrower spaced slats is about the cost of a fancy cup of coffee.
It is always recommended to apply a test coat on a hidden area or scrap piece to ensure color evenness and adhesion. Use primer or wood conditioner as needed.
Comments
Guest (not verified)
Wed, 10/12/2011 - 14:38
Ana - would you ever post a
Ana - would you ever post a plan for a crib?
In reply to Ana - would you ever post a by Guest (not verified)
Ana White
Wed, 10/12/2011 - 16:20
You know, if I ever get brave
You know, if I ever get brave enough to bring another baby home that baby would sleep in a crib that we made and I would trust my crib over an assembled one. But my fear is someone might misinterput my plans or build to a different standard, and a baby gets hurt. There are disclaimers to protect our family, but no disclaimer to protect me emotionally. I'm not saying no... Just not found the right time yet. Ana
loniwolfe
Wed, 10/12/2011 - 23:25
This is so cute! Can't wait
This is so cute! Can't wait until I have a toddler in need of a bed!
Guest (not verified)
Thu, 10/13/2011 - 10:35
Excellent timing!
My boy just turned two and the wife and I have been putting off getting him into a toddler bed. He's a tall one too, so he's been ready for quite a while :).
This might just be the plans that gets me to the store to buy that Kreg Jig and start working on another project! I've built a bookshelf and entertainment center from your site and spread the word when I can.
Thanks again Ana, your site is great!
-Chris
Guest (not verified)
Tue, 10/18/2011 - 09:44
GREAT bed! Now is there any
GREAT bed! Now is there any way to make bunk toddler beds?? Seriously, I have a stepdaughter who has 2 little girls in a teeny tiny room that holds 2 toddler beds and a very small dresser- that's it. We were talking about how great it woud be to bunk the toddler beds and give the girls more room (a twin bed simply would NOT fit in this room) Would this be possible? Can you post how to do this? Surely one of your plans could me made into bunk beds couldn't it? Thans so much for everything you do- your site is my all time fav!!
Guest (not verified)
Tue, 10/18/2011 - 18:51
Plans
Plans
Guest (not verified)
Tue, 10/18/2011 - 18:51
Bed
Bed
hammertime
Sun, 10/23/2011 - 12:40
I love this!
I think I know what my nephew is getting for Christmas. He will be very excited to see what Aunt Kate made for him. :-)
Guest (not verified)
Wed, 11/02/2011 - 14:48
Attaching the cleats
I'm thinking of making this bed over the winter for our daughter. I have a question about attaching the cleats to the side rails. I know you should predrill the cleats, did you do any predrilling to the side rail or is there just enough of the screw to go past the cleat and dig into the siderail without coming out the other side to the outside of the siderail??
angelrm23 (not verified)
Wed, 01/02/2013 - 21:14
Mattress Thickness
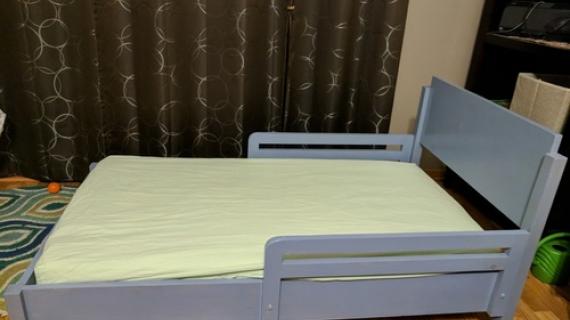
My husband just built this bed for Christmas. When we put the crib mattress on, it was almost flush with the guardrails. It's a 6 inch thick mattress. What did we do wrong or how can we fix it?
Thanks!
davec (not verified)
Thu, 01/03/2013 - 10:56
You didn't do anything wrong.
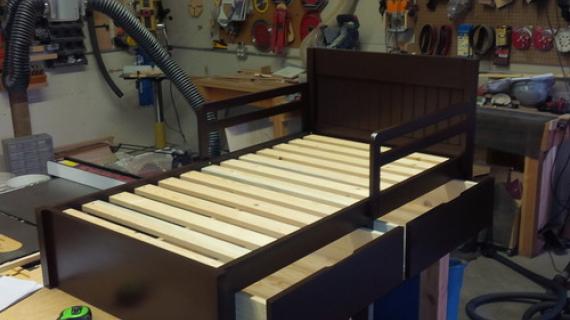
You didn't do anything wrong. The plan only calls for a 2" gap from the top of the siderails to the top of the cleats and the slats are 3/4" thick, leaving only 1 1/4" to the top of the siderail for the mattress. The plan purposely has this look (a lot of mattress sticking up). After that, from the top of the siderail to the top of the guardrail, there is only 5". So, if you had a 6" thick mattress, you would only have 1/4" of guardrail. The simplest fix (and what I plan to do, b/c this is not exactly the look I want) would be to drop the cleats to be flush with the bottom of the siderail. That would give you another 2". Your other option would be to build taller guard rails or do both things.
davec (not verified)
Thu, 01/03/2013 - 10:58
You didn't do anything wrong.
You didn't do anything wrong. The plan only calls for a 2" gap from the top of the siderails to the top of the cleats and the slats are 3/4" thick, leaving only 1 1/4" to the top of the siderail for the mattress. The plan purposely has this look (a lot of mattress sticking up). After that, from the top of the siderail to the top of the guardrail, there is only 5". So, if you had a 6" thick mattress, you would only have 1/4" of guardrail. The simplest fix (and what I plan to do, b/c this is not exactly the look I want) would be to drop the cleats to be flush with the bottom of the siderail. That would give you another 2". Your other option would be to build taller guard rails or do both things.
kasselt001
Wed, 03/05/2014 - 05:14
options for twin
Hi Ana,
Do you have instructions on how to convert this to a twin bed? Also, I live in the Netherlands, and bed sizes are a little different, so how can I change the measurements to fit 90 cm by 200 cm matresses?
btravis72
Mon, 06/15/2015 - 17:11
STEP #7 NEEDS FIXED
As angelrm23 discovered, if you build this bed as shown and you use a standard 6" crib mattress the top of the mattress will be even with the top of the siderails. User davec responded with instructions on how to fix this issue, which is to basically lower the cleats that the slats sit on to be even with the bottom of the frame. I wish I had read this before I glued and screwed the cleats in, but I just found this out the hard way and had to bust the cleats off the frame. I had to readjust, sand, and repaint sections of this bed. Word to the wise: take davec's advice and do it right from the start.
frankb03
Thu, 03/17/2016 - 08:49
Guardrails
Great bed! The only issue is the height. I bought a better and thicker mattress. The guardrails need to be higher. My vertical guardrail needs to be 16 inches.
Emily Anne
Fri, 03/25/2016 - 19:40
Type of wood?
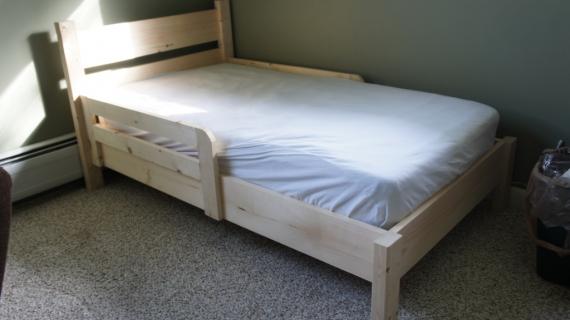
I'm curious what type of wood is typically bought for this project. Are people using furring strips for the 1x2/2x2/1x3 boards? Otherwise how is the cost kept so low?