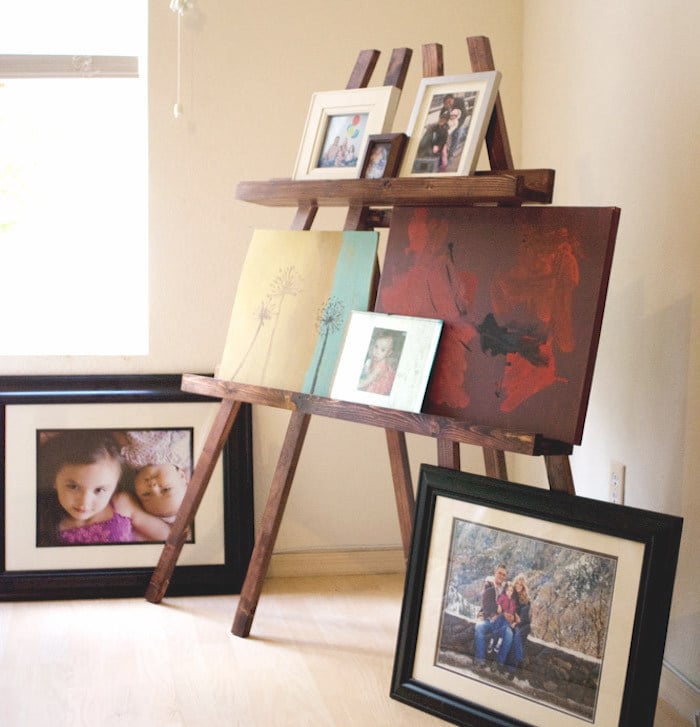


For under $20, you can create this stunning piece to display children's artwork, family photos, or even a menu! This is a "strong" piece of furniture that will make a statement wherever you put it. And it's easy to build, too!
This is a VERY beginner plan. Don't let the angles put you off. If you can cut the angles, just press the boards against the saw fence and nail everything on from there! Click here for full plans from Lady Goats.com
Preparation
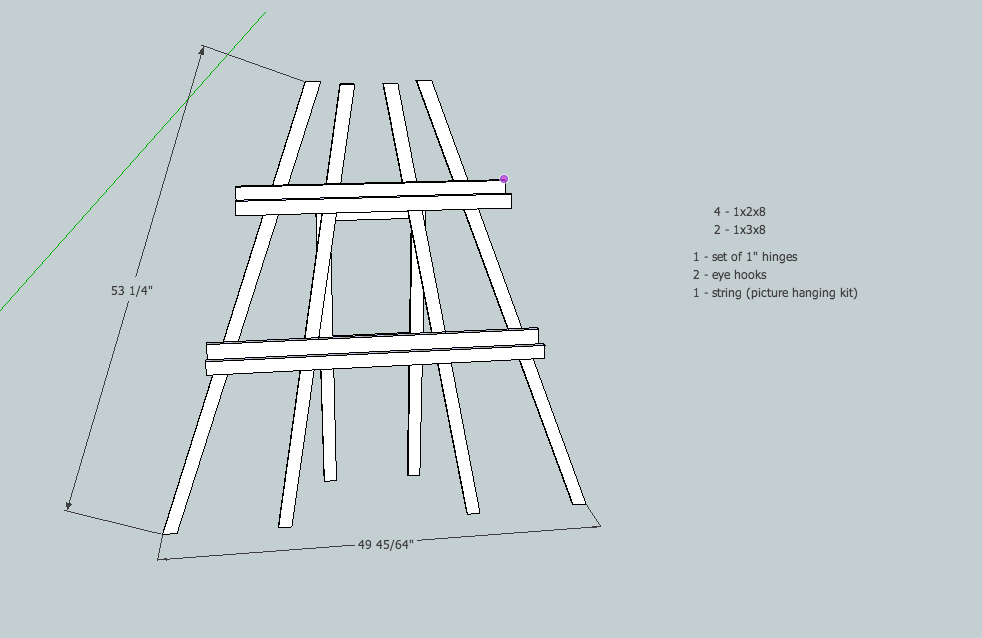
4 - 1 x 2 furring strips
2 - 1 x 3 furring strips
2 - eye hooks
2 - hinges
1 - string
Please read through the entire plan and all comments before beginning this project. It is also advisable to review the Getting Started Section. Take all necessary precautions to build safely and smartly. Work on a clean level surface, free of imperfections or debris. Always use straight boards. Check for square after each step. Always predrill holes before attaching with screws. Use glue with finish nails for a stronger hold. Wipe excess glue off bare wood for stained projects, as dried glue will not take stain. Be safe, have fun, and ask for help if you need it. Good luck!
Instructions
Step 1

make 2 shelves
Step 2

attach to legs
Step 3

create and attach back
Step 4

add photos!
It is always recommended to apply a test coat on a hidden area or scrap piece to ensure color evenness and adhesion. Use primer or wood conditioner as needed.

Comments
AlexWS
Tue, 11/08/2011 - 17:32
This would be perfect.
If only i had the pictures to go on it.
In reply to This would be perfect. by AlexWS
Lady Goats
Tue, 11/08/2011 - 19:23
no pictures?
glue all of the nails from your pallets to some planks (keeping in mind the rule of thirds), and display those!
Jan (not verified)
Wed, 11/09/2011 - 06:17
I could help
I'd be glad to help you out with some paintings, Alex! lol
Seriously, this would be a perfect display for some of the art shows I do. Thanks so much for the plans, Lady Goats!
AlexWS
Wed, 11/09/2011 - 06:52
I've already got a bunch of
I've already got a bunch of rusty pallet nails in a jar on display on a shelf in the living room!