


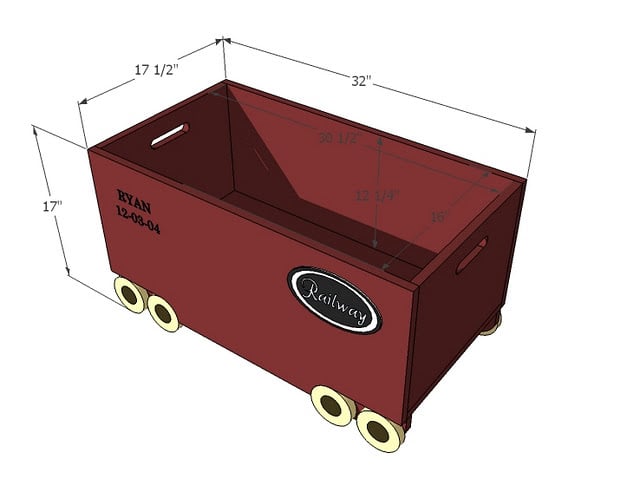
Build a train toybox from 1/2 sheet of plywood! Looking for a cute train toy box? These toy box plans are easy to build and include diagrams, cut list and shopping list.
Preparation
1/2 sheet 3/4" hardwood plywood (shown in PureBond Formaldehyde Free White Oak)
- 3 - 3/4" Plywood @ 15 3/4" x 32"
- 2 - 3/4" Plywood @ 15 3/4" x 12"
- 4 - 3/4" Plywood @ 3" x 12"
See diagram in step 1.


Please read through the entire plan and all comments before beginning this project. It is also advisable to review the Getting Started Section. Take all necessary precautions to build safely and smartly. Work on a clean level surface, free of imperfections or debris. Always use straight boards. Check for square after each step. Always predrill holes before attaching with screws. Use glue with finish nails for a stronger hold. Wipe excess glue off bare wood for stained projects, as dried glue will not take stain. Be safe, have fun, and ask for help if you need it. Good luck!
Instructions
Step 1
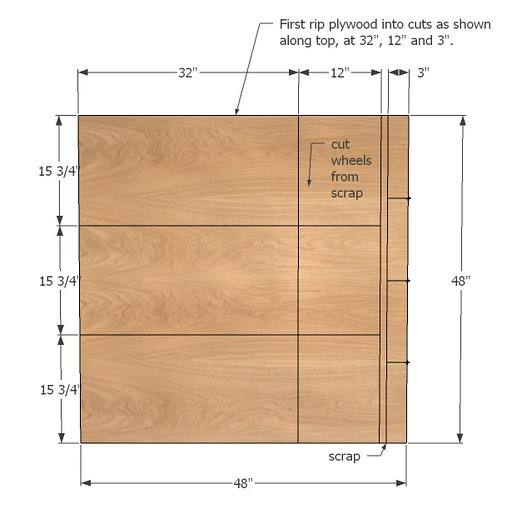
If your hardware store is so kind, have them at least make the initial rip cuts, ripping the plywood into pieces measuring 32" x 48", 12" x 48" and 3" x 48". From there, it's all cross cuts.
Step 2
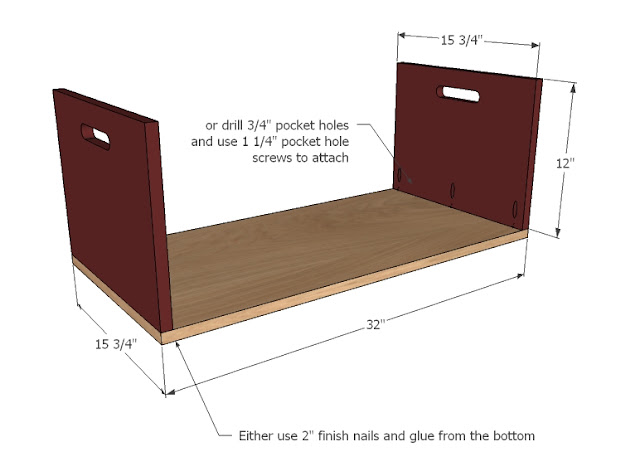 Handles can be cut before or after assembly. Attach sides to bottoms, you can use your favorite fastening method, don't forget the glue.
Step 3
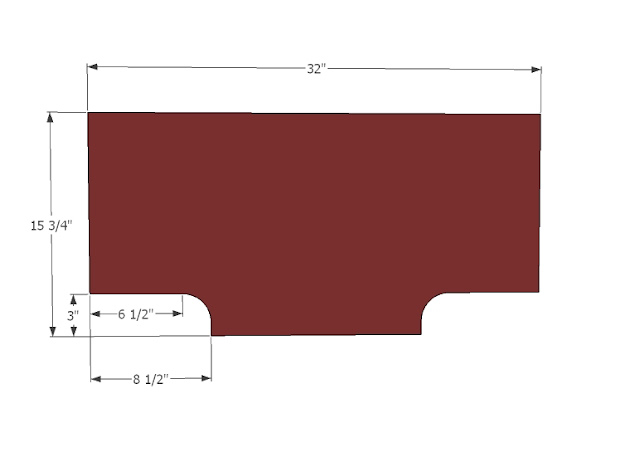
Cut sides out as shown above. Use a jigsaw and sand edges. Save scrap to use as a pattern for cutting remaining sides out, considerate of what side of the line you should cut. Make sure cut edges match.
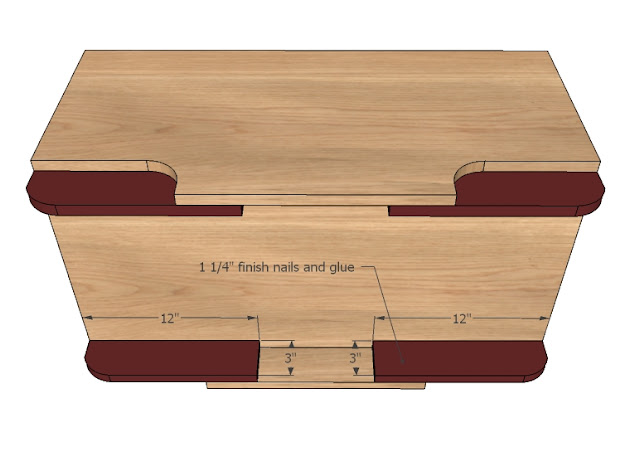
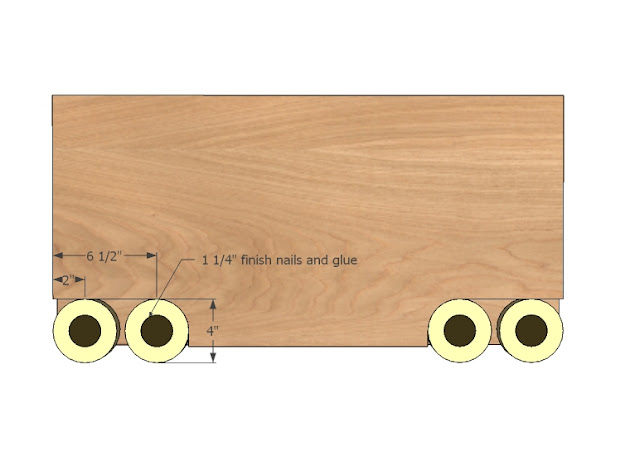
NOT PICTURED: Attach sides to the toy box with finish nails and glue or pocket hole screws or 2" screws and glue.
Step 4
Step 5
It is always recommended to apply a test coat on a hidden area or scrap piece to ensure color evenness and adhesion. Use primer or wood conditioner as needed.
Comments
Amanda R (not verified)
Tue, 11/22/2011 - 12:01
I can't believe I didn't
I can't believe I didn't think of this! I've been wanting to create rolling toy bins for below our kids' train/sand table that my husband and I made last Christmas. These will go perfectly! Thank you!
Anabel (not verified)
Fri, 06/15/2012 - 11:21
This is great, i have found a
This is great, i have found a project similar to this at a donate car USA convention but i forgot to ask about it more details.I'll try to make your design and i was wondering if it could carry some toys.I would like my sons to put their toys there and then carry it around the house this way they do some movement too.