


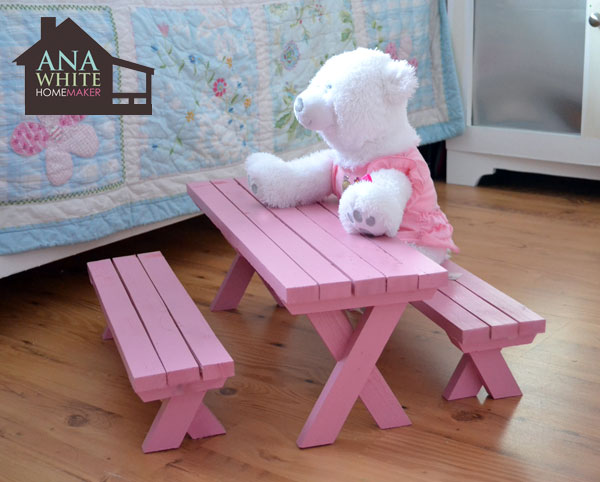
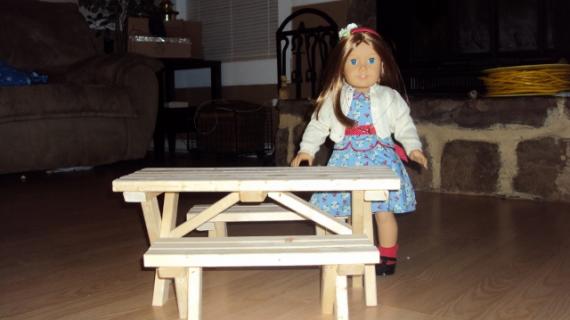
Make a doll picnic table for American Girl or 18 doll.
Thank you thank you for understanding.

Preparation
4 - 1x2 @ 8 feet long
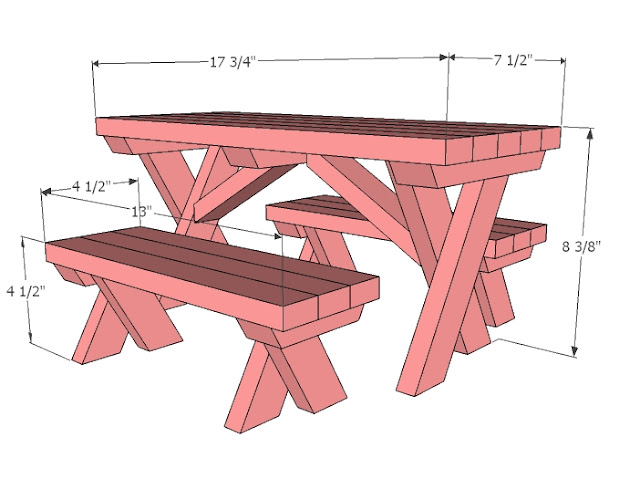
TABLE
5 - 1x2 @ 17 3/4"
3 - 1x2 @ 7 1/2" (Long point to long point, both ends cut at 30 degrees off square, NOT parallel)
2 - 1x2 @ 8 3/4" (Both ends cut at 30 degrees off square, ends are parallel)
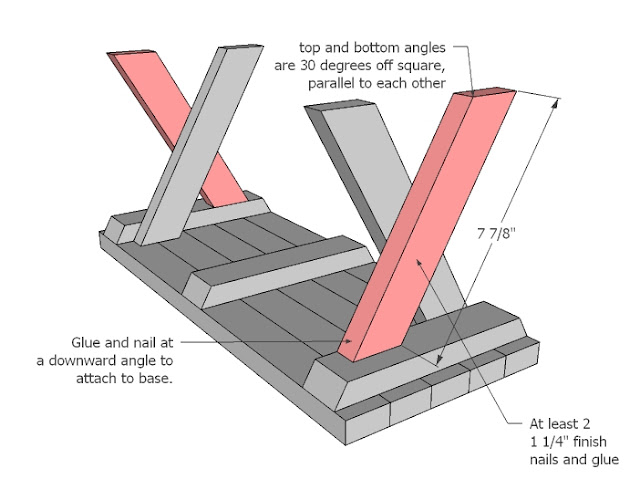
2 - 1x2 @ 7 7/8" (Both ends cut at 30 degrees off square, ends are parallel)
2 - 1x2 @ 6 1/4" (Both ends BEVELED at 30 degrees off square, ends are parallel)
BENCHES (2)
6 - 1x2 @ 13"
4 - 1x2 @ 4 1/2" (Long point to long point, both ends cut at 30 degrees off square, NOT parallel)
4 - 1x2 @ 4 3/8" (Both ends cut at 30 degrees off square, ends are parallel)
4 - 1x2 @ 3 1/2" (Both ends cut at 30 degrees off square, ends are parallel)


Please read through the entire plan and all comments before beginning this project. It is also advisable to review the Getting Started Section. Take all necessary precautions to build safely and smartly. Work on a clean level surface, free of imperfections or debris. Always use straight boards. Check for square after each step. Always predrill holes before attaching with screws. Use glue with finish nails for a stronger hold. Wipe excess glue off bare wood for stained projects, as dried glue will not take stain. Be safe, have fun, and ask for help if you need it. Good luck!
Instructions
Step 1
Step 2

Step 3

Step 4
Step 5

Step 6

Step 7

It is always recommended to apply a test coat on a hidden area or scrap piece to ensure color evenness and adhesion. Use primer or wood conditioner as needed.
Comments
tannisg
Wed, 11/16/2011 - 23:10
so cute! perfect for my little builder
My 8 year old has asked for another AG doll and we wanted to get her some plans to make something for it herself (we're probably making beds too) and this is perfect! She loves to work with wood and I think she could really do a lot of this herself and be so proud with the finished product - thanks!
Guest (not verified)
Thu, 11/17/2011 - 09:31
Linked to you.... :)
Thanks for the CUTE plans, Ana!!!! I linked over to you.... :)
In reply to Linked to you.... :) by Guest (not verified)
Ana White
Thu, 11/17/2011 - 09:50
Thank you so much!!!!
Thank you so much!!!!
jasonw (not verified)
Fri, 11/18/2011 - 11:10
MOMplex
Any updates on the Momplex? Here hasn't been anything since you talked about Kitchen design.
Suffering withdrawal here!
Guest (not verified)
Tue, 11/29/2011 - 16:28
Just an observation---the 4
Just an observation---the 4 1/2" (bench) and 7 1/2" (table) pieces should also be designated as BEVELED.
Thanks for all the plans! I'm working on both the table and benches and the bunk bed for Xmas gifts.
patti rairden (not verified)
Thu, 02/09/2012 - 17:13
adorable
the girls will love these
w2000j
Sat, 02/25/2012 - 03:24
lovely... done
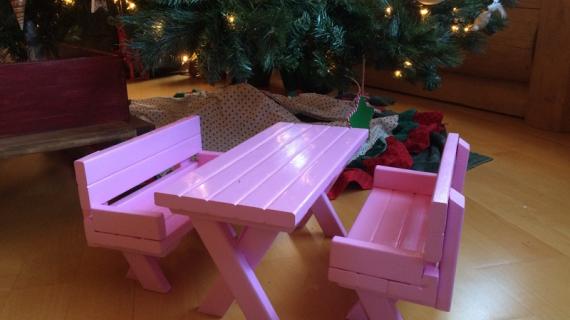
I just finished the table and the benches.. They seems lovely.. I think my daughter will like it... hahaha... thank you ana..
Cat Hansman (not verified)
Sat, 06/02/2012 - 05:58
thanks
Thank you so much for the bunk bed plans. I love making them & appreciate your sharing!!
Todd S (not verified)
Fri, 06/22/2012 - 17:42
thanks
My daughter and I just build the table. Took less than 2hrs and under $10. Thanks for the plan and way to spend time with my daughter.
Amanda Wallace (not verified)
Mon, 07/30/2012 - 16:48
American Girl picnic table
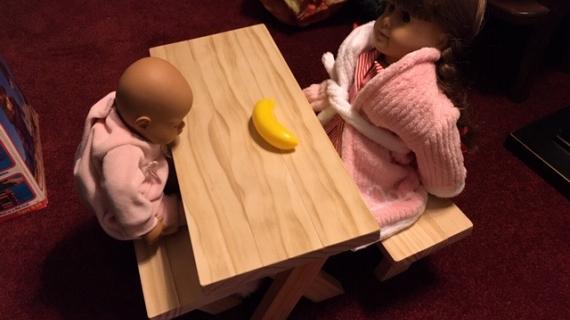
How many AG dolls would comfortably sit at this table? My little girl is having an AG Bday party and wanted to make this for all of their dolls to sit at. I just wanted to make sure I had enough room for all of their girls:)
jcs_nyc
Tue, 01/01/2013 - 12:15
Completed the Picnic Table!
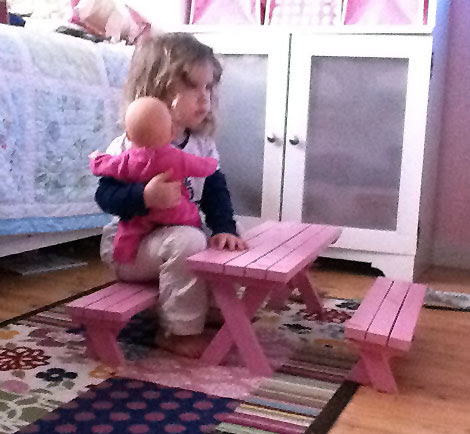
Great project for my 6 year old daughter and I to complete.
Everyone (including her American Girl doll) is very happy with the results!
NanaSandi
Wed, 10/30/2013 - 09:50
Star doll closet
Why can't I get to the PDF plans for the adorable doll closet? I always get an error message. Thanks, Sandi
mrpaul32@yahoo.com
Thu, 03/08/2018 - 16:23
Working on it now
What is the spacing for the cleats on the table top and bench