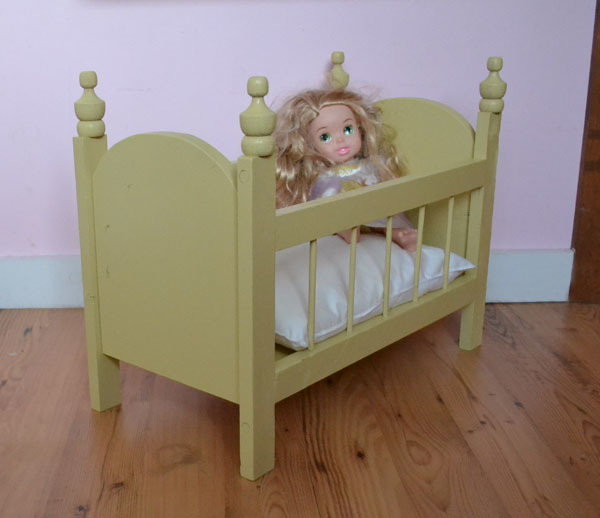


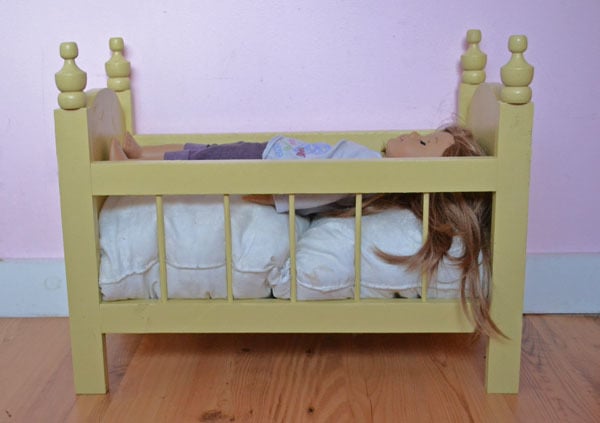
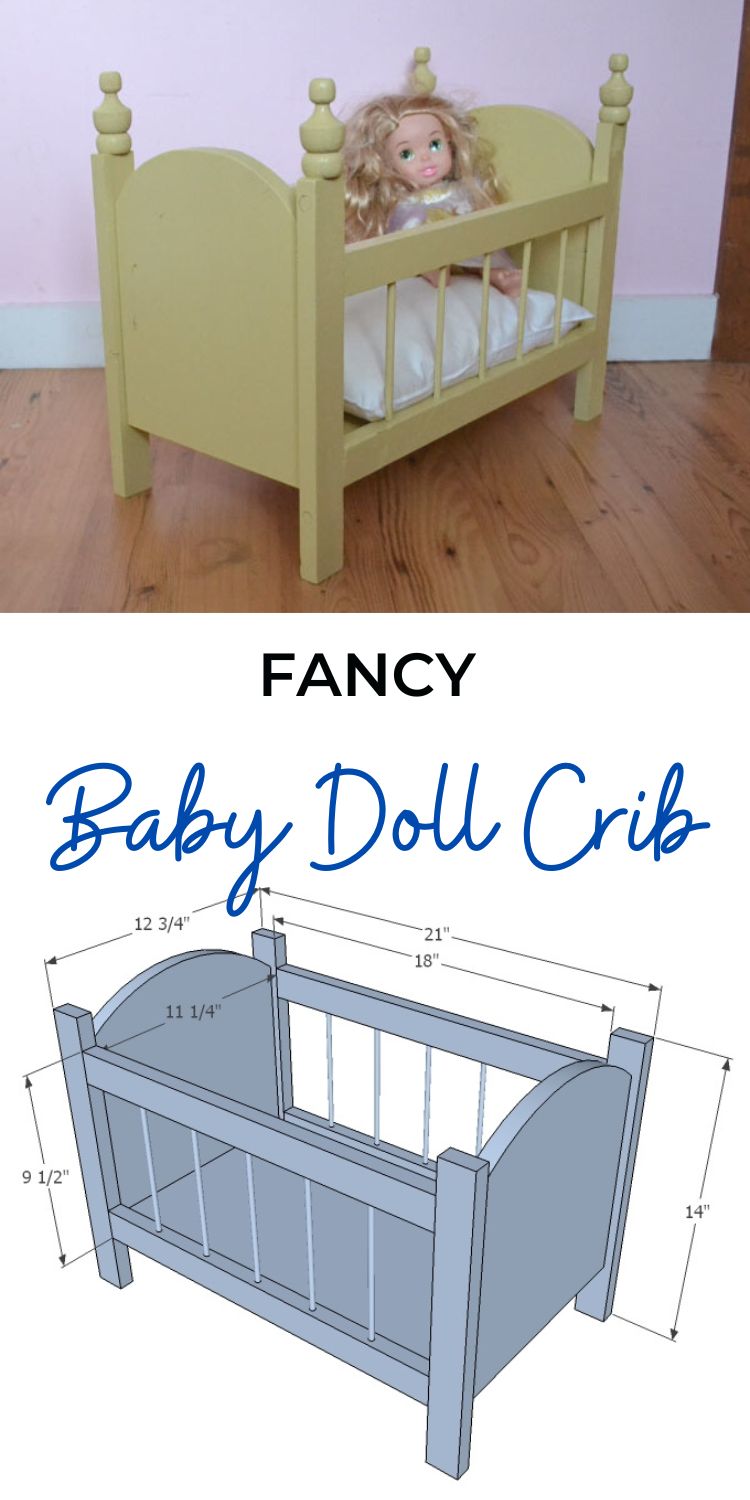
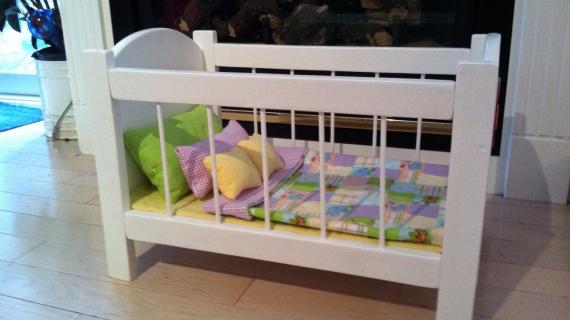
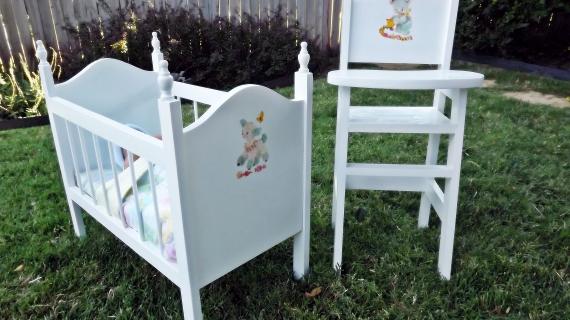
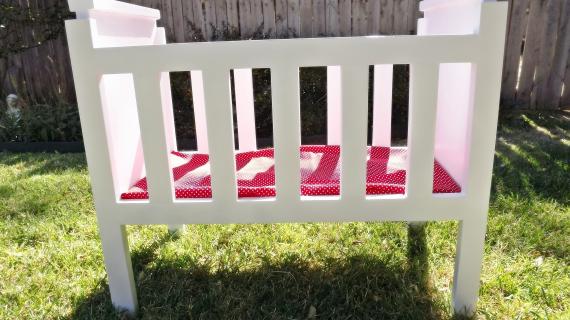
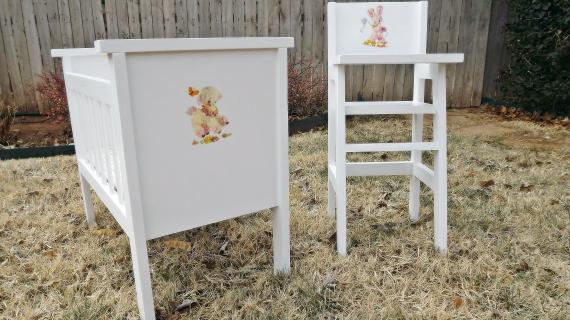
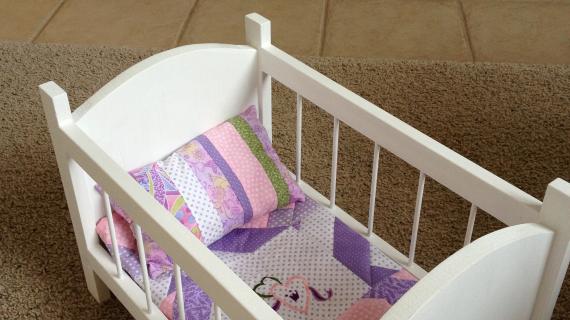
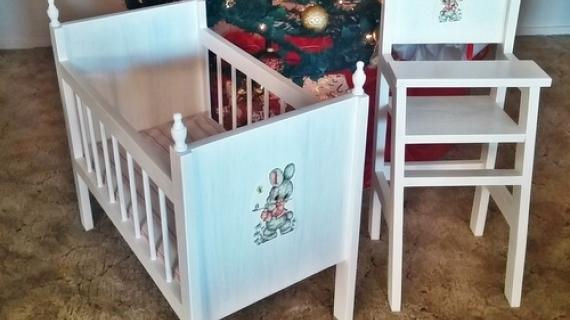
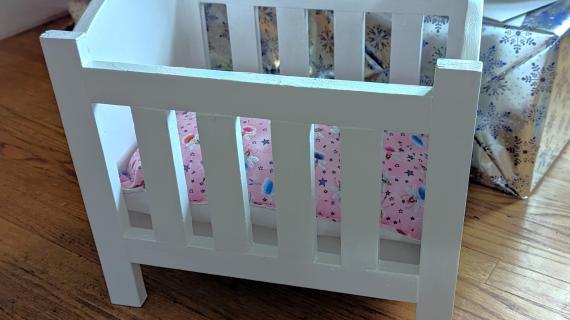
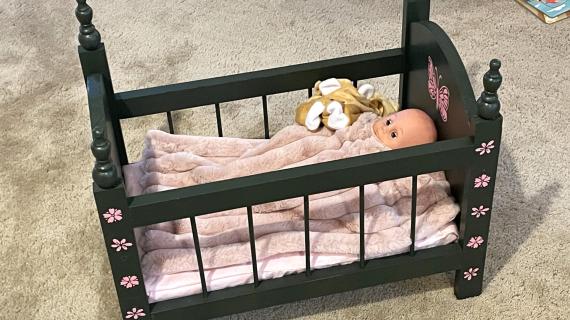
Make a DIY wood doll crib with free easy plans. Fits most baby dolls or 18" dolls or American girl dolls.
Up here in Alaska, we are just days away from the darkest day of the year. And even when the sun is up for a few hours, it's not really up. It's like the sun is tired.
Pin For Later!
Preparation
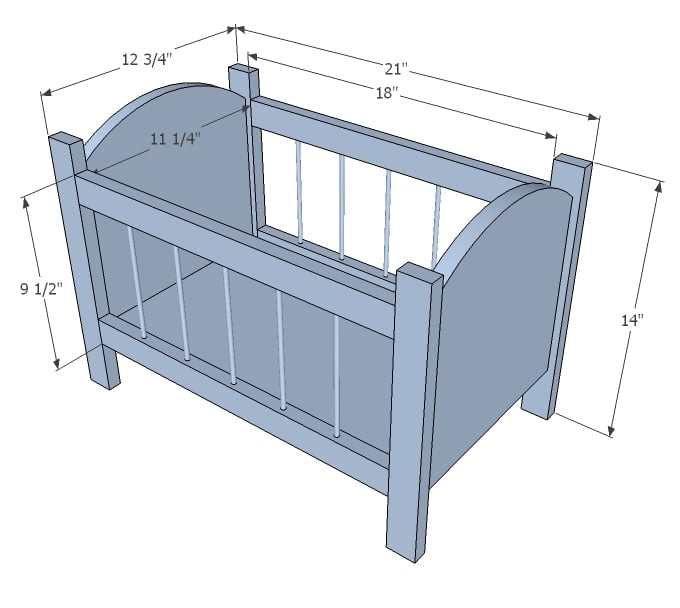
1 - 1x12 @ 4 feet long 2 - 1x2 @ 8 feet long 2 - 1/4" dowels @ 36" long 2 - packages of 2 eaach craft finials (see last step) Either pocket hole screws or 2" countersunk screws
2 - 1x12 @ 11 1/2" 1 - 1x12 @ 18 1/2" 4 - 1x2 @ 18" 4 - 1x2 @ 14" 10 - 1/4" dowels @ 7"


Please read through the entire plan and all comments before beginning this project. It is also advisable to review the Getting Started Section. Take all necessary precautions to build safely and smartly. Work on a clean level surface, free of imperfections or debris. Always use straight boards. Check for square after each step. Always predrill holes before attaching with screws. Use glue with finish nails for a stronger hold. Wipe excess glue off bare wood for stained projects, as dried glue will not take stain. Be safe, have fun, and ask for help if you need it. Good luck!
Instructions
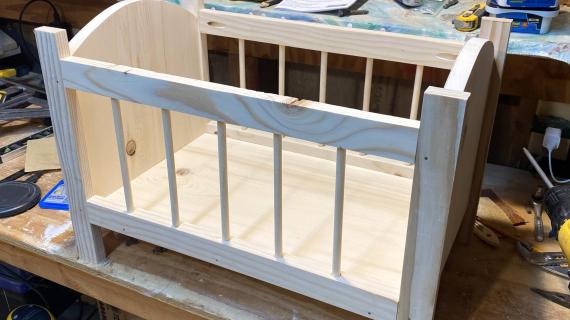
Step 1
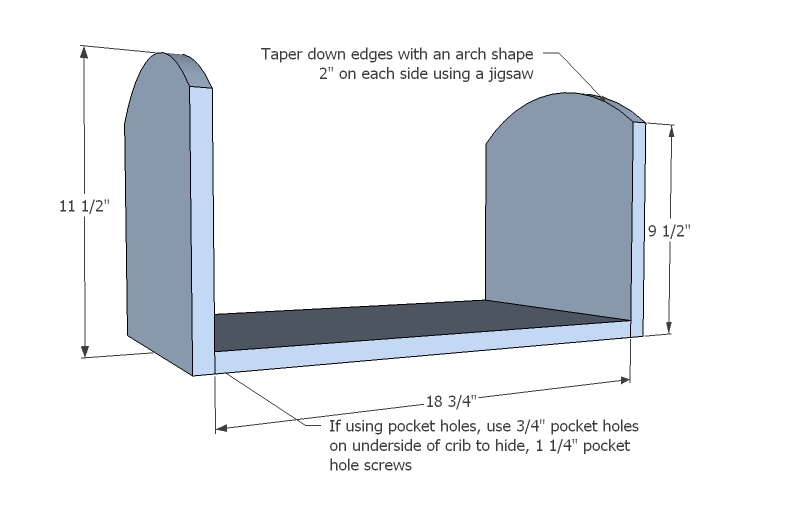
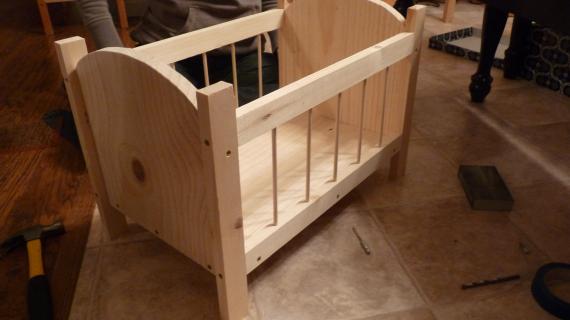
Cut tops of ends with jigsaw to create rounded top edges. Then attach to bottom, with either the Kreg Jig or 2" screws and glue.
Step 2
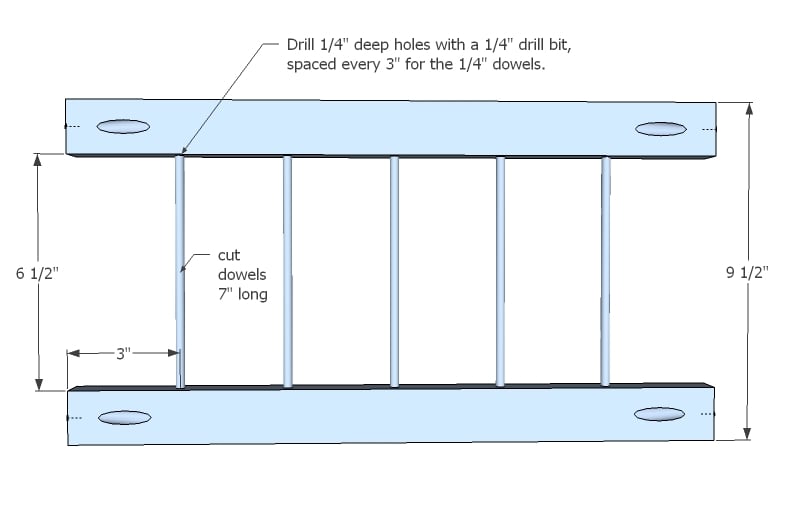
Take your 1/4" drill bit and mark it with a piece of duct tape 1/4" from the end, so you will know how deep to drill your holes. Do a test hole and insert the dowel to make sure the dowel is inserted 1/4" into the hole. Adjust tape if necessary.
Mark each of the 18" long 1x2s every 3" along one long edge. Then drill holes with 1/4" bit 1/4" deep. Insert dowels with glue to create crib railings. You will need to make two of these.
Step 3
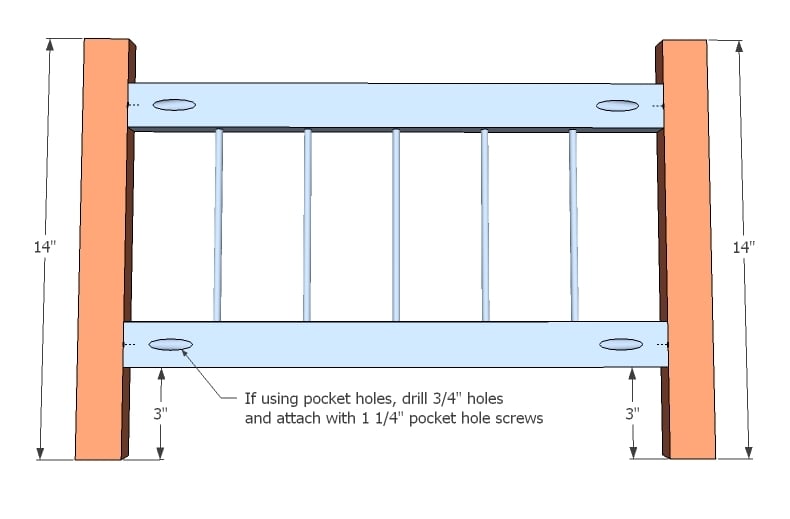
Now add the ends to the railings to create sides for the crib.
Step 4
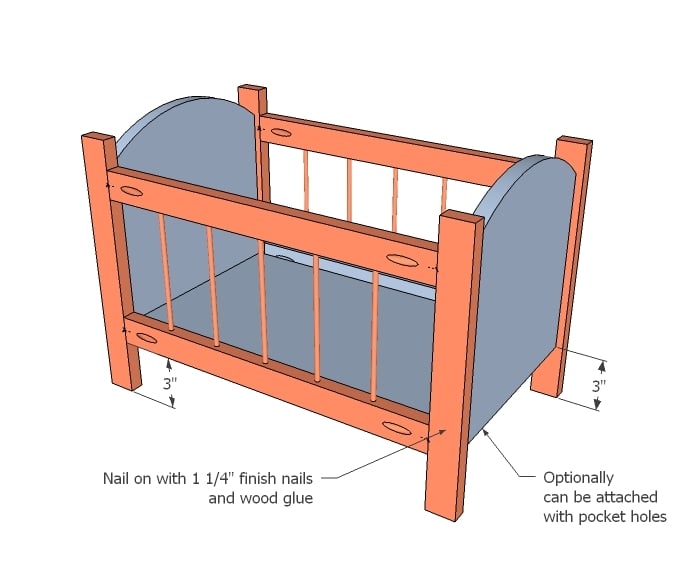
Mark the legs 3" up from bottom and attach to the center of the crib.
It is always recommended to apply a test coat on a hidden area or scrap piece to ensure color evenness and adhesion. Use primer or wood conditioner as needed.
Comments
Lady Goats
Mon, 12/05/2011 - 08:16
Your Grace...
Is a doll herself! So sweet!
spiceylg
Mon, 12/05/2011 - 08:22
Adorable
Love this crib. Will make it for next year's craft show. By the way, when I click on that link for Lowe's in my area, it is $1.88 for two. You are so talented and obviously you've done a good job with Gracie for her to be so generous as well!
Barbara Cash
Mon, 12/05/2011 - 08:57
This is so cute.
Hi Ana,
I am going to make this and the high chair for my granddaughter. Santa is bringing her a baby doll and these will be perfect. Thanks so much for the plans. She will be so excited!
tannisg
Mon, 12/05/2011 - 13:02
perfect timing!
the big girls are getting doll farmhouse beds so this is perfect for my preschooler! now I just hope I have time to finish before school is out so they don't see them :)
Customized Creations (not verified)
Wed, 12/07/2011 - 07:03
Adorable!
I can't wait til my daughter is older and we can make this for her
Guest (not verified)
Thu, 02/09/2012 - 17:03
love this
very cute is it something a beginner can do?
PedroAA
Tue, 03/27/2012 - 09:24
How about a life size one?
I really wanted to make my baby daughter a crib for her grandparents' house...
That way we can spend the night :)
Jenn Hoff (not verified)
Fri, 11/02/2012 - 11:35
Oh, hey, Ana, I wanted to
Oh, hey, Ana, I wanted to tell you something! There is this guy that I have been in love with for almost two years. I'm constantly in the process of trying to wake him up to the realization that we're great together! He's a very clueless fellow. Anyway, I came up with an evil plot to lure him into my web, and it was to get him to come build a Fancy Doll Crib for each of our nieces together! I've mentioned before that I have a rare and painful genetic disorder that keeps me stuck in bed most of the time. So I can only get up and wood work in small 30 minute blocks of time. This means that this guy has to come over all the time and work on the cribs with me over a period of several weeks. Well, it's working like a charm! As soon as I got him behind those power tools, he was hooked! I made a big deal about how good he was with them, even though we both know I could scroll saw circles around him in my sleep. :) He keeps telling me how much he's enjoying himself, and how he would never have done a project like this otherwise.
I remember working for 6 weeks on a headboard from your site, and then crying when I read several comments under the post from people who put it together in one afternoon. It was so discouraging. But it has turned out to be a blessing this time around, as this guy keeps calling and asking if we can do a few more things on the crib every few days. And the best part? As soon as I'm too exhausted to continue, he's helped me back into the house and back into bed, and then will sit in a chair next to me and talk for another hour or so. Seriously, I've been trying to get him to spend time with me like this for a very long time. And the Fancy Doll Crib has been just the ticket! :D :D So I wanted to say thank you. Thank you for posting plans, thank you for working so hard to come up with ideas, thank you for making them free, just... thank you! If things work out, I may display our cribs at the wedding. Jk! :) Seriously, though, your efforts have made a difference for me! And I really appreciate it.
Happy building!
Bridget L (not verified)
Thu, 11/08/2012 - 12:44
If I do not have the tools
If I do not have the tools for pocket holes, can I just drill holes and insert screws from the side to attach the railing to the center piece? Thanks!
Crystal Waggoner (not verified)
Sat, 12/22/2012 - 05:54
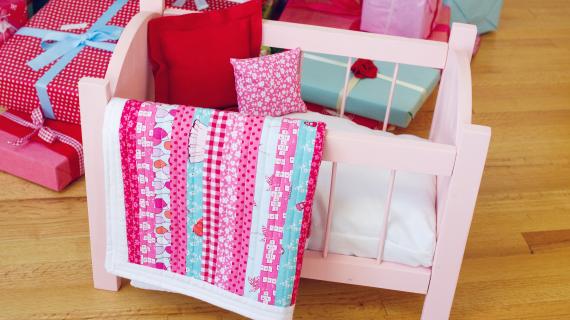
We made it and love it!!
The hubs made this little bed and it turned out beautifully. He still has to stain it, but it is adorable. I posted the bed and linked back to you. Thanks so much for sharing the plans. It's going to make for a very Merry Christmas!!
http://fussymonkeybiz.blogspot.com/2012/12/18-doll-bed-quilt-pillow-and…
Declan
Wed, 09/18/2013 - 01:03
Hmm,,Fantastic, I find it
Hmm,,Fantastic, I find it very useful. Good art of creativity. Describes in very good manner and easy steps. Every body can get it. Once again thanks and keep it up to sharing these kinds of things.
Pedrokat
Wed, 12/04/2019 - 12:24
Fancy Baby Doll crib Step 2
Take your 1/4" drill bit and mark it with a piece of duct tape 1/4" from the end, so you will know how deep to drill your holes. Do a test hole and insert the dowel to make sure the dowel is inserted 1/4" into the hole. Adjust tape if necessary."
The hole depth should be 3/4" not 1/4".