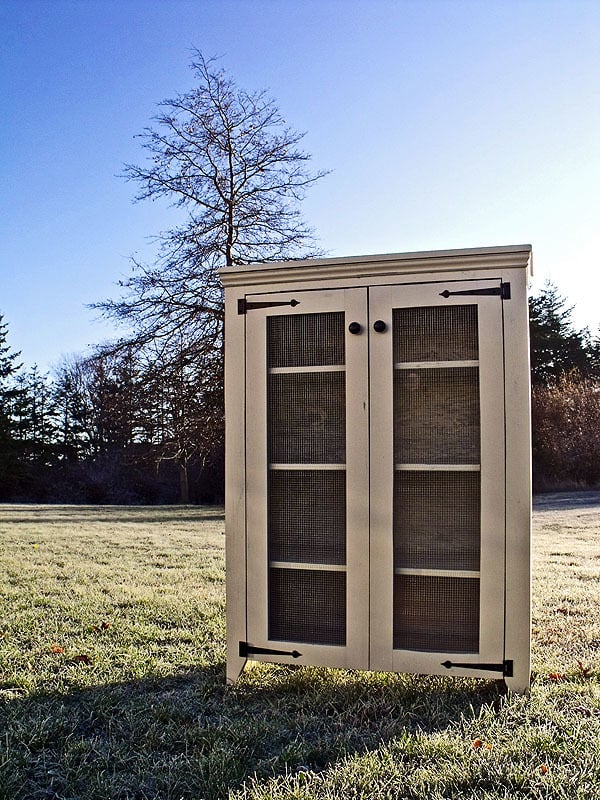

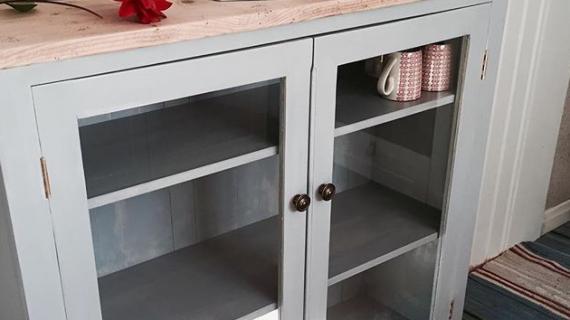
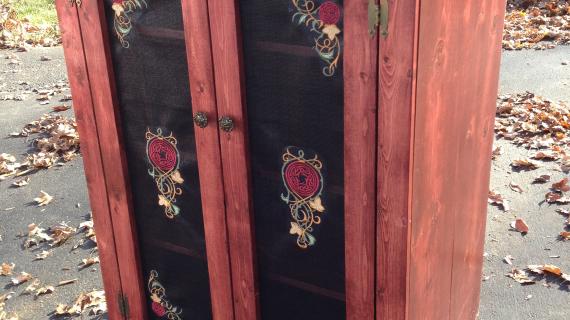
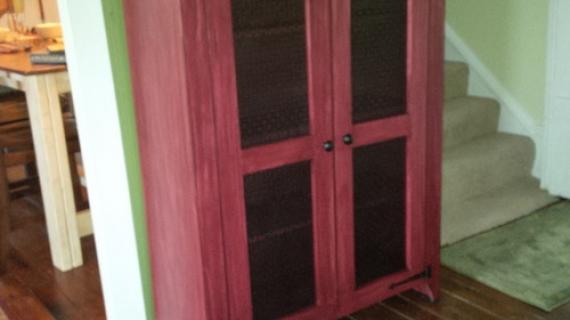
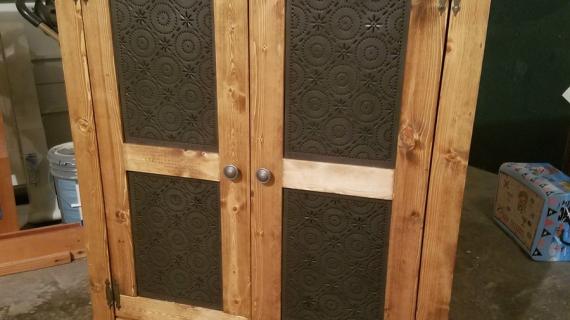
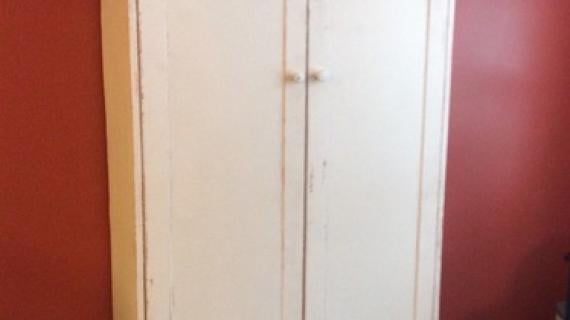
This DIY Jelly Cupboard Plan features a shelves behind doors and primitive styling. Free simple step by step plans to build your own.
Well, we've got ourselves a full day of snow shoveling today. I'm sad to say though temperatures have warmed considerably, we have not yet been able to work on the Momplex. Hopefully today we will have an opportunity.


Preparation
- 1 – 1x10 @ 8 feet long
- 2 – 1x12 @ 8 feet long
- 1 sheet 1/4” plywood or beadboard paneling
- 5 – 1x3 @ 8 feet long
- 1 – 1x2 @ 3 feet long
- Hinges
- Knobs
- Magnetic Clasps
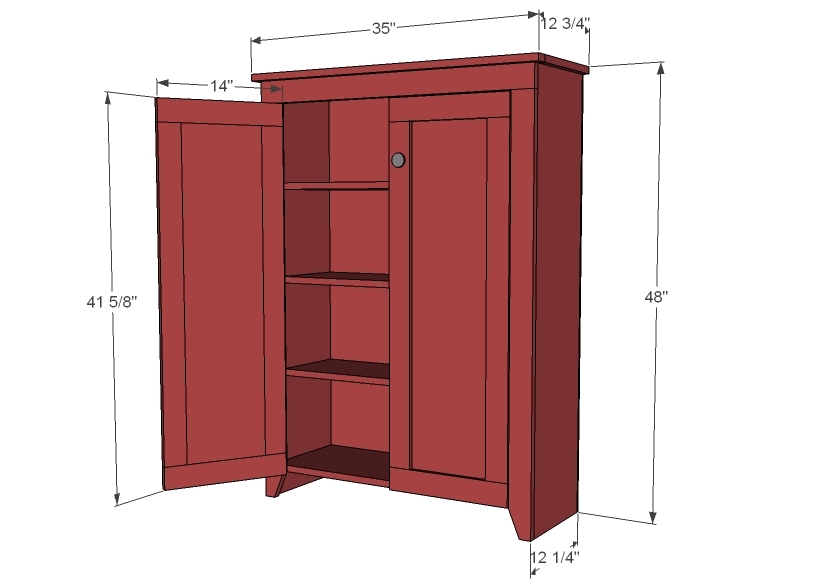
- 2 – 1x12 @ 47 1/4”
- 3 – 1x10 @ 32”
- 1 – 1x12 @ 32”
- 1 – 1x12 @ 35”
- 1 – 1x3 @ 33 1/2”
- 2 – 1x3 @ 44 3/4”
- 1 – 1x2 @ 35”
- 1 – 1/4” plywood @ 48” x 33 1/2”
- 2 – 1/4” plywood @ 12” x 38 1/2”
- 4 – 1x3 @ 14”
- 4 – 1x3 @ 36 1/2”


Please read through the entire plan and all comments before beginning this project. It is also advisable to review the Getting Started Section. Take all necessary precautions to build safely and smartly. Work on a clean level surface, free of imperfections or debris. Always use straight boards. Check for square after each step. Always predrill holes before attaching with screws. Use glue with finish nails for a stronger hold. Wipe excess glue off bare wood for stained projects, as dried glue will not take stain. Be safe, have fun, and ask for help if you need it. Good luck!
Instructions
Step 1

Build exterior frame of cupboard with screws and glue. Mark overhangs on top and bottoms and attach carefully. Adjust for square.
Step 2

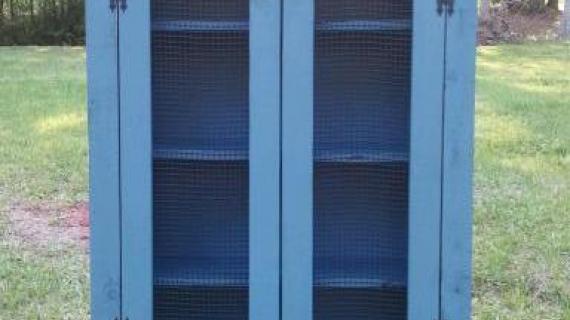
Shelves are 1x10, narrower width than the outside frame. Shelves are installed flush to back of cabinet. This will give room for your doors to have backing, if used.
Step 3

Attach plywood to back with 1 1/4" finish nails and glue. Make sure the cabinet is square, and attach to all fixed boards for best support.
Step 4

If you are using a pocket hole jig, build the frame first, then attach to the face of the cabinet. You can also taper bottom legs for a decorative look with a jigsaw or circular saw.
Step 5

Step 6
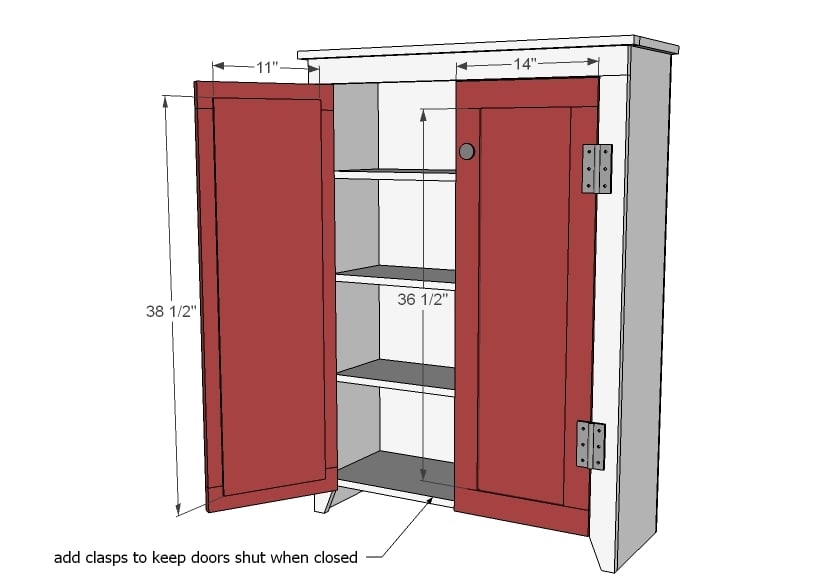
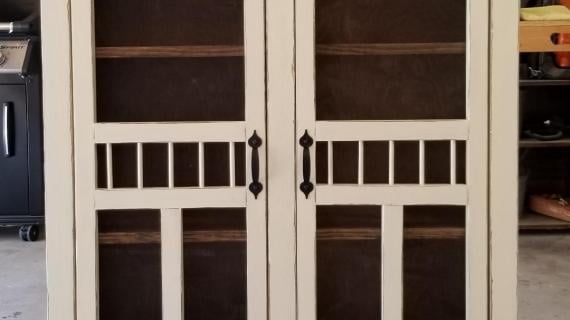
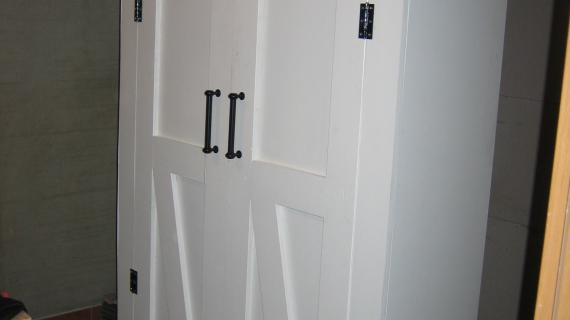
Measure your door openings, as board widths may vary, and build your doors giving an 1/8" gap on all sides of the doors. Attach backing to doors, and attach with hinges to cupboard.
Step 7

It is always recommended to apply a test coat on a hidden area or scrap piece to ensure color evenness and adhesion. Use primer or wood conditioner as needed.


Comments
Sarah Stancliffe (not verified)
Mon, 12/12/2011 - 14:56
Love this! I especially love
Love this! I especially love the tips and tricks in this post.
Guest (not verified)
Mon, 12/12/2011 - 15:07
Looooooooove!
This is completely awesome!!!!Patrick's personalization just makes this piece!
Sunny E (not verified)
Mon, 12/12/2011 - 18:39
How do you make the doors?
How do you make the doors? Specifically, how do you attach the wire/beadboard/plywood to the frames?
lkuchinskas
Mon, 12/12/2011 - 18:47
I am in love!!!!
I cannot wait for dear hubby to build this. It is just my style!
patrickhosey
Mon, 12/12/2011 - 23:45
Screen Doors
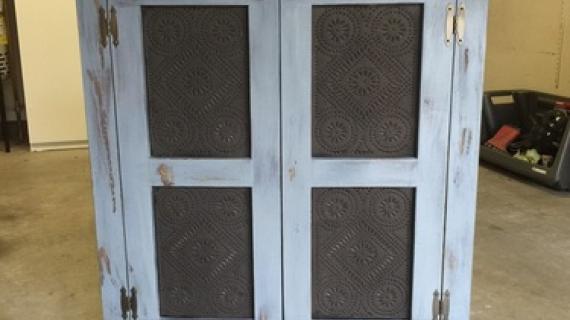
The screen doors are a bit tricky. You can do it a couple different ways. You can staple the wire cloth to the back of the door and then just cover it up with 1/4 inch molding. Keep in mind that when you do that, you make your door thicker than it was. While it was once 3/4 inches thick, now it's an inch thick which is thicker than your face frame. Confusing sorry. So if you do it that way, you'll have to find hinges that accommodate the step up that the thicker door causes.
The other way is rout whats called a rabbet on the inside of your door with a router. Next place the wire cloth inside the rabbet and then nail in what's called glass stop molding on top of the screen. It sounds more confusing than it is. Google routing rabbets or something similar to that and watch your woodworking knowledge expand. Glad you guys like it.
Guest (not verified)
Thu, 12/29/2011 - 21:47
Screen Doors
Patrick,
What size router bit and bearings did you use for the rabbet and what size stop molding did you use? Any additional comments or help on this part would be helpful
Thanks,
Clint
In reply to Screen Doors by Guest (not verified)
patrickhosey
Fri, 12/30/2011 - 21:33
router set up
I used a 3/4" straight bit to make the rabbet. I didn't use a rabbeting bit because i needed the rabbet to be a full 3/4". My stop moulding was 3/4" x 1/4" which is normally used for edge banding plywood. It's wider than the normal rabbet in order to house the screen a little bit better. So I used a 3/4" straight bit on a router table to make it happen. The rabbet ends up being 3/4" wide by just a tad higher than 1/4" high. I hope that helps.
Guest (not verified)
Tue, 12/13/2011 - 05:53
More instruction on the doors
This is a very cute cabinet and is just my style. However I feel there is a lack of instructions on building the doors. I would not know how to go about doing them... I guess the photos give a pretty good idea, but still.
tonjacoy101
Tue, 12/13/2011 - 06:38
Beautiful!
I'm so glad Patrick and Ana teamed up for this one. I love looking at your projects on the brag posts Patrick. They are always so beautifully done. Thanks for sharing!
1916home Chris… (not verified)
Tue, 12/13/2011 - 12:04
Looks Easy!
OMG I could actually make this! It would be perfect for my Christmas cookie recipes too :)
Guest (not verified)
Tue, 12/13/2011 - 16:46
Love it! In the pics you have
Love it! In the pics you have an awesome crown moulding look. How do I do that? I think I can follow the rest of the instructions, I'm just interested on how to give it that beautiful detail!
In reply to Love it! In the pics you have by Guest (not verified)
claydowling
Wed, 12/14/2011 - 02:38
Molding detail
A molding detail is pretty simple to add. You need to make sure the top overhangs the edge on three sides slightly more than the width of the molding profile you want.
Most home improvement stores have a decent selection of moldings. Buy a single piece that is a foot or so longer than the sum of the sides and front of the cabinet. If you need to cut the piece into two pieces to get it into your car, make sure the two pieces are each a few inches longer than the long edge.
To install the molding, cut each piece to length and nail it with finish nails. Where molding meets molding, cut a mitered corner. I recommend starting with the front of your cabinet.
For this measurement, don't use your tape measure. It's faster and more accurate to hold your molding against the cabinet, and mark where the ends are. Cut one mitered end first, line the back of the molding up with th edge of the cabinet, and mark (on the back) exactly where the other end is. Cut that miter and nail the piece in place with a nail about every foot. Drive the nails below the surface with a nail set.
Repeat this for all three sides, always starting with a mitered corner.
You're going to find here that your cabinet probably isn't quite square, and the miter joints won't be perfectly tight. You can either fill with caulk or putty, or you can relieve the offending angle with a block plane. The block plane is my preferred method, because it gives a neater look that holds up better over time.
Stef (not verified)
Fri, 12/23/2011 - 01:47
You're pretty awesome!
You're pretty awesome!
In reply to You're pretty awesome! by Stef (not verified)
patrickhosey
Fri, 12/23/2011 - 08:38
:)
:)
Guest (not verified)
Sun, 01/22/2012 - 06:16
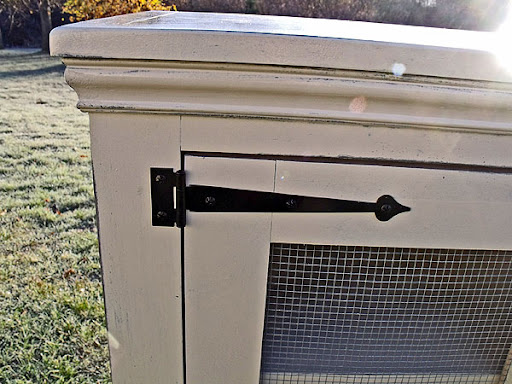
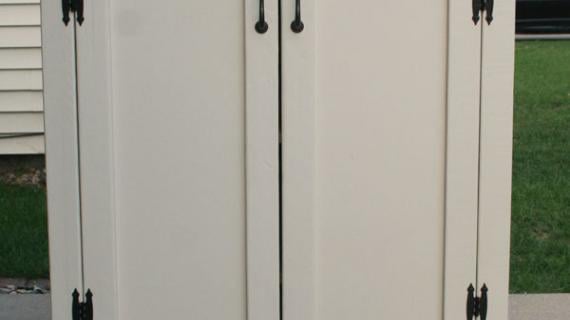
hinges
Where did you get the hinges.
In reply to hinges by Guest (not verified)
patrickhosey
Sun, 01/22/2012 - 07:50
hinges
They're called strap hinges. I had to order them online because there isn't a store that carries them where I live. You can search for strap hinges online and just mess around until you find the right price. These are 6 inch strap hinges. I forget what site I got them from.
bbomer
Wed, 02/08/2012 - 06:50
Completed this last week!
I built this over the past 2 weeks working less than a couple of hours a night (if that). See results here:
http://grvland.com/wordpress/2012/02/07/jelly-cupboard-project/
I will probably re-post the same content as a 'brag blog' here when I get a chance.
Thanks Patrick and Ana!
Brad
Portia Allen (not verified)
Mon, 02/27/2012 - 09:36
How would you make this
How would you make this taller? About a height of 5 ft. And could you use glass instead of a screen or plywood? What would be the changes?
Jamie in NC (not verified)
Sat, 10/06/2012 - 14:16
The cut list and board types
The cut list and board types weren't even close to the expected outcome. After cutting to the specs above, two major issues caused the project to be completely wasted and irreversible. First, the shelves lack enough depth to meet the backing AND the doors on the front. Therefore, one would have to decide if it were more important to have a way to latch the doors on the front via magnets (leaving lots of empty space at the rear of the shelf for things to fall down), or have no way to latch the doors but each shelf flush with the back.
Secondly, the door width somehow managed to be too wide for the spot both would occupy. After comparing the pictures closely, the drawings have the top and bottom cross sections of the doors as traversing the entire width of the door, yet the photos have the side panels traversing the entire height of the door. So which is it? Judging from the measurements of the cut list AND the diagrams, it seems that neither will work.
Grade: F
Jamie in NC (not verified)
Sat, 10/06/2012 - 14:18
The cut list and board types
The cut list and board types weren't even close to the expected outcome. After cutting to the specs above, two major issues caused the project to be completely wasted and irreversible. First, the shelves lack enough depth to meet the backing AND the doors on the front. Therefore, one would have to decide if it were more important to have a way to latch the doors on the front via magnets (leaving lots of empty space at the rear of the shelf for things to fall down), or have no way to latch the doors but each shelf flush with the back.
Secondly, the door width somehow managed to be too wide for the spot both would occupy. After comparing the pictures closely, the drawings have the top and bottom cross sections of the doors as traversing the entire width of the door, yet the photos have the side panels traversing the entire height of the door. So which is it? Judging from the measurements of the cut list AND the diagrams, it seems that neither will work.
Grade: F
Mark Amy Hammett
Thu, 10/18/2012 - 05:56
Doors
We had problems with the doors as well. We cut 4 11" as stated but whichever way we arranged the doors they were not going to fit the opening at all. The door would have been 11" or 15" wide depending on the arrangement. Our opening was 28.5". We ended up cutting 4 more 14" to arrange the doors. Luckily, we looked before we proceeded ahead or that wouldn't have been cool. We are newbies so maybe we read the plans wrong.
tnbrunette007
Mon, 10/14/2013 - 06:55
Doors
I read that other people had problems with the doors. In the cut list it says to cut (4) 1 x 3 x 11" and (4) 1 x 3 x 36 1/2", however the diagram showed the horizontal 1x3's on the door as 14" across and the vertical 1 x3's as 38 1/2". The only way the vertical sides become 38 1/2" is when the 14" not 11" inch which is listed in the cut list, is at the top of the door. Therefore I had to recut my 4 horizontal panels for the doors. Also after measuring my frame, my doors will need to be 14 1/4" wide each because my opening was 28.5", so my doors will be 14.25" wide instead of 14". Be sure to build your frame before building your doors.
AUNTIERAH09
Thu, 06/04/2020 - 10:56
Is there a file for the plans?
Is there a file for the plans? Or am I supposed to just take the plans off this post? I don't see a link anywhere for the plans. Appreciate any help! Thanks!