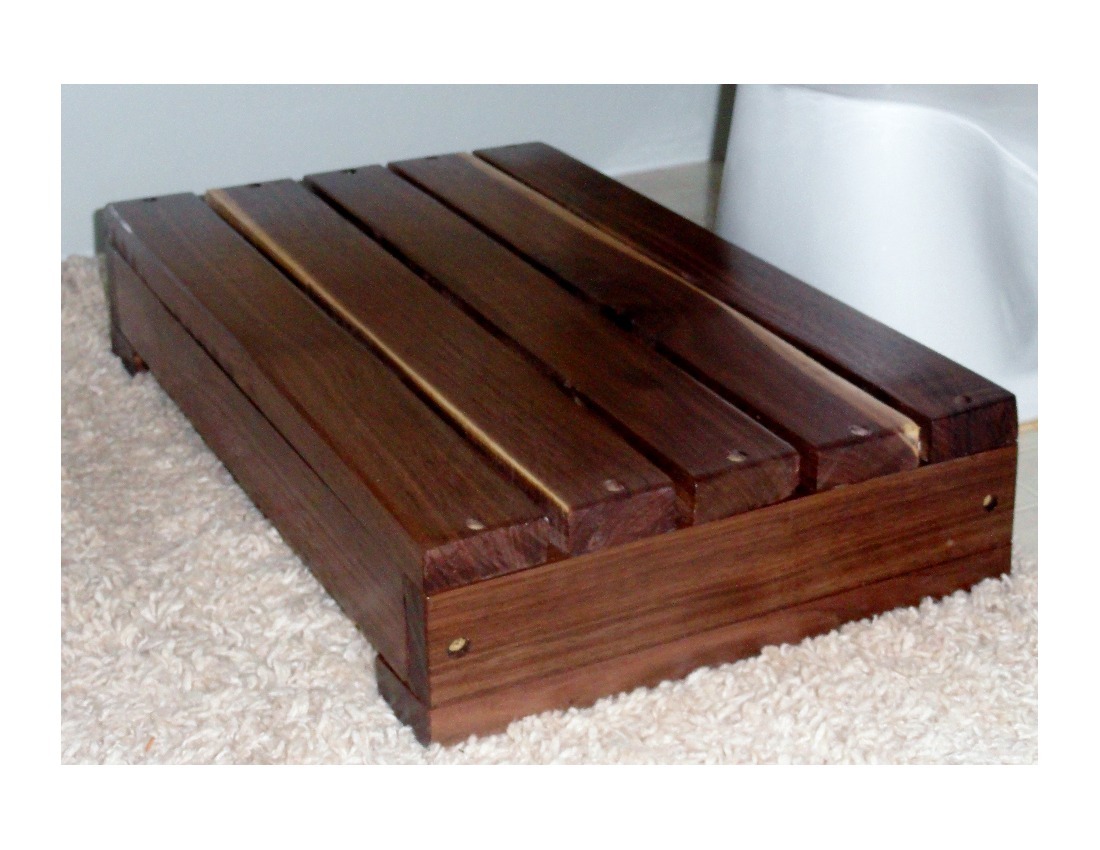


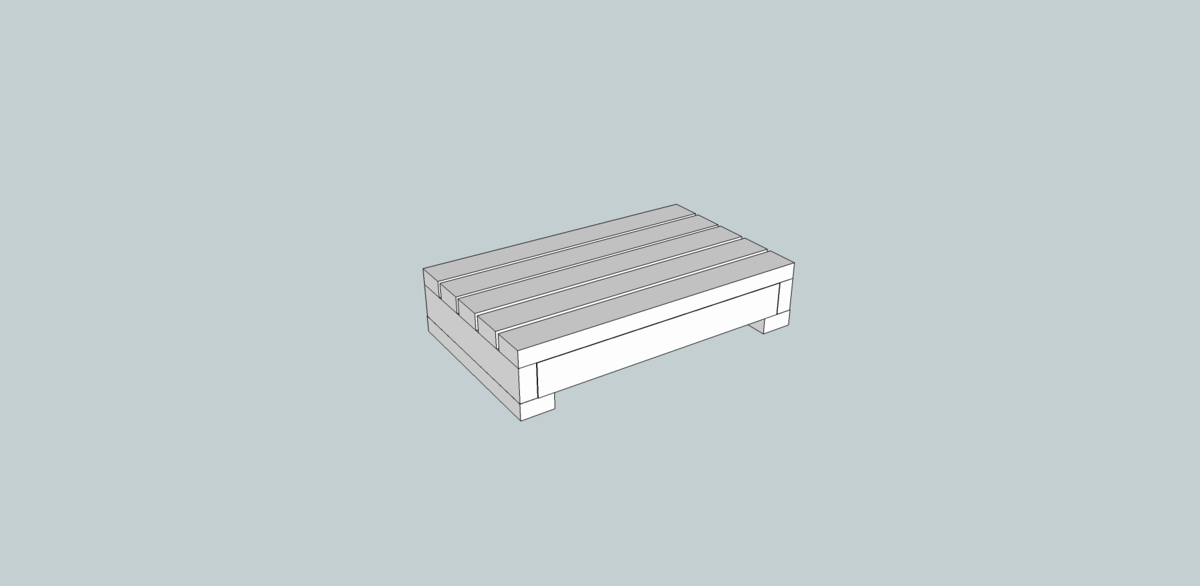
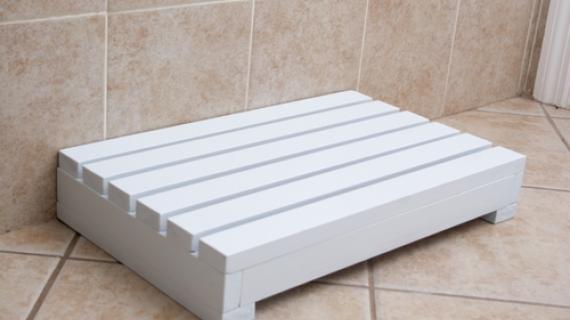
In the quest to potty train our son, I designed this bathroom helper step to help him better reach a regular sized toilet. It is designed wide and low to the ground so there is no chance of the step tipping over. The height could be adjusted by added extra footers to the bottom or using a thicker board for the bottom footers. It is also perfect for him to use as a step at the sink when washing his hands.
A local walnut wood was used to make this stool. Luckily, my neighbor loves to give me wood that he cuts in his saw mill. Of course, any type of wood could be used for this easy project.
This is my first time to digitally design a piece of furniture, so I hope I was able to create a clear plan for you to follow.

Preparation
2 1x2 boards 8 ft long
All cut from 1X2 boards
(5) 17 1/2" Top slats of step
(2) 16" front and back support
(4) 11" Side supports and footers
Cut in order listed. If you find you want your step a little taller cut two additional 11" footer boards and add them to the bottom of the existing footer. If you find you need a shorter step, do not use the footers.


Please read through the entire plan and all comments before beginning this project. It is also advisable to review the Getting Started Section. Take all necessary precautions to build safely and smartly. Work on a clean level surface, free of imperfections or debris. Always use straight boards. Check for square after each step. Always predrill holes before attaching with screws. Use glue with finish nails for a stronger hold. Wipe excess glue off bare wood for stained projects, as dried glue will not take stain. Be safe, have fun, and ask for help if you need it. Good luck!
Instructions
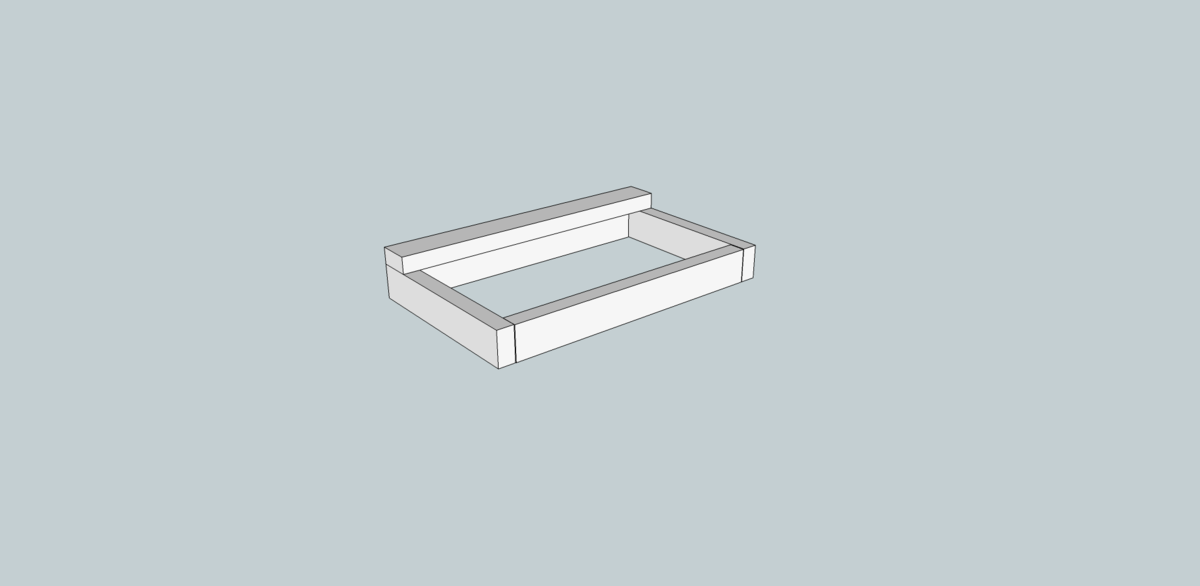
Step 1

Make the frame of the step by attaching the 11" side supports to the 16" front and back supports. Predrill and countersink for all screws and glue all joints.
Step 2
Attach the first top slat to the frame using glue and countersinking screws. Be sure to line up the edges of the frame with the top slat. There should be no overhang.
Step 3
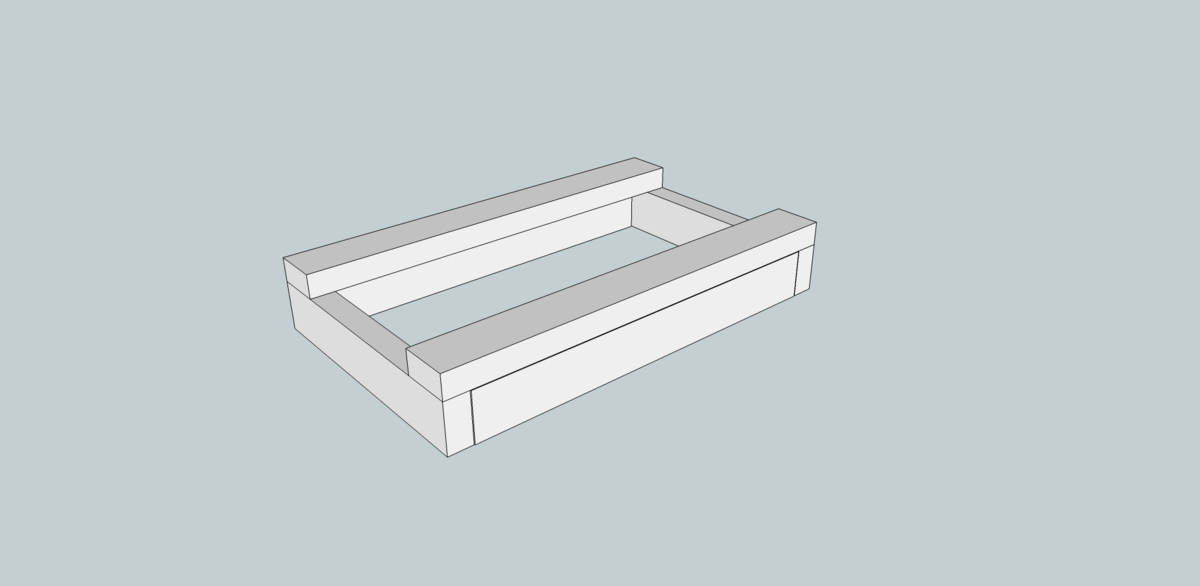
Attach the last top slat in the same way at Step 2.
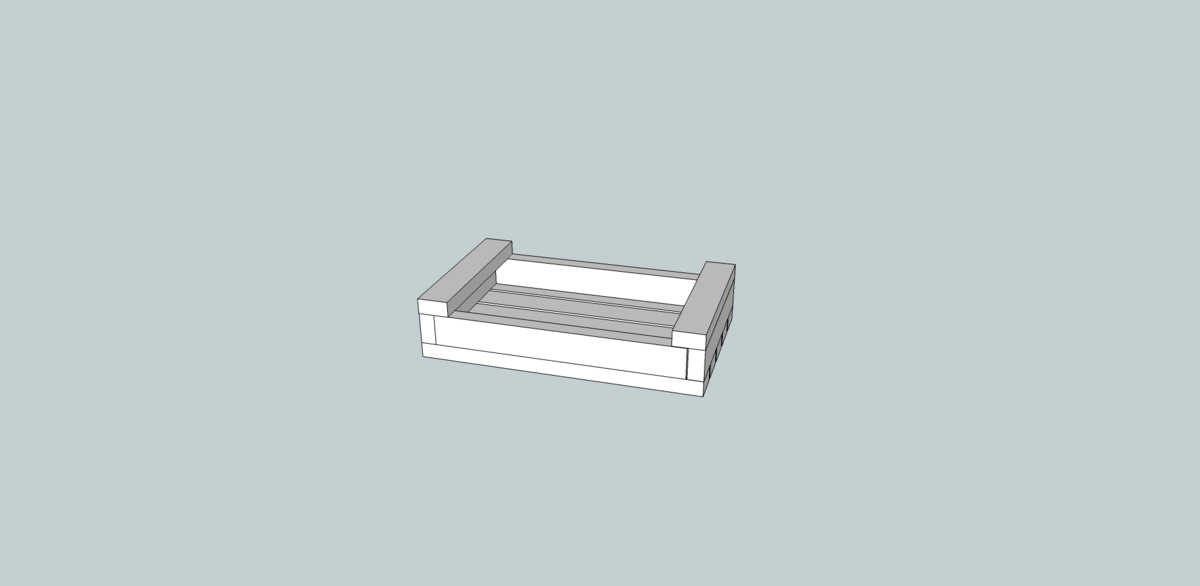
Step 4

Place the remaining top slats on the top of the step with a 1/4" space in between each slat. Glue and coutersink screws.
Step 5
Step 6
Sand and apply finish as desired. On my example I use a spray laquer.
It is always recommended to apply a test coat on a hidden area or scrap piece to ensure color evenness and adhesion. Use primer or wood conditioner as needed.
Comments
spiceylg
Thu, 01/12/2012 - 14:45
step
It's too pretty so step on! :)
Lori E. (not verified)
Mon, 01/16/2012 - 19:26
Love it!
This is my kind of project .... simple & sweet! Nice job!
musicalmaggie
Wed, 07/17/2013 - 09:59
Bathroom Helper
Thank you for the instructions to build this Bathroom Helper. I am disabled and so my toilet is higher than the regular ones. I plan on building this helper for my grandchildren and I would imagine it will be very handy.
skelton
Fri, 07/19/2013 - 14:17
making a change???
I love the look of the step, and am trying to make a custom shelf to fit in my linen closet like that!! I think I will just make this times 3 and stack them on top of each other for a shelf!
any suggestions?
In reply to making a change??? by skelton
elizabethlynnellis
Sat, 07/20/2013 - 07:10
Shelf suggestion
It makes me so happy that you used the plan and liked it! Good job! Your idea of a custom shelf to match is great. If I were to make a shelf to match, I would repeat the top of the step 3 times like you said, but only making the left of right part of the supporting box. Then attach the 3 "step tops" to the boards you would be using to create your self. You could go two different ways, you could use two boards the width of the step to create the sides of the shelf or you could use four of the 1X3's on each corner of the shelf for the main structure. If we weren't in the middle of moving into a new house I would draw this up and post it for you. I'll have to put it on my to do list for when things settle. I would love to see a pic once you are done! Happy wood working!
RadarOH
Mon, 01/11/2021 - 10:55
Design Software?
Ana, what design software do you use?