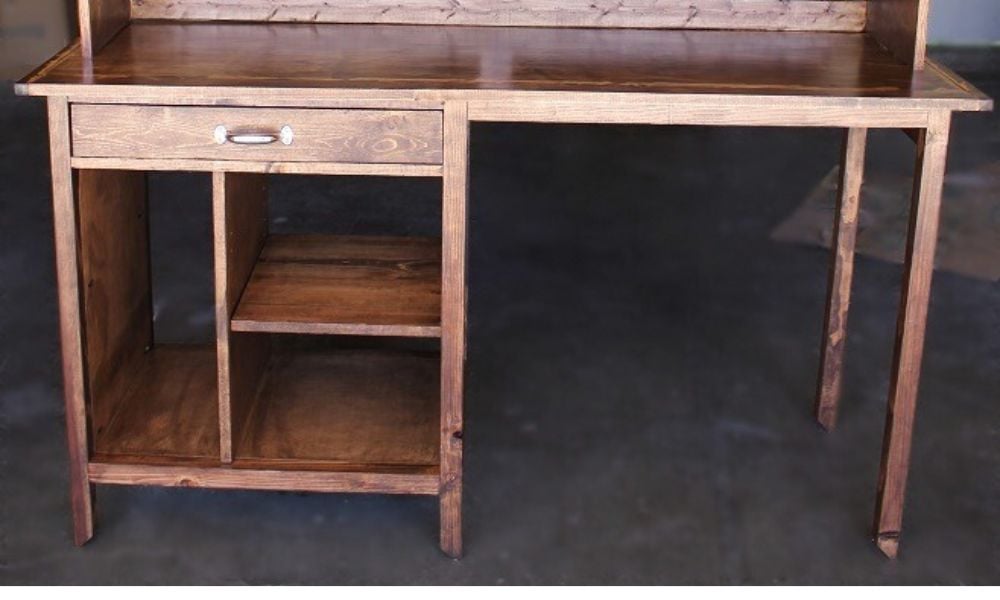


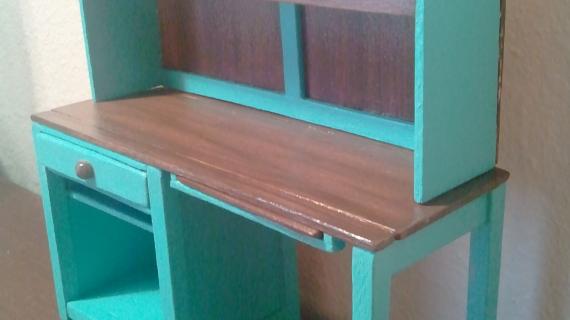
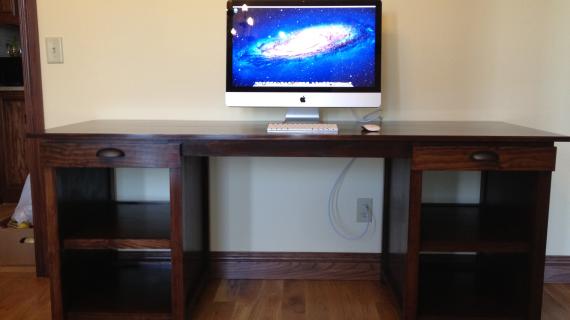
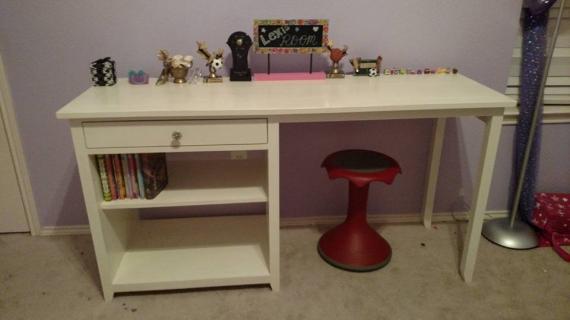
Here's a great desk you can build with free plans!
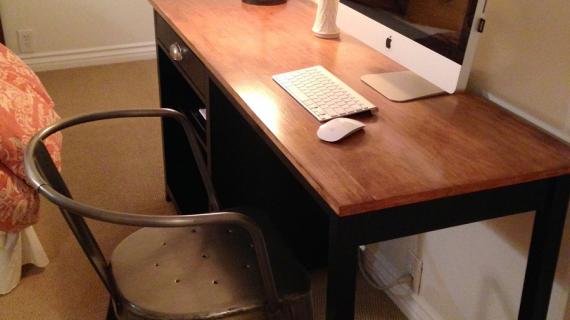
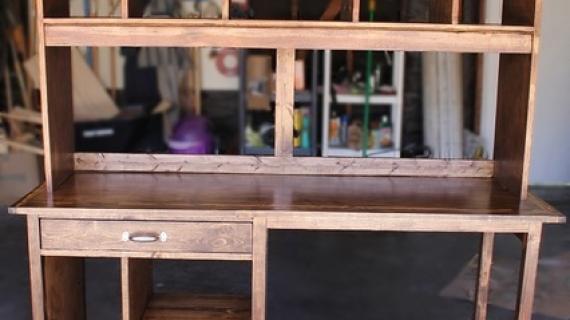
This desk is built from 3/4" plywood, and trimmed with pine boards. We love that the desk is sturdy and simple, can be painted or stained any color, and is easy to modify and update.
Preparation
- 1 - Sheet of 3/4" Plywood ripped into 15 3/4" x 8 foot long strips
- 2 - 1x3 @ 8 feet long
- 2 - 2x2 @ 8 feet long
- 2 - 1x2 @ 8 feet long
- 1 - 1x4 @ 4 feet long
- 1 knob or handle
- 1 set of 16" euro style white drawer slides
- 1/4" plywood 23" x 16"
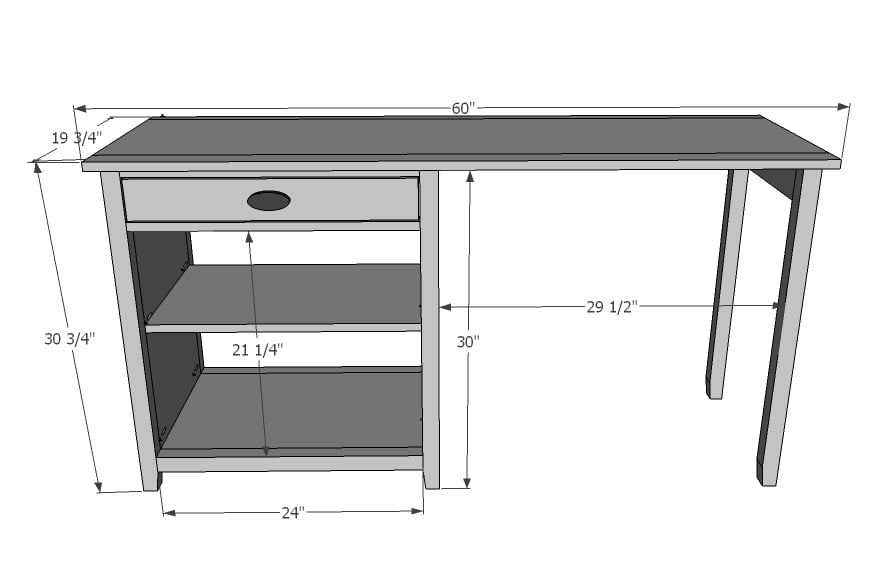
- 2 - 3/4" plywood @ 15-3/4" x 28" (Sides)
- 4 - 1x2 @ 15 3/4" (Side Trim)
- 6 - 2x2 @ 30" (Legs)
- 2 - 3/4" plywood @ 15-3/4" x 24" (Shelves - one is optional)
- 3 - 2x2 @ 24" (Front/Back Trim)
- 2 - 1x2 @ 24" (Drawer Trim)
- 1 - 1x16 @ 60" (Top)
- 1 - 1x3 @ 60" (Top)
- 1 - 1x2 @ 60" (Top)
- 2 - 1x3 @ 21 1/2" (Drawer Front/Back)
- 2 - 1x3 @ 16" (Drawer Sides)
- 1 - 1/4" Plywood @ 16" x 23" (Drawer Bottom)
- 1 - 1x4 @ 23 3/4" (Drawer Face)
- 1 - 1x4 @ 15 3/4" - Leg Apron


Please read through the entire plan and all comments before beginning this project. It is also advisable to review the Getting Started Section. Take all necessary precautions to build safely and smartly. Work on a clean level surface, free of imperfections or debris. Always use straight boards. Check for square after each step. Always predrill holes before attaching with screws. Use glue with finish nails for a stronger hold. Wipe excess glue off bare wood for stained projects, as dried glue will not take stain. Be safe, have fun, and ask for help if you need it. Good luck!
Instructions
Step 1

Attach trim to top and bottom of sides. Use 1 1/4" finish nails and wood glue. NOTE: You may wish to predrill pocket holes prior to this step.
Step 2

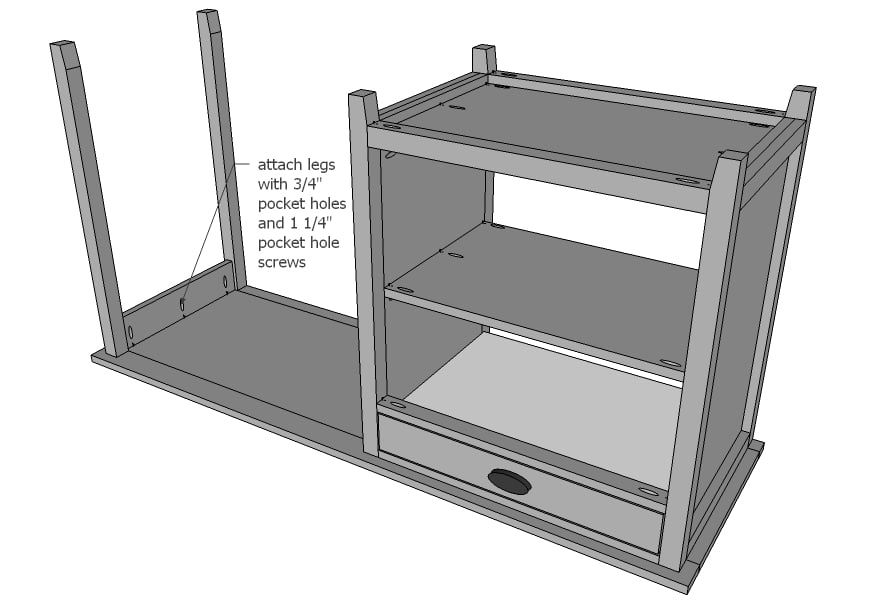
Attach legs to sides as shown in diagram, edges flush to trim, back and top. NOTE: Legs can be tapered as shown.
Step 3
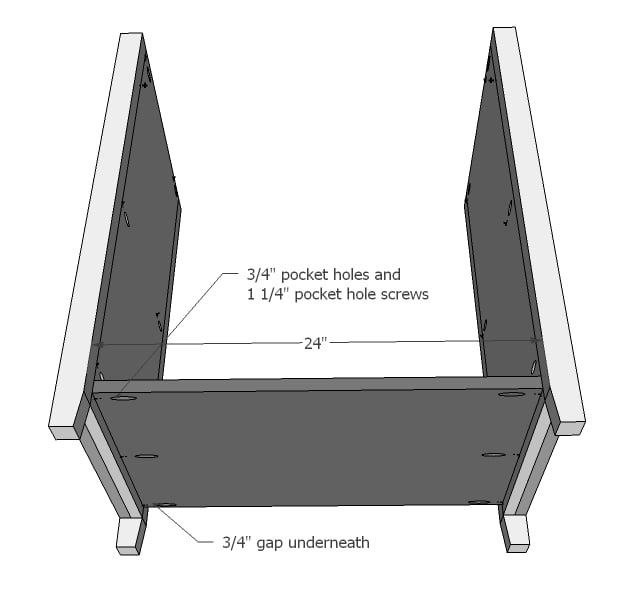
Place bottom shelf and attach with 1 1/4" pocket hole screws. NOTE: You may wish to also drill 3/4" pocket holes along front and back edges for attaching shelf trim (next step).
Step 4
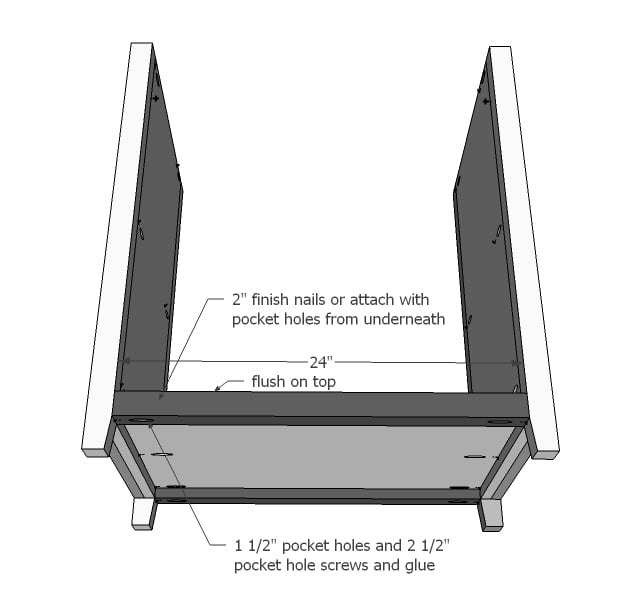
Attach shelf trim either through predrilled pocket holes or with 2" finish nails and glue.
Step 5
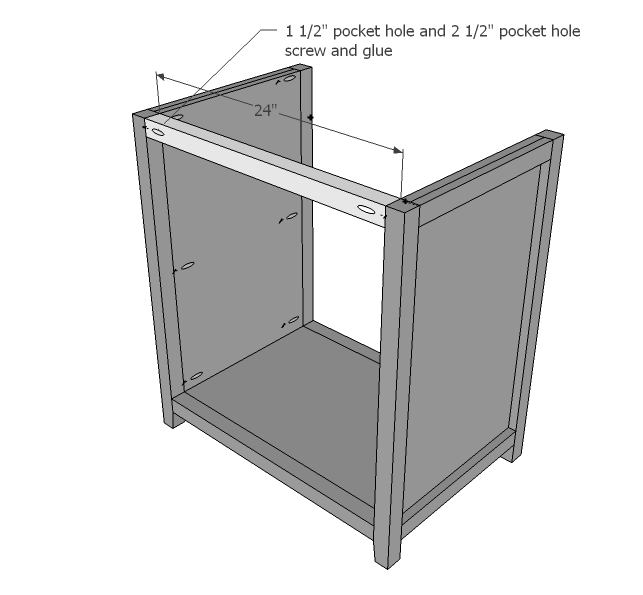
Attach the back trim with 1-1/2" pocket holes and 2-1/2" pocket hole screws.
Step 6

Next is the front trim.
Step 7
TIP: Watch my video on how to make installing and building a drawer using Euro slides easy:
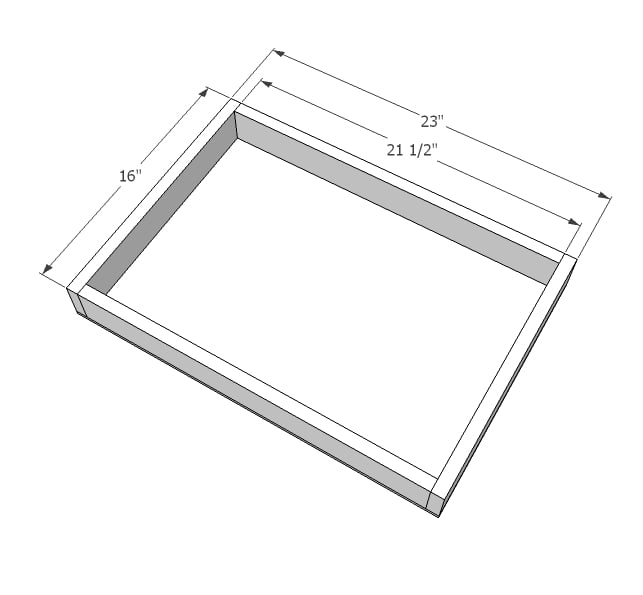
The drawer is just a box with 1/4" plywood on the bottom. If you use pocket holes, place on outsides - the drawer face will cover them up :)
Step 8
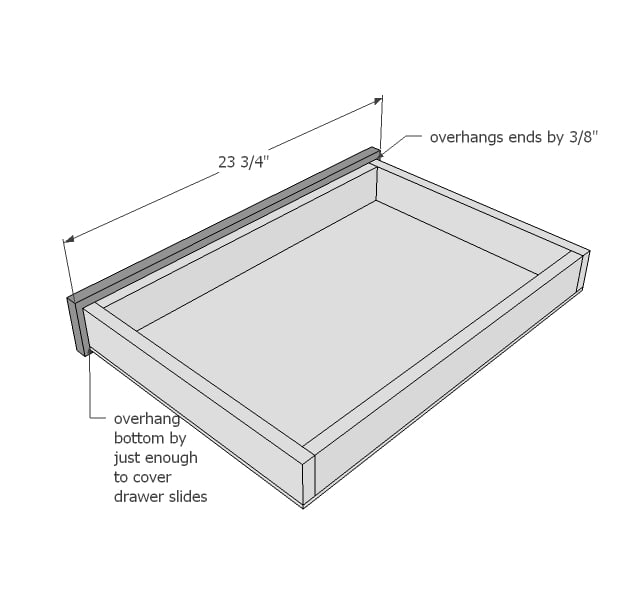
This is up to you - you can attach the drawer face now or wait until after you install the drawer in the cabinet. I like to attach with glue and 1 1/4" finish nails, avoiding hardware locations.
Step 9
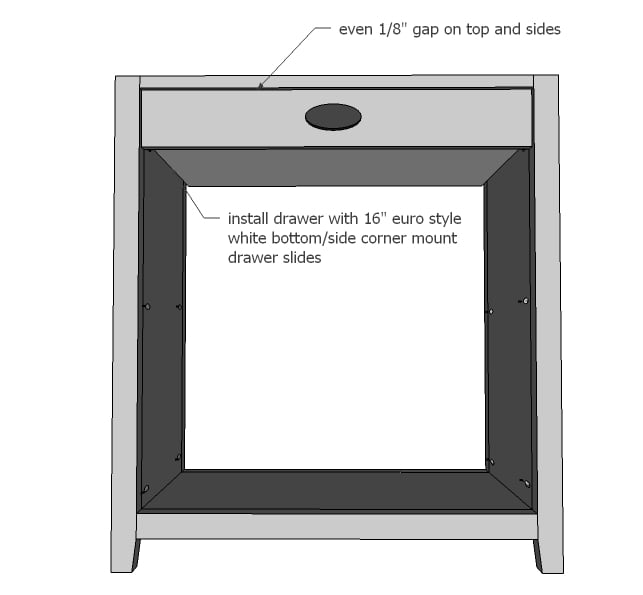
The drawer needs to be installed so there is an even 1/8" gap along top and side edges. If you install drawer box, install leaving room for face (3/4") and then just attach face with an even gap on all sides.
Step 10

ow simply add the bottom trim. Hard part is ovah!
Step 11
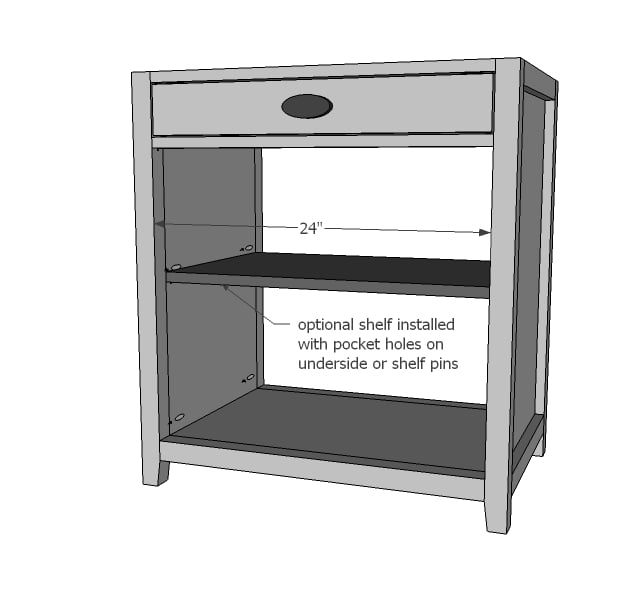
Shelf is optional - you can install fixed with pocket hole screws or make adjustable with shelf pins.
Step 12

Build the leg end as shown above.
Step 13
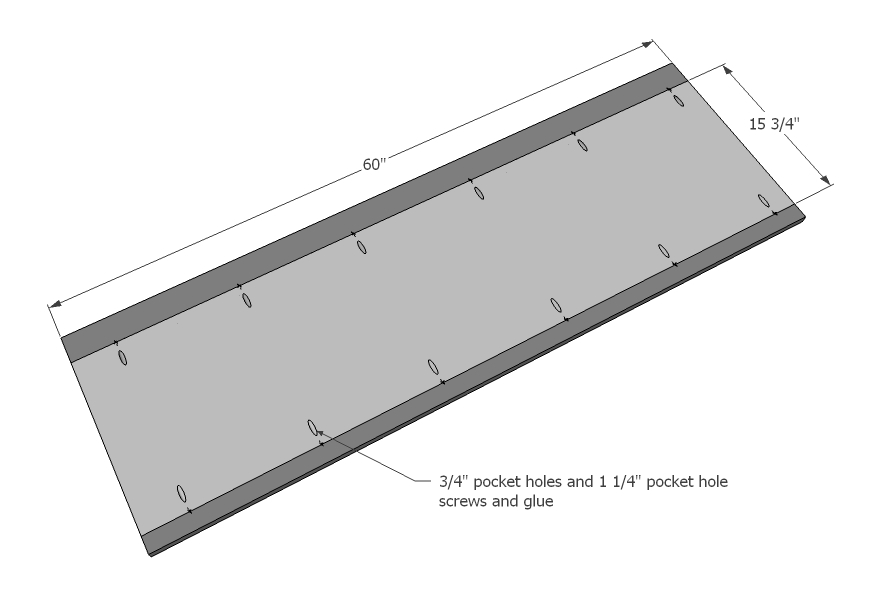
Now the top. Use clamps for a very flat top.
Step 14
And now just attach all the parts!
Step 15

Just in case you need a little extra support.
Step 16
Or your legs aren't staying in place.
It is always recommended to apply a test coat on a hidden area or scrap piece to ensure color evenness and adhesion. Use primer or wood conditioner as needed.


Comments
birdsandsoap
Wed, 01/11/2012 - 08:53
Nice!
I like the tapered legs, great look!
dananryan
Fri, 01/13/2012 - 18:19
Thank you!
I've been hoping for this plan. Now to find the time to get it started...
By the way, I like your version better than PB's!
ecook01
Tue, 01/24/2012 - 20:07
Questions
Thanks so much for posting! This looks awesome. How did you cover the exposed plywood on the ends of the top?
Also, what kind of wood did you use?
I'm excited to try making it. Thanks again
SF Guy
Sun, 02/19/2012 - 16:11
Shopping list update
Just finished staining mine, looks good. Thought I would add though you need 3- 2x2 @ 8'. Thanks for the plan my daughter loves it.
ElleMay (not verified)
Mon, 03/05/2012 - 22:33
additional desk space
Im going to make this desk! I have a big corner desk, but I'm moving and will not have a place for it. So I'm going to build this one! :) But I have a question. I want to add a pull out "desktop" above the drawer. My mom's rolltop has one on each side. Could I get someone to help me with making that addition? Maybe with a sketch?
Thanks, ElleMay
Tanya (not verified)
Mon, 03/19/2012 - 17:21
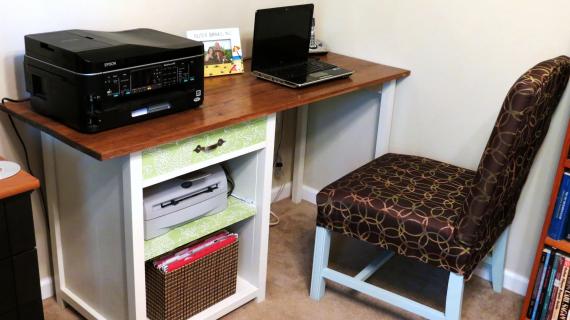
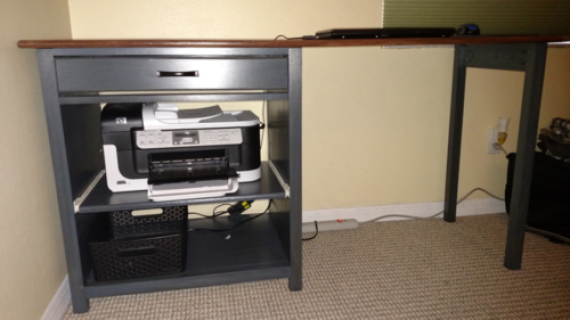
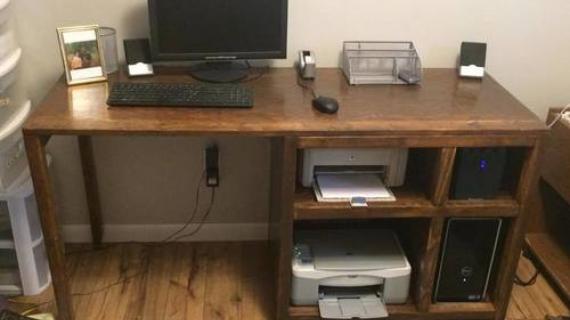
I did something like what you
I did something like what you are talking about - except I didn't do the actual rollout desk but turned it into a rollout printer drawer. Also, ended up adding a file drawer to the bottom.
All that is needed (depending how much money you want to spend on slides) are slides. I used (for the printer) euro slides because those really are the easiest to install and tweak. For the file, I have the side mounts with full extension - pain in the butt but work perfectly now.
I'll post a picture or two when I figure out how to do it.
ElleMay (not verified)
Fri, 03/23/2012 - 11:40
I saw a particle board with a
I saw a particle board with a roll out printer drawer today and thought about buying it. but i don't want particle board. Im really just wanting a little extra desk space. so if i could add a small board between the desktop and the drawer that would suffice. i just need to figure out how to keep it from pulling all the way out. and how to ajust the plans of course.
Toniszym
Sun, 09/18/2016 - 16:59
file drawer
I would love some more information on how to add a hanging file drawer.
ElleMay (not verified)
Mon, 04/09/2012 - 20:51
additional desk space FOUND!!
http://howdyyadewit.blogspot.com/2011/10/diy-pullout-shelf-desk-kitchen…
this site has what I've been searching for! yay! you have to scroll down to the 3rd part of his tutorial, but its what I needed. I figured it was that easy, I just needed the visual. I soooo can't wait to start building this project now!!! :)