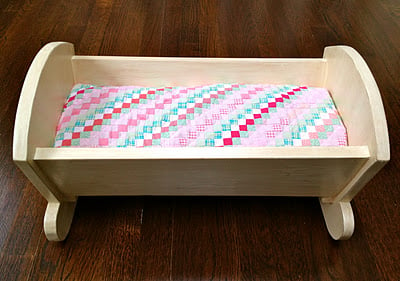


How to make a wood doll cradle. Free plans to build a DIY wood doll cradle that rocks. Includes step by step instructions, cut list and shopping list.
As much as we are enjoying the sun, I'm ready to get home and make some sawdust! I'm good for about a week on vacation, then I just gotta find something productive to do! Thank you everyone for helping others, answering questions, and being patient with me. Can't wait to get home and get back to the garage!

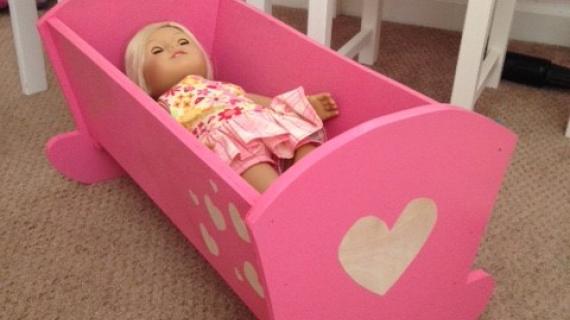
Special thanks to Jaime from That's My Letter for putting together this Vintage Doll Cradle.
Preparation
1 – 1x12 @ 24”
1 – 1x6 @ 5 feet long
1x1 moulding or scraps cut to 1x1 size
2” finish nails or screws
1 ¼” finish nails
2 – 1x12 @ 10 ¾”
2 – 1x1 @ 6 ¾”
3 – 1x6 @ 18”


Please read through the entire plan and all comments before beginning this project. It is also advisable to review the Getting Started Section. Take all necessary precautions to build safely and smartly. Work on a clean level surface, free of imperfections or debris. Always use straight boards. Check for square after each step. Always predrill holes before attaching with screws. Use glue with finish nails for a stronger hold. Wipe excess glue off bare wood for stained projects, as dried glue will not take stain. Be safe, have fun, and ask for help if you need it. Good luck!
Instructions
Step 1
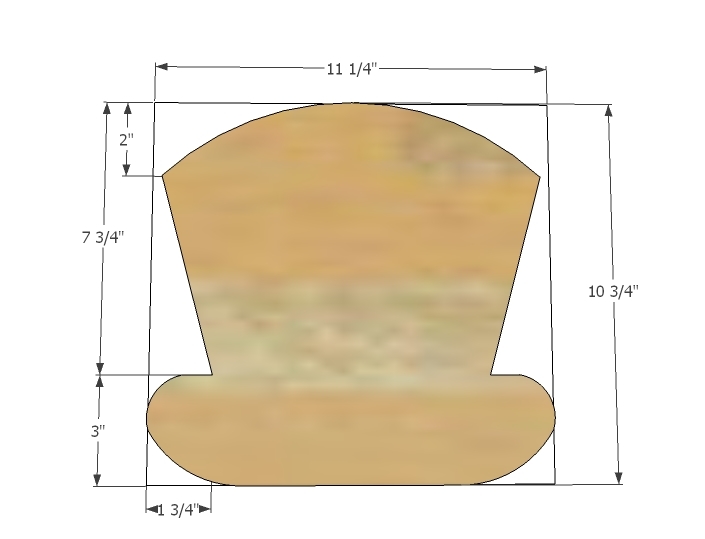
Draw pattern out on 1x12 ends. Edges can be rounded to avoid sharp corners. Cut out carefully with jigsaw and sand all rough edges.
TIP: It’s a good idea to mark out the location of the cleat (next step) while the board is still square. Also mark center of board so you can easily line up center of bottom at step 3.
Step 2

Attach cleats as shown in diagram with 1 ¼” finish nails and wood glue.
Step 3
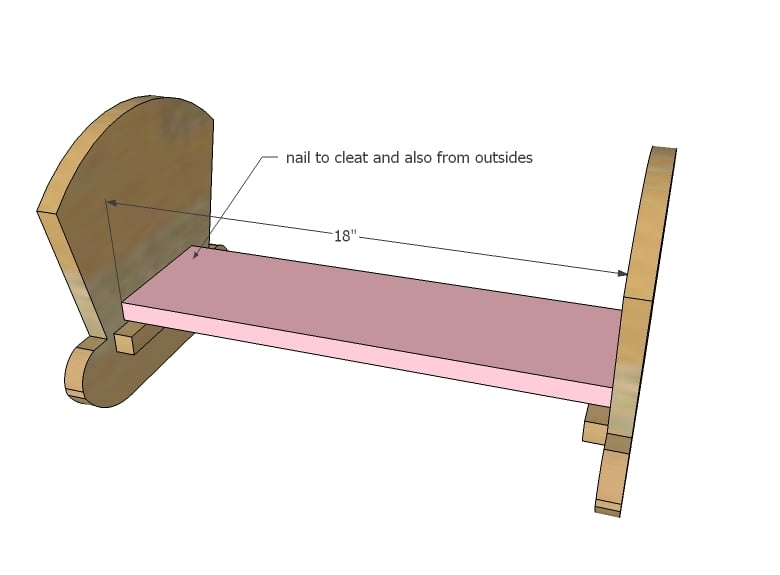
Now add bottom shelf. Use 2" countersunk screws and glue. Kreg Jig users - use 3/4" pocket holes and 1 1/4" pocket hole screws.
Step 4
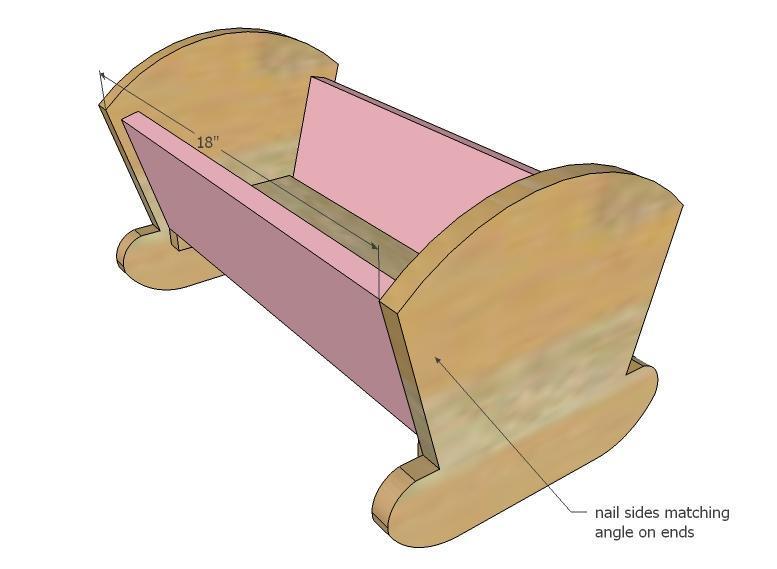
Attach sides with 2" screws and glue. Sides follow the angle of the ends.
It is always recommended to apply a test coat on a hidden area or scrap piece to ensure color evenness and adhesion. Use primer or wood conditioner as needed.

Comments
Midwest Rebecca (not verified)
Fri, 01/27/2012 - 11:33
Handles?
What an adorable doll cradle! My husband made similar ones last Christmas for our daughters and they carry them everywhere in the house with simple handle cut-outs in the ends...I'd recommend adding some to this otherwise perfect plan!
MN (not verified)
Mon, 12/17/2012 - 06:34
Hello, my husband and I are
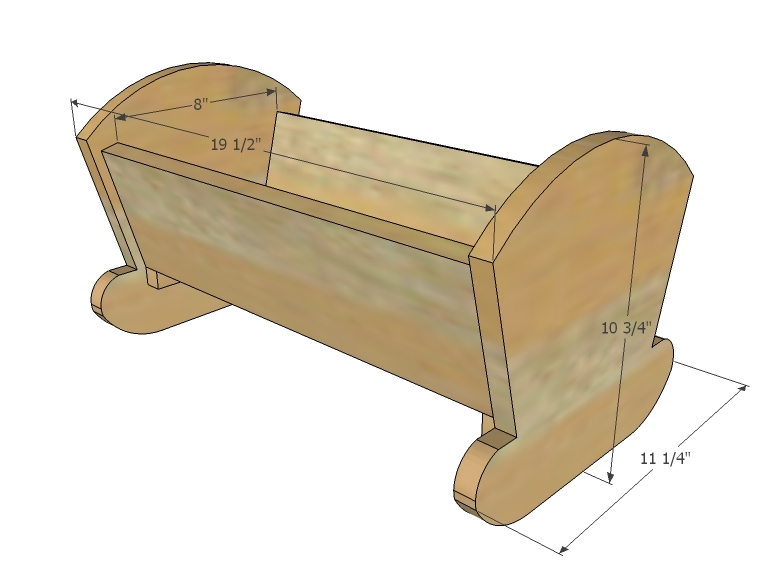
Hello, my husband and I are planning to make this for our daughter's christmas gift. I do have one question though. On the diagram labeled "Dimensions", why does it say that the finished cradle measures 19 1/2" long, when the sides are 18" long and each end is 1" thick? I thought I'd ask just in case I'm missing something in one of the steps. Yikes! :)
Thank you for posting this, it's so cute!
BLB (not verified)
Sun, 12/23/2012 - 12:41
This is a very cute design;
This is a very cute design; thank you for sharing.
MN, dimensional lumber is a bit smaller than the board size after it's milled. A 1" board is actually only 3/4" thick, so the two ends will add the 1 1/2", bringing the overall to 19 1/2" vs. the expected 20". Hope that helps you!
rob_2003
Sat, 04/18/2020 - 18:24
help please
Do we have to draw out our own end pieces or do you have a template where you can just print it off and copy it ?