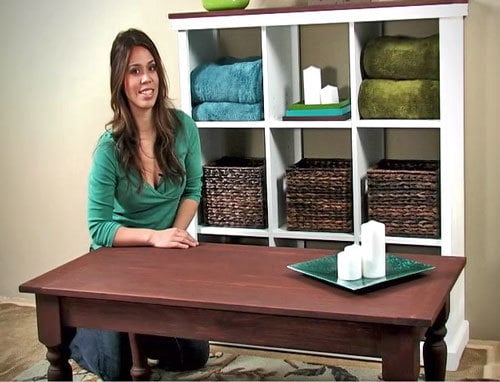


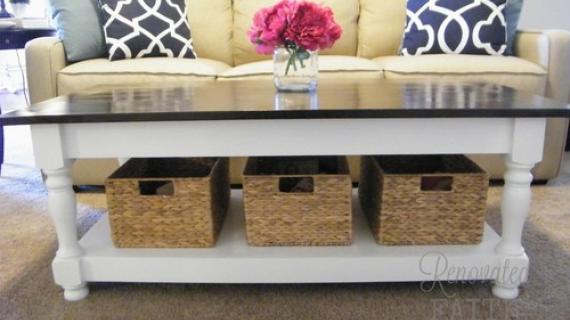
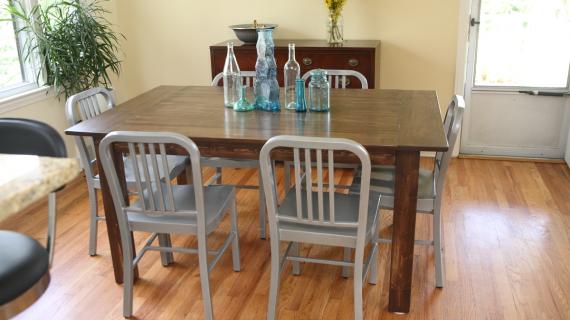
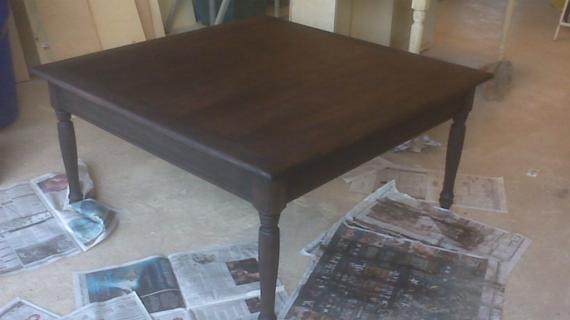
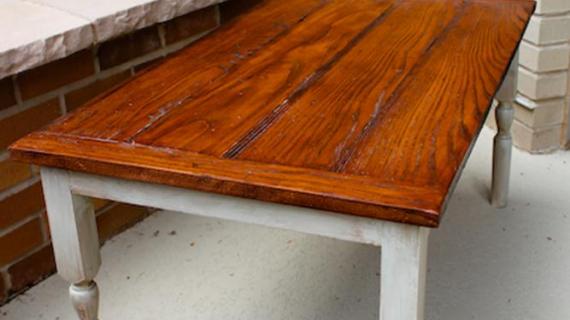
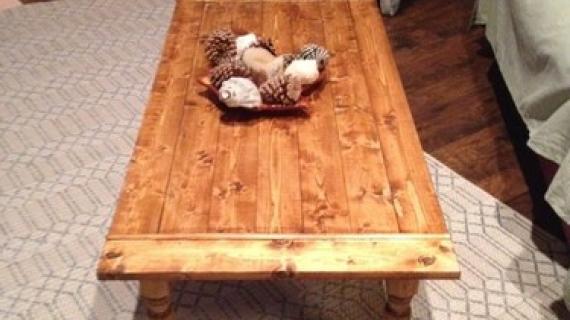
How to build a turned leg coffee table. Step by step plan included video tutorial to build coffee table.
Preparation
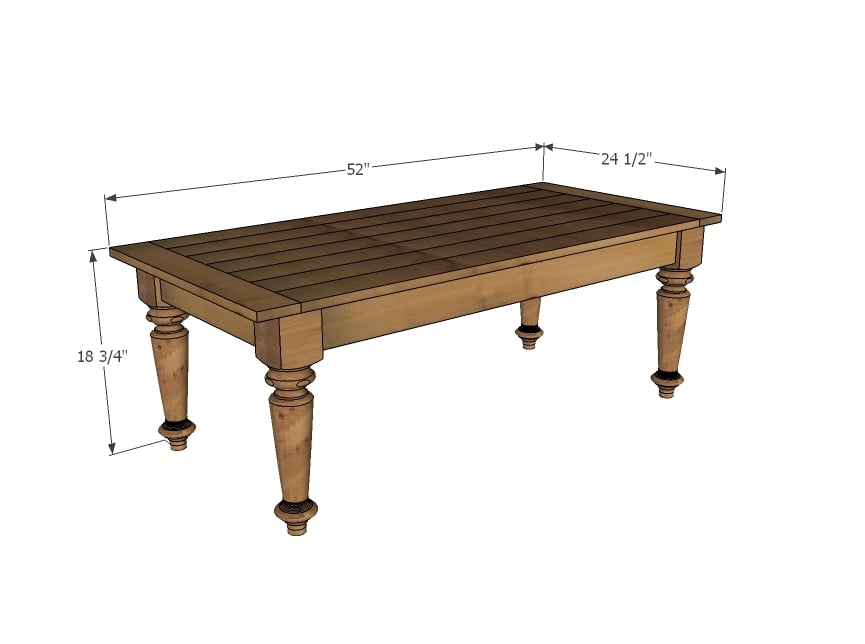
4 - 3 1/2" turned coffee table legs 6 - 1x4 @ 8 feet long
- 7 - 1x4 @ 45" long (tabletop boards)
- 2 - 1x4 @ 24 1/2" (breadboard ends)
- 2 - 1x4 @ 16 1/2"
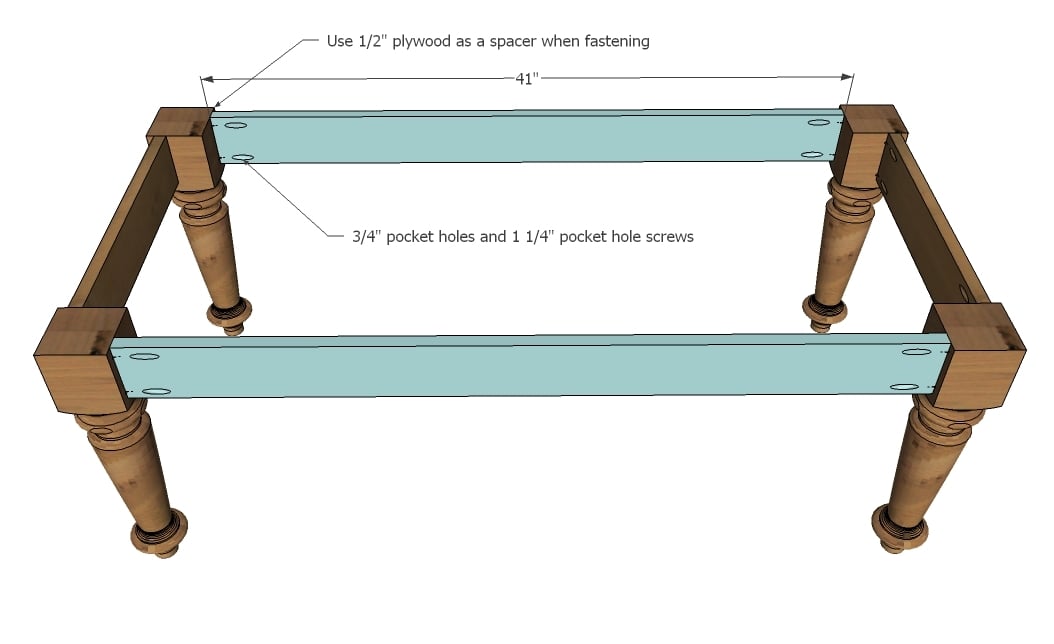
- 2 - 1x4 @ 41"


Please read through the entire plan and all comments before beginning this project. It is also advisable to review the Getting Started Section. Take all necessary precautions to build safely and smartly. Work on a clean level surface, free of imperfections or debris. Always use straight boards. Check for square after each step. Always predrill holes before attaching with screws. Use glue with finish nails for a stronger hold. Wipe excess glue off bare wood for stained projects, as dried glue will not take stain. Be safe, have fun, and ask for help if you need it. Good luck!
Instructions
Step 1
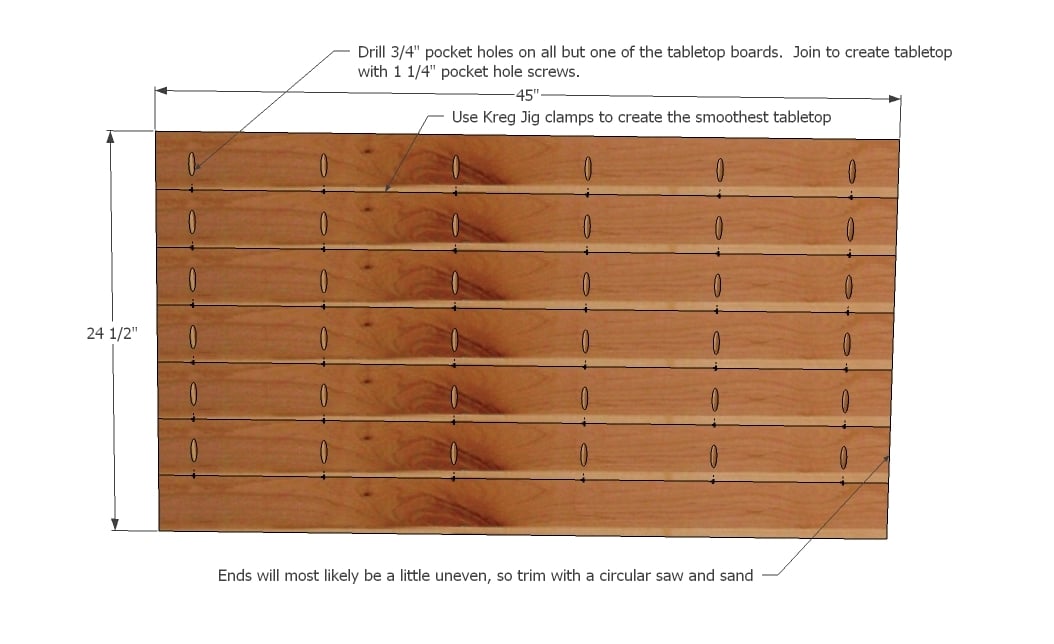
The key to a great tabletop is making sure all of your tabletop boards are cut to the exact length, and then joined with pocket holes from underneath. I like to clamp every screw just to make sure we are getting the smoothest edge to edge joint possible.
If you are using glue, be very careful not to let glue dry on the tabletop and stain the surface.
If your ends are not perfectly straight, there is no shame in trimming with a circular saw. It's about getting a great finished project!
Another consideration is to try to alternate the grain of the boards so the boards aren't all facing bark side up or bark side down. This is done to prevent your tabletop from warping in one direction.
Step 2

Once your main top is straight and square, drill 3/4" pocket holes on ends for attaching breadboard ends.
Step 3
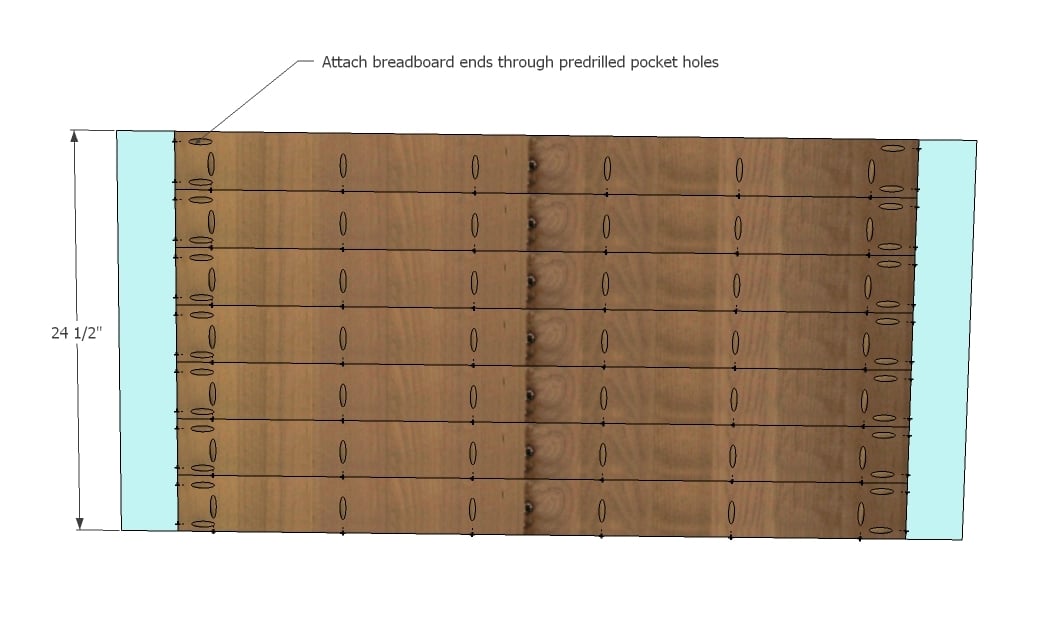
Then attach breadboard ends with 1 1/4" pocket hole screws. Take a second to admire your tabletop and set aside :)
Step 4
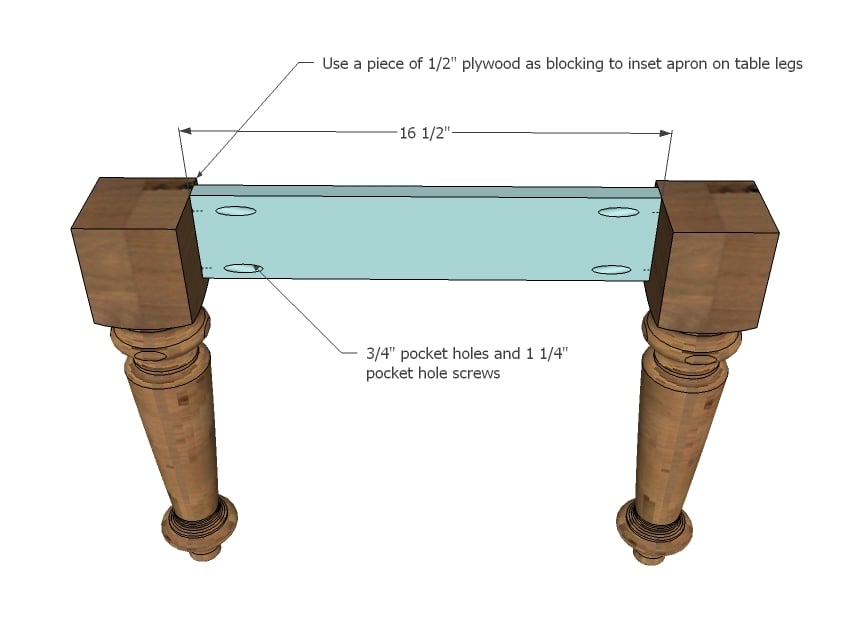
Attach legs to end aprons. I like to use a scrap piece of plywood as a spacer to elevate the apron - just makes life easier!
TIP: to avoid any screw holes on tabletop, drill 3/4" pocket holes on aprons facing upward for attaching top in later steps.
Step 5
Step 6
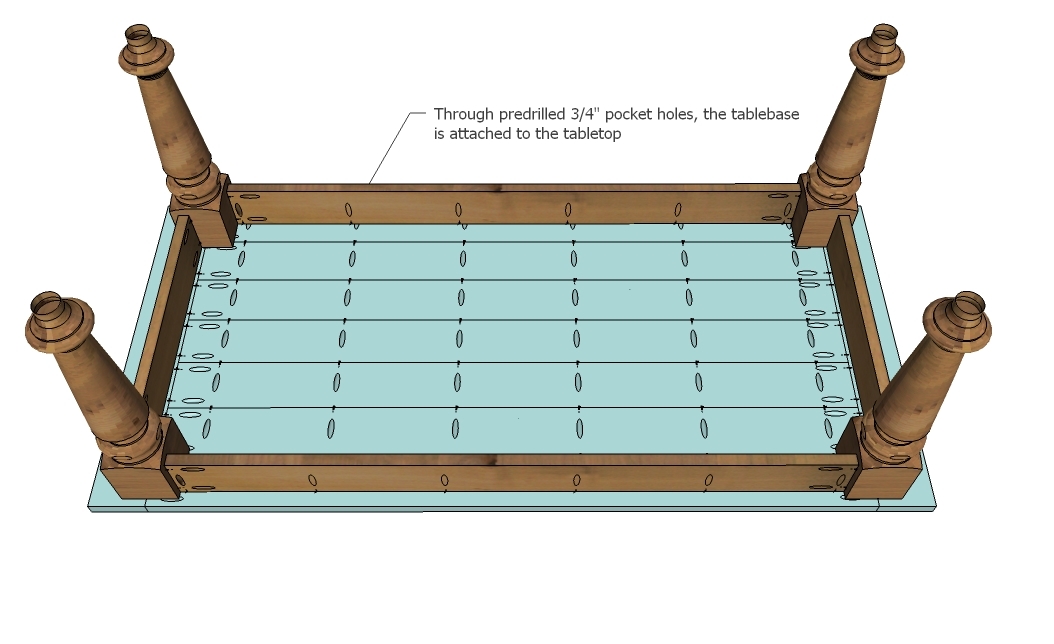
If you drilled the pocket holes in aprons, simply attach through aprons into underside of tabletop with 1 1/4" pocket hole screws and glue. Otherwise, attach through top into aprons.
It is always recommended to apply a test coat on a hidden area or scrap piece to ensure color evenness and adhesion. Use primer or wood conditioner as needed.
Comments
claydowling
Mon, 02/13/2012 - 17:14
Top Thickness
You'll actually be fine with 1x thickness stock for the top and it won't sag if you glue the edges and lay it on rails like you have. If you can secure it with pipe clamps until the glue sets you won't even need the pocket screws to join the edges.
hammertime
Mon, 02/13/2012 - 17:34
Question for Clay
Clay, do you mean with regard to making it a dining table? i.e. using 1x thickness? Just wanted to clarify. I see a new dining table in my future, but would rather use the 1x...
In reply to Question for Clay by hammertime
claydowling
Tue, 02/14/2012 - 04:49
Dining Table
1x material is more than sufficient for a table top, if you use the support rails that Ana has shown in the picture. It will change the look of the table quite a bit, because the top will seem much lighter.
Your wood absolutely needs to be straight, and it's not a terrible idea to match plane the edges (look for youtube videos on match planing). It can partially or completely remove the groove between boards. Another alternative if you have a table saw is a glue line rip blade, which I'm currently using for some glue ups. If you have those tools though you're probably not asking these questions.
hammertime
Mon, 02/13/2012 - 20:16
Gorgeous!
Ana, this is absolutely gorgeous. Thank you so much. The table is beautiful and the video is so very helpful! Love it all.
xo
In reply to Gorgeous! by hammertime
Ana White
Tue, 02/14/2012 - 13:34
Thank you! Really enjoyed
Thank you! Really enjoyed making this table! Hope to see brag posts from this plan soon!
Guest (not verified)
Mon, 02/13/2012 - 22:16
coffee table (turned leg)
Sorry - I am new at this - so some simple questions:
(btw - very nice work/site)
- What type of wood did you use for this?
- What do you mean that you "clamp each screw"?
Thanks!
In reply to coffee table (turned leg) by Guest (not verified)
claydowling
Tue, 02/14/2012 - 07:01
Clamping the screws
Watching the video, what Ana is talking about with clamping the joint line is maybe not entirely obvious, and isn't always practical to do, but is very useful.
She's using toggle clamps to hold the boards down to her work surface, at the joint between the boards, as close as possible to the screw she is driving. That makes for a pretty flat top, and getting it any flatter will require copious sanding or some work with bench planes.
She's using toggle clamps, which require a work surface they can be attached to. The good news is that Kreg makes rails that will hold toggle clamps and can be attached to nearly any work surface. If you can find a Woodcraft store they usually have a pretty good selection and the people there can show you some really neat options.
I also thought she was using something a bit nicer than standard home center pine, possibly poplar or a select grade. For something like this the quality of the wood makes a real difference.
Guest (not verified)
Wed, 02/22/2012 - 09:47
Thanks Clay - very helpful!
Thanks Clay - very helpful!
impex380
Tue, 02/14/2012 - 06:43
Great legs Ana!
Great legs Ana!
hammertime
Tue, 02/14/2012 - 08:12
Thank you, Clay!
This is very helpful information, Clay. I'll look for match planing videos as you suggested. There is a lumber store near me that sells very nice straight wood (unlike the wood I find at Orange or Blue) so I may go there for the wood.
Thanks again Ana!
dmcarwin
Tue, 02/14/2012 - 08:19
Color?
Ana I love this table! However the coolest part is that I was about to watch your video and got pulled away from the computer by one of my kids. I came back and my husband was watching it, after which he declared he was going to make this table. (I think he is having a hard time because I am using all the power tools and building and he hasn't built anything) I couldn't be happier because I would love to have him build with me. Anyway, I loved the color of the turquoise table in the video. Could you tell me what color paint you used? I just made your narrow cottage end tables and would love to do them in this color!
Also you are amazing! I really admire all you do and truly appreciate it! What is the best way to contact you if I have a request for a plan, or is that even possible?
Thanks!
In reply to Color? by dmcarwin
Ana White
Tue, 02/14/2012 - 17:03
Hi there! Thanks! The
Hi there! Thanks! The turquoise is actually spray paint bought in the can. I can't recall the exact color, but it was a muted blue toned spray paint. Wish I had saved the label for you - so sorry!
In reply to Hi there! Thanks! The by Ana White
dmcarwin
Tue, 02/14/2012 - 17:18
Thanks
That's ok! Thanks for letting me know. I will find something, maybe I will go and check out the spray paint isle!
Cindy from Indiana (not verified)
Tue, 02/14/2012 - 12:41
Oh for Pete's sake! ;-)
Oh for Pete's sake! Now I have *another* Ana White project I must do! I'm never going to see the light of day if you (and all the other awesome users) keep posting all these wonderful building projects! LOL
Guest (not verified)
Tue, 02/14/2012 - 22:01
Furniture grade pine?
Hi Ana, was that furniture grade pine you were using in the video? It just looked so good, but you can never tell in a video.
I do understand why you don't specify what lumber you are using as it's different depending on your geographic location, but it would be nice to know just to compare or get an idea of what alternatives might give similar (great!) results.
Thanks so much.
Emily Frazier
Wed, 02/15/2012 - 07:27
I love this
Ana, I have been looking at your website for weeks. I love it. I cant wait to get started. For Valentines day I got a Kreg Jig Master kit to get started. I cant wait to try some of your projects.
Thanks,
Emily
Ana White
Wed, 02/15/2012 - 09:37
Hi everyone! The wood used
Hi everyone! The wood used for this coffee table is actually poplar. It really needed little sanding when done!
However, I missed the rustic imperfection found in pine on this project.
It's all a preference, as long as you are using straight square boards.
In reply to Hi everyone! The wood used by Ana White
claydowling
Wed, 02/15/2012 - 10:06
Pricing check
I just checked with my lumber dealer, and poplar is equivalently priced with pine, surfaced four sides. It's definitely not priced that way at the home center, but at lumber yards and other lumber dealers it should be near parity.
Poplar definitely needs a stain or paint (or a toner), because the wood isn't pretty. But it's commonly used as the underpinning for commercial furniture because when properly dried it's incredibly stable, not prone to warping, bowing or twisting.
Now I'm going to need to contemplate building something with poplar.
meganleiann (not verified)
Wed, 02/15/2012 - 13:06
Lovely! When you join planks
Lovely! When you join planks for a table top like this do you go back and fill all the holes?
claydowling
Wed, 02/15/2012 - 13:46
Filling holes
Megan,
Those holes are on the underside of the table. There's also a lot of them. It's going to take a lot of work, and they're unlikely to be seen. I'd leave them because they're harmless.
Anybody under your table has other concerns, such as "who are all you people" and "why is there a marching band in my head?"
In reply to Filling holes by claydowling
spiceylg
Sat, 02/18/2012 - 04:10
:)
LOL
windjamer812
Sat, 02/18/2012 - 00:10
Pocket Hole Wood Plugs
They actually make pocket hole wood plugs nowadays. Kreg and a variety of other companies make them and they are fairly cheap. They also come in a variety of wood types.
BTW Ana, I really enjoy your website and your wonderful projects.
bw_bandit
Sun, 02/19/2012 - 14:28
Wow!!
Just found your site and love it. Man Ana is hot and a craftswoman too. I just order the Kreg system and can't wait to start learning how to use it. Ana will make it easier with her plans and blueprints.
Guest (not verified)
Tue, 02/28/2012 - 18:48
Could you use just a one
Could you use just a one piece of pine already cut instead of individual boards or maybe it wouldnt look as good? Any thoughts? I know they sell them here where I am.
In reply to Could you use just a one by Guest (not verified)
claydowling
Wed, 02/29/2012 - 03:57
Pine panels
You can definitely use the wide pine project panels to make this table. If you're feeling adventurous, you can also glue up your own panels. You'd need to do some research on panel glue ups. I've done it a couple of different ways, with pictures of one of them on my blog.
Ginger Momma
Tue, 02/28/2012 - 22:52
Great!
Beautiful, simple table. Oh and your Alaskan accent makes me smile =]
Sarah M
Sun, 03/04/2012 - 12:58
brand new want-to-be woodworker
Hi All...
I have always been good with tools and figuring out plans but thanks to this site I have some new found inspiration to try and really make something.
This table, along with your video and plans, looks like a good starting point. Do you agree?
And also, since I'm just starting out and have nothing for tools other than average home owner tools (skill saw, palm sander, jig saw, etc), is there something that you can suggest as a must have for wood working and furniture building?
We don't park our cars in the garage anyway, so I've got the work space LOL
In reply to brand new want-to-be woodworker by Sarah M
claydowling
Sun, 03/04/2012 - 17:07
Good base set
That's a pretty good basis to start from. Chisels and hand planes are always fun, as well as sharpening equipment. A bench is also a nice thing, which you can build for yourself instead of buying.
Sarah M
Sun, 03/04/2012 - 17:12
Thanks Clay
What about alternatives to the pocket jig? just nailing from the outside and filling the holes? The pocket jig looks really cool and way easier but I want to be sure I'm serious before buying $100+ tools. And do nails from the outside hold as well?
claydowling
Sun, 03/04/2012 - 18:02
Nail not a solid plan
It could probably be made to work with nails, but I don't recommend it. The kreg jig is pretty cool, but it can be expensive. You can buy a smaller kit for around $40.
Were I building this for myself and trying to avoid the kreg jig, I would use match planing and glued edge joints to build up the top. It takes a little longer, but it looks really great and is more durable than the kreg jig joinery.
You can attach the stretchers to the legs by using a mortise and tenon joint, which would be traditional. But an easier and nearly as strong joint is a dowel tenon. There are a few ways to make them.
The top can be attached to the base using screwing cleats. They're small blocks along the long side, predrilled and countersunk to have screws going into the stretchers and the top. I think the pocket hole looks more elegant in this situation, but there's something about about screwing cleats that make me smile every time I look at them.
There are four tools outside of the set you have currently that would be necessary, and they're useful for other projects as well. You'd need a jack plane, a chisel set, a marking gauge and a set of sharpening stones. The problem is that these tools are likely to cost nearly $100 themselves.
I picked up my jack plane second hand for about $30 after shipping on ebay, but I think you can buy a new one for $50 or so. The new ones at the big box stores have not impressed me with their construction, but I haven't actually used them.
For chisels, skip anything sold at the big box stores. You can buy a good set of four via mail order for $35.
For a marking gauge, look for one that cuts rather than scratches. They're a pretty simple tool, so don't spend a lot of money. Once you have a little experience you can build one of your own that's nicer than what you buy.
Sharpening stones are pretty inexpensive. I bought a very nice set of arkansas oil stones at Lowes for $25. Lowes also sells a synthetc sharpening stone for under $10, and I've had decent luck with it. It won't last as long as the arkansas stones, but your grandchildren can probably use your arkansas stones when they're grown.
All of these of course require you to learn how to use them. There are good books that can set you on the path, but of course practice is what you'll need most.
Sarah M
Wed, 03/07/2012 - 08:45
Thanks again! I really
Thanks again!
I really appreciate your advice. Hopefully I can get something decent together that I'm not embarassed to share LOL
In reply to Nail not a solid plan by claydowling
Lady Goats
Wed, 03/07/2012 - 10:49
Clay, how do you find the
Clay, how do you find the time to sit down and type all this up?! :-)
In reply to Nail not a solid plan by claydowling
claydowling
Wed, 03/07/2012 - 11:48
Preparation and minimal responsibilities
The kids are grown up and nearly out of the house. In the last year I've also spent a lot of time thinking about how a person can get started up cheaply, and developing the skills. So the posts write themselves quickly because I'm not having to think it out as I'm writing it.
Tina Garza
Wed, 03/07/2012 - 16:47
Work bench
Ana, is that a Kreg work bench you are using or something you made? I love the table and will be making it as a desk. Thank you for all ou do!
bbcarey
Mon, 08/05/2013 - 15:04
why not stagger the pocket holes
For the table top... Is there any reason the pocket holes are all lined on the same side of the boards.. wouldn't staggering them between opposite sides of the seam be beneficial vs having them all on one side? I'm joining 4 boards for a buffet top and was planning on using pocket holes... and that was my plan... Thoughts? Thanks!
Bailey Shagogue
Mon, 10/21/2013 - 05:00
Legs!!
Ana-- Your work is awesome, and you are so talented!! I cannot wait to build this coffee table and the x console table!!! So many things on my to-do list!!! Where did you buy the legs for this coffee table? I looked at Lowes and Home Depot, but they didn't have anything this "chuncky."
Thanks!!