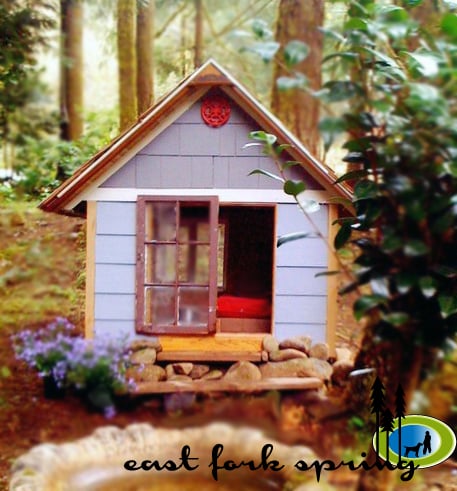


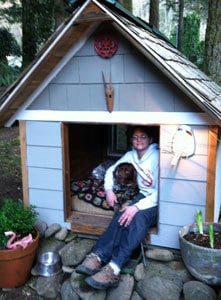
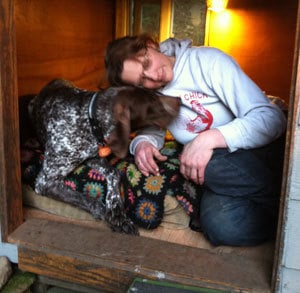
My dog Barli, a neurotic German Shorthaired Pointer, was the absolute bane of my existence for the first year and a half we were together. But then something happened. I don't know if it happened over the course of a single day or two miserable years, but it surely happened: Barli became my best friend. Barli and I called a truce and have been inseparable since. Woman's best friend. He's got his big ol fat stupid head in my lap right now. Helping, of course. He's my best helper. So I built him a doghouse. He wanted to start napping in there before I was even done framing. He loves his house, and me. And I love him back.
Let me know if you need help!
Preparation
Materials I Used
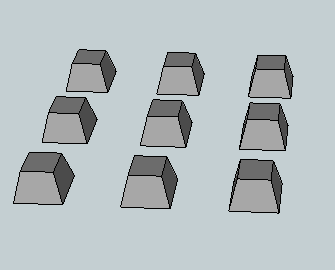
• Foundation – concrete piers on gravel
• Floor frame – oversized pallet
• Subfloor – plywood
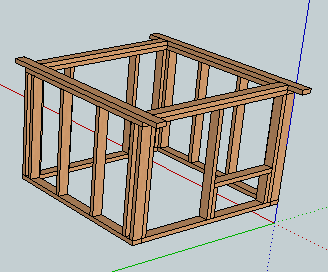
• Sill plate (mud sills), studs, top plate- fir 2x4s
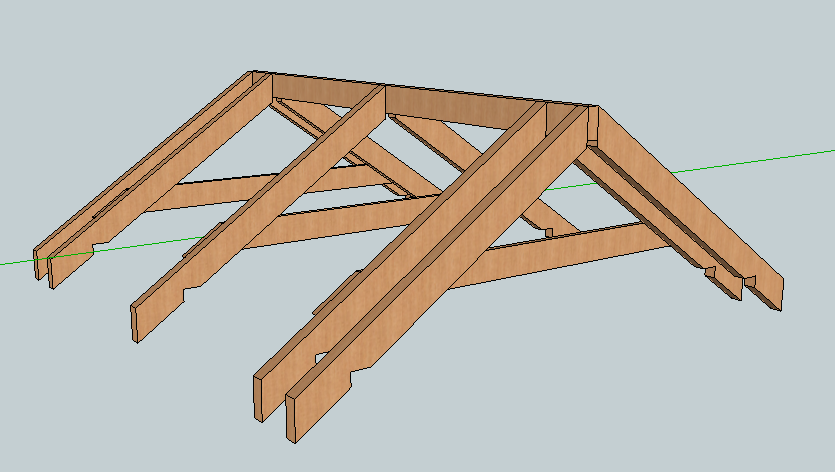
• Rafters – I used fir 2x6s because I had a ton available, but I think 2x4s would be sufficient
• Collar ties and ridge – fir 1×6 (I doubt collar ties are really necessary, I used them because I didn’t want a ceiling but still wanted to use the space under the rafters for storage if needed… considerations of an admitted wood hoarder whose stash gets out of hand from time to time)
• Sheathing – 7/16″ OSB
• Building wrap – Raindrop by GreenGuard
• Roof underlayment – #30 felt paper
• Siding – fiber cement lap siding and shakes (both are Certainteed products)
• Roofing – cedar shakes
• Insulation – mostly r-13 bat
• Interior and exterior trim – oak flooring
• Interior walls – wood paneling
• Flooring – tile on Hardie (for his dining area) and laminate on foam underlayment (for his bedroom)
• Fasteners – a boatload of 8(2-1/2″), 10(3″), and 16 penny (3-1/2″) nails for the framing; 2″, 12-1/2 gauge nails for the siding, 1-1/2″ (medium crown) staples for the cedar, and other odds and ends screws and finish nails throughout
• Other – 2′ vinyl window, old wood frame window, paint, rocks, 2×10 (steps), cast concrete birdbath (project for another day), flowers
Tools I used
• Safety glasses- honey is always nagging me about that one, so I’ll list first lest I forget
• Work gloves
• Tape measure
• Pencil
• Hammer
• Utility knife
• Squares: T, roofers, speedy
• Levels: 4′, torpedo, string
• Drill
• Saws- I used a circular saw, miter saw, table saw, tile saw, and hand saw. Really, you could do it all with a circular saw or hand saw. If they’re available to you, the others just make it a little easier/quicker.
• Air compressor along with a pneumatic stapler, framing nailer, and finish nailers (I prefer to hand nail all framing, but for ease of installation of siding, shingles, and trim, you can’t beat pneumatic tools. They’re a luxury, but one I’m unashamed to indulge in. I’m guessing build time would have been 2x longer without)
• Shovel, rake, tamp (site prep)
The best plan I can give is just a little friendly advise… during your build, think outside the doghouse. It’s the only way to really do more with less. I also encourage you to be creative, safe, and awesome (like you always are). Above all, have fun. Oh, and post pictures when you’re done… I can’t wait to see how yours turns out!
Instructions
Step 1
Step 2

Step 3
Step 4
Step 5
Step 6

Step 7

Step 8

Step 9
Done! Nice work!
Step 10

Step 11
Step 12
Step 13
Step 14
Step 15

It is always recommended to apply a test coat on a hidden area or scrap piece to ensure color evenness and adhesion. Use primer or wood conditioner as needed.
Comments
Ana White
Sat, 03/24/2012 - 13:41
What a brilliant idea to use
What a brilliant idea to use a pallet for the floor!!! I love this idea! I have been looking into a chicken coop, and this would be great for that too!
Thank you so much for sharing!
Guest (not verified)
Sat, 03/24/2012 - 15:43
Is that a photo of a little
Is that a photo of a little scale model of the finished dog house? If so, do you have a pic of the actual "real life" sized house after it's built?
east fork spring
Sat, 03/24/2012 - 20:15
I wish I was that organized (to make a model)
But I'm not. I made a scale model once. Dorothy Gale's
house (Wizard of Oz) as birdhouse for my Dad's birthday this year (I attached its photo to this comment) It took me a month of 40 hour weeks to
complete. Waaay more difficult than the
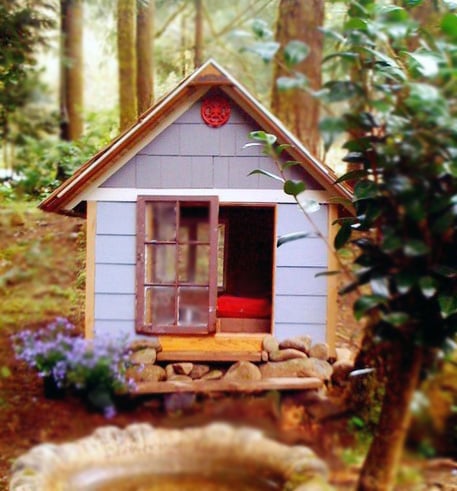
real thing. That's the real deal in the photo. I had just discovered the wonder
that is tilt-shift photography at the time, so that could explain the
"miniature" effect. I started building the doghouse on kind of a
whim, so no model, no plans. Just a pile
of half rotted, tore up lumber and house guts. We were siding our old (new to
us) house, and with every course of shingles we tore off the exterior, there
was a surprise. The bad kind. Ever build a house from the outside in? That's
basically what we did... one stud, joist, or section of sill plate at a time.
While we were living there. I'm way off track here, but the moral of the story
is I had a mountain of debris in my driveway, no money to rent a dumpster, and
not a stitch of patience left for the siding job from hell. So I took the weekend off from remodeling,
separated wood from the debris, pulled about a zillion nails out of 2x4s and
shingles, cut the bad sections out, and managed to come up with enough
miscellaneous material to build the doghouse. No time for scale models. I
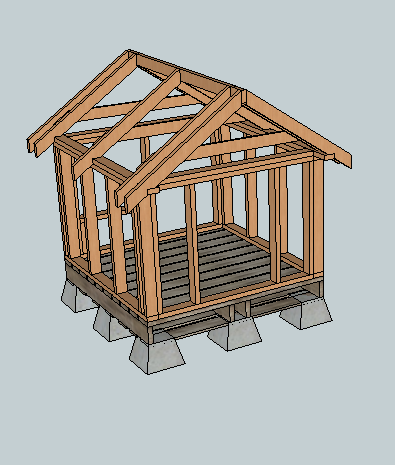
rendered it in Sketchup after the dog house project(and the house house
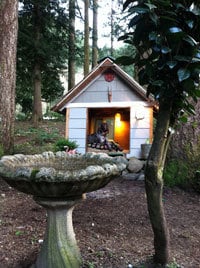
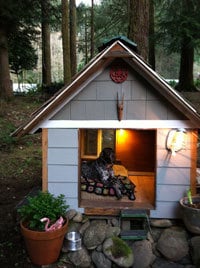
project) were completed. Since that photo was taken, I installed some lighting,
though. I also put in a different pair of stairs and a coat of paint. Minor changes, but I added a few photos to
the plan for you. Just taken today. Same house. I'm the one with the glasses,
not the long floppy brown ears. Hope that looks a little better for you! (And here's Barli..)
Guest (not verified)
Sun, 03/25/2012 - 18:49
OMG - That's fantastic! I am
OMG - That's fantastic! I am the one who asked if the photo was of a scale model. It just looked so tiny and "whimsical"! LOL And Barli looks very cozy and comfy in his adorable "dollhouse" of a doghouse. What a gorgeous scene!
I too once made a scale model house - not as nice as your Dorothy house. My son bought a house out of state and I had one weeks vacation to help him arrange and decorate so we knew where EVERYTHING was going to go beforehand because of the scale model. You're right it is a lot of work.
Thanks for your reply. I LOVE the house!
Risa (not verified)
Wed, 08/22/2012 - 23:21
More thorough plans
Hello! I was wondering if you could e-mail me a more thorough plan for the beautiful dog house. I'm a beginner with wood working and could use the small details. I would greatly appreciate it. Thank you in advance!