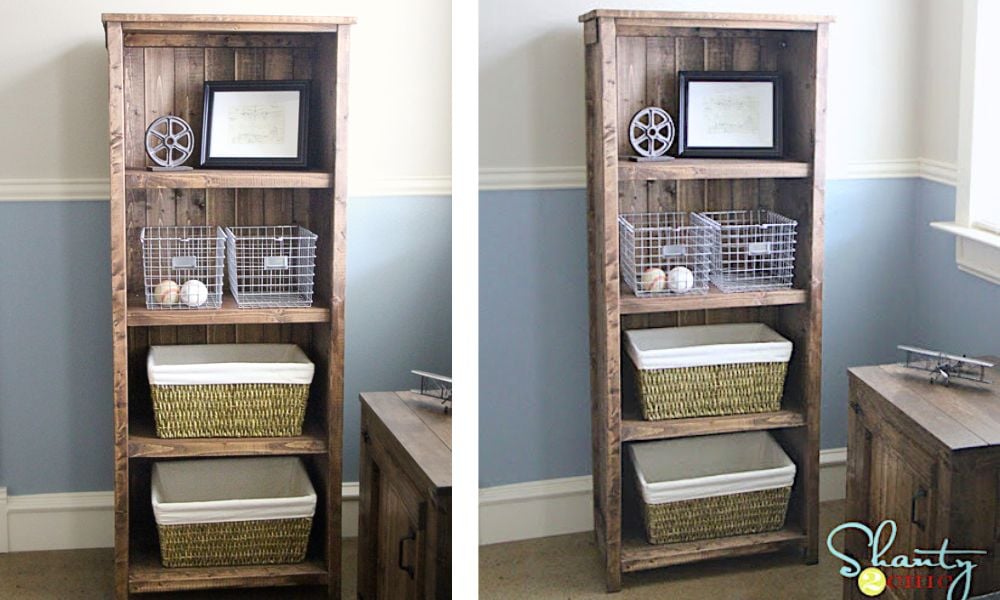


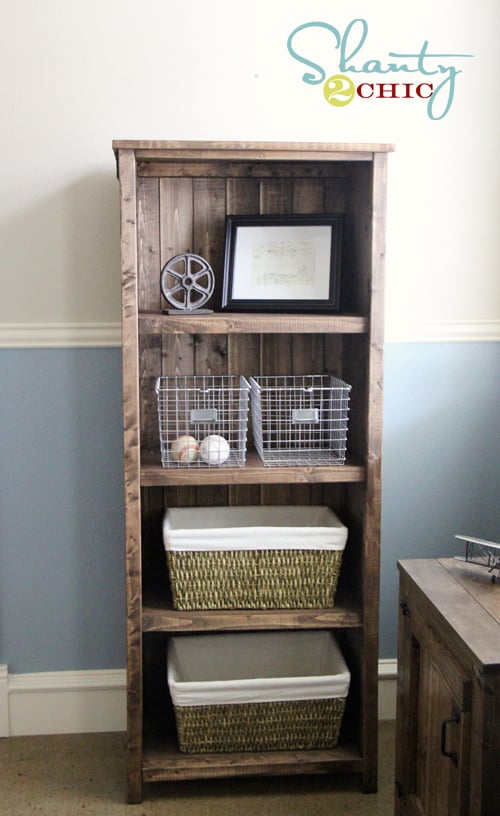
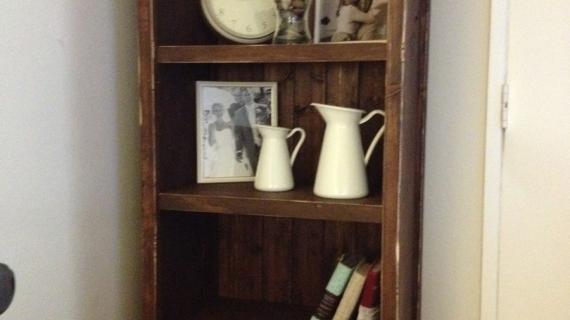
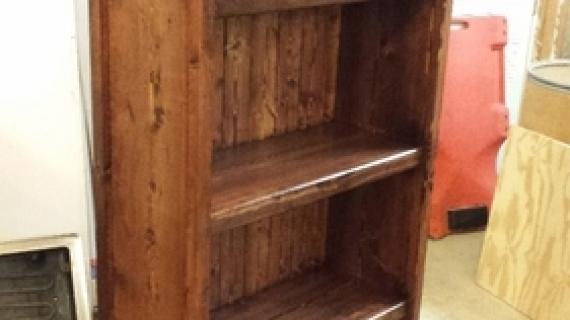
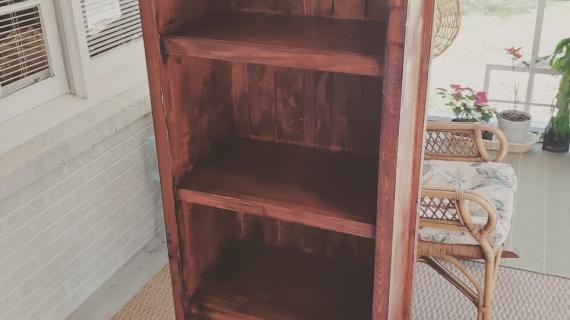
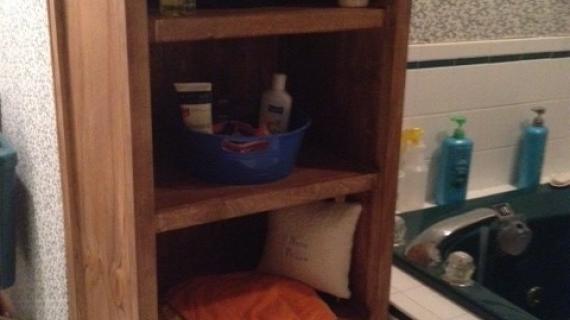
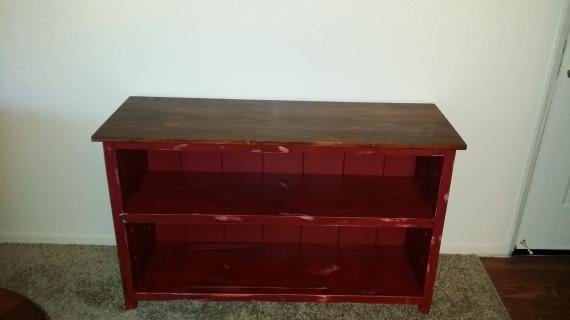
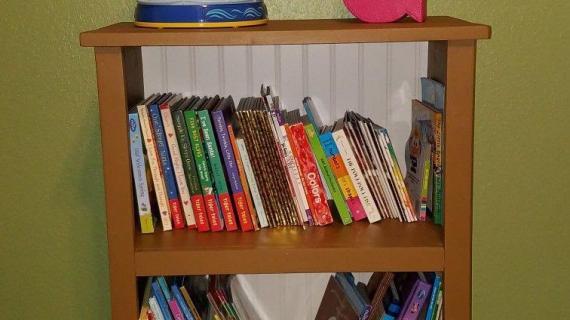
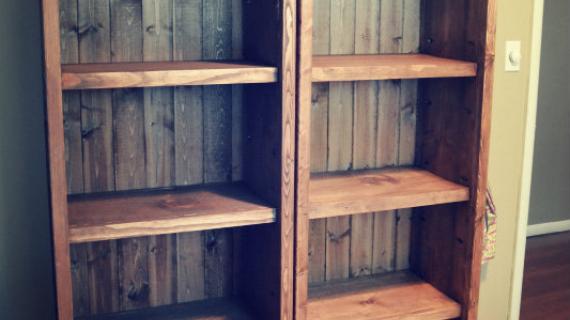
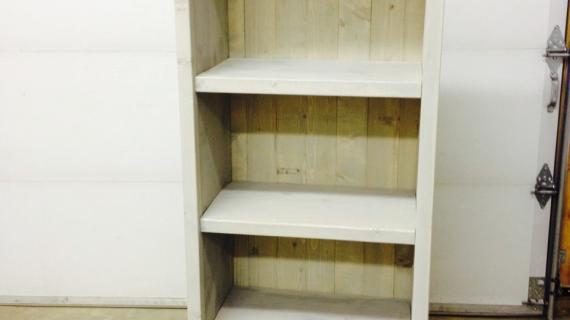
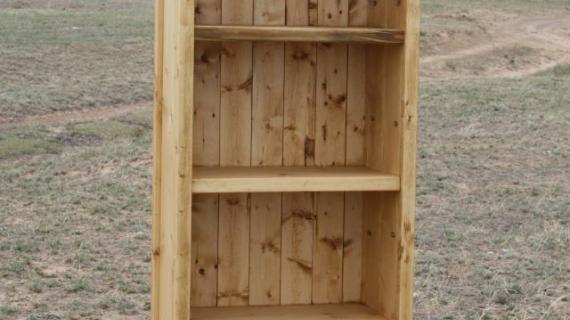
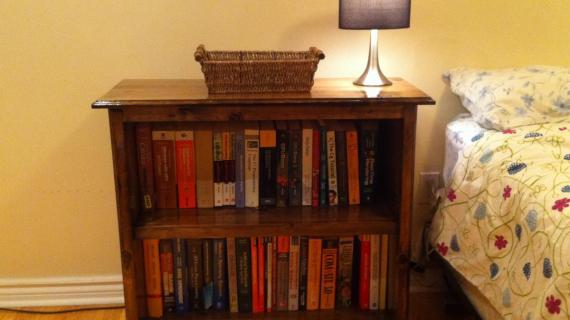
How to build a rustic wood bookshelf. Free plans, shopping list, cut list and real photos to help you build your own bookshelf. This is a reader favorite and is easy to customize in shape and size! All pine or white wood boards. From Ana-White.com
About this Bookshelf
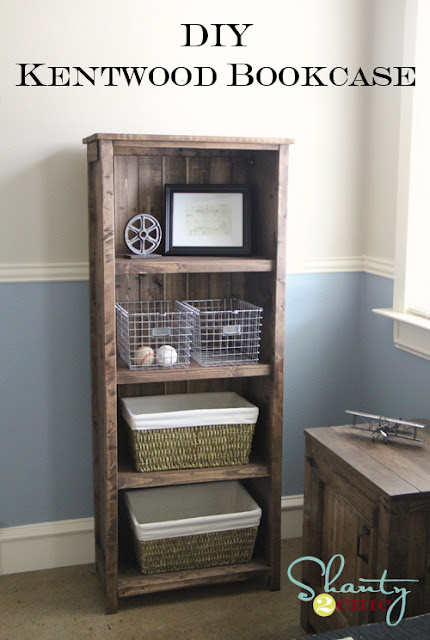
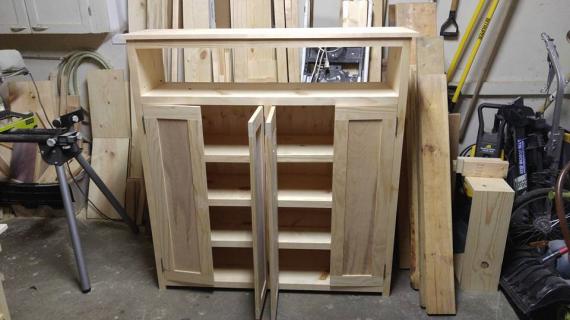
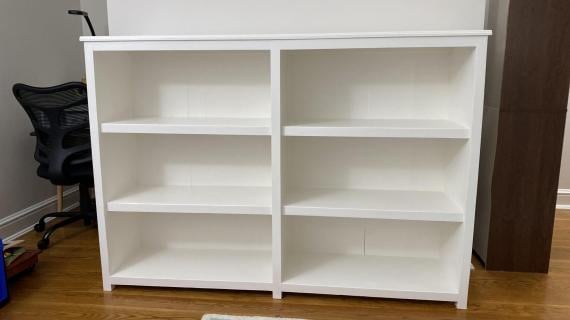
Free Plans to Build this Rustic Pine Wood Bookshelf
Preparation
- 1 - 4 feet long 1x12
- 2 - 8 feet long 1x12
- 2 - 8 feet long 1x2
- 2 - 8 feet long 1x3
- 4 - 8 feet long 2x2
- planking for back (can use 1/4" panel or 1x boards or tongue and grove boards)
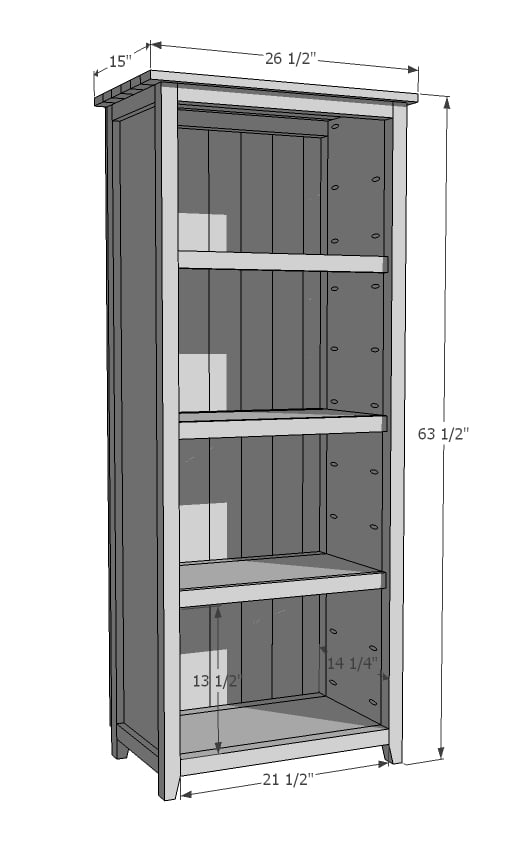
- 2 - 1x12 @ 60 3/4" (sides)
- 4 - 1x2 @ 11 1/4" (side trim)
- 4 - 2x2 @ 62 3/4" (legs)
- 4 - 2x2 @ 21 1/2" (top supports and bottom shelf trim)
- 4 - 1x12 @ 21 1/2" (shelves)
- 6 - 1x2 @ 21 1/2" (shelf trim)
- 6 - 1x3 @ 26" (top)
- 7 - 3 1/2" wide planking or 1x4s @ 60" long (back)


Please read through the entire plan and all comments before beginning this project. It is also advisable to review the Getting Started Section. Take all necessary precautions to build safely and smartly. Work on a clean level surface, free of imperfections or debris. Always use straight boards. Check for square after each step. Always predrill holes before attaching with screws. Use glue with finish nails for a stronger hold. Wipe excess glue off bare wood for stained projects, as dried glue will not take stain. Be safe, have fun, and ask for help if you need it. Good luck!
Instructions
Step 1

Start by drilling 3/4" pocket holes along side edges of the sides. You may also wish to drill holes along top edge for attaching top. Then add the side trim to the outsides.
NOTE: If you don't have a pocket hole jig, you can still build this plan. You will need to carefully predrill holes and use 2 3/4" trim screws to attach legs in next step.
Step 2

Add the legs ...
Step 3

And the top supports.
Step 4

Build your bottom shelf first (see next step) and then attach to bottom.
Step 5

Step 6

And insert into the bookshelf. I recommend having fixed shelves in this project to give you something to attach the back planking to.
Step 7

Build top first with 3/4" pocket holes and attach to top.
NOTE: If you do not have a pocket hole jig, cut 3 2x2s 11 1/4" long and screw between top supports. Then use these supports to attach top planking to.
Step 8

Finally add the back. To conserve costs, try adding planking or tongue and groove to back, but you can always use 1x4s.
It is always recommended to apply a test coat on a hidden area or scrap piece to ensure color evenness and adhesion. Use primer or wood conditioner as needed.
Comments
Eric Page (not verified)
Wed, 03/14/2012 - 18:47
Very nice.
Very nice.
Debbie Christianson (not verified)
Thu, 03/15/2012 - 04:01
Just great
Fabulous job! I love following your blog!
Angel Rose
Thu, 03/15/2012 - 07:09
Love all the plans . . . more Videos
I Love this plan. How about some short videos to put as reference for ALL projects. For example : how to taper legs, checking/adjusting for square, using a jigsaw . . .
lauren eg (not verified)
Fri, 03/16/2012 - 09:13
love this bookshelf...
this shelf is perfect and exactly what i want. i can't wait for this weekend.
i must ask, though, where did you get those new milk crates? i've been looking for a couple and cannot find one online for less than $60 because they're all rusty and 'vintage'.
Ana White
Sun, 03/18/2012 - 17:08
Thanks everyone! The milk
Thanks everyone! The milk crates are Shanty2Chic's so I can't advise on where to purchase.
@Angel Rose would love to do more video! Video just requires a ton of time *sign* so haven't been able to put together videos for every plan.
Little miss builder
Mon, 04/09/2012 - 05:19
Staining
I built this shelf and it was pretty simple to build. I sanded it down and put wood filler in screw holes and sanded it again, then stained it. My wood filler spots showed through stain. Was wondering what I did wrong and how to fix it, thanx.
Dr. D- (not verified)
Tue, 03/20/2012 - 13:12
Please fix the PDF link!
Please fix the PDF link! This seems to be a chronic problem with the site. Just sayin'...
Little miss builder
Wed, 04/04/2012 - 09:24
Kentwood bookshelf
Just made this yesterday. Enjoyed it.
Lilmissbuilder (not verified)
Mon, 04/09/2012 - 04:52
Staining
I built this last weekend. Sanded it down,put wood filler on, sanded it again,then stained it but where my wood filler was put showed through stain. What did I do wrong and what could I do to fix?
mattyjaco (not verified)
Wed, 05/09/2012 - 15:51
you didn't do anything wrong,
you didn't do anything wrong, you can re sand the whole piece then use a pre-stain wood conditioner before staining again
derrick.mclendon (not verified)
Sun, 06/24/2012 - 22:36
May I ask what color stain is
May I ask what color stain is used on this piece?
Philippe Merta (not verified)
Tue, 09/04/2012 - 11:08
When to use 2-1/2" pocket hole screws
In the materials list there are 2-1/2" pocket hole screws there but I can't see any place in the building instructions when they are used. Did I miss something or where are they supposed to be used?
Jason P. (not verified)
Fri, 10/12/2012 - 23:11
RE: When to use 2-1/2" pocket hole screws
In step 3 and 4 you'll use 2-1/2" pockets for the 2x2 top brace and bottom shelf?
Sarah Willey (not verified)
Thu, 01/10/2013 - 14:44
I can't wait to make a pair
I can't wait to make a pair of these!! I need someplace other than my floor to store all of my nursing textbooks. How much would the wood be for one of these? I believe I guessed about $40-50. Has someone made one already? How much did they spend? Hah, I'm a broke nursing student so I thought I'd ask before I drive to the store to get the wood
KarlaMarinee
Thu, 04/18/2013 - 09:32
Love it!!
We are working on it right now! Question: what kind of wood do you usually work with to build your projects?
emilymac33
Mon, 11/11/2013 - 10:54
Level Shelves
I'm having a hard time getting my shelves level *frustrating!*
...do you have any tips so that I don't keep putting holes in the insides?
dbizzle
Sun, 05/04/2014 - 21:52
Easy level shelves
Start at the bottom and work up.
For fixed shelves, cut spacer blocks and work your way up.
Otherwise, invest in a shelf pin jig (purchased or homemade) and a drill depth stop. Again, start at the bottom and work up. As long as the bottom is level, everything else will fall into place.
benjaminrogers
Fri, 12/27/2013 - 11:01
Has anyone made these out of
Has anyone made these out of plywood? If you used 3/4" finish ply you could get some nice finishes. Just curious, Ben
emilybear75
Fri, 05/02/2014 - 15:22
Making it wider?
I am trying to build a bookshelf to fill an exact space. How much wider can you safely make this without the shelves bowing?
SherieB
Sun, 08/24/2014 - 05:35
Cost in Australia
Hello, I really wanted to build this bookcase, so I converted the measurements to what I could buy in our biggest hardware store, Bunnings here in Central QLD, Australia.
Cost of Timber (Pine) $207.14
Nails, Screws, Glue, Stain, Wood Putty $89.69
Total Cost $296.83
I can buy a similar type bookcase for $366.41 from https://eurekastreetfurniture.com.au/6x3-stockman-bookcase
Looking at the comparison, I don't think its worth the effort. :(
If anyone wants my spreadsheet with the converted timber measurements, let me know and I will send to you.
Cheers,
Sherie
In reply to Cost in Australia by SherieB
ktbrix
Wed, 10/07/2015 - 10:41
Its Your Location
I had the same problem when I lived abroad in Europe. The cost of lumber was more than twice as much as it is here in the United States. However, I just completed this project in the United States and it cost less than $100 for the wood, pocket screws, and finishing nails. Purchasing all of the tools required to properly complete the project (except a saw; my hardware store cut all of the wood for me for free) was nearly $100 more. However, I thought it was worth it, because I wanted to purchase all of the tools eventually anyways, and now I'll have them on hand for future projects. I'll be building an identical bookshelf this weekend so that they'll be a matching pair, and with all costs included, it'll be less than $300 for two custom solid wood bookshelves and a collection of tools.
cbirkey
Thu, 10/09/2014 - 19:01
Need More Details for the Top
I'm currently in the middle of building this bookshelf but am confused about how to specifically make the top. Could you advise with more detail? Thanks!
alberthansen
Fri, 10/10/2014 - 08:29
i can't wait for this weekend
i can't wait for this weekend. i must ask, though, where did you get those new milk crates? and How much wider can you safely make this without the shelves bowing? thanks
AKenny11
Wed, 10/22/2014 - 15:31
confused about the top
I'd like a little more clarification on how to assemble and attach the top please? Thanks
In reply to confused about the top by AKenny11
ktbrix
Wed, 10/07/2015 - 10:50
Assembling the Top
I used wood glue and clamps to attach all six planks to each other to make as smooth and solid a surface as possible. After the wood glue dried, I attached the top by hammering finishing nails through the top of each of the six planks into the frame all the way around. Then I covered the nail holes with wood filler, which is probably not necessary, but I wanted them to be less noticeable. I let that dry, sanded the entire top down, cleaned it, conditioned it, then stained it.
Emstock1
Mon, 04/27/2015 - 16:48
Attaching top
Love these and I'm to the step where you connect the top. I built the planked top with my kreg jig but not sure how to attach it? Any advice?
In reply to Attaching top by Emstock1
Ana White
Mon, 04/27/2015 - 21:00
You can just glue and nail to
You can just glue and nail to the top. Hope this helps!
In reply to Attaching top by Emstock1
wthalin
Thu, 05/21/2015 - 13:41
You can also just countersink
You can also just countersink through the (2) 2x2 top supports straight into the backside of the top. Just make sure you do not use too long of a screw. 1 1/2" should do the trick.
paleighalanna
Wed, 10/19/2016 - 15:22
Wanting to make this bookself
Wanting to make this bookself soon, but want it bigger. Does any have plans they can send me?
William Dyer
Wed, 01/03/2018 - 13:09
Kentwood Bookshelf
I have made several Kentwood Bookshelfs. I made the standard four shelf, a two shelf as a night stand. I made another two shelf but made the shelves 48 in wide. One of the two top shelf was plank like your plans for a TV stand and the other was made from a fourty inche by sixteen inche piece of wood. I used this one as livingroom book/picture stand. The solid top makes it easier for picture frames to set on.
dbroersma
Fri, 01/12/2018 - 06:27
Question about Holes on Side
This looks awesome and I'm hoping to learn more about woodworking. This plans seems simple but I had a question about the pocket holes on the sides of the shelves. Why do we need to drill so many if we are only putting four shelves. The only reason I can come up with would be if I wanted to have moveable shelves? I'm not sure. Thanks!
In reply to Question about Holes on Side by dbroersma
yummybear
Tue, 07/02/2019 - 08:21
You're only drilling 2…
You're only drilling 2 pocket holes on each side of each shelf. The other pocket holes are for attaching the legs to the 1x12.
mhellis6
Sun, 06/28/2020 - 08:23
Lots of questions
Hello. I am wondering if I can make this without the legs and trim. Can I just make my bottom shelf higher so the side piece is its own leg? And can the top attached directly to the side piece? Sorry for all the questions. It's my first project.
Debramer1
Sun, 08/16/2020 - 00:46
Bookshelf
Bookshelf
cwatson
Thu, 11/26/2020 - 08:12
Pocket Holes
So, each pocket hole is 8" a part?