


The easiest slipcover pattern ever! Make the chair too!


Hi everyone!!!
I hope your Mother's Day was lovely and full of appreciation. As a mother myself, I have huge respect and admiration for all mothers. Mom's give so much, give up so much, Mother's Day is a very special day for us to make sure our own Mom knows how much we love and appreciate her.
We had such a great Mother's Day weekend!
My present isn't quite done yet, so I can't spill all the details yet .... but I think you will be as excited about my gift as much as I am! Oh I can't wait!
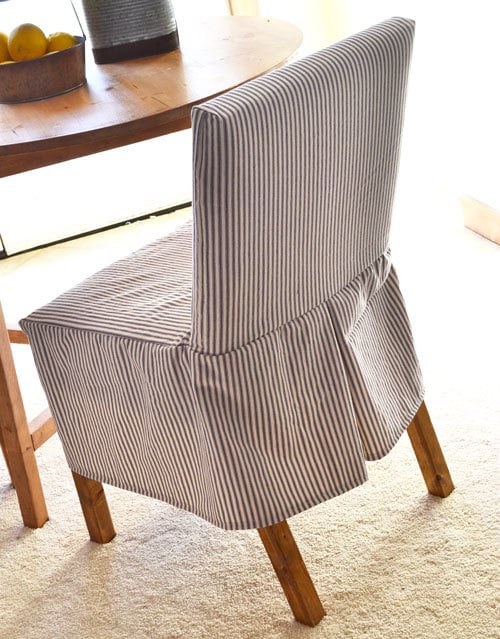
I've been wanting to share a little sewing project I did a while back. Now I'm no pro at the sewing machine, but I think that's what you may like about this project. It's so fast and easy anyone - even me - can make a parson chair slipcover in ten minutes. And that's with directional fabric!
I made these parson chairs a year or so ago, and we love them! But after a year of constant use, the fabric was starting to look a little dirty and old. I didn't want to spend a ton of time making a slipcover, just something quick and easy to refresh the chairs.
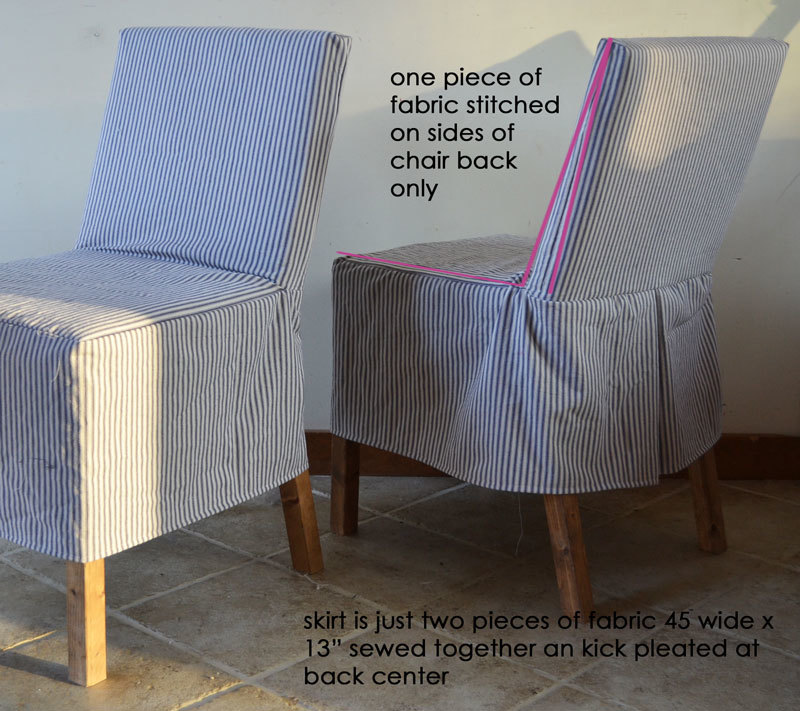
So what I did was use one piece of fabric to make the seat/back/back and then another for the skirt! So easy!
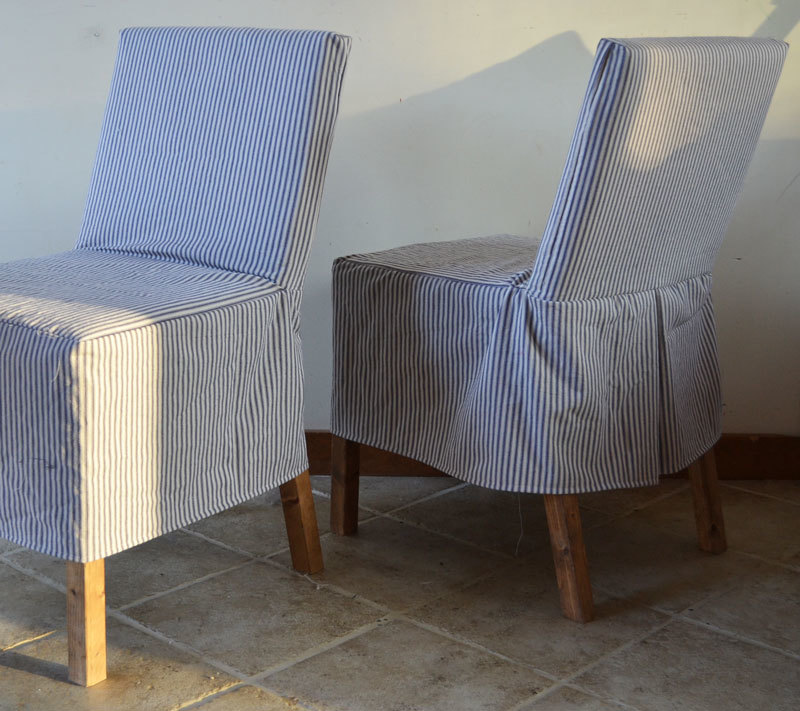
Once I figured out the pattern, the second chair slipcover only took me ten minutes to make! And the stripes matched up perfectly!
You could use this pattern to make ruffled slipcovers, floor length slipcovers, or just little short ones.
Preparation
2 yards fabric per 2 chairs, 45" (I use decorator weight)
thread and notions
sewing maching
cutting board and rotary cutter
pins
Per chair:
1 - 20" x 48 1/2" Fabric
2 - 45" x skirt length
Please read through the entire plan and all comments before beginning this project. It is also advisable to review the Getting Started Section. Take all necessary precautions to build safely and smartly. Work on a clean level surface, free of imperfections or debris. Always use straight boards. Check for square after each step. Always predrill holes before attaching with screws. Use glue with finish nails for a stronger hold. Wipe excess glue off bare wood for stained projects, as dried glue will not take stain. Be safe, have fun, and ask for help if you need it. Good luck!
Instructions
Step 1

UPDATE: The first, FIRST thing you have to do is make the chair.
The first thing is to cut your fabric. I made two chair slipcovers, and because I used directional striped fabric, I layed out the pieces as shown in the diagram. If your pieces do not have a direction, you could lay them out differently. Also, I made my skirts 12" long - you can make your skirts any length with 18" being floor length. From 45" wide fabric, you will need to cut two strips per chair.
Step 2

Take the main seat/back piece and fold it over with right sides together so the fold overlaps 16 1/4". Pin and stitch with 1/4" inseams along edge.
At this point, I recommend fitting the slipcover over your chair to make sure the fit is right. If you are satisfied, remove and then clip in 1" at base of fold over as shown in diagram.
Step 3

Then fit slipcover back on chair, still with wrong side facing outward. The corners will come to a point as shown in picture. Pin and draw a line over the excess fabric as shown in photograph. Remove and stitch over line. Clip off excess fabric leaving 1/4" for seam allowance.
This completes the seat/back! Turn so right sides are out and fit over chair. Now all we need is the skirt!
Step 4

For the skirt you will need a long strip. Sew the two strips together to create this long strip using 1/4" inseams as shown in diagram.
Step 5

Step 6

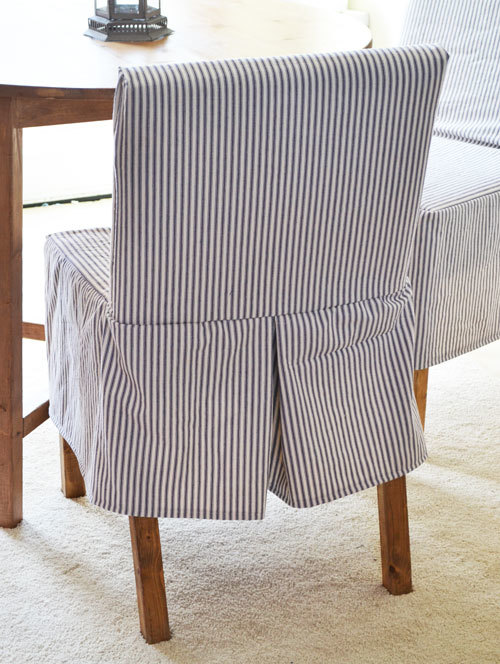
Now we just got this back piece of the skirt to figure out. No biggie. What I did was sew the two skirt ends together first. Then I found the center of the back piece and matched up with center back seam of skirt and pinned. Then I pinned excess fabric into a kick pleat with right sides together. And then I just stitched it all up. Super easy.
Step 7

And then I just hemmed the entire skirt by pressing under and stitching. You could even hem before attaching skirt to seat/back but I wanted an opportunity to adjust the hem if necessary.
And that's it!
It is always recommended to apply a test coat on a hidden area or scrap piece to ensure color evenness and adhesion. Use primer or wood conditioner as needed.
Comments
Juanita_r
Wed, 05/16/2012 - 21:27
Perfect for the lil people in our lives. just mess and wash
These are such a great idea for messy kids. no need to stress constantly about them spilling dinner or drinks. just mess and wash!
www.formalites… (not verified)
Sun, 11/04/2012 - 23:21
This is interesting blog
This is interesting blog post. I truly liked this. I highly recommend you always keep submitting such an educational article...
Robin @ happil… (not verified)
Fri, 11/30/2012 - 14:59
Yippee, a simplified slipcover :)
Thank you Anna, your slipcover may just be the {much} easier solution that I so hoped to find for my dining room parson chairs. Love the cute kick pleat idea too. Thanks again! Robin
Moppet
Tue, 04/26/2016 - 10:05
I'm confused by the 1" cut
I'm confused by the 1" cut that has to be made. What is this for? I am covering a different chair so I guess it needs to be a different length cut?
Moppet
Tue, 04/26/2016 - 11:21
Please could you tell me what
Please could you tell me what the measurement should be for the 1" cut if I am using a chair with different dimensions?
CSaintD
Wed, 04/27/2016 - 08:04
1" cut is for
The 1" cut is so you get a box shape at the corner of the chair. If your chair is wider, you may want to stitch in further giving you a bigger box shape. I would suggest trying it on a scrap piece of fabric and seeing how it works before sewing and cutting the actual piece.
Paticohairs
Wed, 07/27/2016 - 12:57
Slip Cover for Chair
do I have to cut a separate pattern piece for the place where one sits? (Square piece). I'm a little confused. Or do I make the back piece of chair long enough so that the back piece reaches over to the front? Thanks so much!!