

Free plans to make a cute play table with colorful library catalog style drawers! Make this play table from solid wood boards!


Hi Everyone!
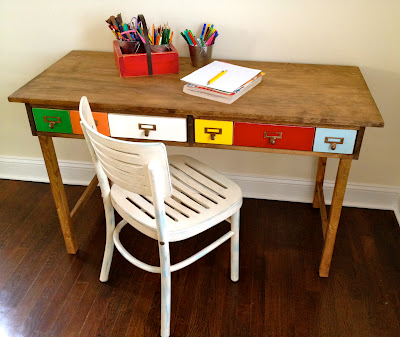
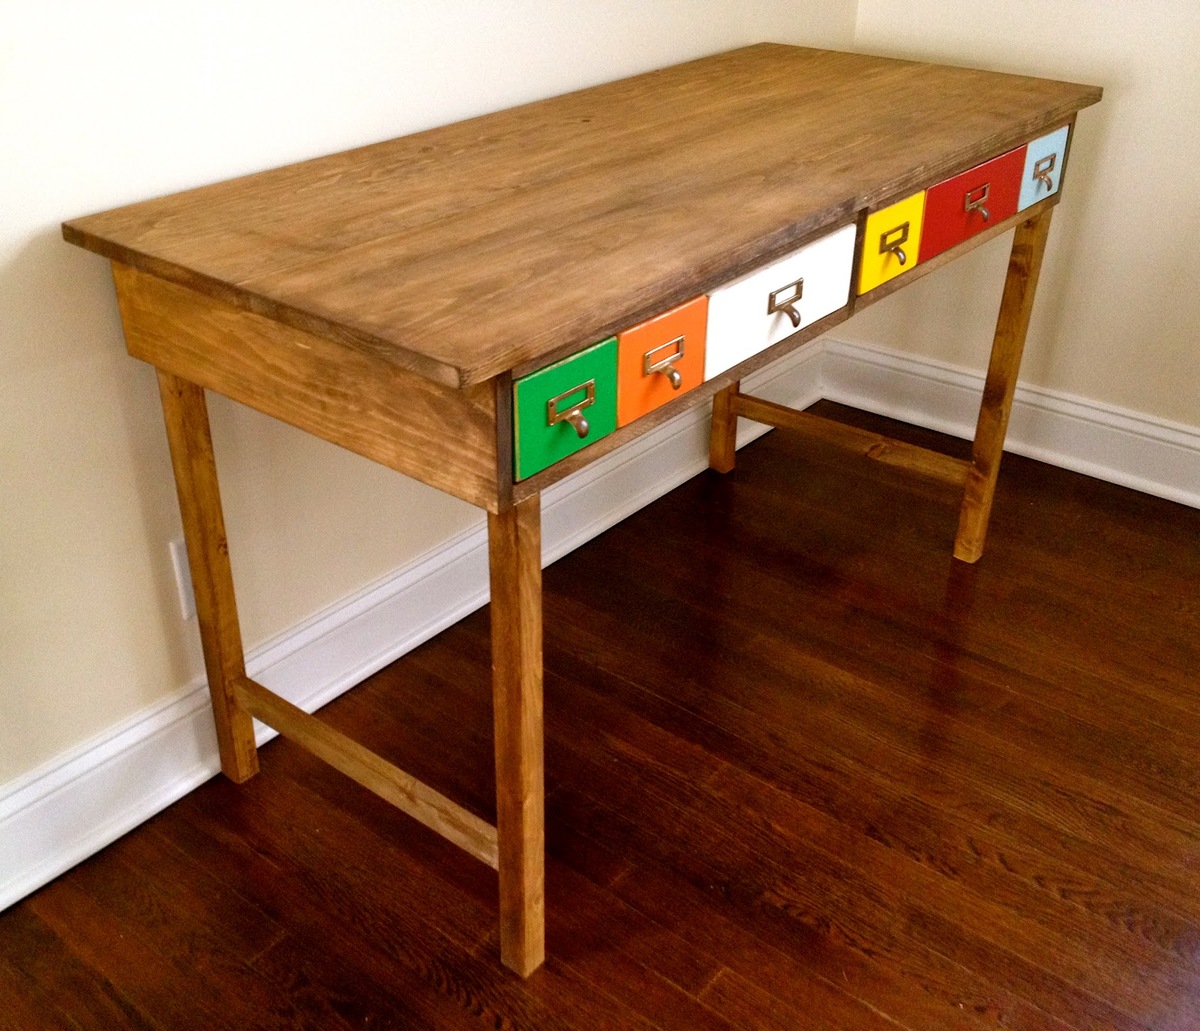
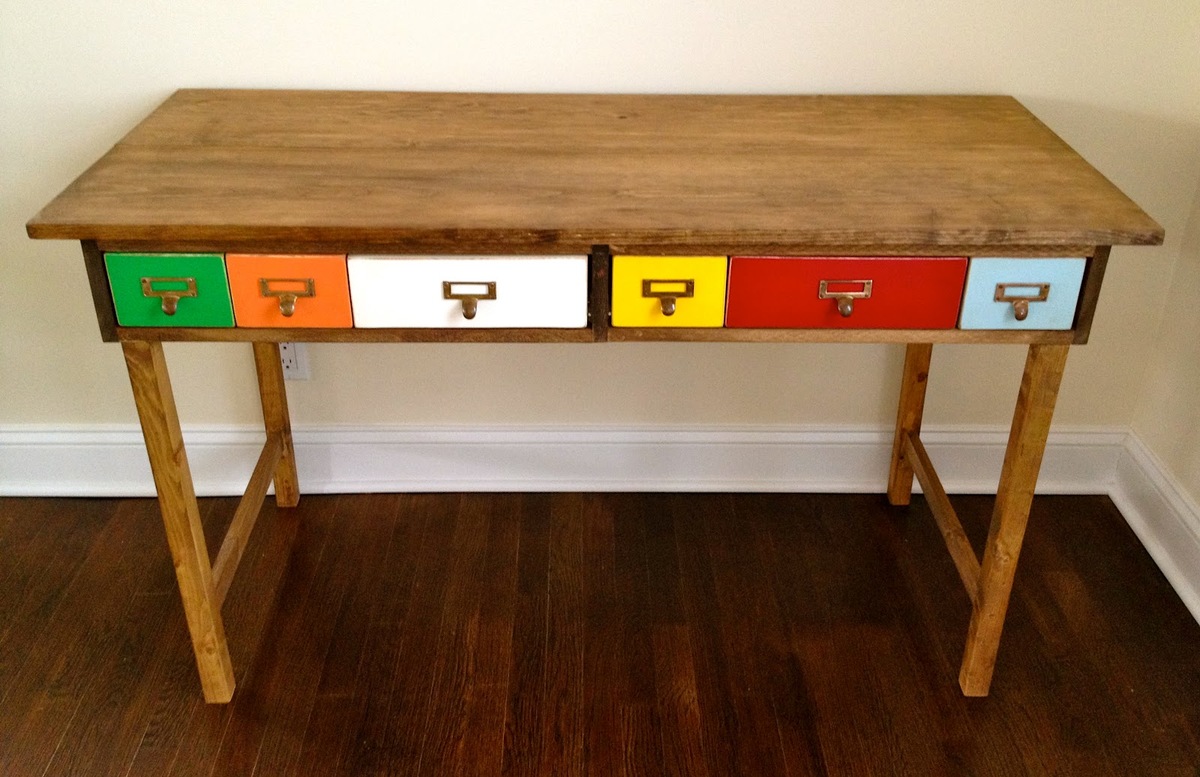
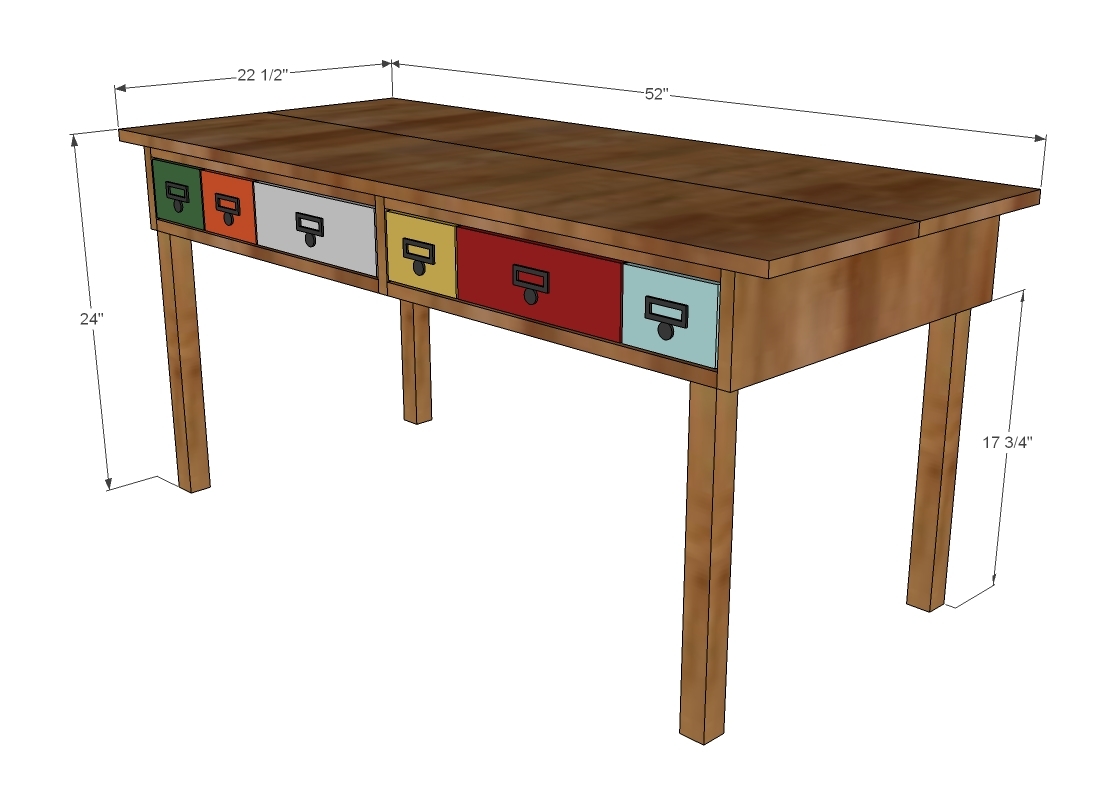
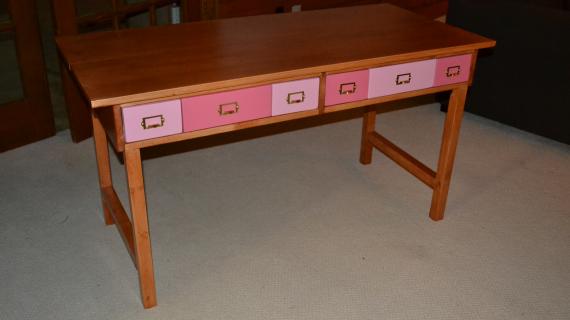
Today we have such a fun little project for your little ones! It's a play table with two full drawers, complete with colorful decorative drawer faces like a vintage library catalog.
My friend Jaime from That's My Letter and I worked on the play table together. We wanted to keep the plans simple and made from solid wood boards, but charming and cute at the same time.

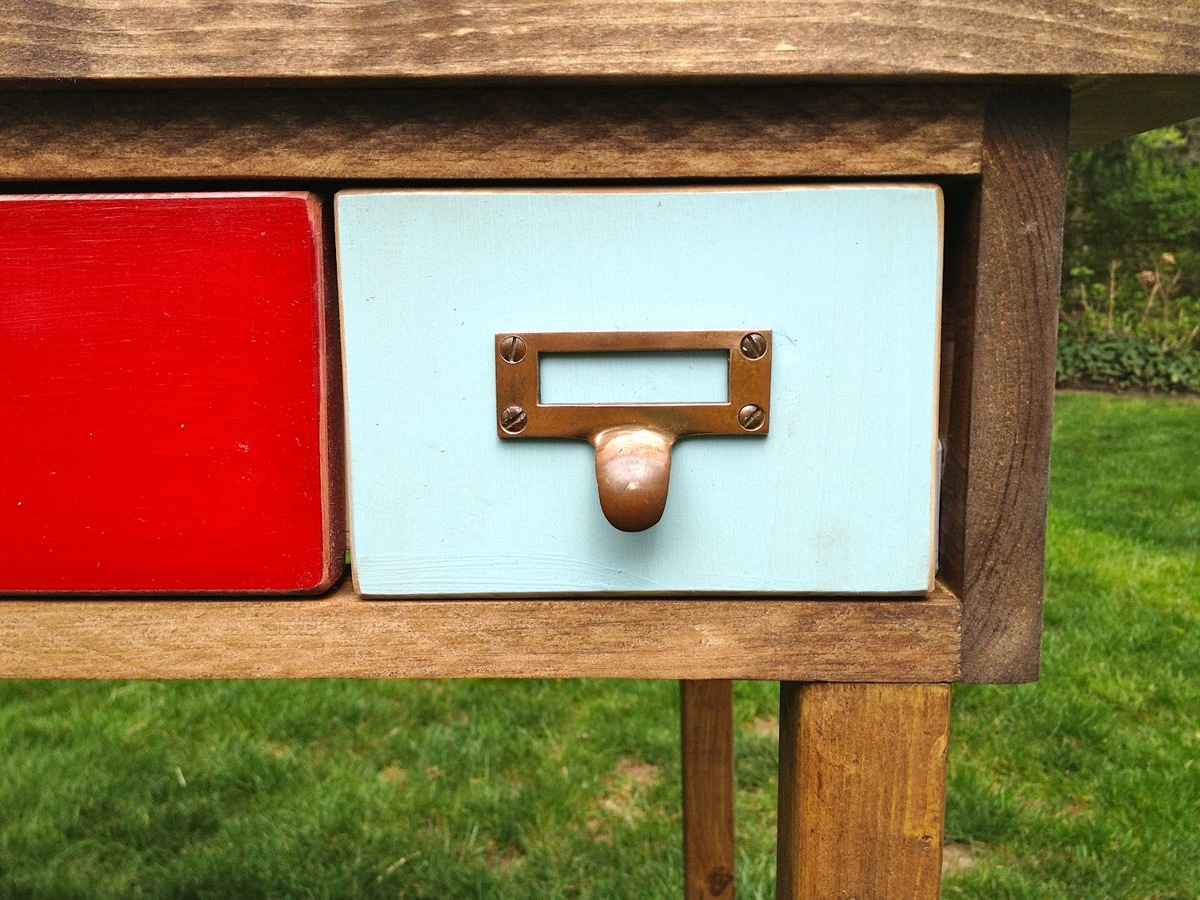
It's the drawer faces and the little hardware pieces that make this table! Jaime has lots of details and construction photos on her blog that I hope you take a second to check out. Lots to be learned from this lady!
Preparation
1 – 1x12 @ 10 feet long
1 – 1x6 @ 12 feet long
1 – 1x2 @ 8 feet long
1 – 2x2 @ 8 feet long
2 – 1x3 @ 8 feet long
2 – 16” white euro style bottom corner mount drawer slides
Scrap ¼” plywood for drawer bottoms
6 drawer pulls with labels
1 1/4” pocket hole screws
1 1/4” finish nails
2” screws or finish nails
2 – 1x12 @ 52” (top)
1 – 1x6 @ 46 1/4” (back apron)
2 – 1x6 @ 22” (side apron)
1 – 1x6 @ 21 1/4” (center divider)
4 – 1x2 @ 22 3/4" (front trim)
2 – 2x2 @ 17 3/4" (front legs)
2 – 2x2 @ 23 1/4" (back legs)
DRAWERS – CHECK CUT LIST TO FIT
4 – 1x3 @ 20 1/4"
4 – 1x3 @ 16 ½”
2 – 1/4” plywood @ 21 3/4" x 16 1/2"
4 – 1x6* @ 3 3/4" (drawer false faces)
2 – 1x12* @ 3 3/4” (drawer false faces)
*Assumes 1x6 is 5 1/2" wide and 1x12 is 11 1/4" wide


Please read through the entire plan and all comments before beginning this project. It is also advisable to review the Getting Started Section. Take all necessary precautions to build safely and smartly. Work on a clean level surface, free of imperfections or debris. Always use straight boards. Check for square after each step. Always predrill holes before attaching with screws. Use glue with finish nails for a stronger hold. Wipe excess glue off bare wood for stained projects, as dried glue will not take stain. Be safe, have fun, and ask for help if you need it. Good luck!
Instructions
Step 1
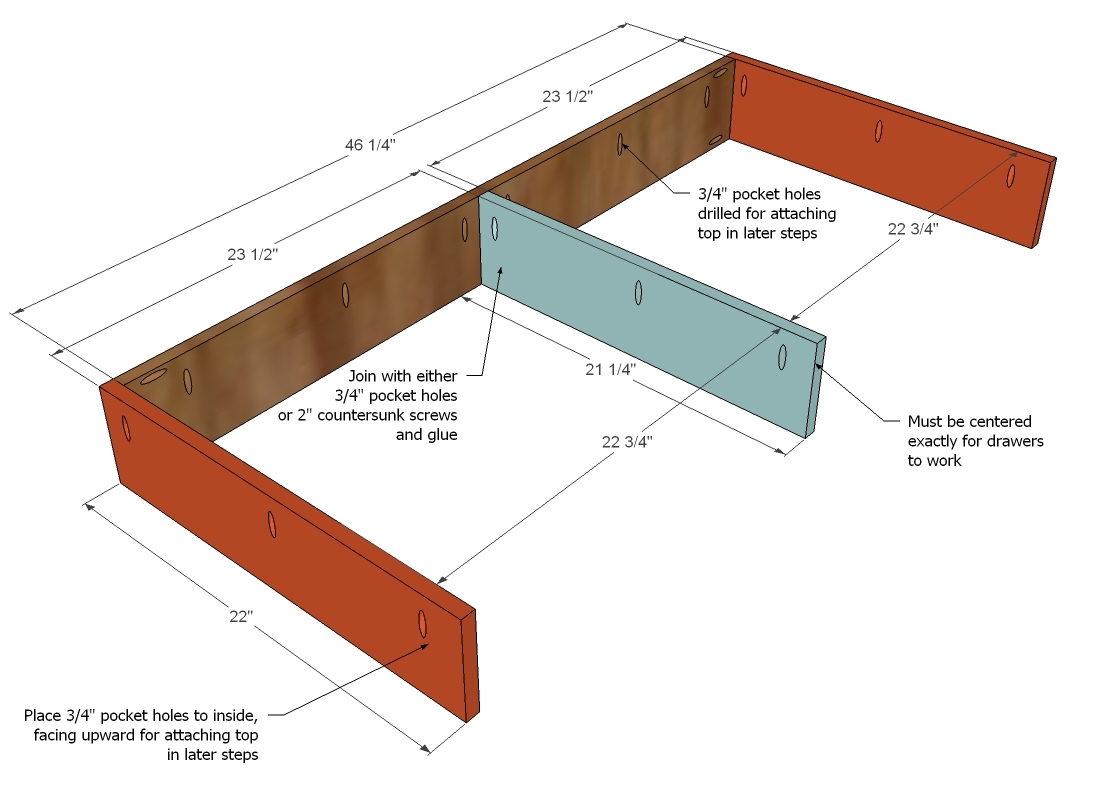
Start by building the main drawer box as shown in diagram.
NOTE: You may wish to drill pocket holes facing upward on the insides of aprons for later attaching top through.
Step 2

Then trim out front.
Step 3

We'll add our legs to the front trim. If you don't have a Kreg Jig, consider attaching front legs first to bottom trim before attaching.
Step 4

Now the back legs. These extend all the way to the top of the table for added support.
Step 5

Step 6
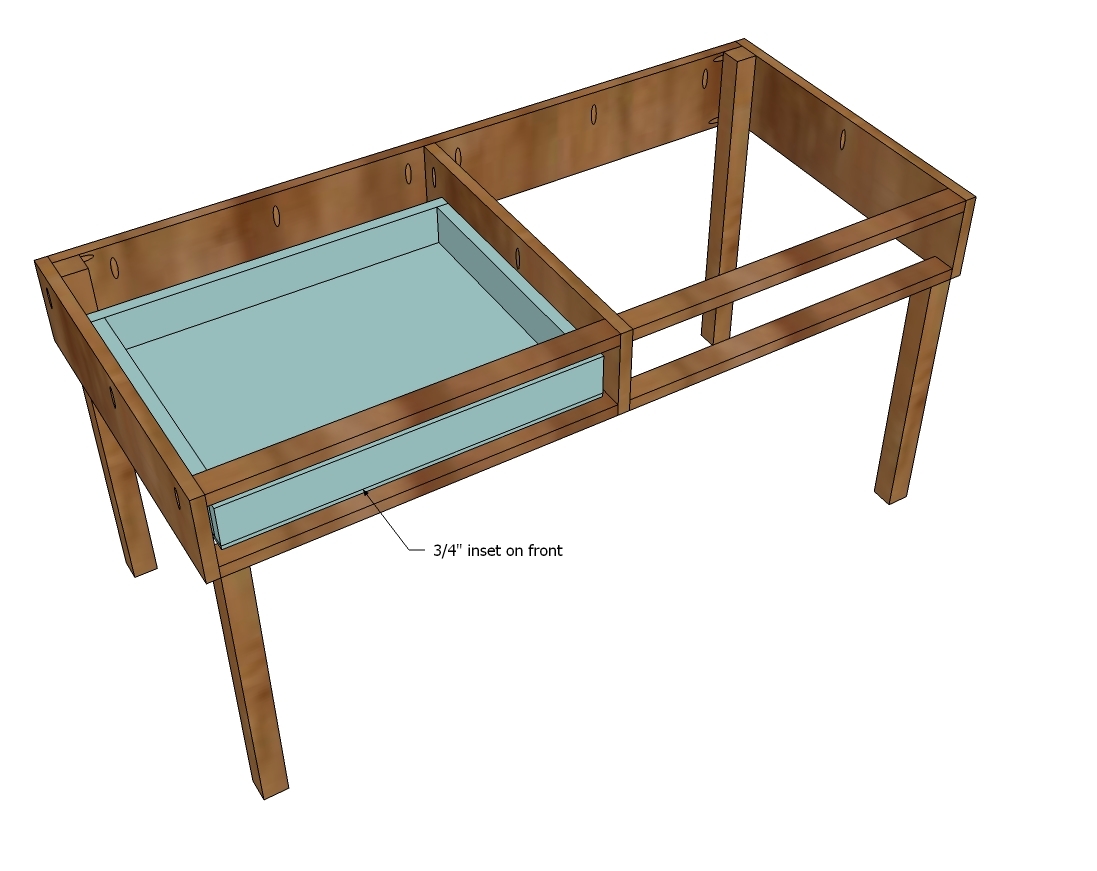
It is ALWAYS easier to do these things before the top is on!! Install drawers using the white euro style bottom side corner mount drawer slides.
IMPORTANT: The drawer faces need to be installed 3/4" inset to give room for the false drawer faces.
Step 7
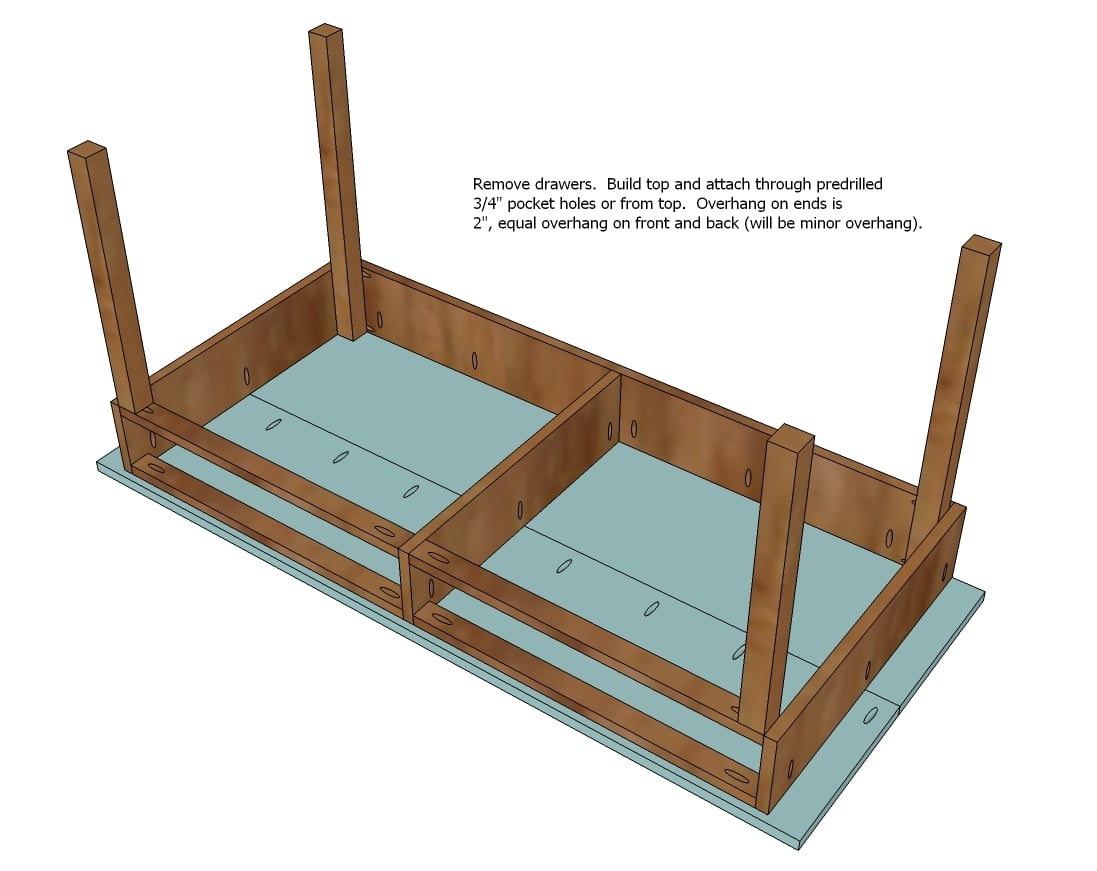
Remove the drawers and attach the top. Top can also be attached through the top with screws into aprons if you did not go the pocket hole route.
Step 8

And now the super fun part! Attach the drawer faces to the drawers. What I do is position so there is an even 1/8" gap on all sides, then nail on with a few finish nails (1 1/4") and glue. Then I open the drawer up and from the inside add a few screws just for extra measures. Remember, the drawer faces are supposed to look like individual drawers, so allow gaps between the drawer faces too.
Step 9
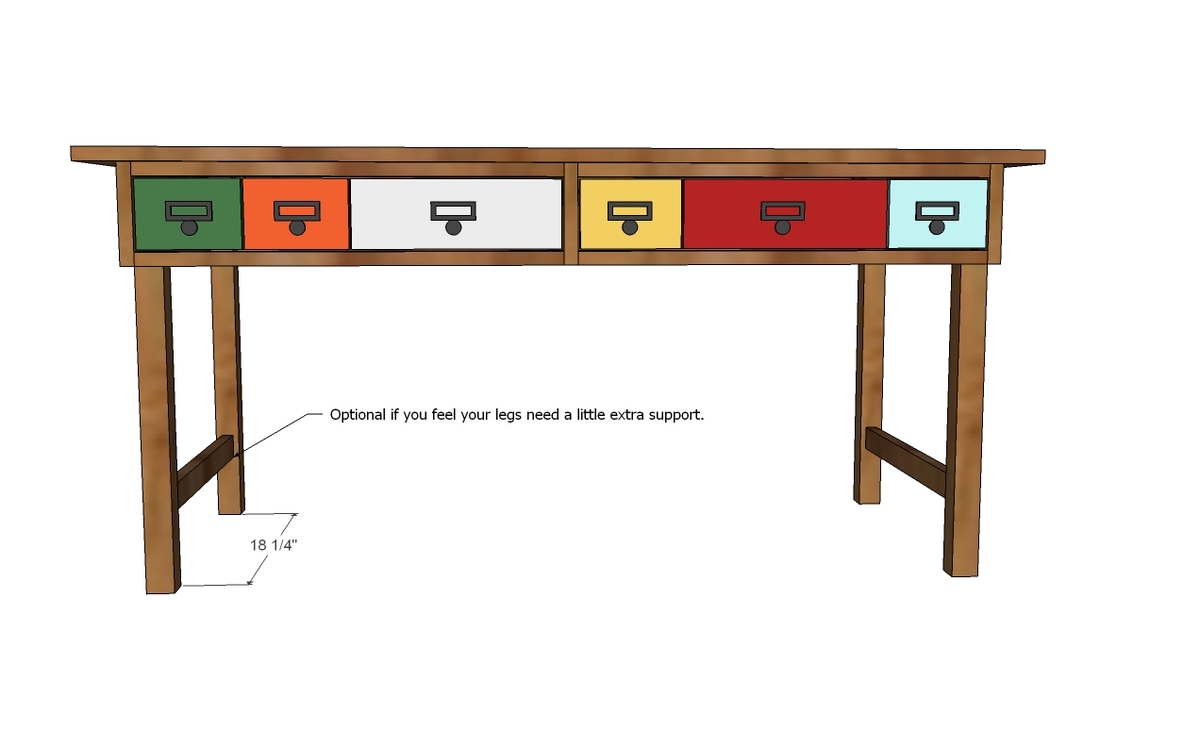
Jaime opted for a little taller height, so I suggested adding some supports at the base of the legs. This one's up to you, but it won't hurt!
Step 10

And don't forget, there's lots more details and tips and tricks available to you in Jaime's blog post as well. Good luck building!
It is always recommended to apply a test coat on a hidden area or scrap piece to ensure color evenness and adhesion. Use primer or wood conditioner as needed.
Comments
TiffanyGJD (not verified)
Wed, 05/02/2012 - 10:56
you read my mind!!!
OMG, you read my mind! I've been drooling over this in the PB Kids catalog for months now- guess what my son's desk is going to be!!
dan-k
Wed, 05/02/2012 - 13:33
Front leg issue
I would worry that the front legs would be wobbly being attached only from the ends. Maybe the sides could be made taller so that they overlap the front legs giving another point of support. Or add a second support between the legs.