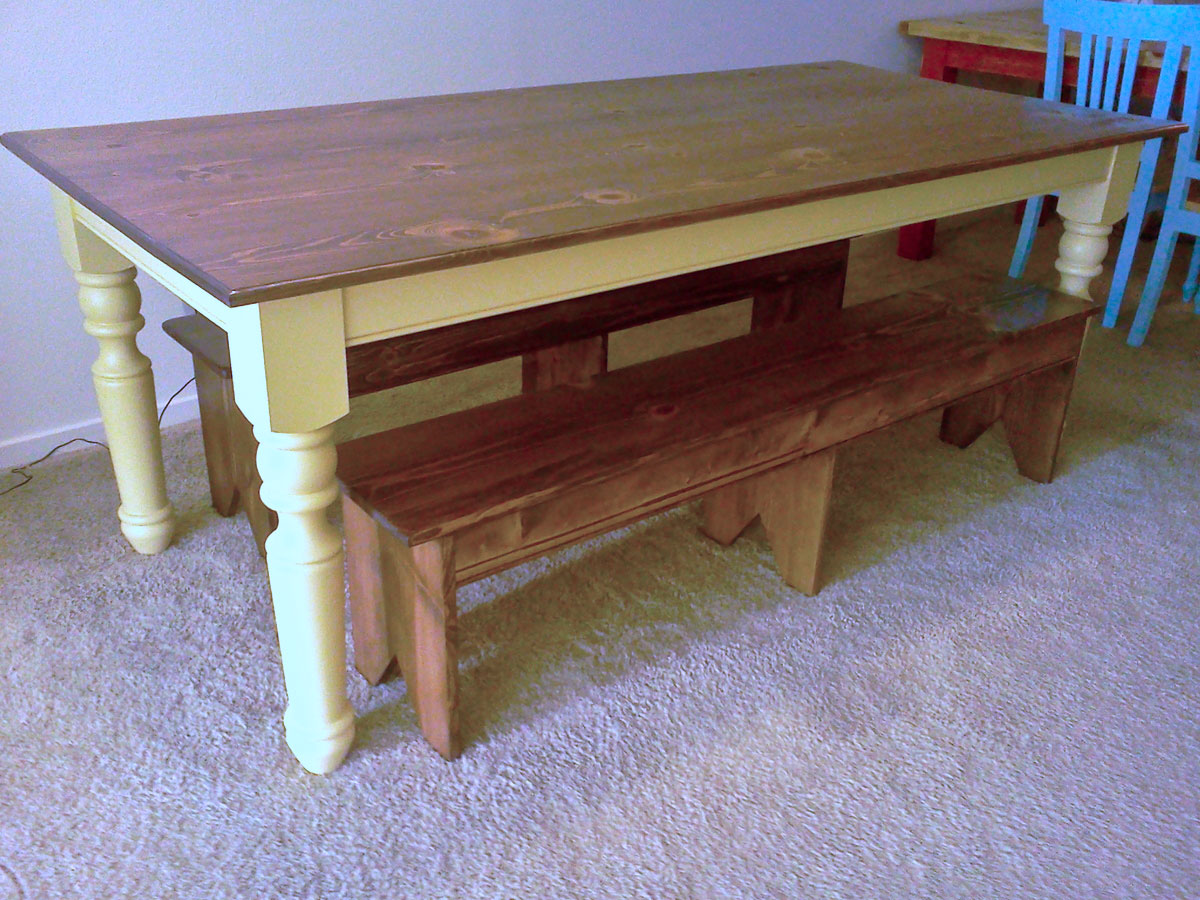


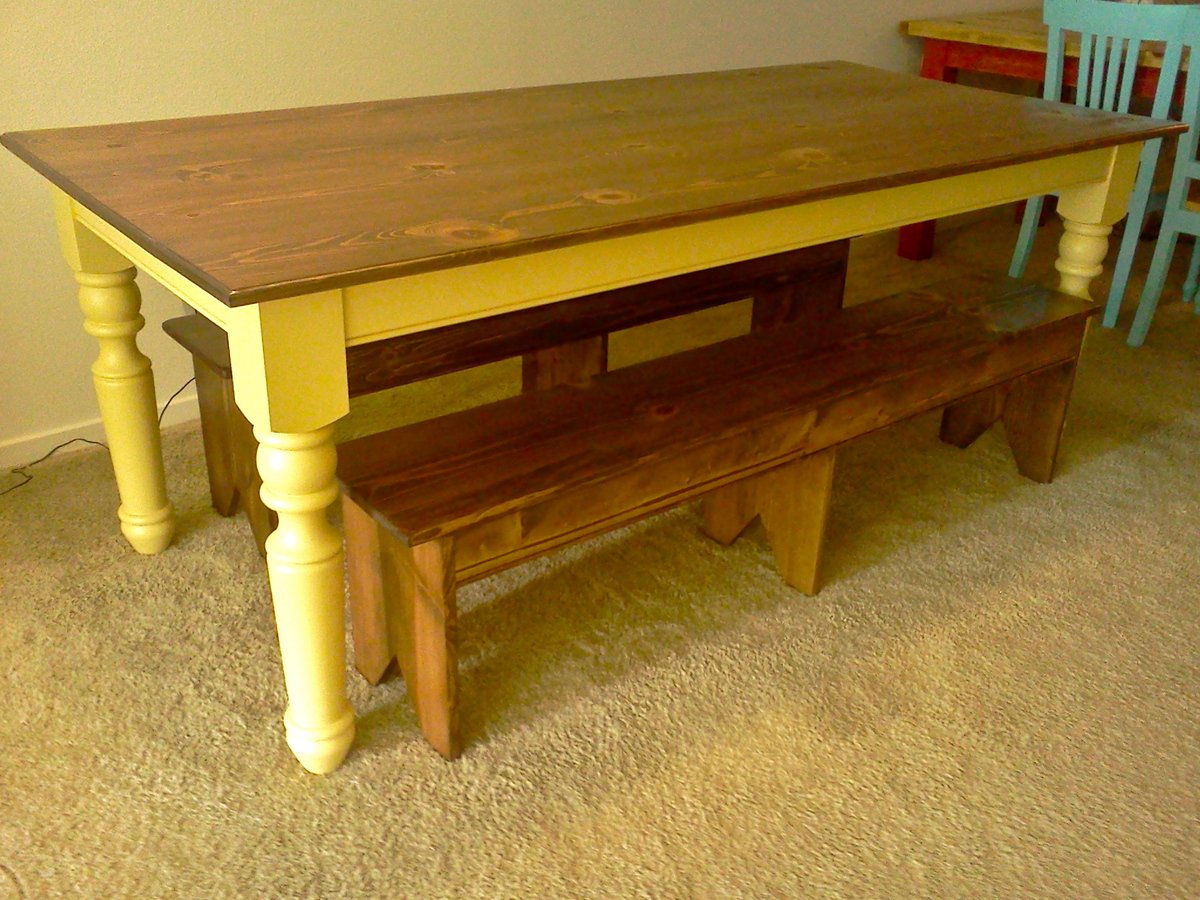
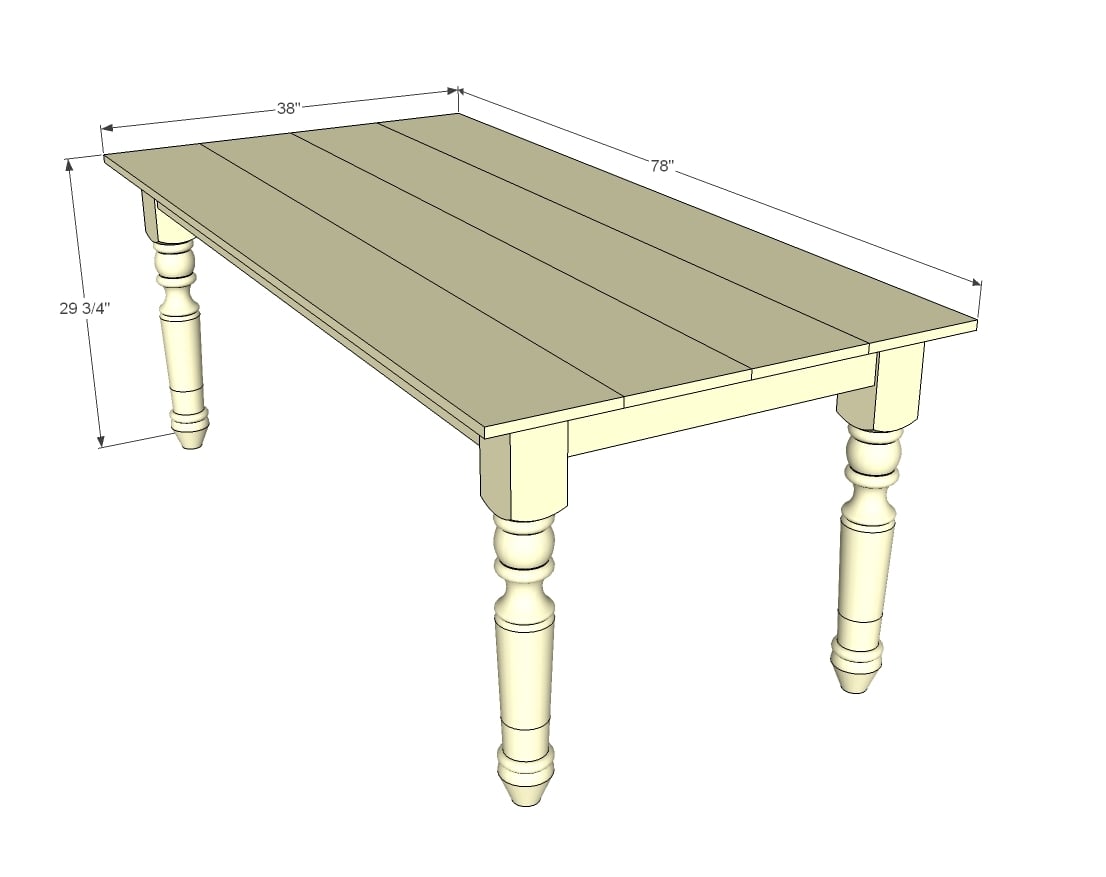
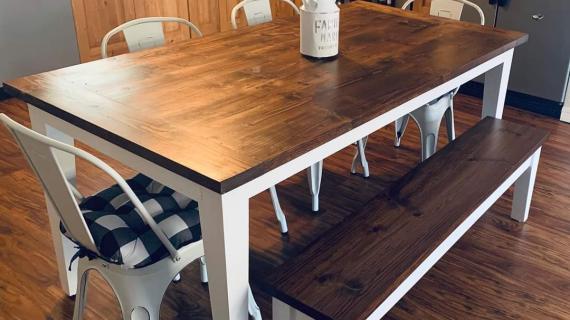
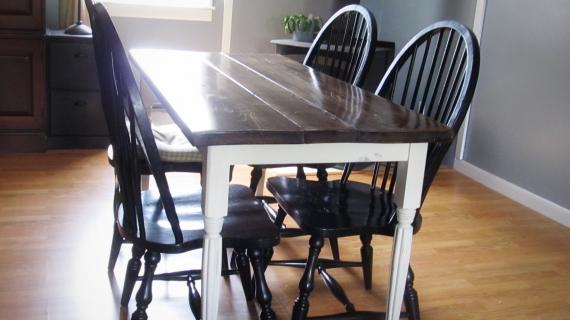
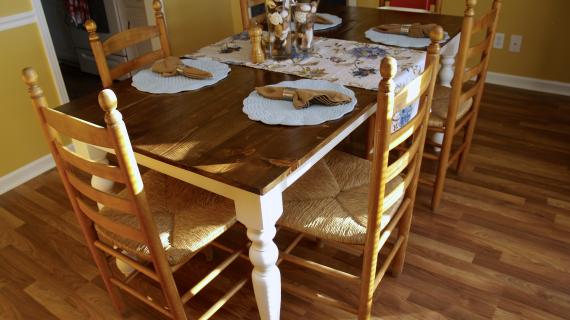
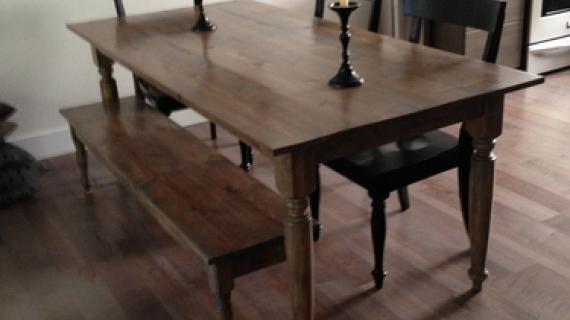
Build a farmhouse table with turned legs! Free plans from Ana-White.com
Preparation
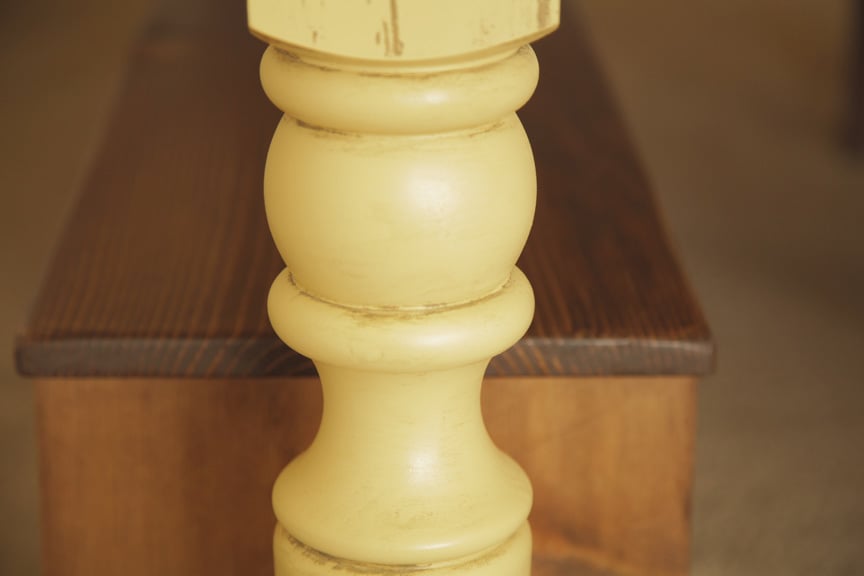
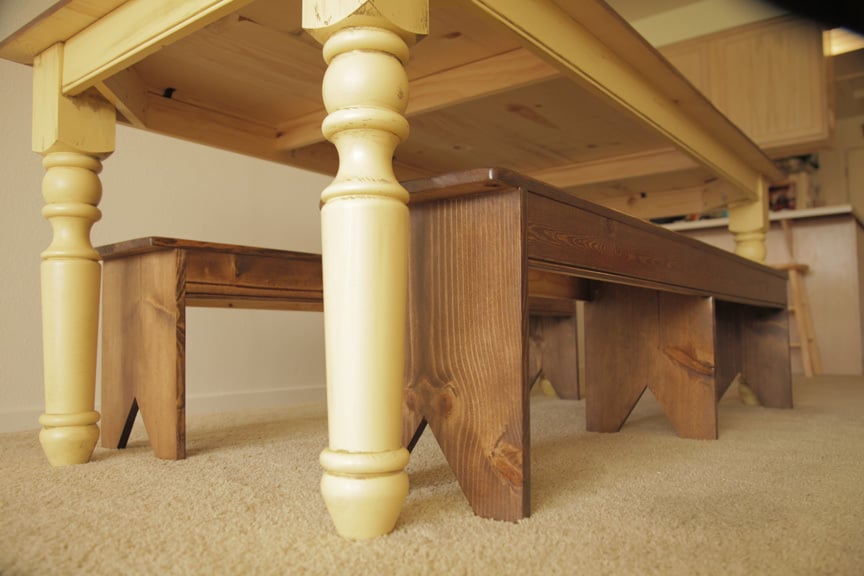
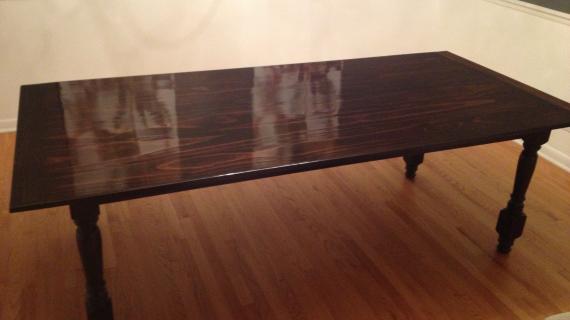
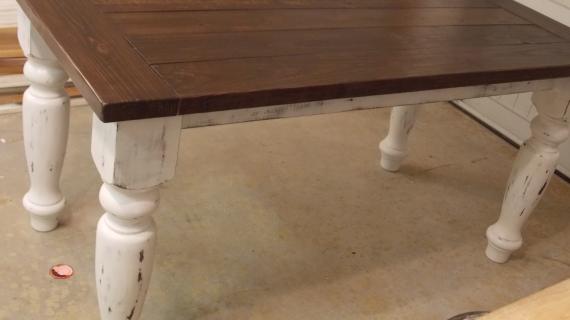
4 - Portsmouth Large Dining Table Legs from Osbourne Wood
4 - 1x10 boards @ 8 feet long (save scraps to use for benches!)
2 - 1x4 @ 8 feet long
1 - 1x3 @ 8 feet long
2 - 1x4 @ 24 1/2"
2 - 1x4 @ 66"
2 - 1x3 @ 30 1/2"
4 - 1x10 @ 78" Angle supports cut from scraps


Please read through the entire plan and all comments before beginning this project. It is also advisable to review the Getting Started Section. Take all necessary precautions to build safely and smartly. Work on a clean level surface, free of imperfections or debris. Always use straight boards. Check for square after each step. Always predrill holes before attaching with screws. Use glue with finish nails for a stronger hold. Wipe excess glue off bare wood for stained projects, as dried glue will not take stain. Be safe, have fun, and ask for help if you need it. Good luck!
Instructions
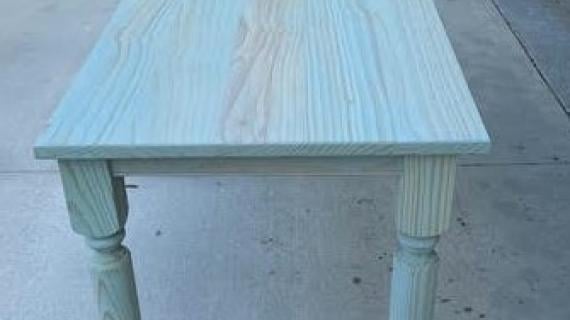
Step 1

Build your tabletop first. Set aside on a flat level surface to let dry.
Step 2

Next, build your end aprons/leg pieces.
Step 3

And then simply connect with side aprons.
Step 4

Add center supports.
Step 5

It is always recommended to apply a test coat on a hidden area or scrap piece to ensure color evenness and adhesion. Use primer or wood conditioner as needed.


Comments
bhoppy
Thu, 05/24/2012 - 11:44
Loved this!!
For many reasons... I thoroughly enjoyed watching all the steps and tools you used Patrick! And the video was beautifully shot and edited:-) Loved the shallow depth of field close ups!
whitney_smith
Thu, 05/24/2012 - 13:11
Amazing
Having already built a table almost exactly like this one, I know just how much love goes into it. This video beautifully captured that passion between woodworker and wood.
birdsandsoap
Thu, 05/24/2012 - 14:12
wow.
Amazing Patrick!
This is a such a great video, it is done so well. I loved watching the table come together, but then I got lost in the music! Music by Patrick Hosey?! You truly are the jack of all trades.
The table turned out beautiful, and as I was watching your video, I kept thinking, "There's that router table and miter saw cart that I want sooo bad!"
Nice job. I really enjoyed the video and transitions, and the music was so calming....now I have to go build something!
In reply to wow. by birdsandsoap
tracysmith
Thu, 05/24/2012 - 23:52
HA!
I just posted a comment about the same thing before I even read any of the others! I did the same thing watching his video... I want that router table! Too funny!
In reply to HA! by tracysmith
birdsandsoap
Fri, 05/25/2012 - 00:19
Great minds think alike!
Great minds think alike!
patrickhosey
Thu, 05/24/2012 - 15:36
Thanks Guys
Thanks for all the nice words. This was a very fun project. Thanks to Ana and Gabe for making it happen. Here are a couple things to google after watching this video.
- How to joint boards for glue ups.
- How to glue up large table tops.
- Beadlock joinery
- TableTop Fasteners and Hardware and what it does
There are so many ways to do things, just find a way that you like
Maybe we should do some more shop furniture next time.
In reply to Thanks Guys by patrickhosey
birdsandsoap
Thu, 05/24/2012 - 15:52
Yes!
I've never seen those fasteners from Rockler before, I'll have to check those out. And the joinery too, I've never seen that type of jig...so much I don't know about, but it's fun to learn!
I "Second" the nomination for more shop furniture! *ahem* router table.
Rick S (not verified)
Thu, 05/24/2012 - 19:28
Legs
Can you provide a link to the legs used in the table? Thx.
In reply to Legs by Rick S (not verified)
patrickhosey
Thu, 05/24/2012 - 20:37
Legs
There's a link on the materials list. It looks like just bold black text but it's a link.
dananryan
Thu, 05/24/2012 - 17:26
Yes Please!
Great video and table. I second birdsandsoap. More shop furniture would be awesome! Especially the router table...
Sawgrass Homegirl (not verified)
Thu, 05/24/2012 - 18:11
This was such an inspiring
This was such an inspiring video. LOVED it! Thank you so much for taking the time to do this. My husband and I will definitely be revisiting this video for years to come!
SarahM (not verified)
Thu, 05/24/2012 - 19:47
Stain
Hello,
I love this table. Thank you so much for such detailed instructions. Would you mind sharing what stain you used for the table top?
Thank you in advance.
Sarah
In reply to Stain by SarahM (not verified)
patrickhosey
Thu, 05/24/2012 - 20:39
Stain
I used Dailys walnut stain
tracysmith
Thu, 05/24/2012 - 23:50
Wow Patrick!
This was AMAZING!!!!!!!!! I loved the build, the table was beautiful, but the video was spectacular. In it's simplicity, the music, the way it was edited. I loved it! It encapsulates what I experience sometimes when I'm out in my garage turned shop building. Just creating, just being. There's almost something spiritual about it for me. I do my best thinking out there ;-) I also got really hung up on your amazing router table and miter saw table.... did you build those as well and are you planning on sharing those plans with us? ;-) I have been scouring the web looking for a good router table design, still haven't found one that I really liked until now.
Excellent work! Please, keep those videos coming, very great!!!!!
SarahM (not verified)
Fri, 05/25/2012 - 05:17
Stain color
Hello,
I love this table. Thanks for the great instructions. Would you be able to share the kind and color of stain you have used on the table top.
Thank you in advance,
Sarah
SarahM (not verified)
Fri, 05/25/2012 - 05:19
Stain
Thanks Patrick and ignore the repeated question I thought the first one didn't go through.
Cheers,
Sarah
patrickhosey
Fri, 05/25/2012 - 06:29
Tip
Most important tip, Gerber formula cans make great mixing cans hah
deannaf
Fri, 05/25/2012 - 07:49
Amazing work
Patrick that was an amazing video and the table looks fantastic. I like others who have commented am really interested in your router table, is that your own plan or are you able to share where you got the plan from.
Your little one is gorgeous too by the way, what a cutie.
Aisha_ (not verified)
Fri, 05/25/2012 - 07:56
Beautiful video and beautiful
Beautiful video and beautiful table Patrick! So inspiring watching stuff like this. I love the tool you used to make those...are they biscuit joints? Anyway, where did you get it from? And the idea of making shop furniture sounds like the greatest. I would also love plans for a router table!
In reply to Beautiful video and beautiful by Aisha_ (not verified)
patrickhosey
Fri, 05/25/2012 - 12:24
Joinery
Google beadlock joinery. I just combined loose tenon and pocket hole joinery. :)
Kathyy (not verified)
Fri, 05/25/2012 - 10:32
You Guys Rock
Another reason you make furniture is because you are great at it. Love your blog and all the wonderful projects you make.
claydowling
Sat, 06/02/2012 - 08:47
Cool joinery jig
I've never seen that particular style of loose tenon and jig before. I've either hogged it out with a drill and cleaned it with a chisel, or gone old-school with a mallet and mortise chisel. That looks like a good option for low labor, low cost.
Watching you work with the spray gun just convinces me that I need to get back to experimenting with mine again so I can master it. Or at least become something resembling competent.
patrickhosey
Sat, 06/02/2012 - 12:54
Clay
That jig is called the beadlock loose tenon jig. It's awesome. Very fast. You're not supposed to have to clean the mortises out because the tenon stock comes fitted to the mortise. But what I found is that they fit so tight that there wouldn't be any room for glue in there so I clean them up a little. The pocket screws were just to add clamping pressure without a clamp.
Also I'm nowhere near mastering the spray gun yet. What a weird world that is.
Patrick
Guest Chris (not verified)
Sat, 06/16/2012 - 12:36
farmhouse table
That was so neat! I want to try something like this but have been so intimidated just thinking about it. You make it look totally manageable and I'm gonna go for it!
Beckyo21 (not verified)
Fri, 07/13/2012 - 16:05
LOVE this table....what
LOVE this table....what type/color paint did you use on the base?
TeeTee (not verified)
Wed, 08/15/2012 - 11:50
I love the table! I'm gonna
I love the table! I'm gonna try to build this for my kitchen. Is there a way to make a leaf in the table or something? Bcuz the current size is too big for my kitchen. So I would like to make it smaller, or be able to remove a leaf and add it when I need to.
Billie (not verified)
Mon, 09/24/2012 - 13:46
Table Leaf Here Too!
I, too, would love to see this plan with a table leaf or two. I have a family of four, but love to have guests over for dinner. The ability to go from a 4 or 6-top to an 8 or even 12-top when needed would be amazing!
Thanks so much for all that you do!
sambenedetto7@…
Wed, 09/26/2012 - 18:53
conversion for a square
anyone have specific buy,cut information to do this as a square table for 8? math is not my strong suit, i follow directions great, but not ready to wing it yet
Patrick Hosey (not verified)
Sun, 10/07/2012 - 07:12
square
If you make all 4 aprons the same size, you'll get a square without even trying.
Sugarman (not verified)
Thu, 10/11/2012 - 09:52
I wanted to make a ten foot
I wanted to make a ten foot table using furniture grade plywood as the tabletop. Also not having a mortise and tenon jig but having a dowel jig how would that change the equation? Thanks
In reply to I wanted to make a ten foot by Sugarman (not verified)
patrickhosey
Thu, 10/11/2012 - 09:58
You can use furniture grade
You can use furniture grade plywood no problem. You just have to mask off the edges. It's totally up to you but I would avoid using edge banding on a table top. It would just be super cheesy. Again that's your choice though. You can totally use a dowel jig to do the same thing I did using the tenon jig. If you have a kreg jig then you can mix the two as well. If not, you'll need some long clamps.
Sugarman (not verified)
Thu, 10/11/2012 - 17:24
I plan on putting some kind
I plan on putting some kind of molding on the edges. i have a nailgun and compressor so it will be a cinch. I also have a kreg pocket hole jig. It is a great tool. Pocket hole versus dowel, which would you recommend? Also your table is 8 feet long. Do I have to modify the plans at all to go to 10 feet? Maybe add another crosspiece?
Sugarman (not verified)
Thu, 10/11/2012 - 17:36
Also any recommendations for
Also any recommendations for the wood I use? Oak has a bolder grain which doesn't really work because i am going for a more refined look. I mostly work with maple. That should be fine, no?
SarahBeth (not verified)
Wed, 10/24/2012 - 17:57
The table is awesome and the
The table is awesome and the video is a work of art! So wonderful.
fireperry
Fri, 07/15/2016 - 12:37
length of table
Can you make the table longer?
brianan
Fri, 05/22/2020 - 10:18
Seems like the video is gone…
Seems like the video is gone? :(
Dianne Kynaston
Thu, 11/26/2020 - 14:28
Want to try it
Want to try it