

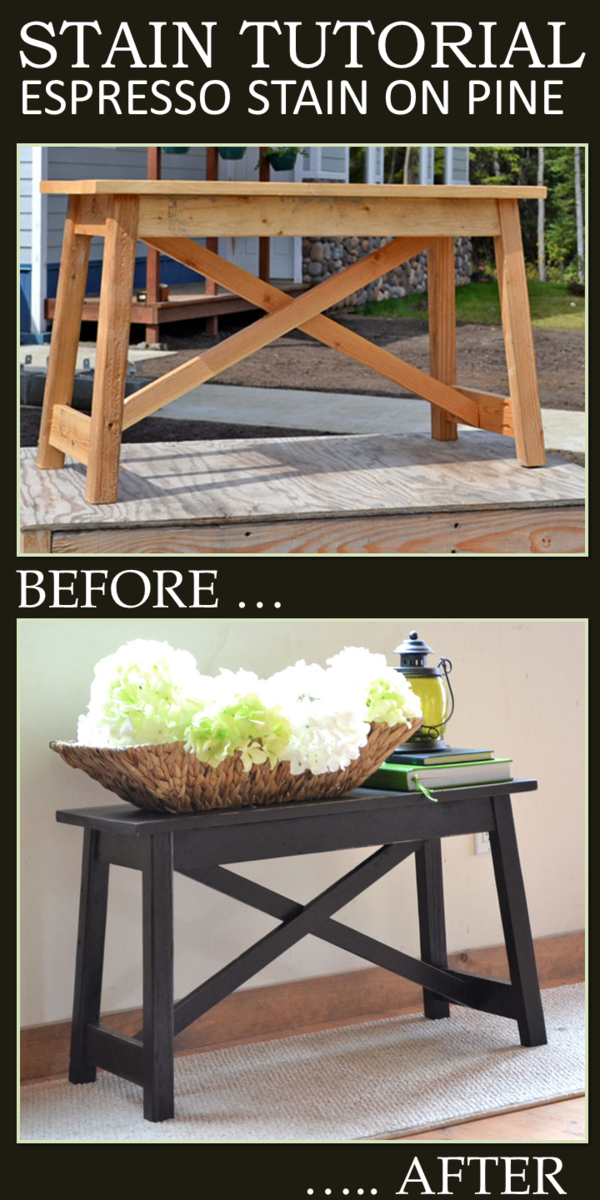
One of the most frequent questions I receive from readers is “How do I get that espresso stain on pine?”
An espresso stain is hard to achieve on soft woods like pine without appearing blotchy and inconsistent. One can work with hardwood boards, but you will lose the rustic character and inexpensive cost that come with pine.
But today, I am so excited to finally be able to answer this question. I’ve teamed up with the kind folks over at Minwax to bring you a new series of tutorials, focused on how to finish your beautiful projects with stains. We’ll be doing 25 tutorials, ranging from simple stains to layered stain and paint finishes, over the next year, all in an effort to help you better your own home!
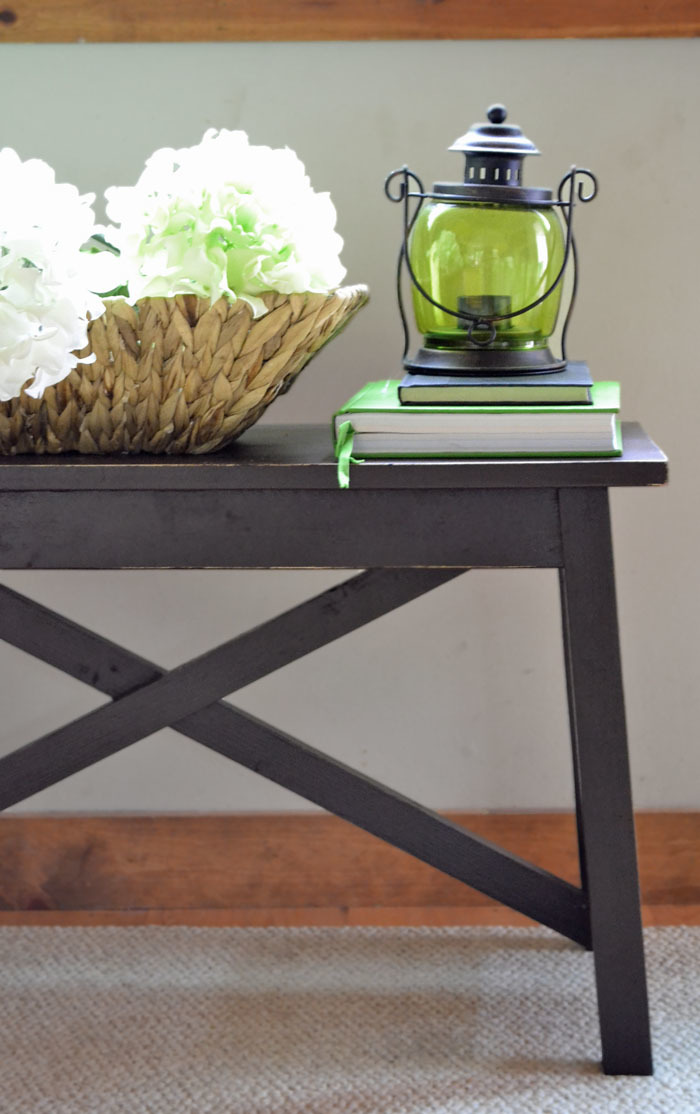
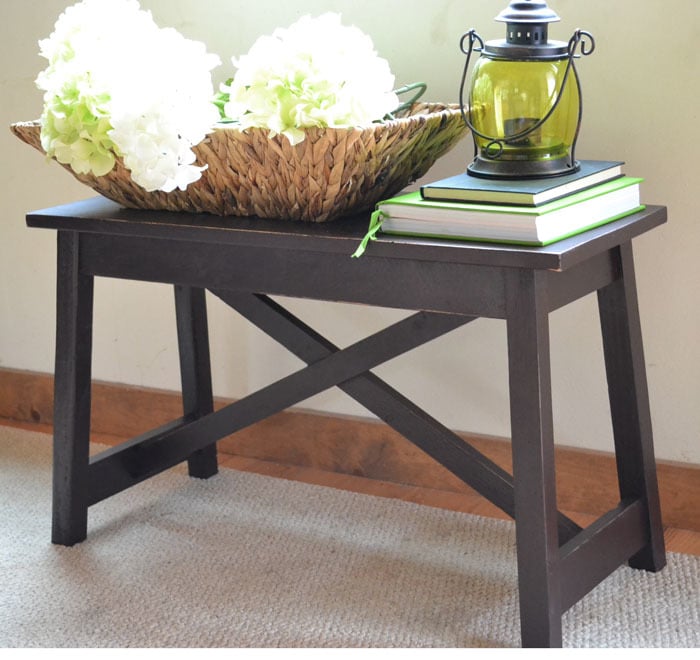
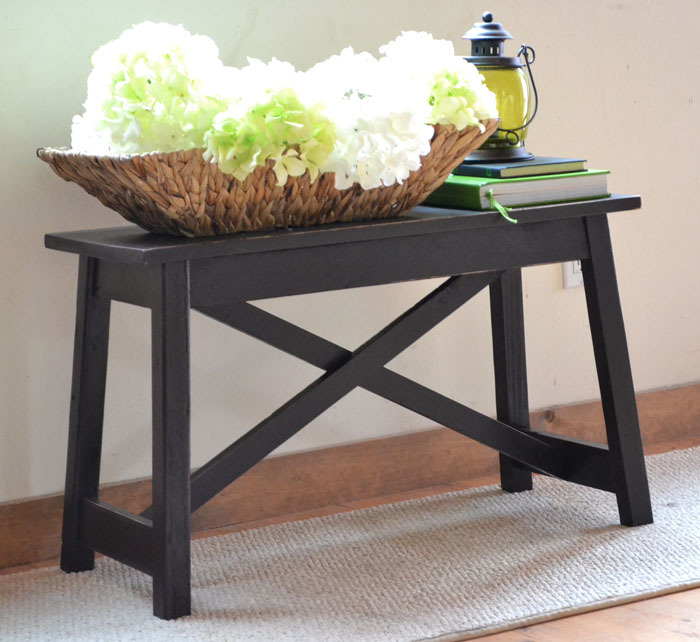
For the first tutorial, I have listened to you and have created a step by step tutorial to help you get that espresso stain on your pine DIY furniture!

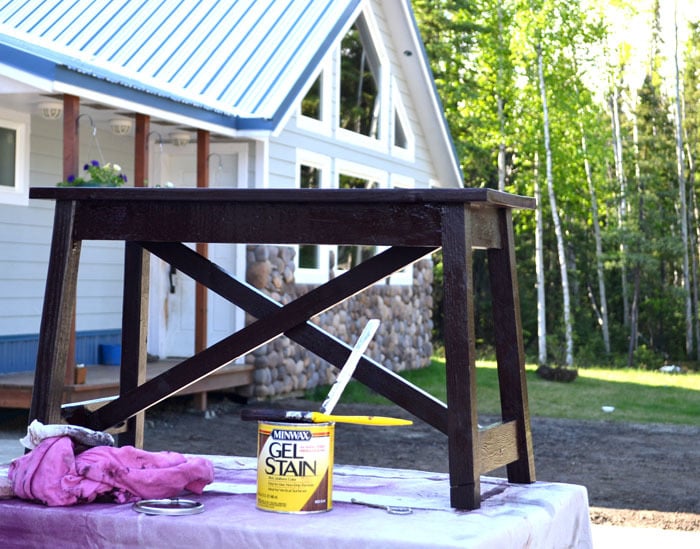
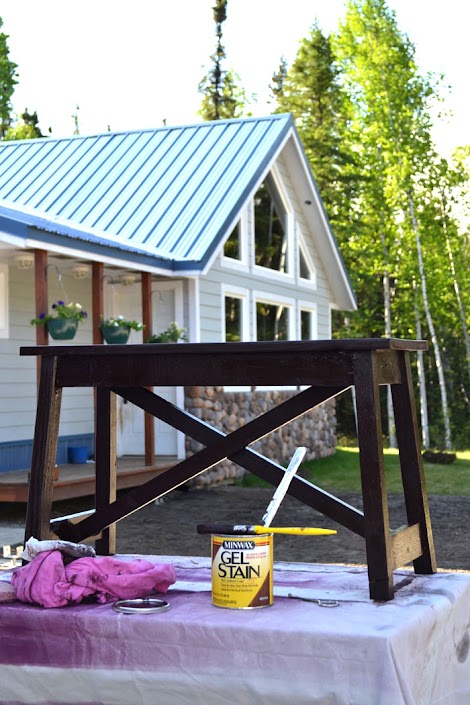
I took one of our most popular project plans – the rustic X bench – that is indeed very rustic, and turned it into this beautiful bench! And in this tutorial, I’ll be showing you step by step how to do the same!

So ... here we go!
• Mineral Spirits or Paint Thinner
• 220 Grit Sanding Block
• Sand Paper in varying grits
• Finishing/Buffing Pad
• Rags
• Stainable Wood Filler

Prepare the Project
After you build your project, you will need to prepare it
for a finish. Fill any screw holes or
pocket holes with stainable wood filler and let dry completely. You may need to fill a second time as wood
filler tends to shrink as it dries.
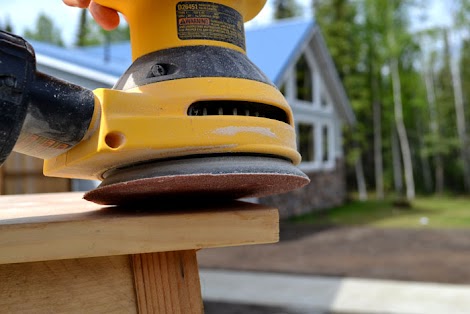
Then sand your project with coarse sandpaper, followed by
medium, and then fine.
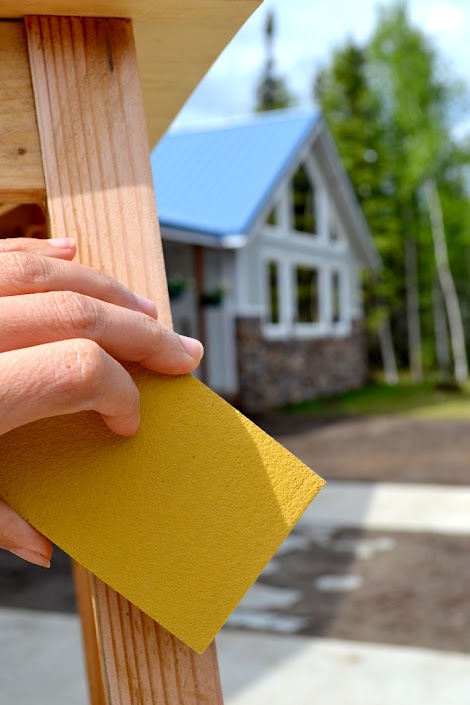
And then give your project a quick buffing with a super fine
sanding block.
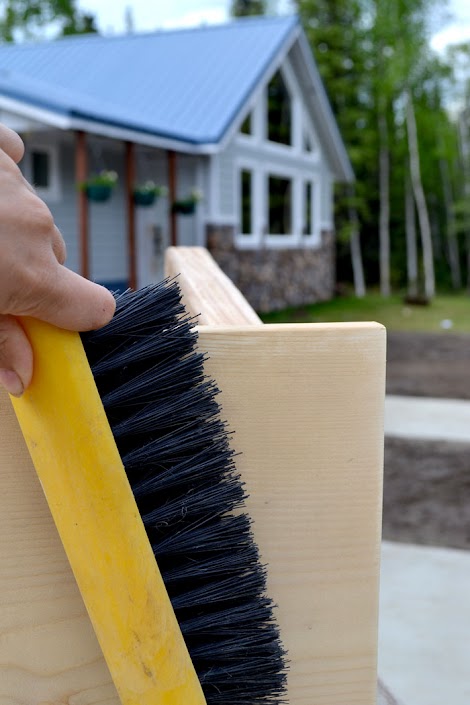
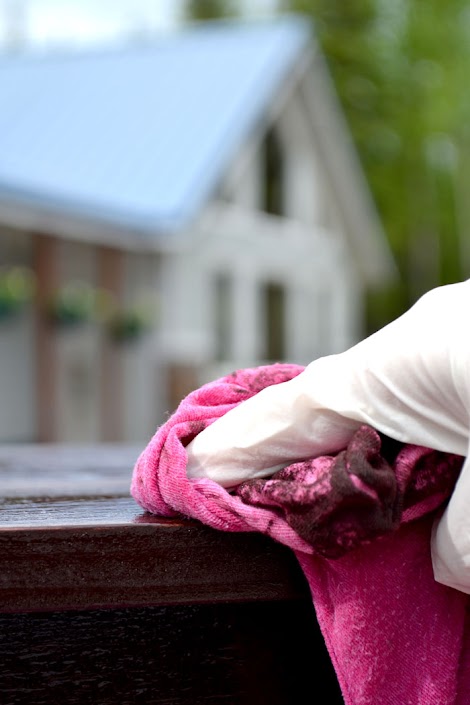
Next, you must remove any sanding residue. Use a brush to remove sanding residue, and
then wipe clean with a slightly damp rag.
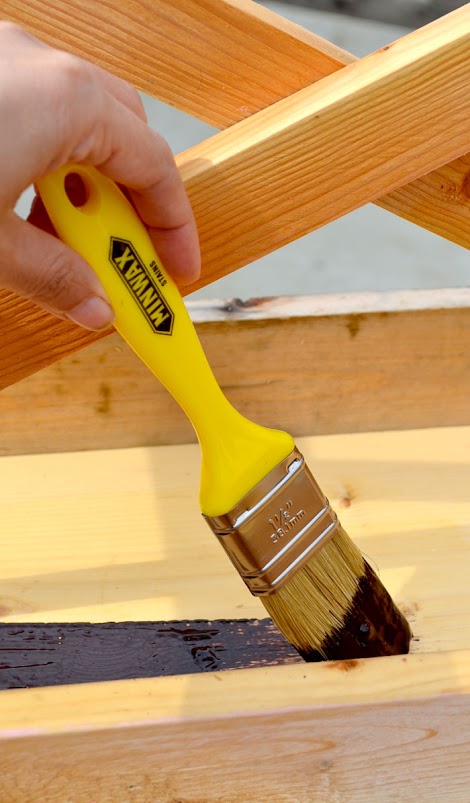
Apply First Coat
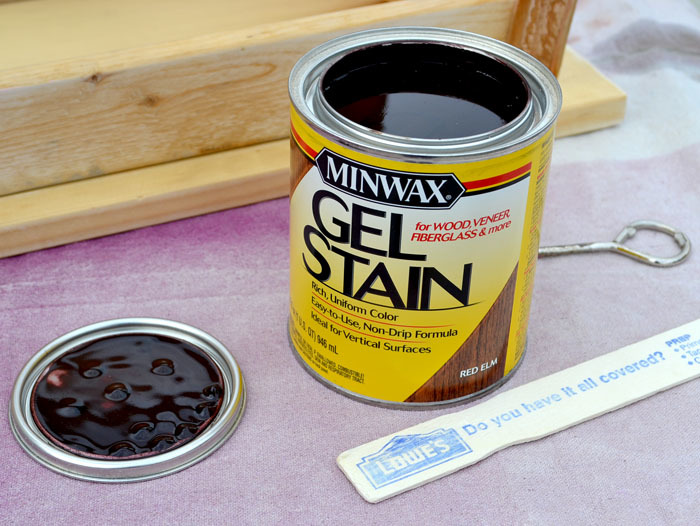
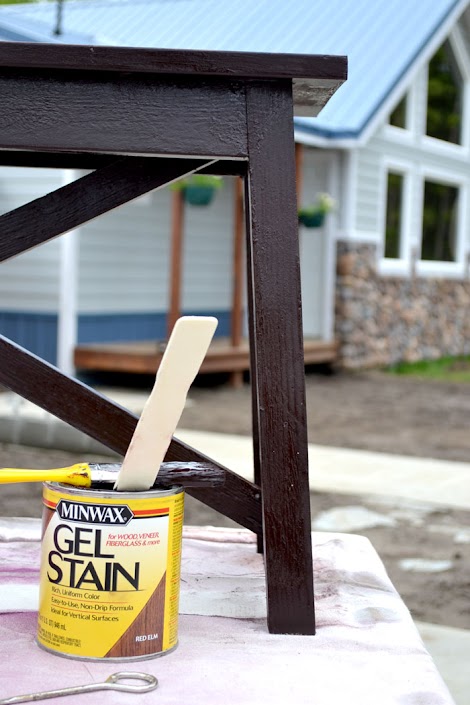
For the espresso stain, use Minwax Gel Stain in Red
Elm. When you open the can, the stain
will look like jello.
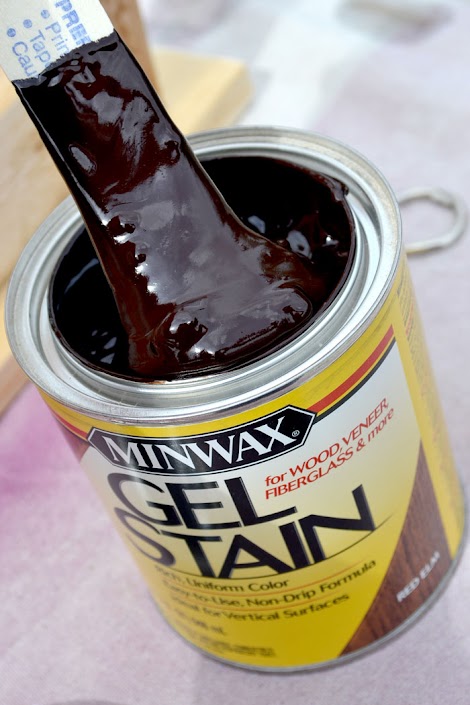
Mix the stain until it looks like melted chocolate.
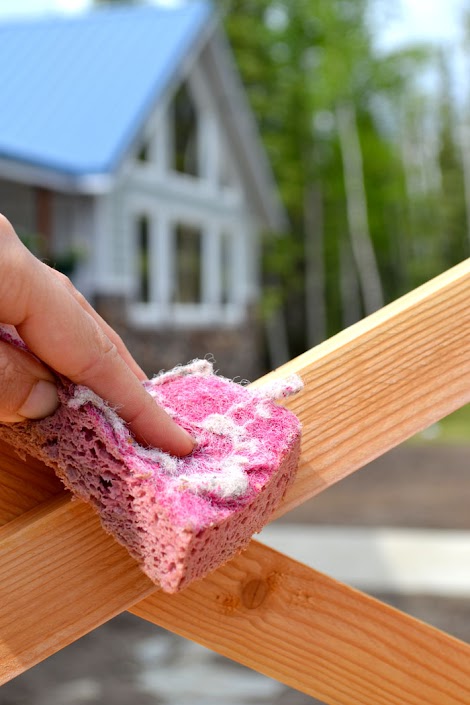
I find working with a slightly damp surface helps the stain
soak in faster and more evenly. Gently
wipe the project with a damp rag or sponge.
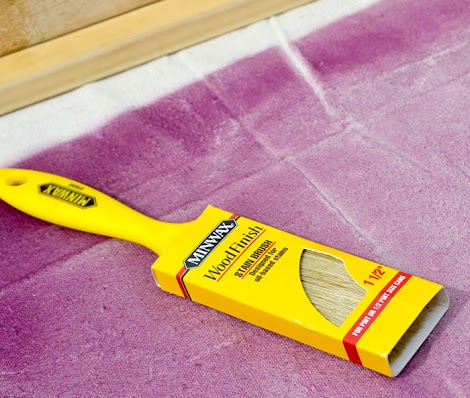
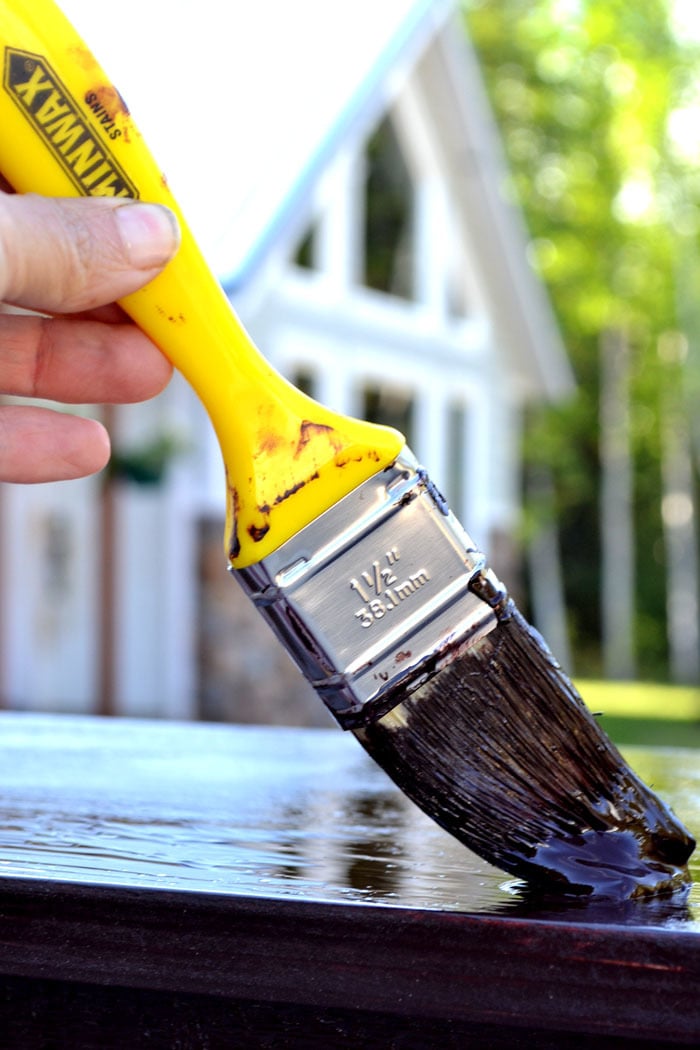
For this project, you will want to use a stain brush.
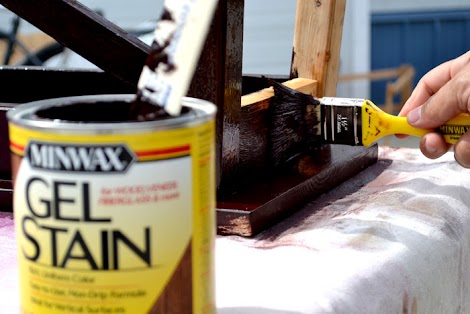
Start at the inside, underside of your project – in the
hardest to reach place – and work your way outward. Trust me on this one – if the underside is
hard to reach, it will be even harder to reach when the rest of the project is
covered in wet stain!
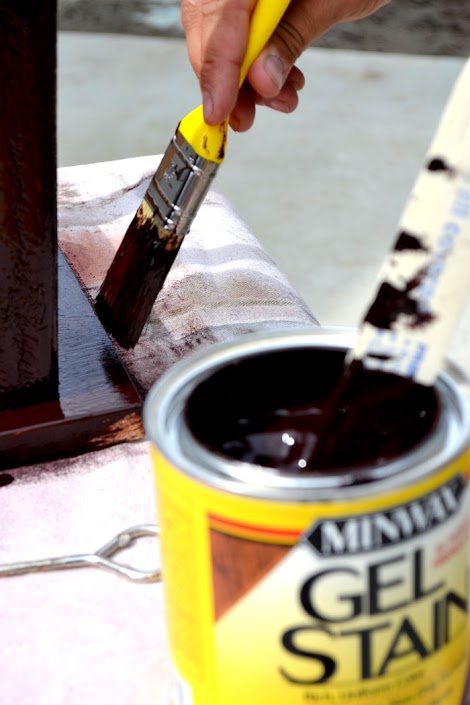
Apply the gel stain liberally, working in sections. You will want to wipe off excess gel stain
after approximately 3 minutes.
So work fast, again over applying the stain
And flip the project over and apply stain to top sides.
Approximately 3 minutes after applying gel stain – more or
less depending on humidity, temperature and wind – begin wiping off excess gel
stain. If you have a larger project, it
is a good idea to have a second person wipe off excess gel stain while you are
still applying it.
Let Dry
Here’s the hard part.
Wait a full 8 hours – or more depending on weather – for the stain to be
completely dry.

May I suggest sandwich bags and hair ties for keeping the brushes from drying out between coats?
Apply Second Coat
After the first coat of gel stain is completely dry, and
there are no tacky spots, we can add a second coat.

First mix your gel stain up again.
And then apply a second liberal coat over the first. After a few minutes wipe off excess and allow
the project to dry. For even deeper
color, you can add additional coats.

Let your project dry again. Gel stain is different than regular stain - if little saw dust particles or dirt blows on the finish, it's sticking. So make sure you protect your project until it dries to touch from dirt or debris - or bugs.
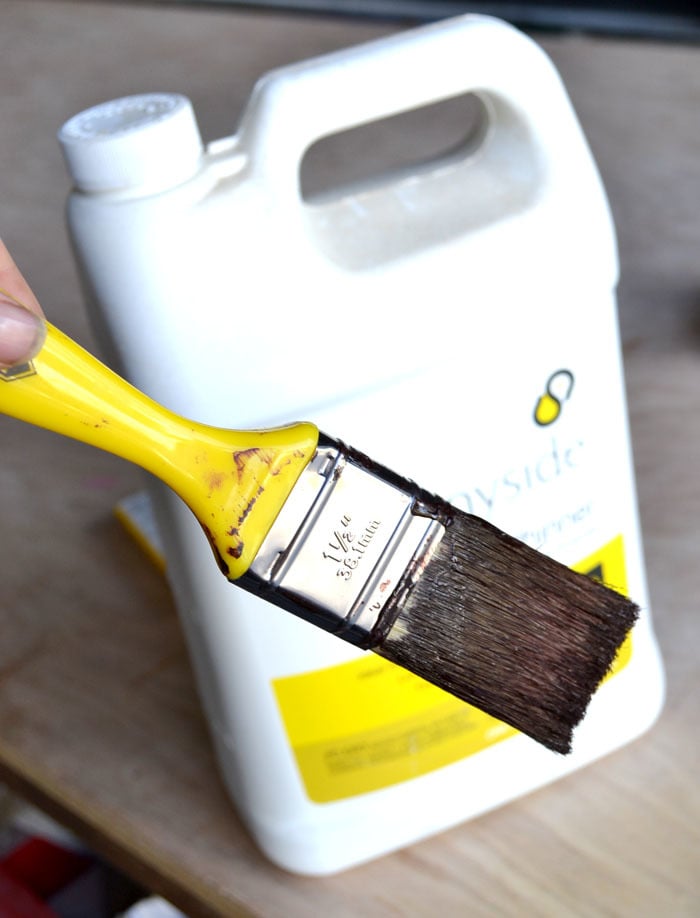
Clean Stain Brush<p><img src="https://lh3.googleusercontent.com/-VKzb6BTfVJI/T9Yfw93ZVmI/AAAAAAAAKnI/…; style="height: 616px; " alt="" /><br /></p><p><p class="MsoNormal">While you are waiting for the final coat to dry, let’s take
care of cleaning the brush! Brushes
clean well with mineral spirits or paint thinner.<o:p></o:p></p><p class="MsoNormal"><img src="https://lh6.googleusercontent.com/-W9z_PiViGWM/T9YfzSPGexI/AAAAAAAAKnY/…; alt="" /></p><p class="MsoNormal"><p class="MsoNormal">Fill two small jars halfway up with mineral spirits. Place brush in one jar and swish around.<o:p></o:p></p><p class="MsoNormal"></p><p class="MsoNormal"><img src="https://lh4.googleusercontent.com/-i11B10Zu3fI/T9YfzjHf6qI/AAAAAAAAKng/…; style="height: 418px; " alt="" /></p><p class="MsoNormal"></p><p class="MsoNormal"><p class="MsoNormal">Use a fork to comb through brush, working stain out of
bristles.<o:p></o:p></p><p class="MsoNormal"></p><p class="MsoNormal"><img src="https://lh3.googleusercontent.com/-cPoObpHMGtc/T9Yfzjv6EOI/AAAAAAAAKnc/…; style="height: 341px; " alt="" /></p><p class="MsoNormal"></p><p class="MsoNormal">Once brush is free of stain, rinse in second jar of mineral
spirits.</p><p class="MsoNormal"><o:p></o:p></p><p class="MsoNormal"><img src="https://lh3.googleusercontent.com/-YtJK5z8crOI/T9Yf1e5_t9I/AAAAAAAAKnw/…; alt="" style="height: 314px; " /><br /><o:p></o:p></p><p class="MsoNormal"></p><p class="MsoNormal"><br />The brush will be free of stain, but still needs to be washed. </p><p class="MsoNormal"></p><p class="MsoNormal"><img src="https://lh6.googleusercontent.com/-f8YDgcKlCew/T9Yf116kPCI/AAAAAAAAKn4/…; style="height: 352px; " alt="" /></p><p class="MsoNormal"></p><p class="MsoNormal"><p class="MsoNormal">Wash brushes in soap and water.<o:p></o:p></p><p class="MsoNormal"></p><p class="MsoNormal"><img src="https://lh5.googleusercontent.com/-KEzLHH5m9Yg/T9Yf1zafjKI/AAAAAAAAKn8/…; style="height: 351px; " alt="" /></p><p class="MsoNormal"></p><p class="MsoNormal"><p class="MsoNormal">And rinse until clean.<o:p></o:p></p><p class="MsoNormal"></p><p class="MsoNormal"><img src="https://lh6.googleusercontent.com/-Q4_kcPfSWOw/T9Yf4PAPiuI/AAAAAAAAKoI/…; style="height: 404px; width: 470px; " alt="" /></p><p class="MsoNormal"></p><p class="MsoNormal"><p class="MsoNormal">My Minwax stain brush recommends storing in original
packaging.<o:p></o:p></p><p class="MsoNormal"></p><p class="MsoNormal"><img src="https://lh5.googleusercontent.com/-36M_R7xniJk/T9Yf4kTM6fI/AAAAAAAAKoQ/…; style="height: 705px; " alt="" /></p><p class="MsoNormal"></p><p class="MsoNormal"><p class="MsoNormal">Like brand new!<o:p></o:p></p><p class="MsoNormal"></p><p class="MsoNormal">Take care of your brushes.</p><p class="MsoNormal"></p><p class="MsoNormal">They will take care of you.</p><p class="MsoNormal"></p><p class="MsoNormal">And it will save you $$$$ .... so you can buy more lumber .... and build more projects!</p></p></p></p></p></p></p></p>

<h1>Prepare for Top Coat</h1>
Now back to the project. Let it dry.<p><br /><p>Completely dry. </p><p> Let there be not one tacky spot. </p><p> Not one.
</p><p></p><p><img src="https://lh4.googleusercontent.com/-uoFf0H-suoo/T9Yf-CMNpFI/AAAAAAAAKpA/…; style="height: 705px; " alt="" /></p><p></p><p></p><p class="MsoNormal">Once dry, I use a damp finishing pad to prepare for the
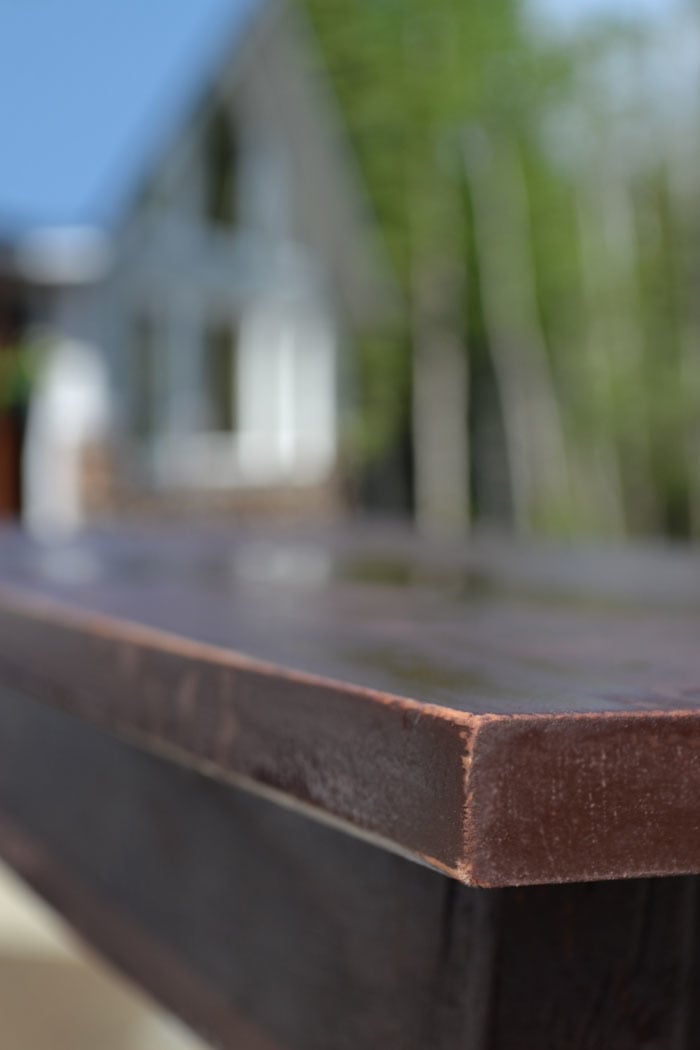
final top coat. This is a gentle way of removing any rough patches, bugs that might have thought my bench was indeed as deliciously choclately as it looks, or removing any dust or debris.<o:p></o:p></p><p class="MsoNormal"><img src="https://lh3.googleusercontent.com/-b3ZZQvwNurI/T9YgANC8ZyI/AAAAAAAAKpQ/…; style="height: 705px; " alt="" /></p><p class="MsoNormal"></p><p class="MsoNormal"></p><p class="MsoNormal">I love distressed edges, so I used the finishing pad to
expose the edges. But this is purely
optional.<o:p></o:p></p><p class="MsoNormal"></p><p class="MsoNormal">Distressed Edges = Going to happen anyway (in my house)</p><p class="MsoNormal"></p><p class="MsoNormal">Might as well do it on purpose! </p><p class="MsoNormal"></p><p class="MsoNormal"><img src="https://lh3.googleusercontent.com/-D2h5iVxnBwc/T9Yf_lb68fI/AAAAAAAAKpI/…; style="height: 705px; " alt="" /></p><p class="MsoNormal"></p><p class="MsoNormal"></p><p class="MsoNormal">The project is then wiped completely clean and is dry.<o:p></o:p></p><p></p><p></p><p class="MsoNormal"></p><p></p></p>
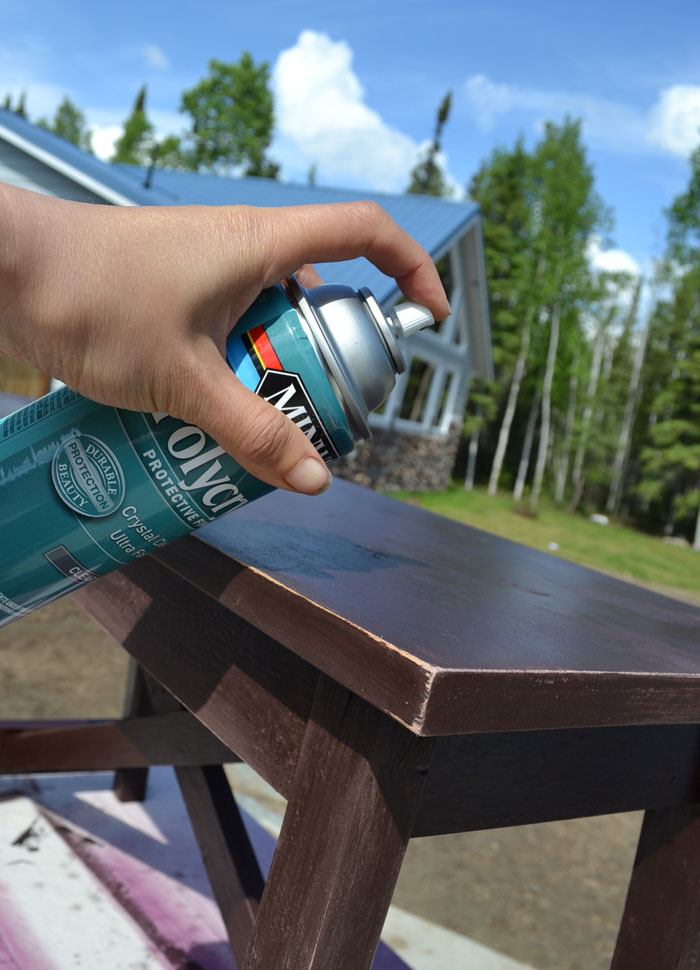
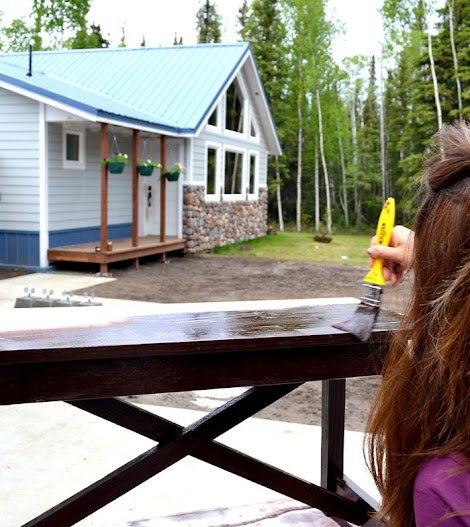
<h1>Apply Top Coat</h1>
Now we've worked so hard to get this beautiful Espresso Finish on Pine ... okay, not <em>that </em>hard ... but we want to make sure the finish stays beautiful and is easy to wipe clean. We will need to apply a top coat.<p></p><p>Top coat also can add a sheen, enhancing the color of your project. For a matte finish, use satin, as I am. For a glossy, rich finish full of luster, use gloss.</p><p></p><p><img src="https://lh5.googleusercontent.com/-9AWTTW0FddU/T9Yf9a2p4kI/AAAAAAAAKo4/…; style="height: 651px; " alt="" /></p><p></p><p class="MsoNormal"></p><p class="MsoNormal">I love using spray on <a href="http://www.minwax.com/wood-products/interior-clear-protective-finishes/…; target="_blank">Minwax Spray On Polycrylic</a> because it goes on very
smooth and even, and then I don’t have to wash another brush! You will want to be outdoors here and be
aware of overspray and wind direction.
Spray in light, even strokes, applying several coats rather than one
goopy drippy one. Let the polycrylic dry
between coats. </p><p class="MsoNormal"></p><p class="MsoNormal"> <o:p></o:p><img src="https://lh6.googleusercontent.com/-oxVGHDQkqY4/T9YgAPYXIHI/AAAAAAAAKpU/…; style="height: 701px; " alt="" /></p><p class="MsoNormal"></p><p class="MsoNormal"></p><p class="MsoNormal">On the final coat, allow project to dry a full day before
using.<o:p></o:p></p><p class="MsoNormal"></p><p class="MsoNormal"><img src="https://lh4.googleusercontent.com/-oqHGl2oTx4E/T9Yf7vsbqiI/AAAAAAAAKow/…; style="height: 431px; " alt="" /></p><p class="MsoNormal"></p><p class="MsoNormal">Enjoy your beautiful Espresso Finished Project!</p><p class="MsoNormal"></p><p class="MsoNormal">Special thanks to the kind people at <a href="http://www.minwax.com/" target="_blank">Minwax </a>for bringing you this finishing tutorial! </p><p></p><p></p><p></p>
Comments
mebohn
Mon, 06/11/2012 - 13:19
perfect
nicolae
Sun, 03/10/2013 - 12:58
It looks great. I will do one
LisaT
Mon, 06/11/2012 - 20:28
Great Tutorial
birdsandsoap
Mon, 06/11/2012 - 23:07
Nice Tute!
mariarose7 (not verified)
Tue, 06/12/2012 - 07:08
Gel Stain
TiffanyGJD (not verified)
Tue, 06/12/2012 - 10:33
finish request?
In reply to finish request? by TiffanyGJD (not verified)
Ana White
Fri, 06/15/2012 - 14:21
Request noted! Thank you
judym
Tue, 06/12/2012 - 19:39
Perfect timing ... again!
tracysmith
Thu, 06/14/2012 - 01:16
Wow, your timing is perfect!
hjewls10
Fri, 10/05/2012 - 07:35
Softening Hard Brushes
Karen Parker (not verified)
Sat, 06/16/2012 - 22:29
question about touching up stain
AmandaD (not verified)
Tue, 06/26/2012 - 07:32
Newbie Question
In reply to Newbie Question by AmandaD (not verified)
birdsandsoap
Sat, 07/14/2012 - 22:29
I built the ten dollar ledges
Mugsy42 (not verified)
Sun, 07/08/2012 - 06:55
Oh, Ana! You inspire us all
Kirstin (not verified)
Tue, 07/10/2012 - 07:48
Cleaning up?
In reply to Cleaning up? by Kirstin (not verified)
birdsandsoap
Sun, 07/15/2012 - 01:15
Pam the Goatherd left this
hazardous wast… (not verified)
Sun, 07/15/2012 - 00:41
paint and thinner disposal
kendikat
Thu, 08/09/2012 - 13:57
I don't know how you get that
Bigverm23
Sun, 10/07/2012 - 05:44
Mine came out the exact same
KellyAnn (not verified)
Tue, 09/25/2012 - 07:48
Thank you...
hjewls10
Fri, 10/05/2012 - 07:52
No Need to Use Mineral Spirits...
Bigverm23
Sat, 10/06/2012 - 17:16
Red elm coming out red?
Lynda Draper (not verified)
Thu, 10/18/2012 - 16:23
Great website!
Saved By Grace (not verified)
Sun, 11/11/2012 - 06:16
Oil and water-based stain and top coat
Saved By Grace (not verified)
Sun, 11/11/2012 - 14:50
Nevermind :)
Tannis (not verified)
Sat, 01/12/2013 - 06:26
The espresso bench, wood you
mukrtarbi
Fri, 02/08/2013 - 23:11
I have been assigned to do a
darkjuan
Tue, 08/13/2013 - 07:55
the color I wanted!!!
nashiakhanem1
Tue, 09/17/2013 - 13:15
really great decorate home
heromark
Wed, 09/11/2013 - 01:00
Great job.