

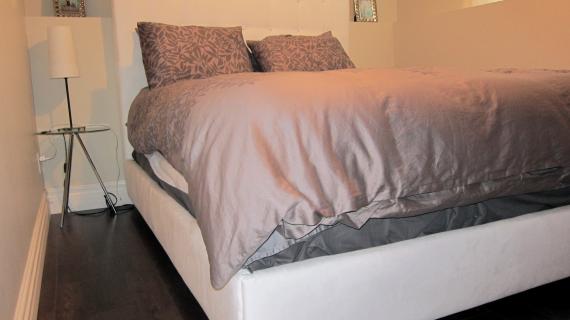
DIY upholstered bed! Free step by step tutorial from Ana-White.com

Hey Boss!!!
Thank you so much for your kindness and beautiful comments on our "not much" posts - I feel like you have given me already the greatest job in the world, and now you are giving me vacation time on top of that!
Now do not fear, technology has increased so much in Alaska, I can still work (yay!) even when I'm traveling, and you can expect to still see lots of plans, updates to the Momplex and then maybe some fun stuff we do too. We are just trying to get on a work four or five days (although long ones!) a week/take a couple off schedule!
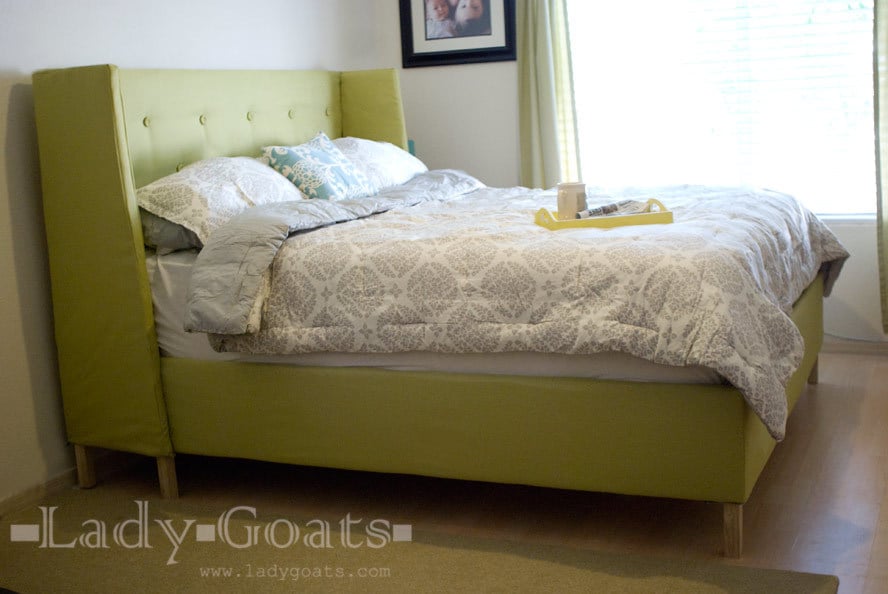
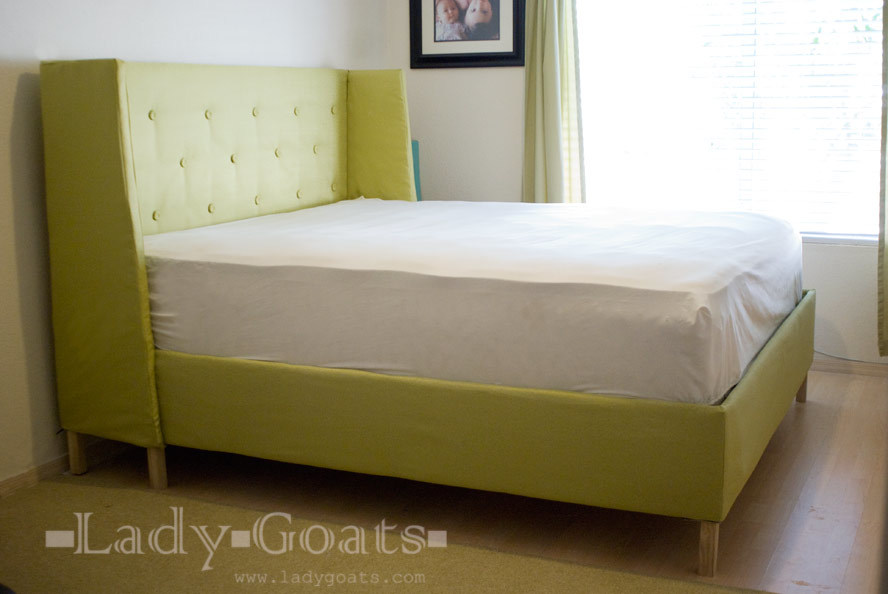
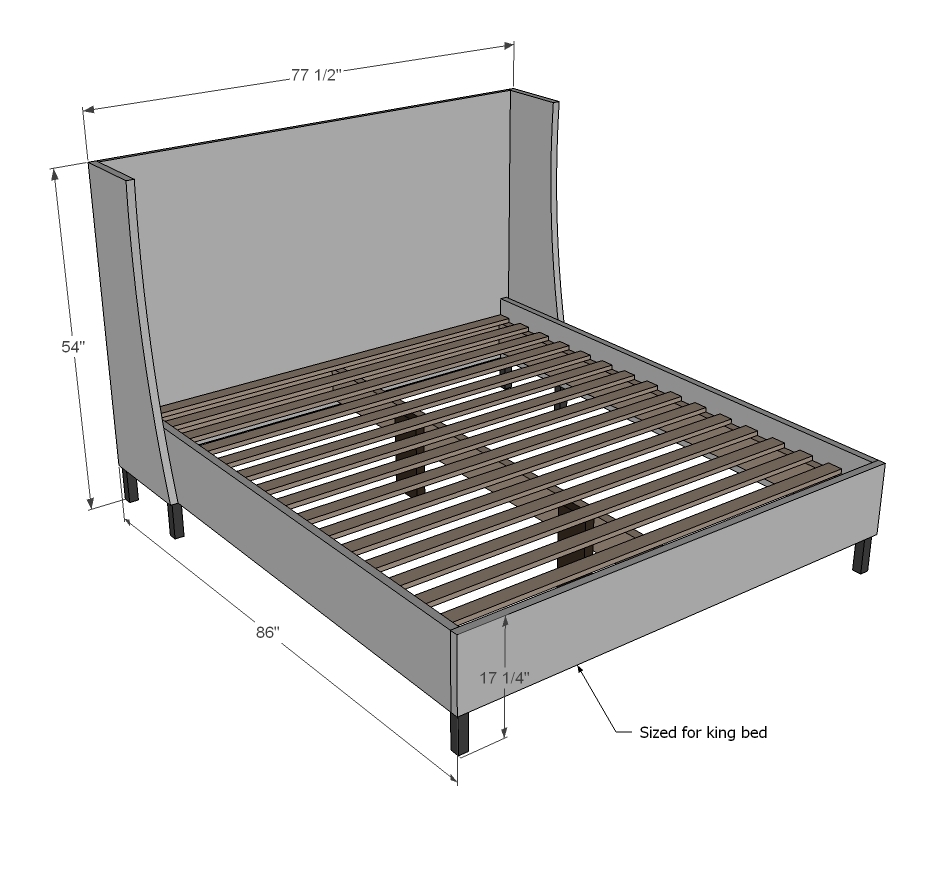
And it's lovely people like Gina that are making this possible for me. You know her as Lady Goats, and we've partnered up again to bring you an upholstered bed with wings - in California King!!!
I about fell out of my chair when I saw these photos! So brace yourself!

Gina has taken the time to photograph her step by step of making this bed - so please - stop over and visit her and check out lots more photos and details.
And here's from Gina:
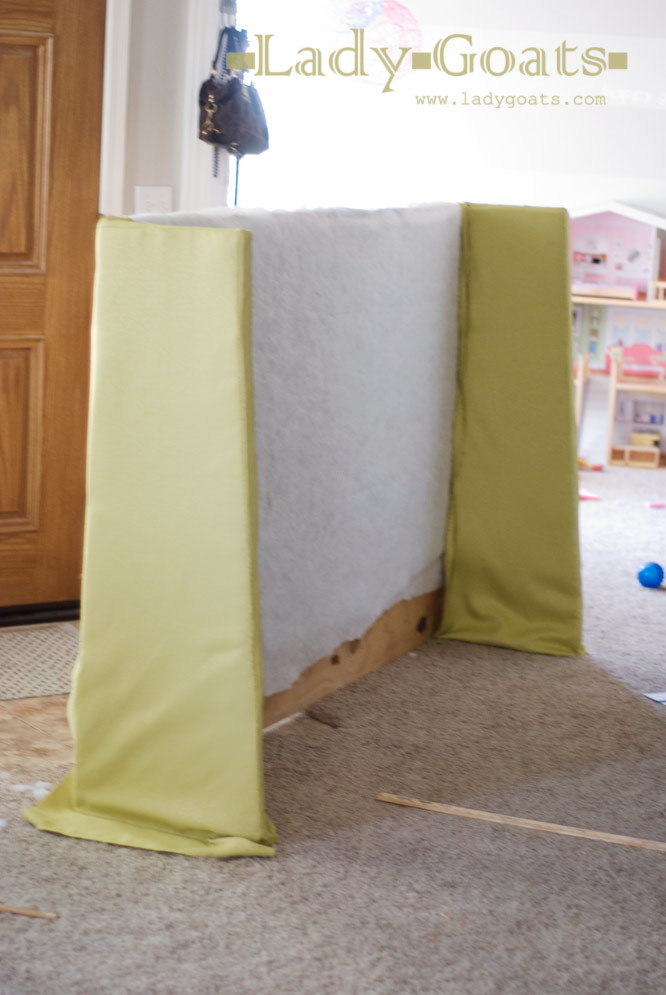
Building the bed was the simplest part.
Isn't that what we always say?
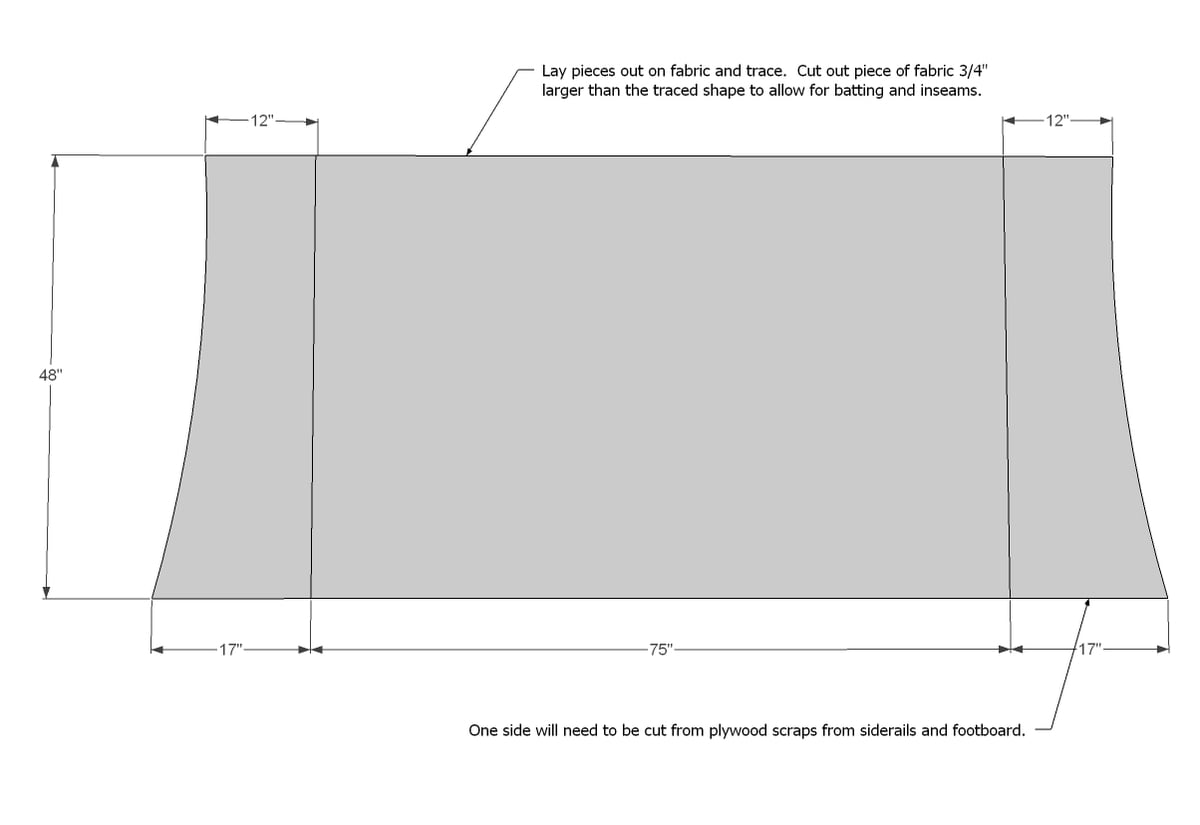
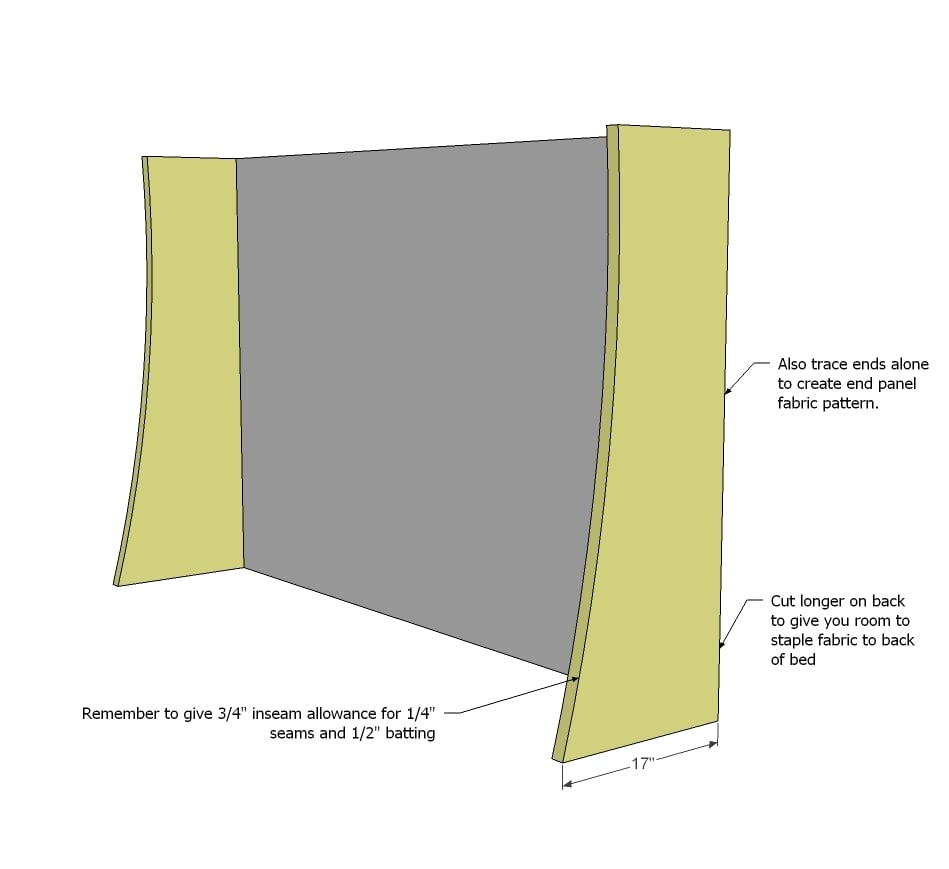
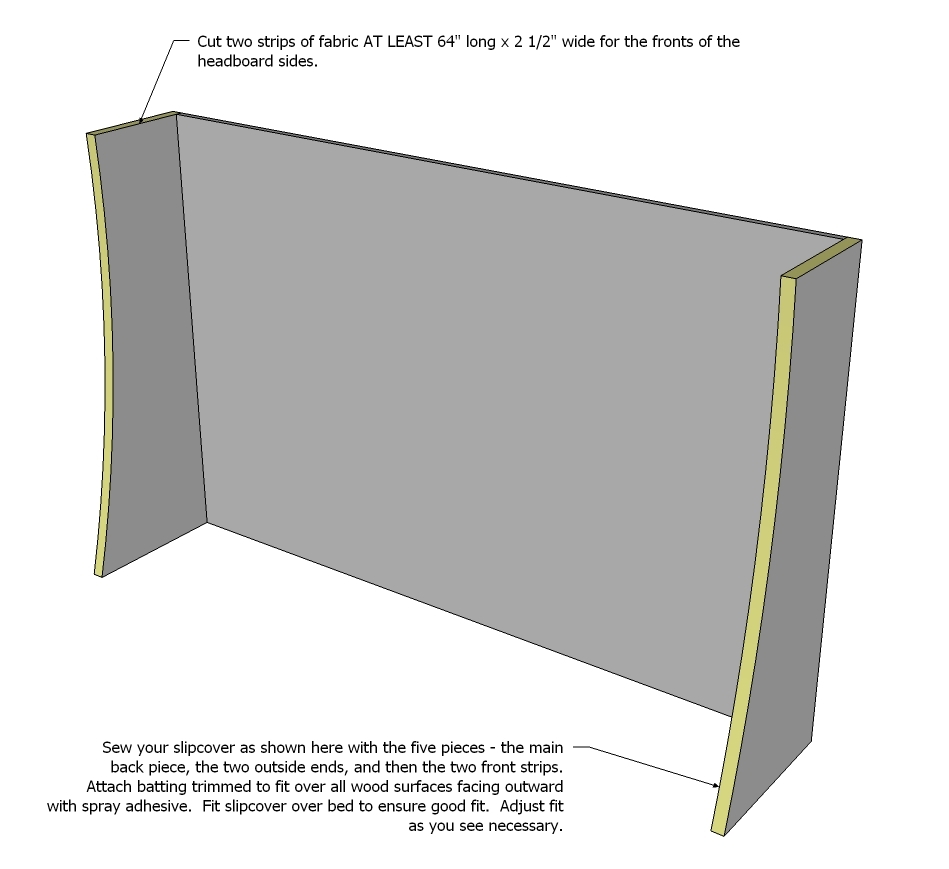
I tried to create a full slipcover like the plans said, but after 3 failed attempts (taking almost 3 days to do!) and too much time with my seam ripper, I decided to just create slip covers for each of the "wings" and then use tack strips for the main part of the headboard.
Also, 1/2" batting doesn't really mean it's going to take up 1/2" of space! You're going to need 1/2" foam for that. The thinnest I could find was 1" at Hobby Lobby, so I used that only on the inside of the wings, and wrapped the batting around.
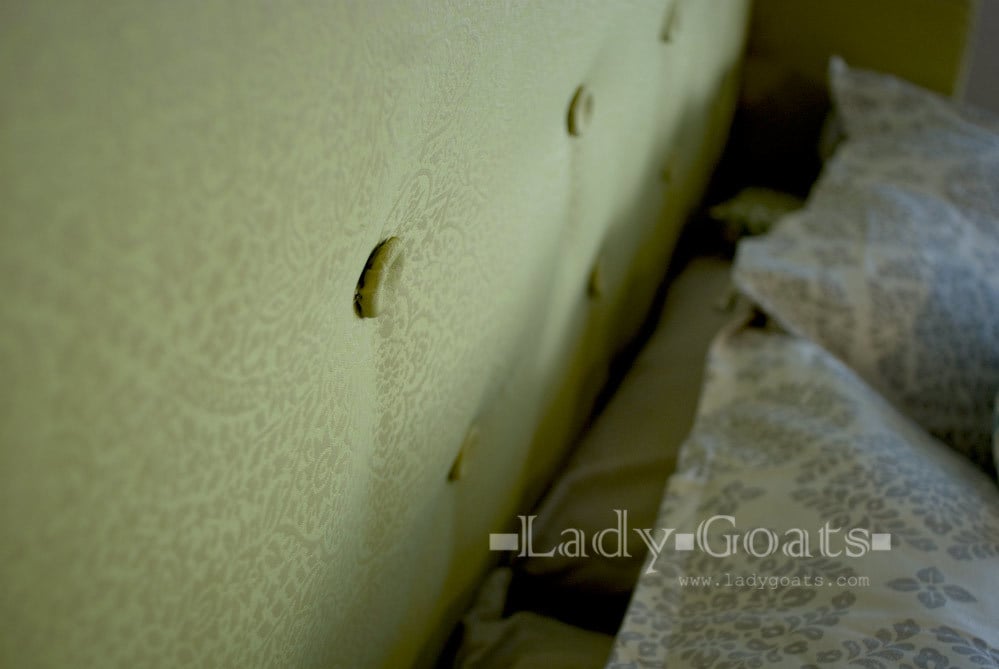
For the buttons, the rows were 7 1/2" apart, and the columns 12 1/2". I started the top 6 1/4" in, the middle one 12 1/2" in, and the bottom 6 1/2". I'll post more detailed upholstering instructions on my blog... for those of us that apparently have no idea what we're doing! haha.
I ended up buying 9 1/2 yards of fabric, and I probably have almost 1 yard left by saving the large scrap cuts. The fabric I chose didn't require me to focus on orientation/pattern, though, so that's something you'll have to take into consideration when buying fabric for this.
For the decorative legs - this is what I recommend:
- Use these as decorative legs
- Attached with top plates for corners to add strength
- these for the decorative side ones
Preparation
2 sheets 3/4" plywood
5 – 2x6 @ 8 feet or stud length
6 – decorative 6” parson style feet
4 – corner brackets
2 – standard brackets
6 yards 1/2 thick batting - Gina recommends 1/2" thick foam
Spray adhesive
½” staples and staple gun
Sewing notions and thread
Fabric – amount will depend on if using pattern/directional fabric – recommend decorator weight 54” width
2 1/2" PH screws or 3" screws for countersinking
1 1/4" PH screws
2" screws for attaching siderails to bed frame
2 – 2x6 @ 72”
3 – 2x6 @ 81”
2 – ¾” plywood 11 ½” x 84”
1 – ¾” plywood 11 ½” x 73 ½”
1 – ¾” plywood 75” x 48”
2 – ¾” plywood 17” x 48” (tapering to 12”)
Wood slats will be 72” or use box spring


Please read through the entire plan and all comments before beginning this project. It is also advisable to review the Getting Started Section. Take all necessary precautions to build safely and smartly. Work on a clean level surface, free of imperfections or debris. Always use straight boards. Check for square after each step. Always predrill holes before attaching with screws. Use glue with finish nails for a stronger hold. Wipe excess glue off bare wood for stained projects, as dried glue will not take stain. Be safe, have fun, and ask for help if you need it. Good luck!
Instructions
Step 1
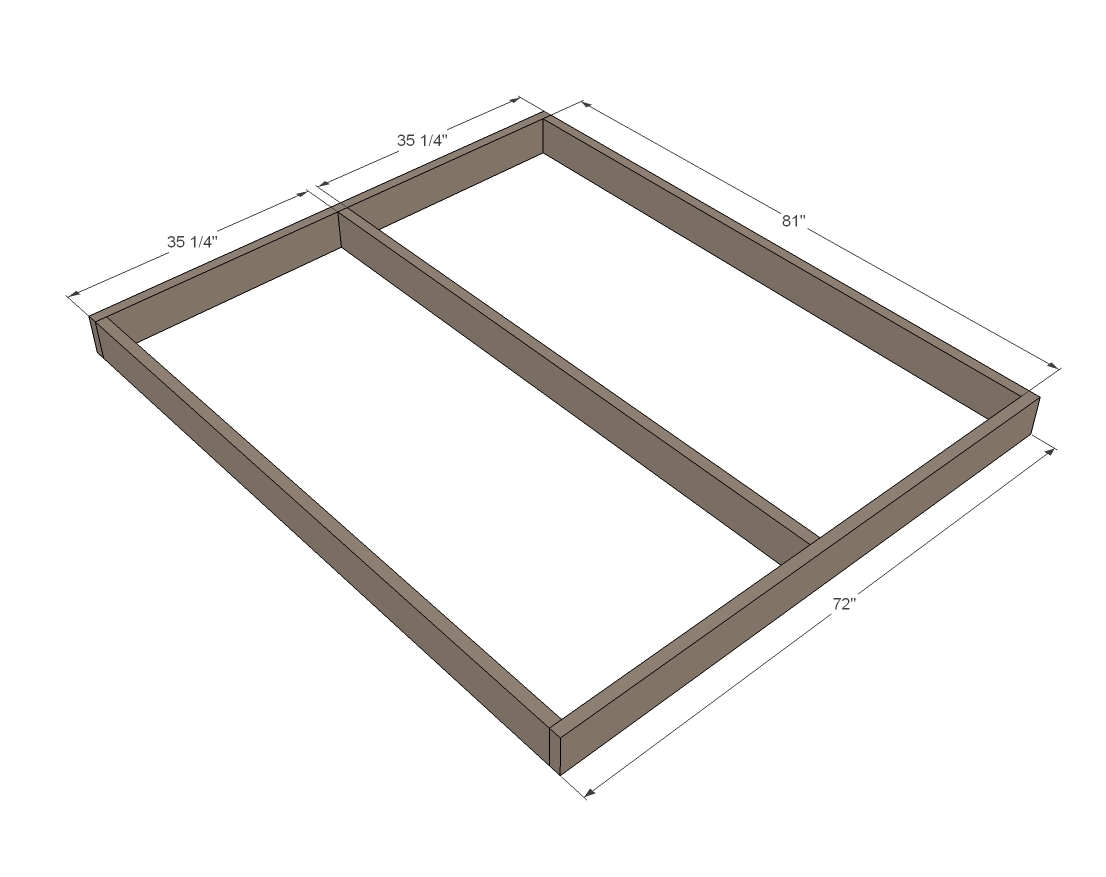
Gina is right - building the bed is going to be the easy part. And it starts easy - just make a box with the 2x boards.
Step 2
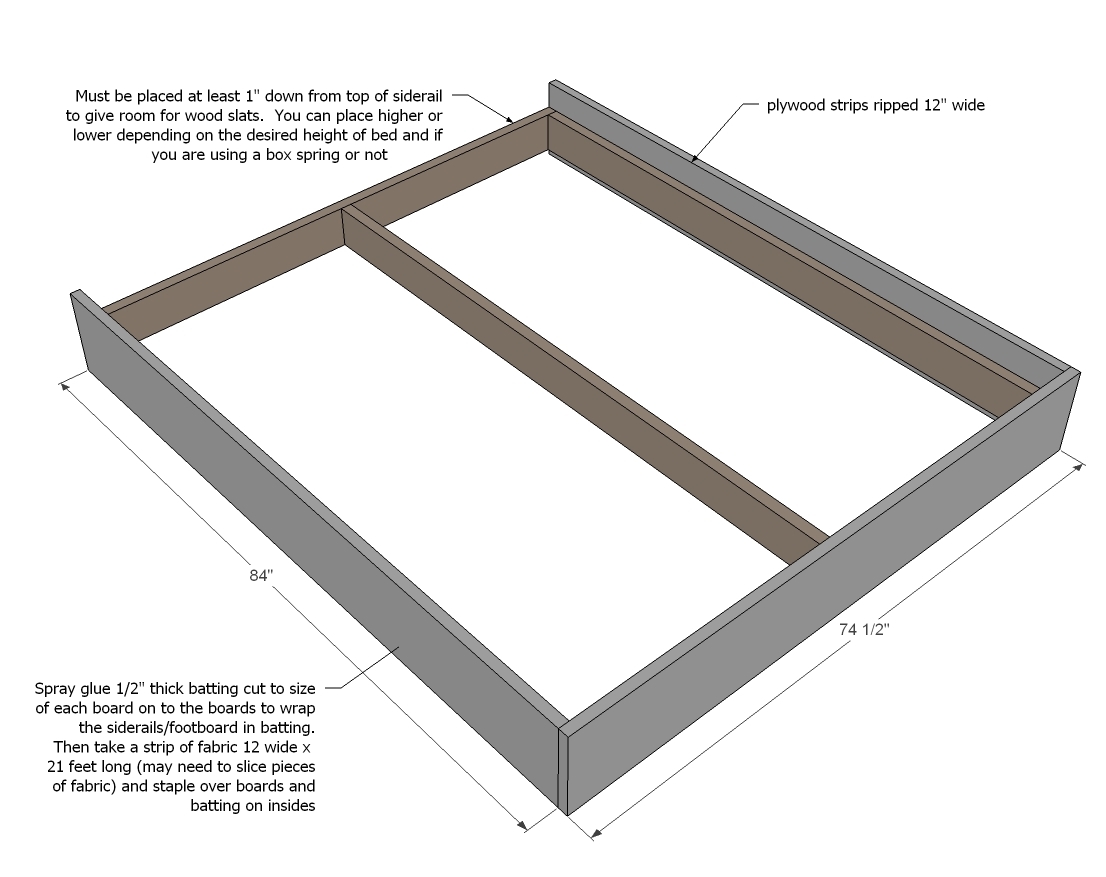
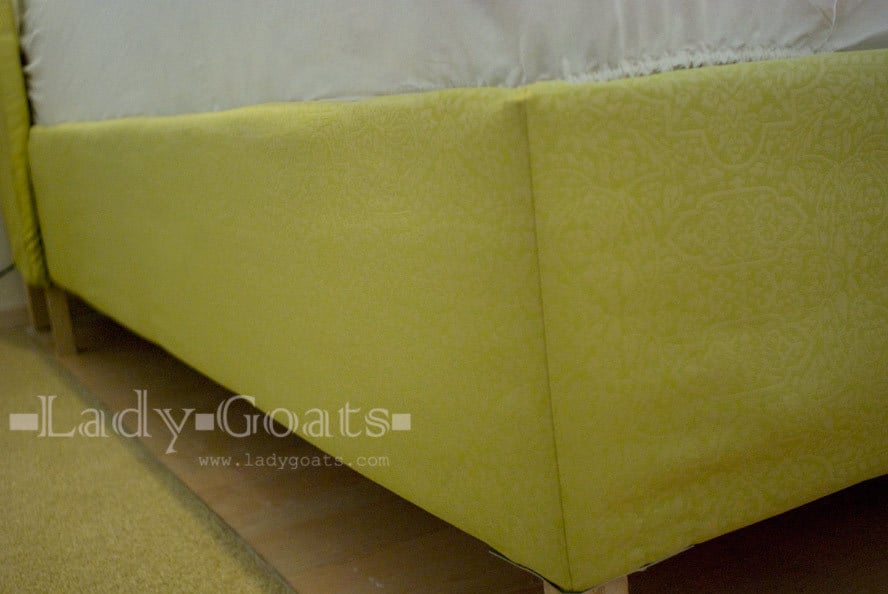
Then attach with 2" screws upholstered side rails. You could also upholster in place as well - there should be room.
Step 3
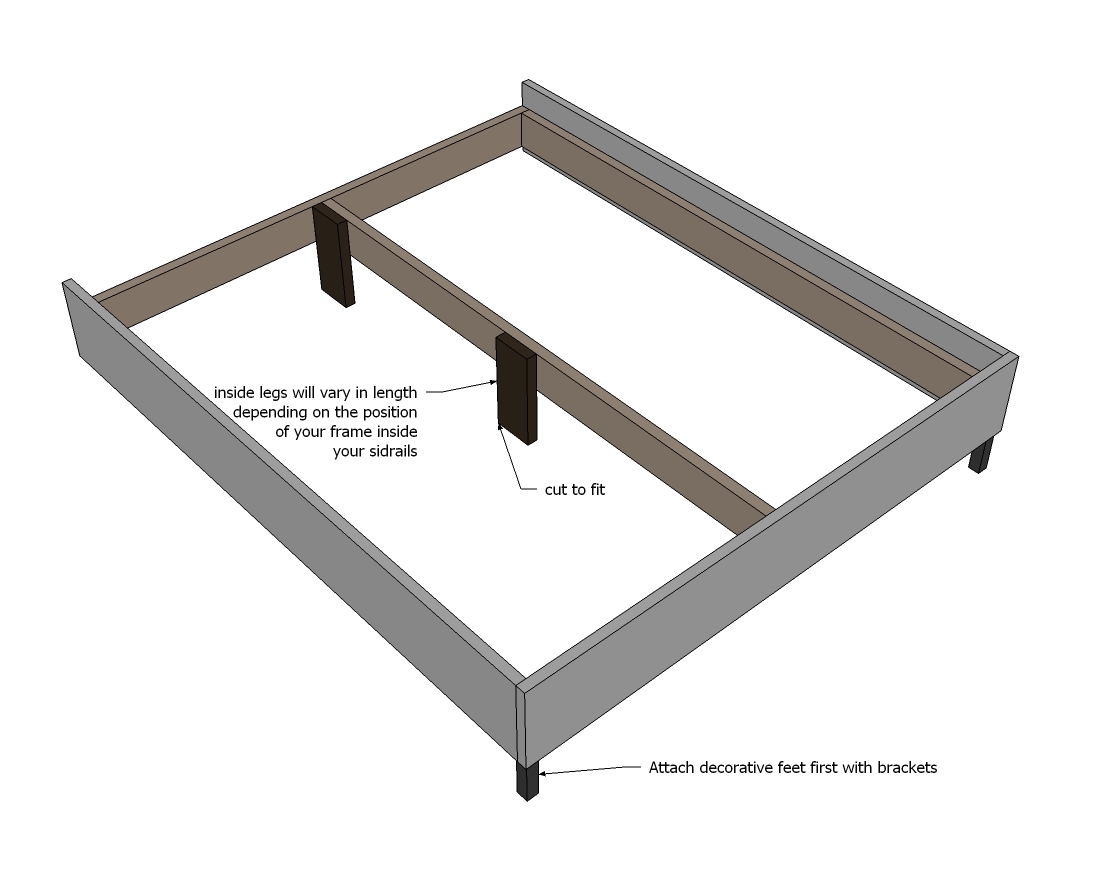
Use scraps up to make additional legs for support where you need it. These guys are the real "legs" on this bed.
Step 4
Gina ended up just slipcovering the pieces, and then attaching together - please read her post for more details here.
Step 5
Step 6
Step 7

Then we attach it all together - adding the legs on as well.
Step 8

And add slats for the mattress if you are not using a box spring.
Step 9

For more details on the upholstery - and all those buttons - please visit Gina at Lady Goats. Thanks Gina!!!
It is always recommended to apply a test coat on a hidden area or scrap piece to ensure color evenness and adhesion. Use primer or wood conditioner as needed.

Comments
Charlene in AK (not verified)
Thu, 06/14/2012 - 11:03
Bed
Oh yes I wanted a bed like this when I saw them at Restoration Hardware! My DH didn't think that it would be as easy as just adding sides to a headboard so he hasn't let me try it. Now I can show him that there are plans for it and he has to let me! Thank you Ana and Lady Goats! Your bed is beautiful!
Charlene in AK (not verified)
Thu, 06/14/2012 - 11:06
Bed
Oh yes! I wanted a bed like this since I saw one at Restoration Hardware! My DH didn't think it would be as easy as just adding sides to a headboard so he hasn't let me try it. Now I can show him the plans and he has to. Great plans ANA. The bed is beautiful Lady Goats!
Charlene in AK (not verified)
Thu, 06/14/2012 - 11:13
Bed
Oh yes! I wanted a bed like this since I saw one at Restoration Hardware! My DH didn't think it would be as easy as just adding sides to a headboard so he hasn't let me try it. Now I can show him the plans and he has to. Great plans ANA. The bed is beautiful Lady Goats!
Cindy from Indiana (not verified)
Fri, 06/15/2012 - 09:40
That is gorgeous!
That bed is absolutely gorgeous! Great job, Gina!
franky (not verified)
Fri, 06/15/2012 - 11:21
this is such a wonderful
this is such a wonderful tutorial! Thanks for sharing this with us. I must try this out in order to save my wallet some money!
birdsandsoap
Fri, 06/15/2012 - 15:24
I love that fabric! I just
I love that fabric! I just sewed drapes from the same material!
In reply to I love that fabric! I just by birdsandsoap
Lady Goats
Mon, 06/18/2012 - 09:38
Fabric
I love it, too! Did you use the exact same kind? If so, do you know what it's called? I don't have anything that says who made the fabric, and I've been asked a few times. Any idea?
In reply to Fabric by Lady Goats
birdsandsoap
Mon, 06/18/2012 - 10:25
I have no idea! I bought it
I have no idea! I bought it at Home Fabrics during their Spring Sale. I wish I knew the designer, I love the pretty morroccan looking pattern. I'll see what I can find.
In reply to I have no idea! I bought it by birdsandsoap
Lady Goats
Mon, 06/18/2012 - 10:29
Haha, I bought it on
Haha, I bought it on clearance at Home Fabrics. The only thing the receipt says is "jacquard - ric"
Thanks, chica!
Tarryn (not verified)
Thu, 06/21/2012 - 11:11
Measurements for king
Can you PLEASE provide all the measurements for a King bed? I sooo love this bed and am planning on redoing my bedroom For my 13th anniversary coming up. I was so excited when I saw these plans. Also you don't mention how to get the "tufted" effect. It just says you sewed onto the fabric. Can you explain?
Thanks!
In reply to Measurements for king by Tarryn (not verified)
Lady Goats
Sat, 06/23/2012 - 15:09
King Measurements
Hi Taryn! for a King, the cut list would be as follows
2 - 2x6 @ 76"
2 - 2x6 @ 77"
2 - 3/4" plywood @ 11 1/2" x 80"
1 - 3/4" plywood @ 11 1/2" x 77 1/2"
1 - 3/4" plywood @ 79 x 48 (I'm not totally positive about this measurement, to be honest)
Also, I didn't tuft the fabric. I seriously just sewed the buttons through the fabric. I started sewing in from the back, stapled the thread on the back and knotted it so that it "caught", and then kept sewing through the button, and under the staple. Then I just knotted it off when it was done. No tufting involved. Hope this helps!
Tarryn (not verified)
Sun, 06/24/2012 - 19:39
Measurements for King
Thanks Gina! Will let you know how this works out. If you get clarification in that last measurement please let me know!
Tarryn
thejanellekay
Sat, 07/21/2012 - 19:58
Measurements for a Queen!
Hello All,
I desperately want to make this bed for a queen size. Is there anyone someone could help me with a cut list for a queen?
Thanks!
Janelle
Kate (not verified)
Fri, 09/21/2012 - 13:58
I second that- Queen please!
I agree with Janelle- I'd love to build this for a queen mattress. I'd love to have the measurements! Thanks so much :-)
Michelle U (not verified)
Tue, 10/23/2012 - 16:04
I third that Queen size request!!
I'd be interested in the Queen size cut list as well. :)
In reply to I third that Queen size request!! by Michelle U (not verified)
Lady Goats
Tue, 10/23/2012 - 16:27
Queen
Let me look into this to see if I can easily convert to a queen.
Michelle U (not verified)
Sat, 10/27/2012 - 15:20
We're in the middle of
We're in the middle of building this. Where does it show how to attach the wings to the headboard? Where do the brackets come into play?? Maybe I missed it but the instructions seem to skip that step all together....goes from building the base to upholstering the headboard. Do the plans show instructions on how to build the headboard?
Michelle U (not verified)
Sat, 10/27/2012 - 21:33
foam?
Where do you buy the 1/2inch foam. I can't seem to find it. for under $20 yard. Is that about what you paid?
laurenhala
Wed, 11/28/2012 - 11:35
Love this Wingback bed!
We are in the process of purchasing a home now and I'd love to build this in a Queen size for our Master Bedroom! Love the clean lines and the fabric (though I'll probably go a bit more neutral).
I hope you're able to post queen dimensions soon! Thanks for sharing!