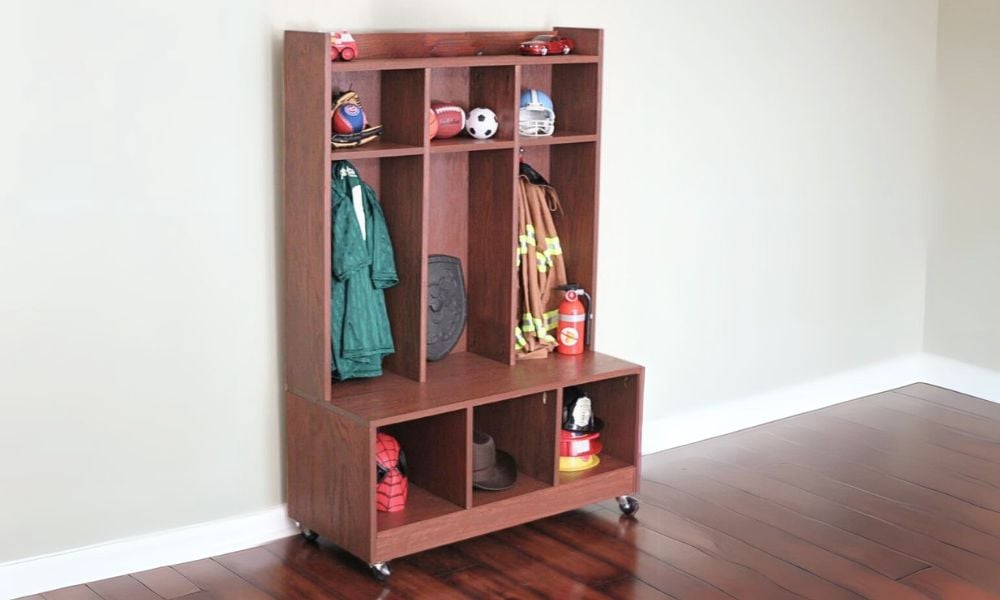


This diy hall tree is built from one sheet of plywood! Get the free template and plans with step by step instructions, diagrams, shopping and cut list and build this.
Preparation
- 1 – sheet ¾” thick plywood
- 4 – 4 feet long 1x3 boards in matching species
- 1 – half sheet ¼” plywood in matching species
- 4 – caster wheels with plates
- 1 ¼” Pocket hole screws
- 1 ¼” brad nails
- Wood glue
- 3/4" Edge Banding in matching wood veneer
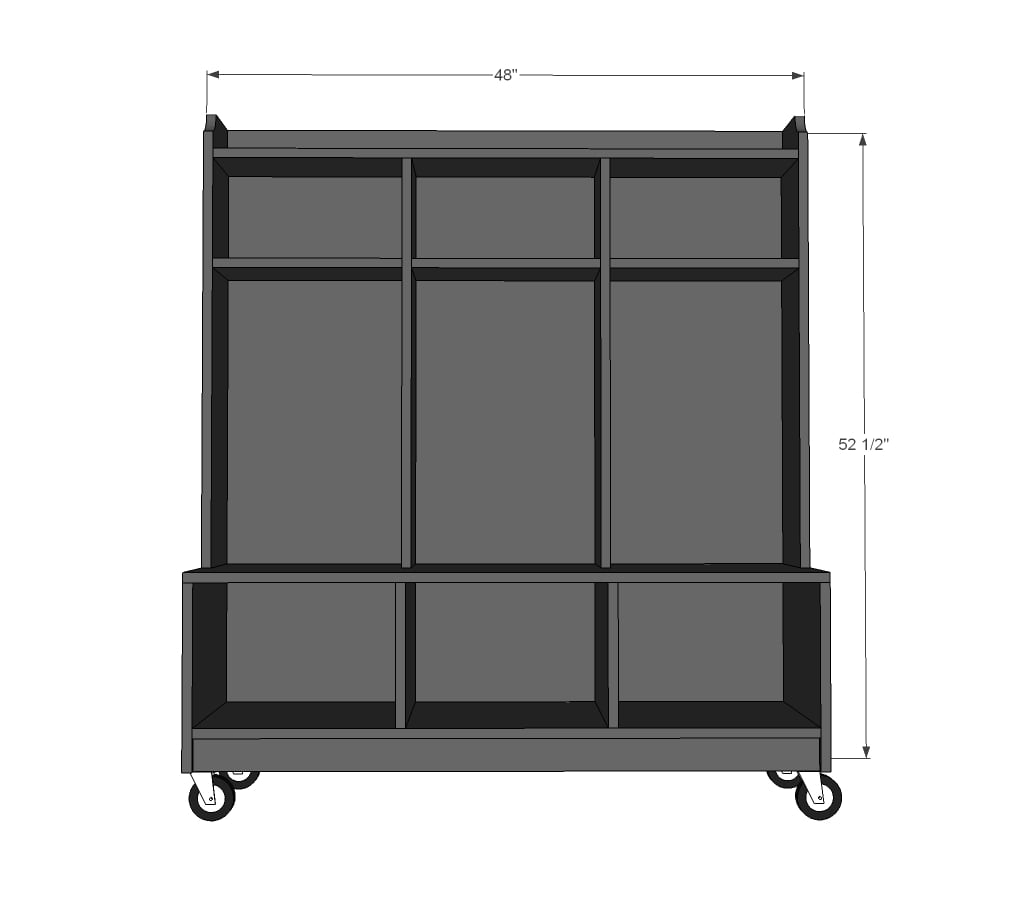
- 1 – 3/4" plywood @ 15-3/4" x 48”
- 2 – 3/4" plywood @ 15-3/4" x 14”
- 2 – 3/4" plywood @ 15-3/4" x 10 3/4”
- 1 – 3/4" plywood @ 15-3/4" x 46 1/2”
- 3 – 1x3 @ 46-1/2"
- 2 – 3/4" plywood @ 7-3/4" x 36-1/4”
- 1 – 3/4" plywood @ 7-3/4" x46-1/2”
- 2 – 3/4" plywood @ 7-3/4" x 33”
- 1 – ¼” plywood 48” x 48”
- 3 – 3/4" plywood @ 7-3/4" x 15”
After cutting the plywood pieces, apply edge banding to the front edges.


Instructions
Step 1
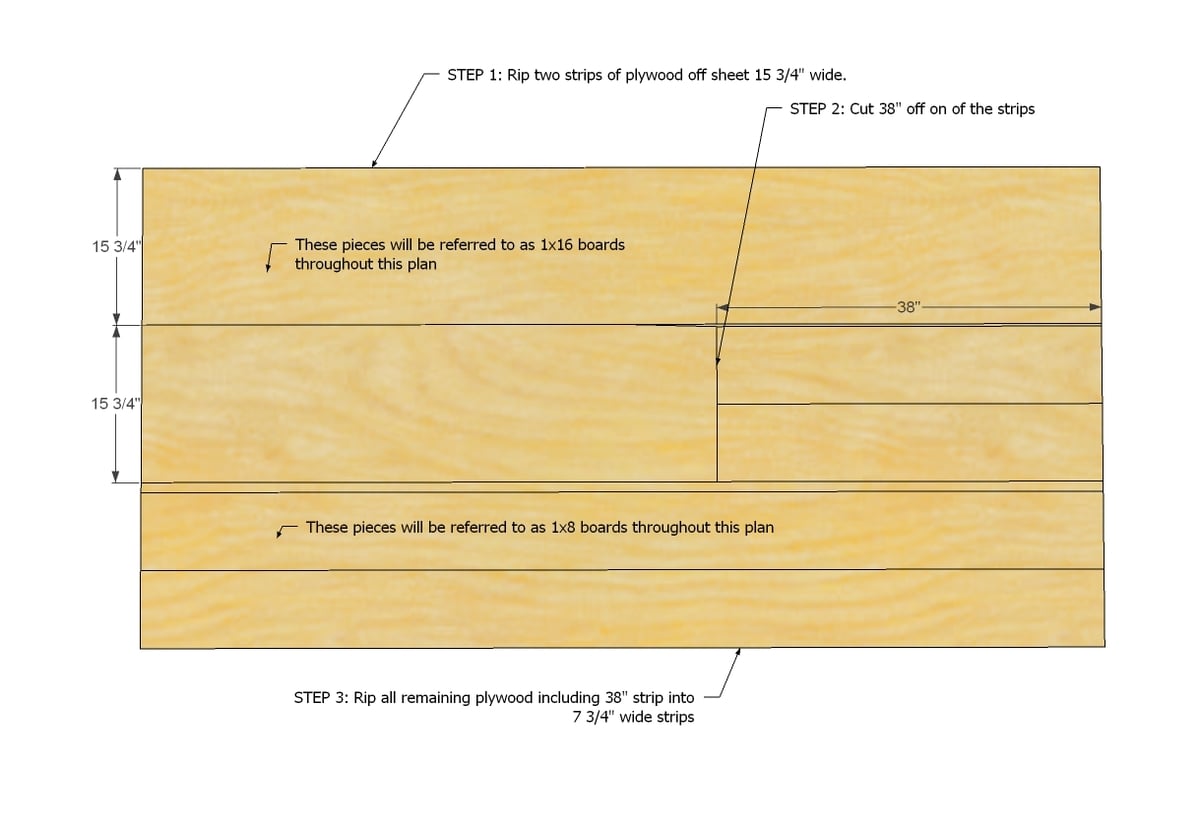
The first step is to break the plywood panel down in size.
Rip two strips, 8 feet long by 15-3/4" wide. Then cross cut 38" off one of the strips.
Rip the remaining strip and the 38" strips into pieces 7-3/4" wide.
If you don't have a tablesaw, here is a method of using the circular saw to make good rip cuts:
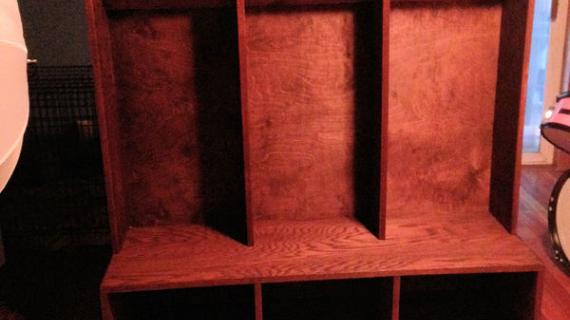
Step 2
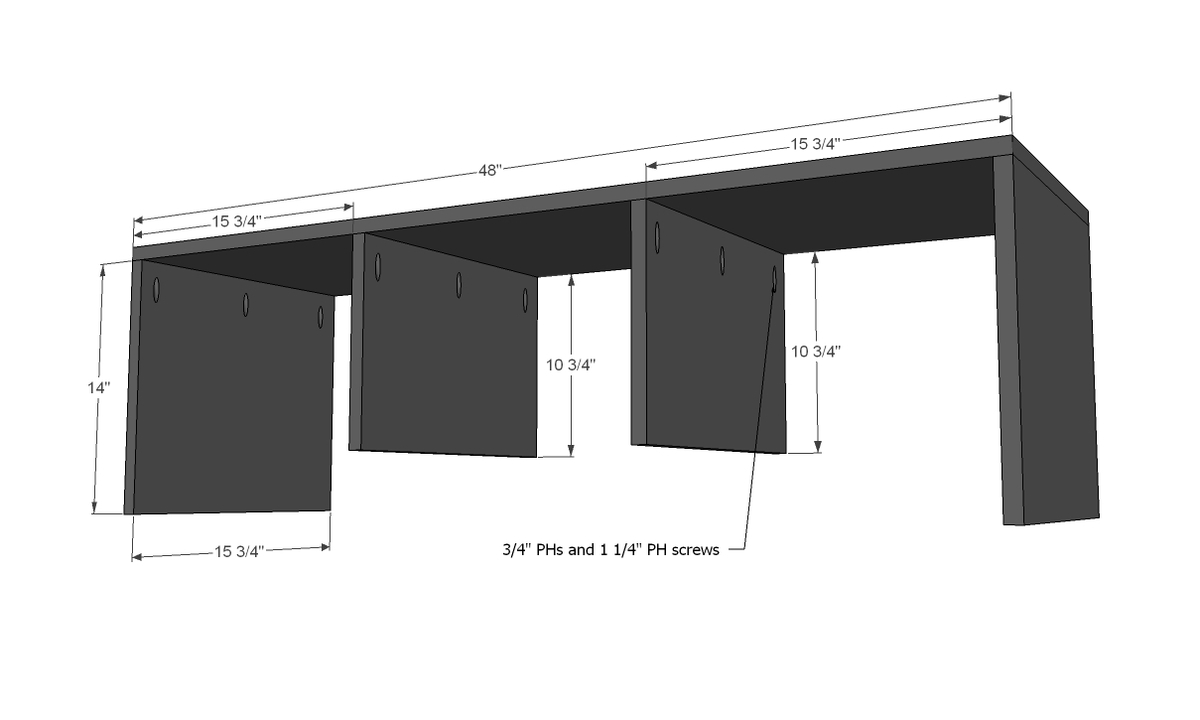
Start by assembling the base storage compartments as shown above. Measure and mark out the joint locations with a square and attach with 3/4" pocket holes and 1-1/4" pocket hole screws.
Step 3
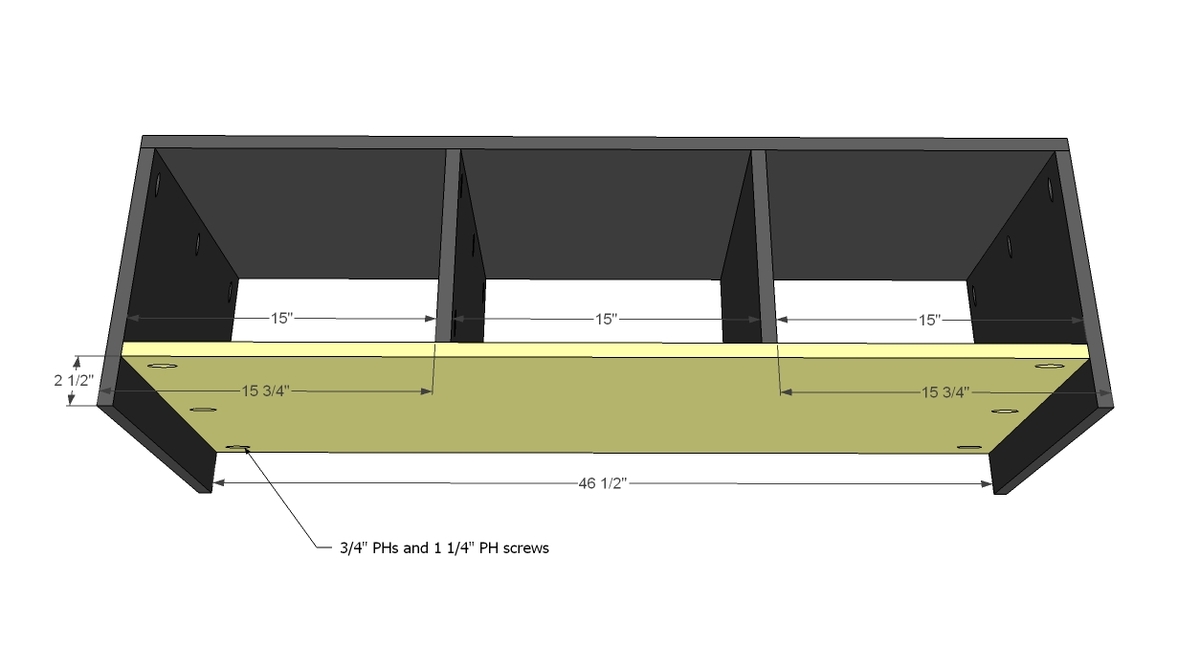
Mark out the cubby divider locations with a square, and then attach this time with countersunk screws.
Step 4
Drill 3/4" pocket holes along top edge and ends of the footers. Attach inset slightly to the base.
An alternative attachment method is 1-1/4" brad nails and wood glue.
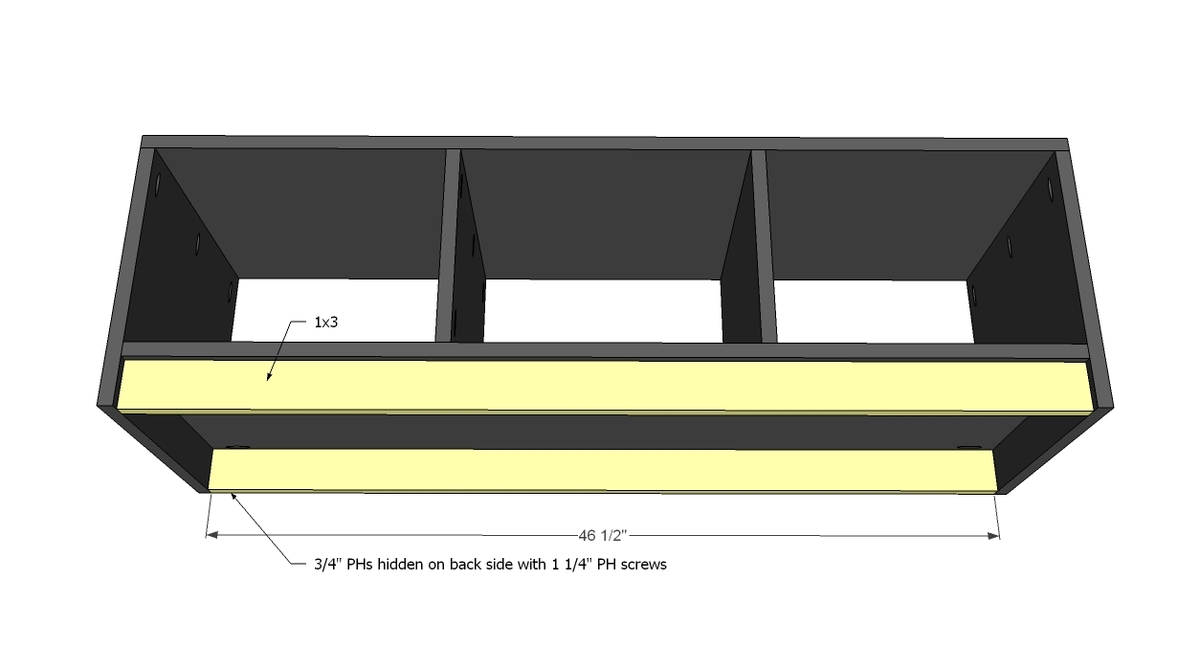
Step 5
Attach the 1x3s under the bench with 1-1/4" brad nails and wood glue.
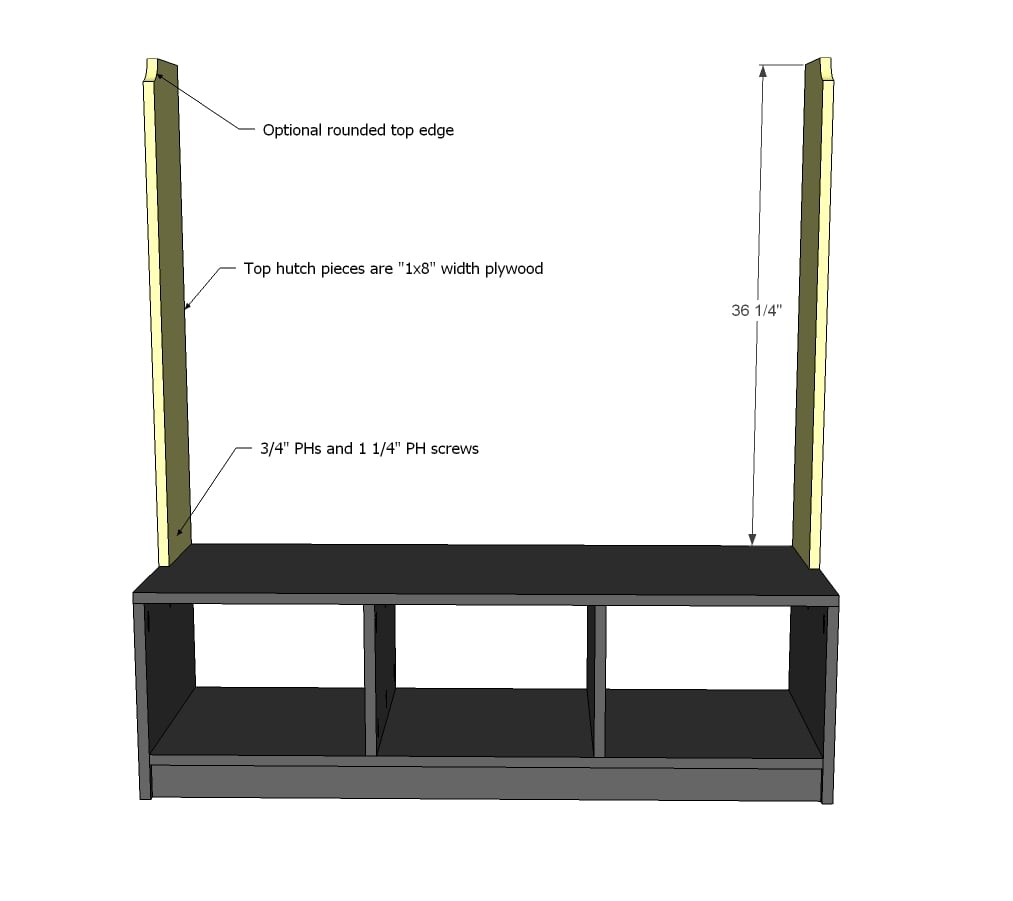
Step 6
Build the upper hutch with 3/4" pocket holes and 1-1/4" pocket hole screws.
Step 7
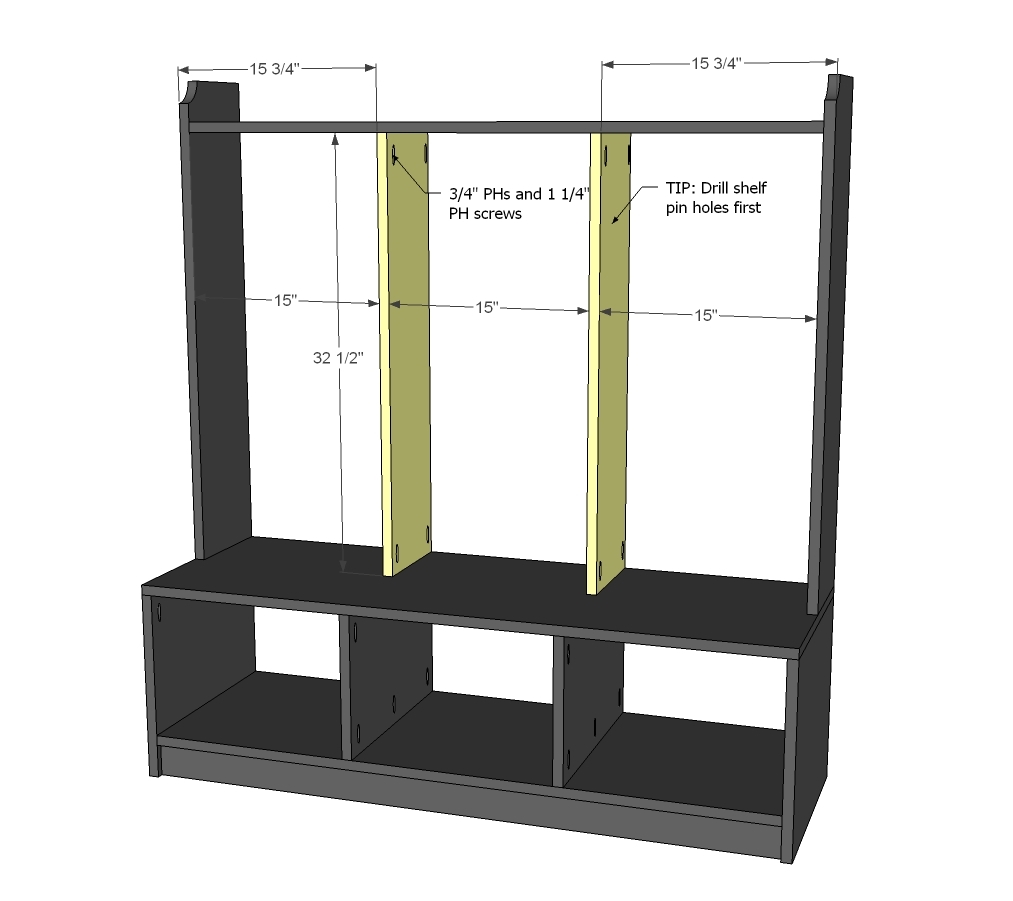
And then attach the dividers. NOTE: These should actually be 33" long.
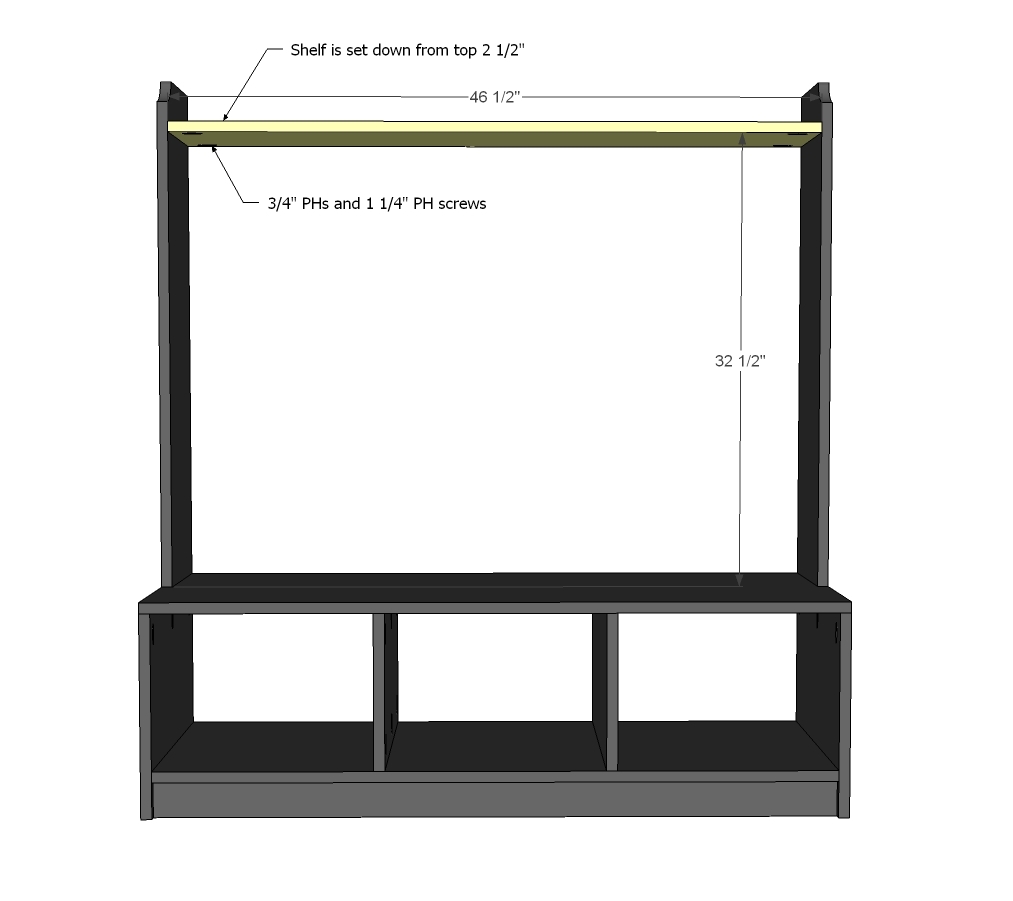
Step 8
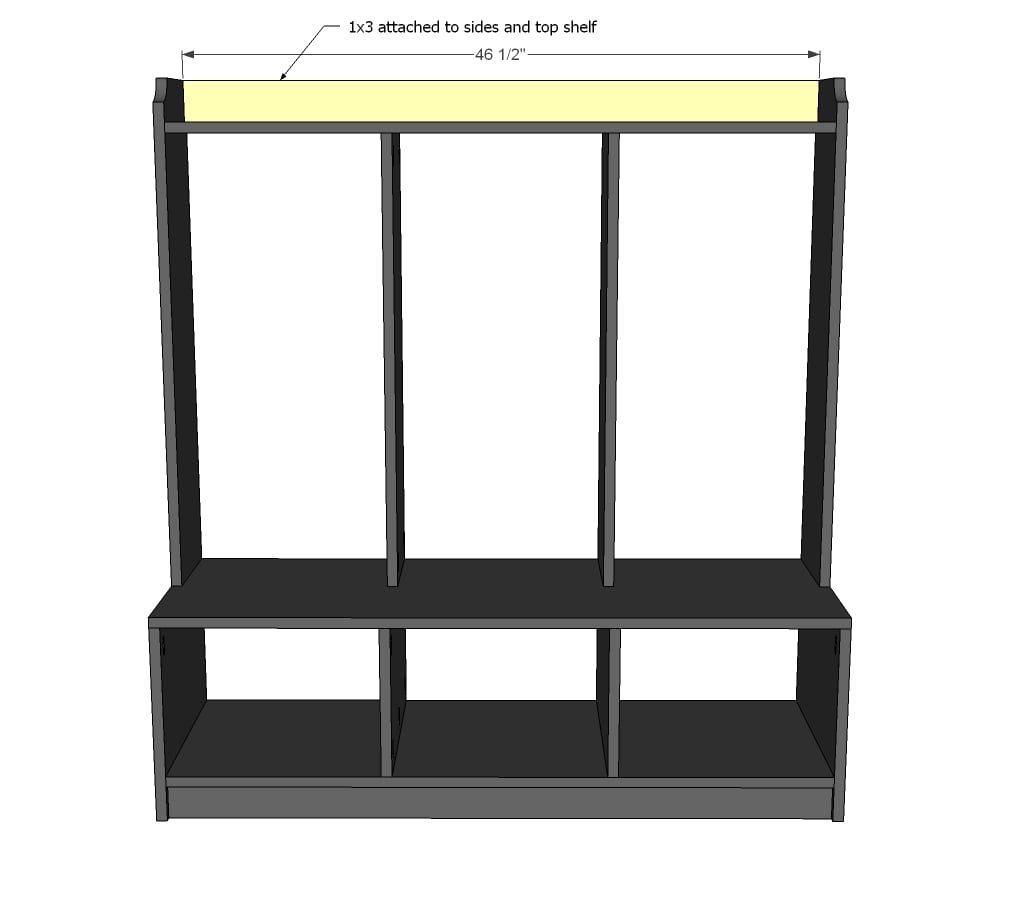
Followed by the back header - do the same, drill 3/4" pocket holes along ends and bottom edge and attach as you did the footers.
Step 9
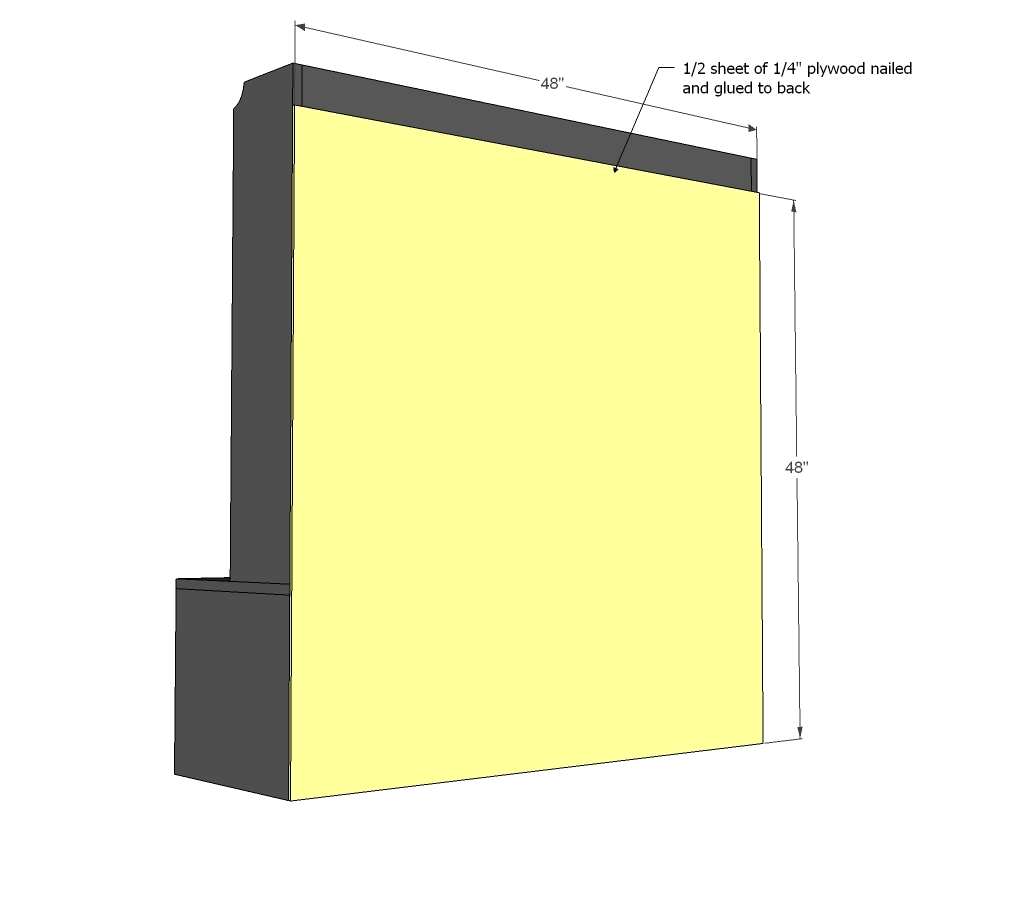
Finally, attach back with glue and nails.
Step 10
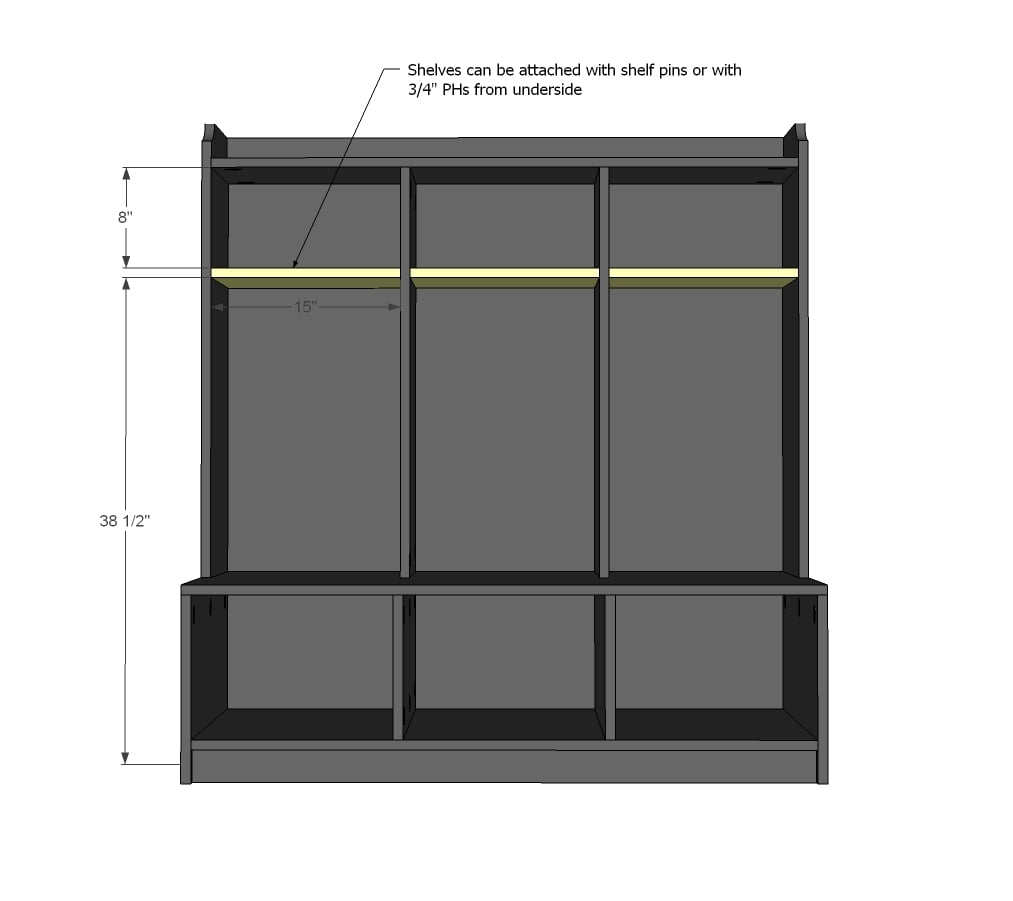
NOTE: For the shelves, I used shelf pins and recommend attaching a 1x3 to back underside of the shelf to attach hooks to. Then when you move your shelf down or up, the hook goes too.
It is always recommended to apply a test coat on a hidden area or scrap piece to ensure color evenness and adhesion. Use primer or wood conditioner as needed.
Comments
Deneen Glidwell (not verified)
Mon, 06/25/2012 - 19:39
Haven
Thank you so much for the great workshop. I won the Ryobi compound saw and table! I will be following your blog now to learn how to use it! lol
Bill (not verified)
Mon, 06/25/2012 - 23:16
fastenings and pins
This design looks pretty well thought out. However do you think the pocket system is extra work for fastening the interior verticals? I'd do them simply countersunk from above/below and then you don't have the elliptical holes to fill.
The side verts would be stronger with the pockets though because of the grain directions.
The plywood back is actually critically important. If done right, with a good glue joint it will hold everything together. Without it, the system is rickety. You could even eliminate the pocket fastenings on the outer verts that are toward the back--because of the support of the back.
Now, for shelf pins: you don't describe how you deploy these. Accuracy of placement is important to prevent wobbly shelves. How did you do it?
Ilana (not verified)
Sat, 07/07/2012 - 20:22
Fixing some issues
Hi, Ana
This is my first project- I know, kinda crazy- and I am having an issue already. When I was sawing my boards, some of my cuts went wrong. Right now I have one 1x16 @ 14" and the second one is shorter, @13.5 approx.
What can I do so that my piece is not totally lopsided?
I since then researched on your blog and saw hoe to make a jig for cutting plywood... Good to know for next time, but what with now?
Also, would you suggest getting the guys at home depot to do every single cut for me in the future? I only have a circular saw...
Thanks!
Ilana
In reply to Fixing some issues by Ilana (not verified)
Ana White
Sat, 07/07/2012 - 21:46
Hi Ilana, great that you got
Hi Ilana, great that you got started!
For a first project, might not be a bad idea to ask the HD to do the board cuts :)
No worries on your cuts being off. Just make both ends the same at 13 1/2" and then take 1/2" off the 10 3/4" boards (make them 10 1/4". Then all you did was shorten the whole project by 1/2"
Good luck on the project!
Ana
ravinirvana13
Wed, 09/18/2013 - 21:29
I think the way you write
I think the way you write feels like having so much passion, I am curious on the way you write down this topic. This is the kind of content that will give clearance to this issue and you have put it in a way that everyone can understand
http://swoggi.rosites.com
Alex01
Wed, 11/13/2013 - 01:07
Pretty Locker
Nice Post