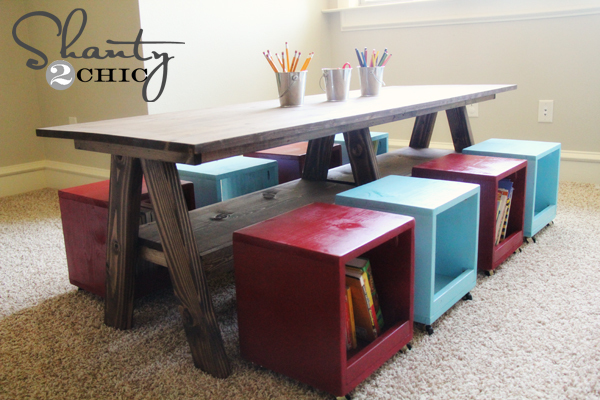


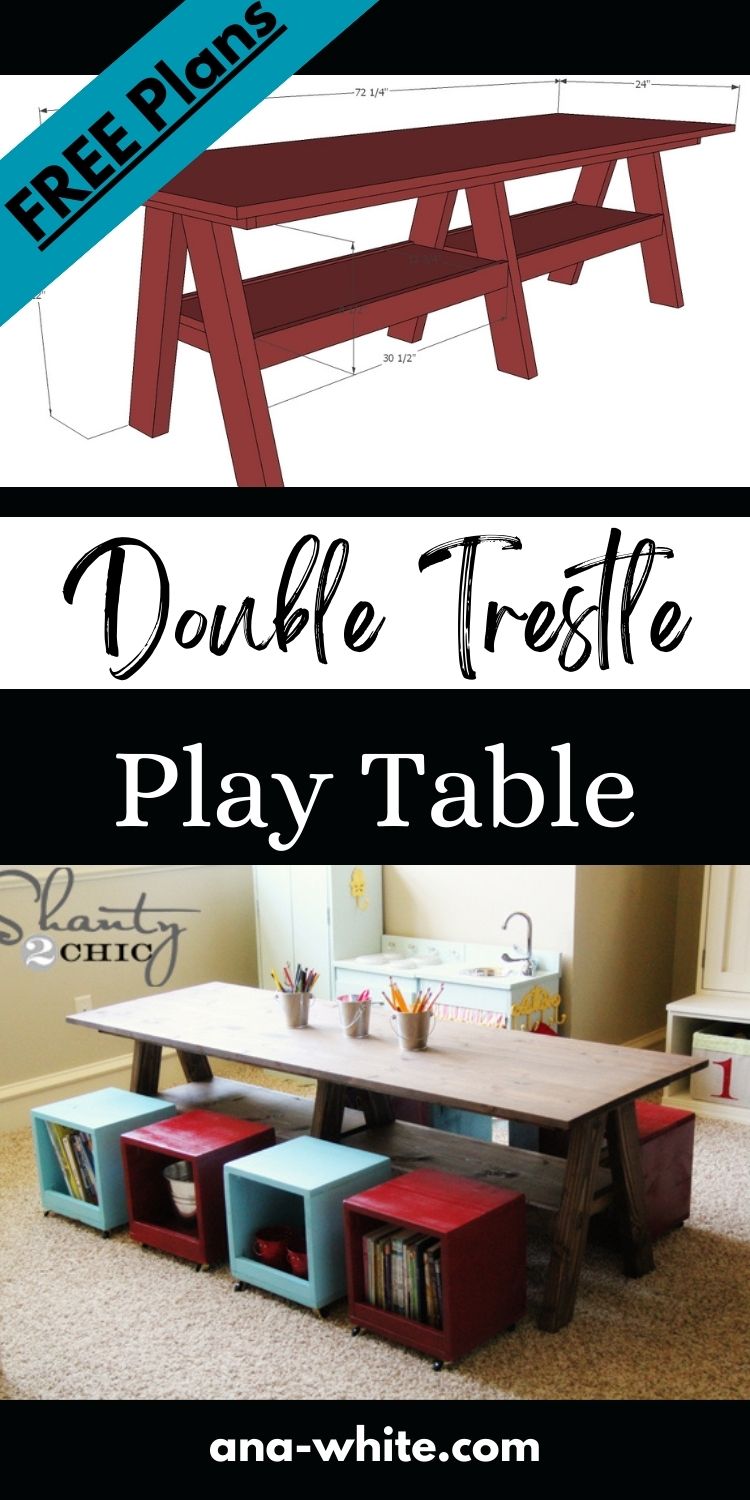
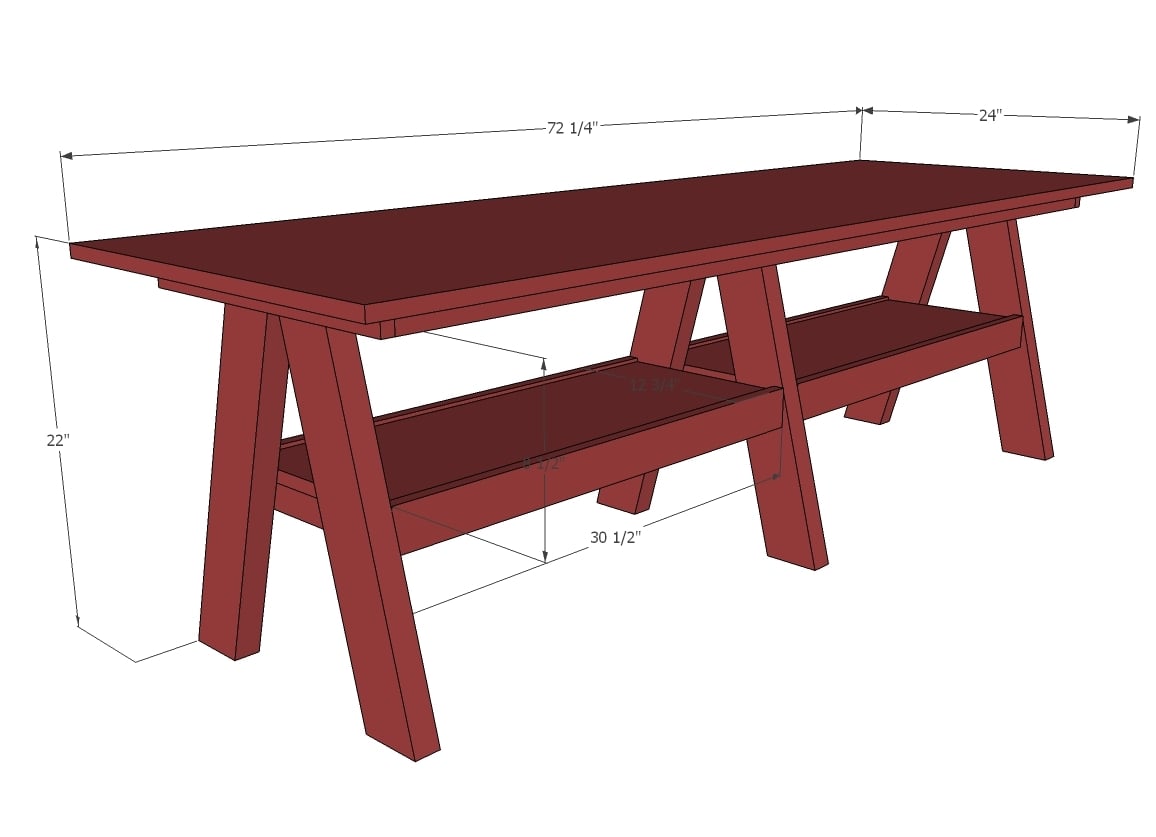
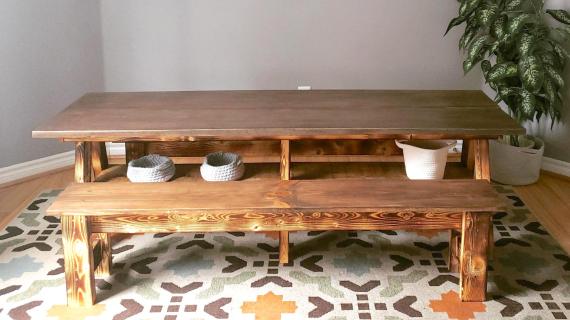
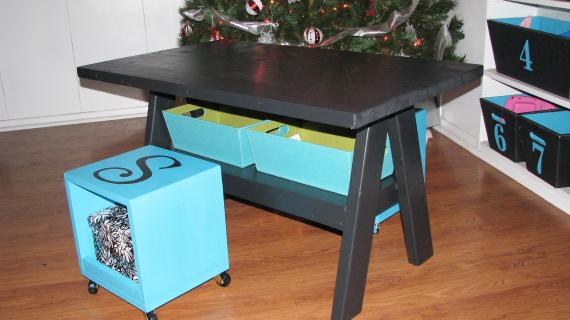
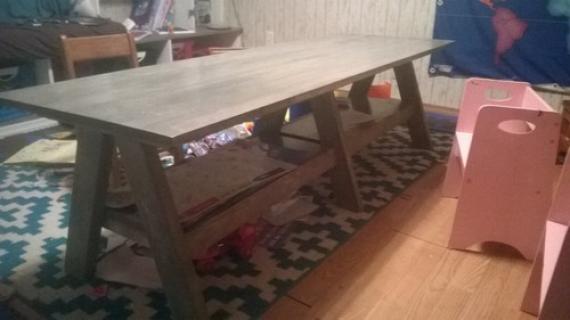
Make this adorable table for $65 using off the shelf materials and basic power tools. We love the smooth, wide top, the storage underneath, and the solid wood design - so you can stain or paint any way you want. Our free step by step plans include lots of diagrams, shopping list and cut list.
We also have plans for a smaller version of this play table here.
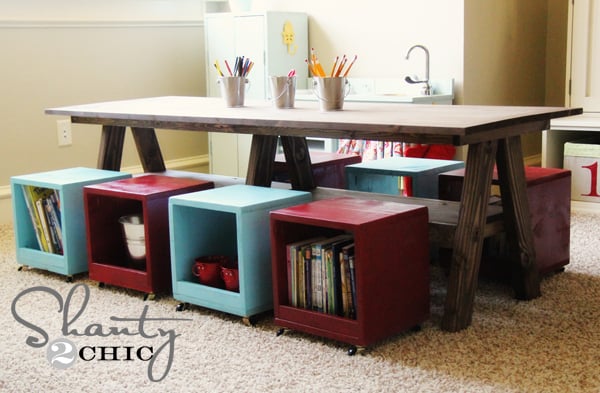
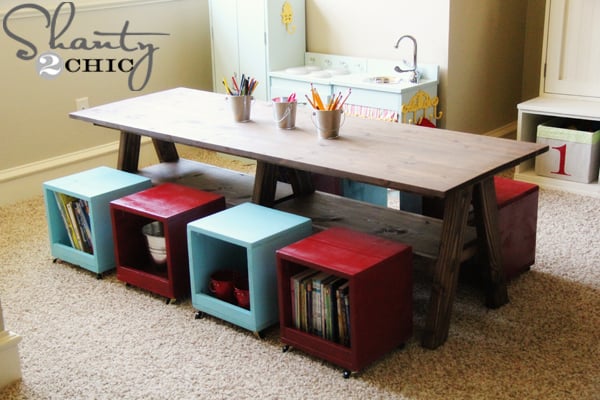
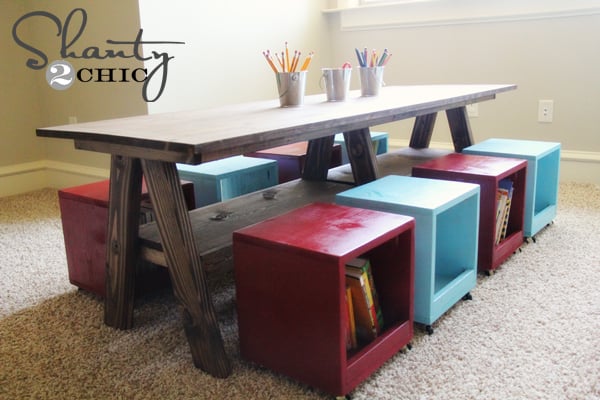
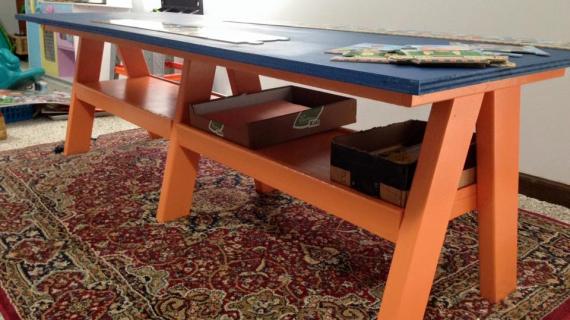
I bet you are also getting ready for the new school season? My friend Whitney of Shanty2Chic - who has no less than 5 kids - has been needing a larger play table to fit her family at.
We thought it would be cute to double the length of the Trestle Play Table, and I absolutely love how it turned out!
Here's from Whitney:
My family outgrew the last kids table I built. I asked Ana to give me one to fit my herd and she delivered. This was a super easy build. I had the whole thing put together in under 2 hours. I paid $65 for the wood and could not be happier!! LOVE IT!
Two hours and $65. Wow.
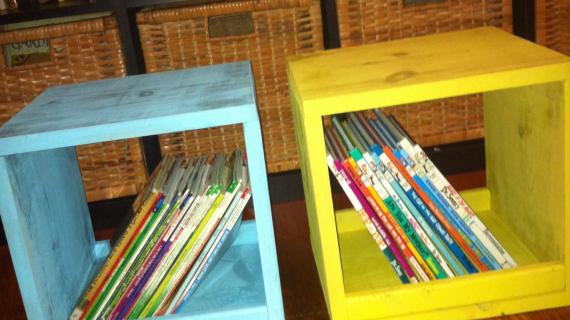
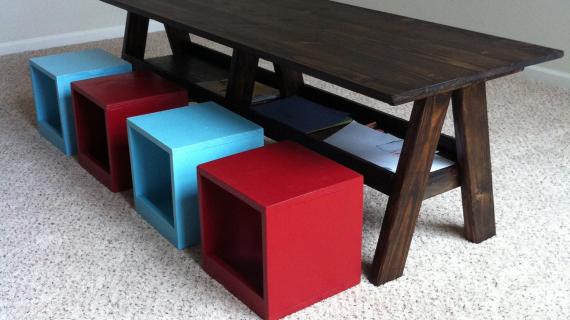
Please stop over and check out lots more photos and building details - and the low down on those rolling stools! - over at Shanty2Chic!
Pin For Later!
Preparation
- 2 – 2x4 @ 8 feet long
- 2 – 1x2 @ 8 feet long
- 1 – 1x12 @ 6 feet long
- 2 – 1x3 @ 8 feet long
- 2 – 2x2 @ 8 feet long
- 1 – ¾” thick project panel 24” x 72”
- 6 – 2x4 @ 22” (both ends cut at 15 degrees off square, long point to short point, ends ARE parallel)
- 4 – 1x2 @ 11 ¼” (cut to width of 1x12 shelf)
- 2 – 1x2 @ 18”
- 2 – 1x2 @ 15”
- 2 – 1x12 @ 30 ½”
- 4 – 1x3 @ 30 ½”
- 2 – 2x2 @ 65 ½”
- 1 – ¾” pine project panel 24” x 72”


Please read through the entire plan and all comments before beginning this project. It is also advisable to review the Getting Started Section. Take all necessary precautions to build safely and smartly. Work on a clean level surface, free of imperfections or debris. Always use straight boards. Check for square after each step. Always predrill holes before attaching with screws. Use glue with finish nails for a stronger hold. Wipe excess glue off bare wood for stained projects, as dried glue will not take stain. Be safe, have fun, and ask for help if you need it. Good luck!
Instructions
Step 1
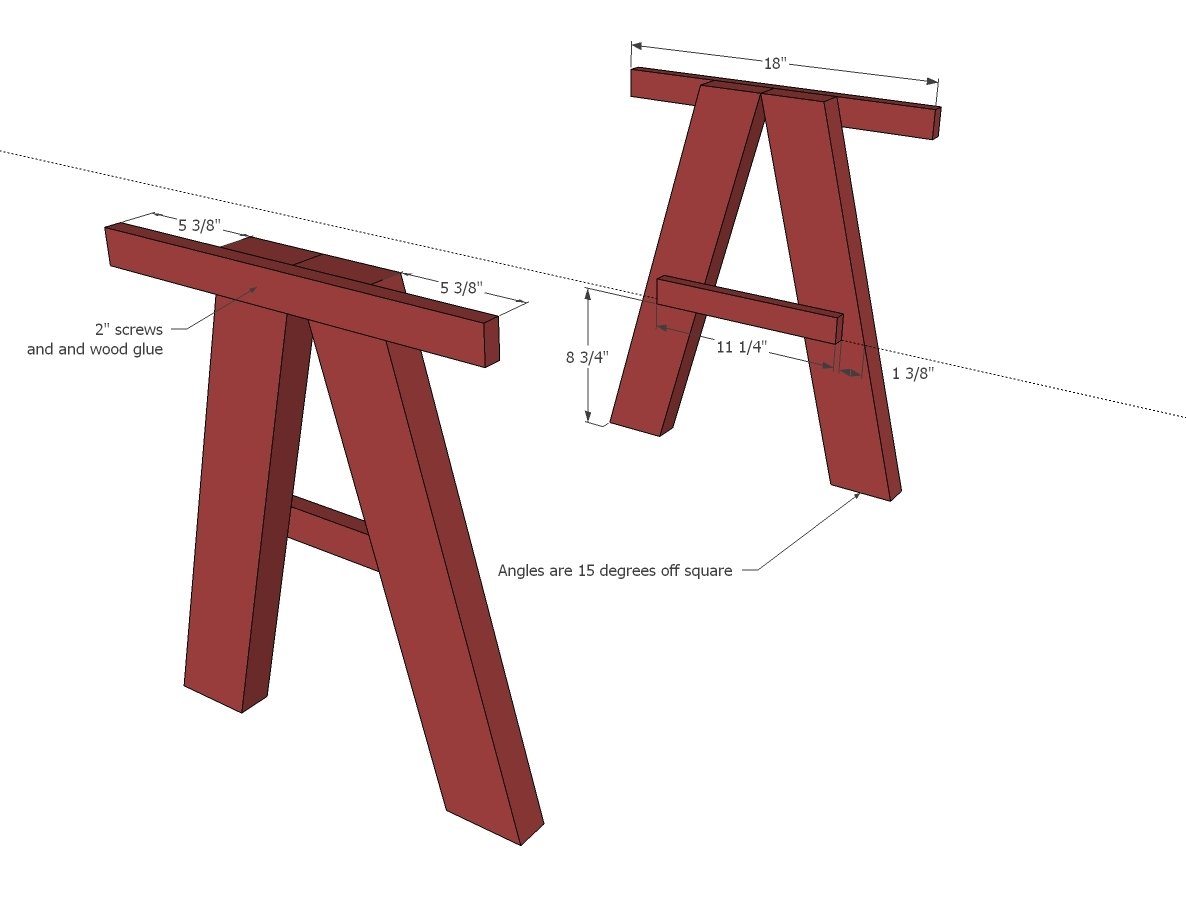
If you can get your legs all built square, you will be good to go!
First mark out the 1x2s @ 18" long 5 3/8" from each end.
Layout the two ends, and attach top 1x2 to two end legs and repeat for second side.
Then measure up from the base of the legs 8 3/4" on each leg and mark a line across both legs.
Place the 1x2 @ 11 1/4" on this line and attach with 2" countersunk screws and glue as shown in diagram.
Remember, you will need to make two ends that are identical.
NOTE that this plan assumes your 1x12s are 11 1/4" wide. If your 1x12s differ in width, adjust the bottom shelf cleats to the length of your 1x12s.
Step 2
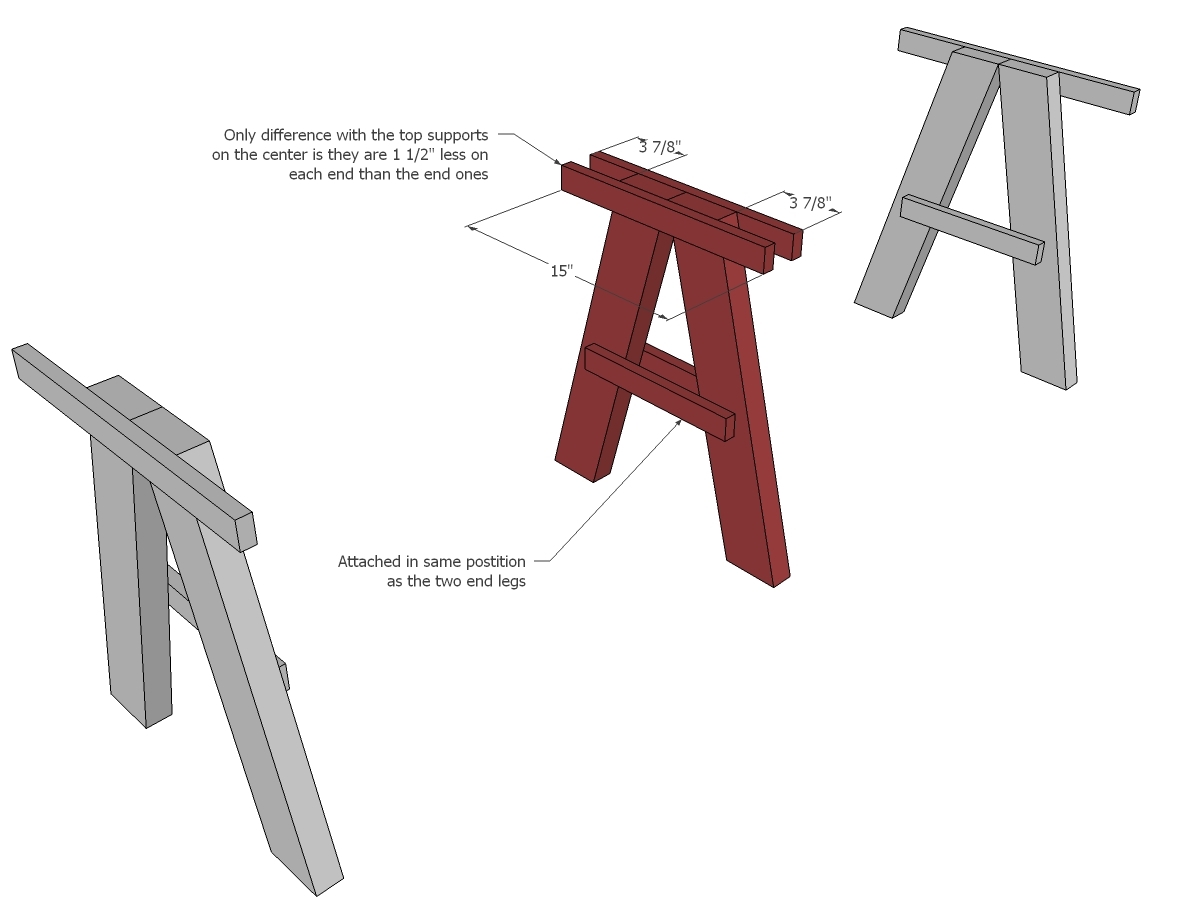
The middle leg follows the same process, only we will do the cleats on both sides for bottom shelf, and the top boards are a little shorter. Build middle same as ends, noting the changes.
Step 3
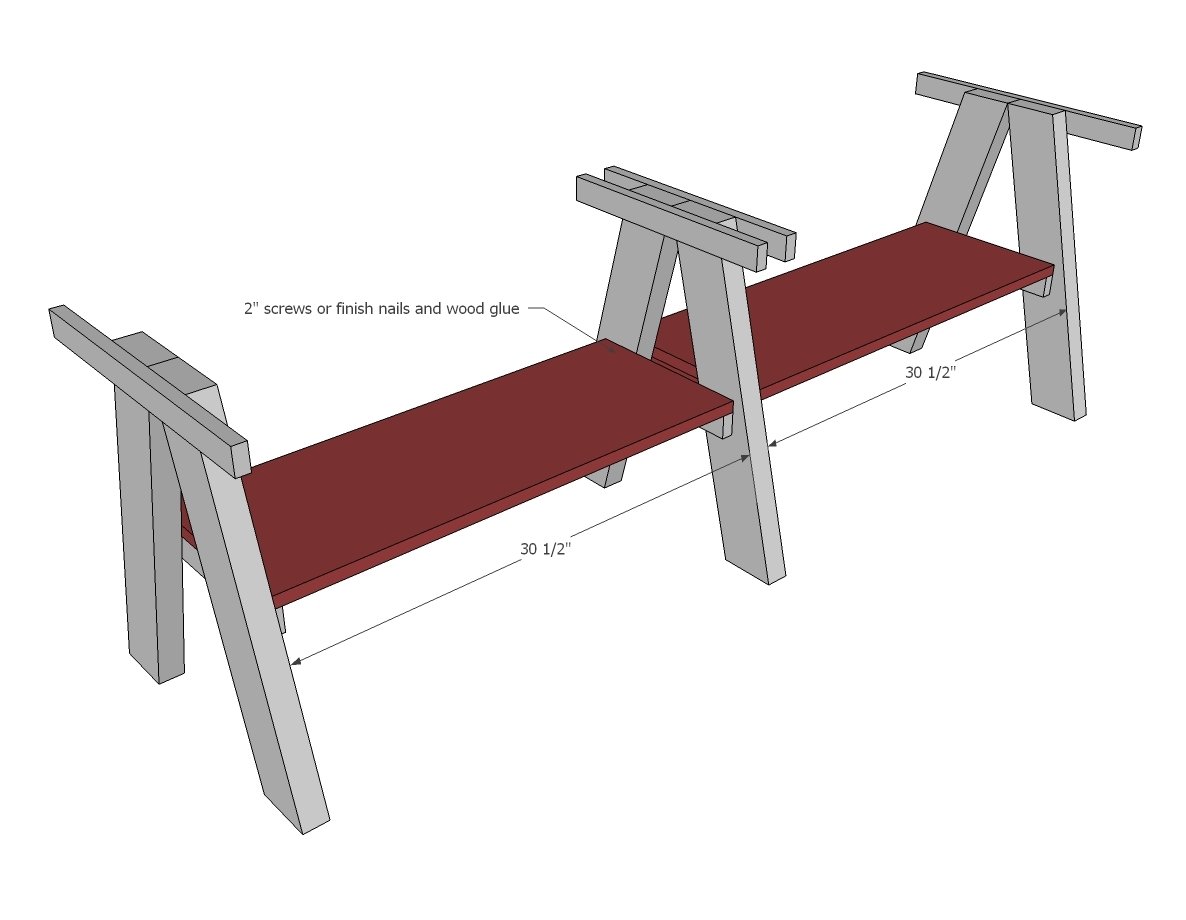
Attach 1x12 to legs with 1-1/4" brad nails and wood glue.
Step 4
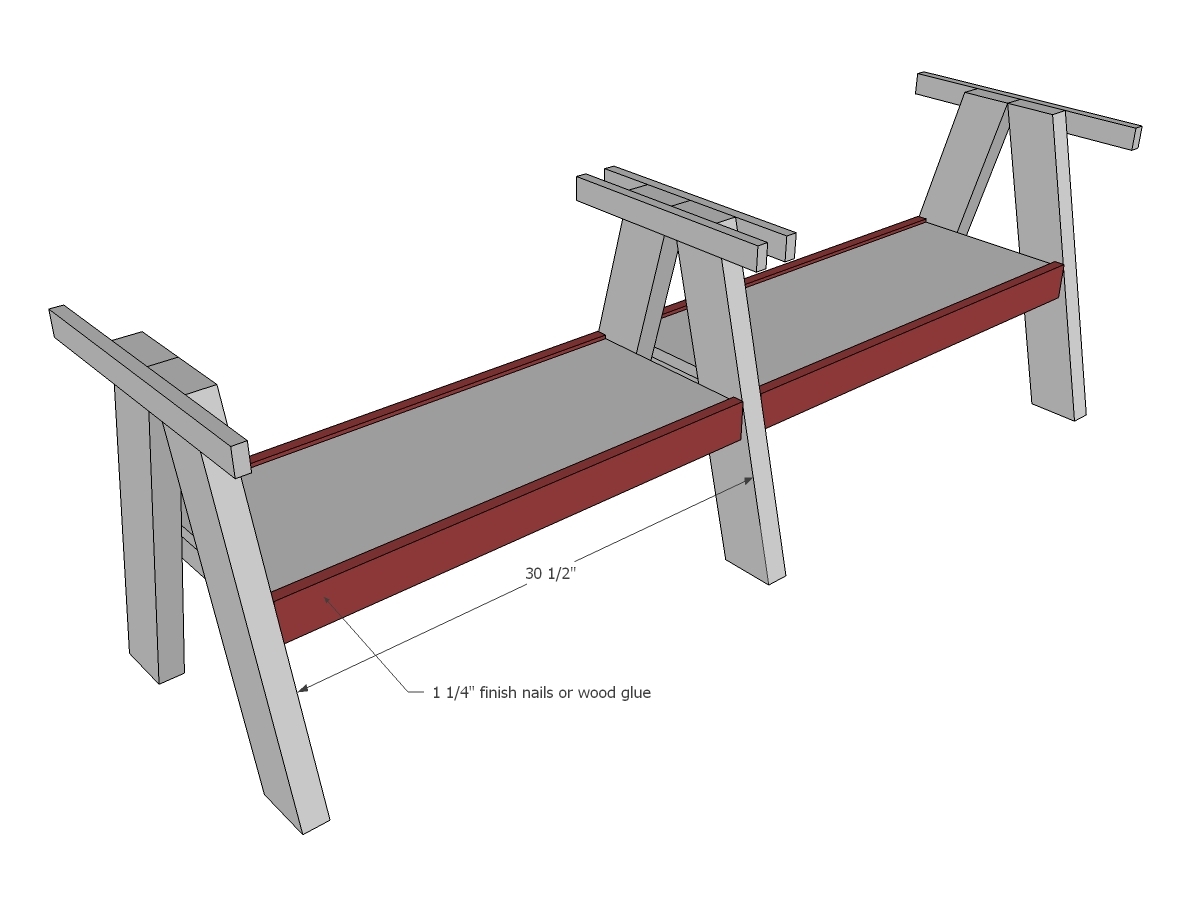
Attach trim to edges of 1x12 with 1-1/4" brad nails and wood glue.
It's also a good idea to use 2" screws to attach from the outside of the legs into the ends of the 1x3 and 1x12.
Step 5
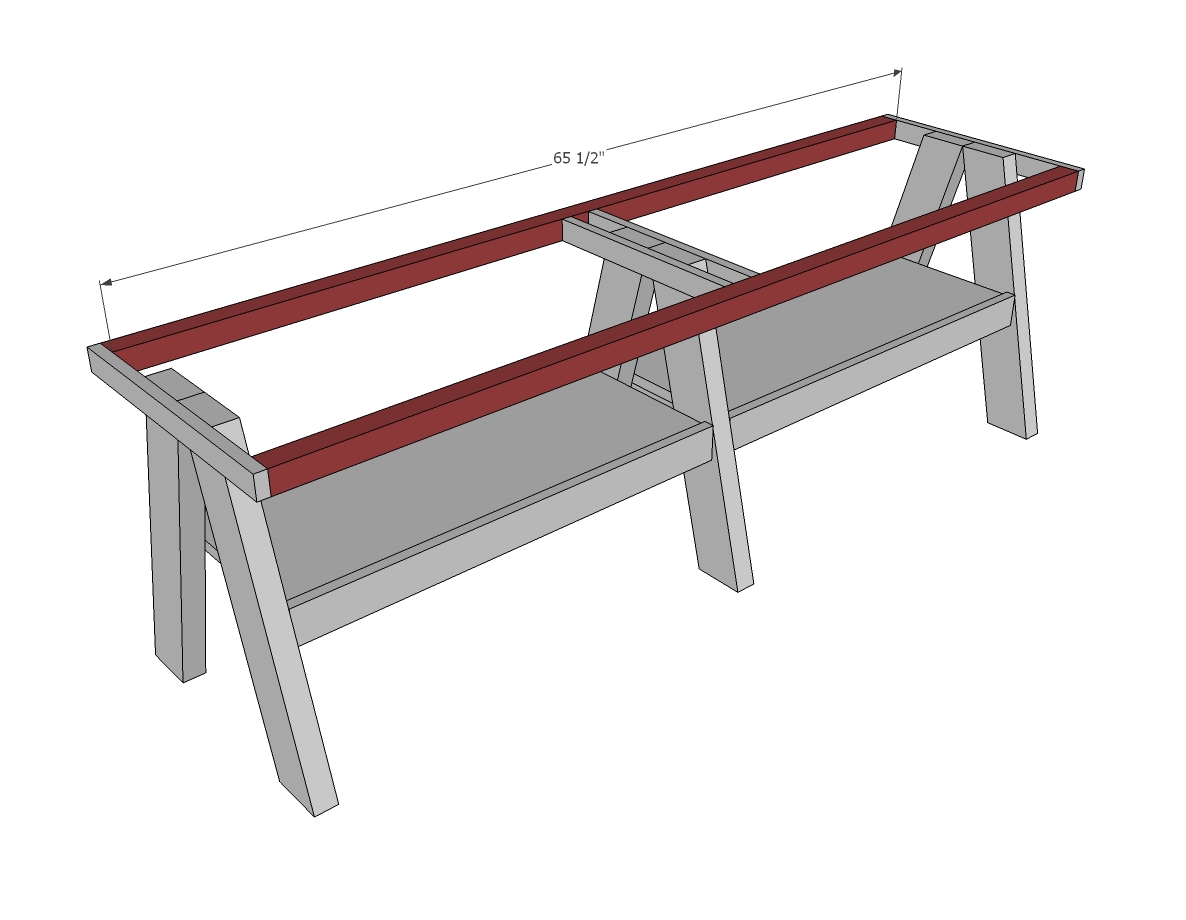
Attach side trim to the leg 1x2s with 2" screws.
Step 6
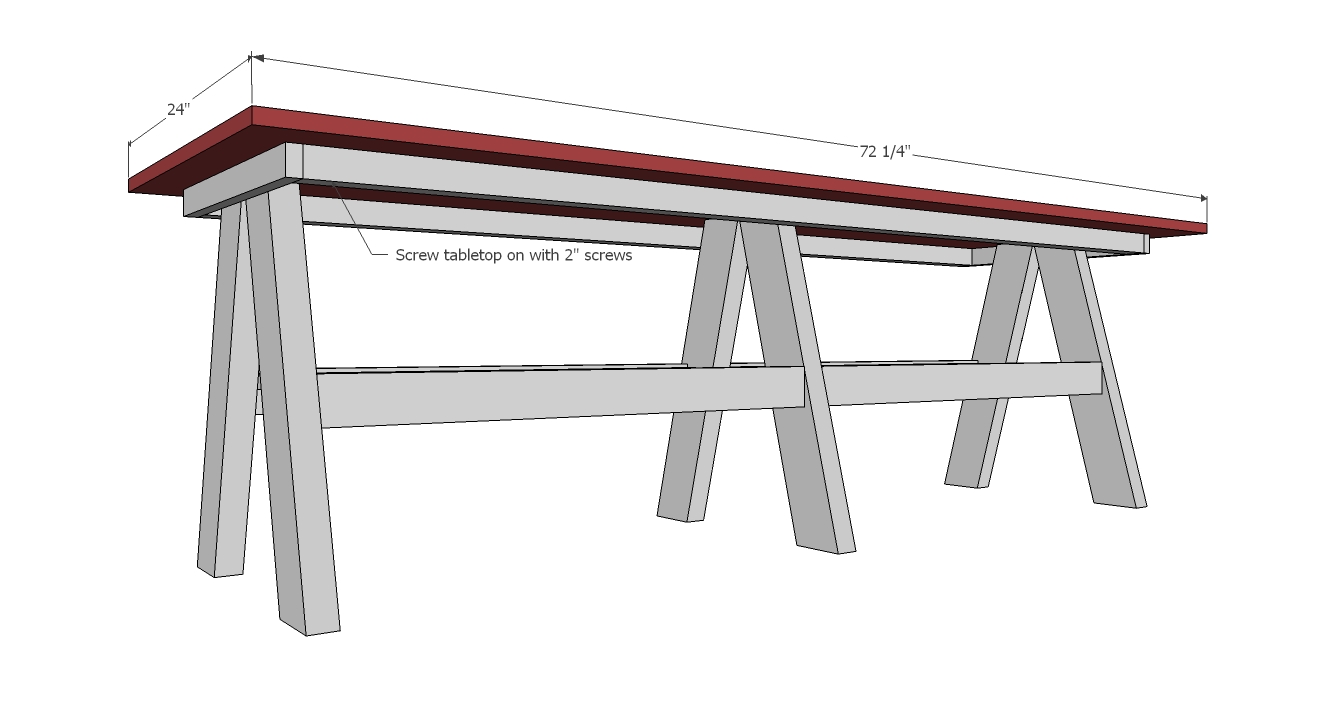
Add the top, with even overhangs on all sides. Use 1-1/4" brad nails and wood glue through the top or 2" screws from the underside.
It is always recommended to apply a test coat on a hidden area or scrap piece to ensure color evenness and adhesion. Use primer or wood conditioner as needed.
Comments
MissyTate123 (not verified)
Thu, 08/02/2012 - 08:27
Would love to do this taller!?!
Absolutely LOVE this table!! I have seven kiddos and homeschool. Currently closing in our garage for a school room. Some of them are older and I would love to have the table fit them as well. How would I make this taller???
Darci Marquette
Fri, 03/22/2013 - 20:57
Hello MissyTate123, I would
Hello MissyTate123, I would also like to make this table taller and was wondering if you received a reply?
luciannaregini
Tue, 08/07/2012 - 09:47
table top
I am new to the whole building thing... So what is a project panel? Is it a better option than just some ply? :) thanks
Spolitte
Tue, 08/21/2012 - 21:22
Rolling cubby chairs?
I love the rolling cubbies you have serving for stools. They seem simple enough but it would be great to have the dimensions. Is there a chance of getting plans for those?
Mom of 3 busy girls (not verified)
Tue, 12/25/2012 - 14:51
Thank you so much
My kids have been complaining for awhile now about misplacing crayons, coloring books and not having table space to color. I found these plans and thought it looked cute so we decided to build it. I have to thank you and my children are thrilled with it. It is beautiful and so perfect. I did have to make some modifications as our only hardware store in town didn't carry 2x2's or 1x2's and we had extra 1x 6's laying around instead of the plywood or 1 x 12(and my husband messed up a little he he) Now I can't wait to make the stools, neither can my girls! Thank you so much this is such a life(and MONEY) saver!! For only $17 in wood and $10 in paint we made a sweet little table!
It really came out awesome again thank you so much.
nokiedokie
Fri, 08/08/2014 - 16:01
Alternate size plans, please?!?!
I absolutely LOVE this table and plan to make it for my daughter/future kiddos and their friends, and have it ready by my daughter's birthday in early December. However, I would really like to make it in a modified size, closer to a standard train table. The trouble is, I have no idea how to modify the plans and cut sizes, etc. If anyone out there in the Ana-verse, or Ana herself :), would be so kind as to create new plans for me I would greatly appreciate it!! I'm looking at closer to 55-60" long by 36-38" wide (the height is good, or could increase by a few inches if necessary). I give a range for two reasons, 1) I know Ana usually likes to work with standard sizes (ie. 60 by 36), but 2) I'm also aware that there may be a "magic" new size within that range that works best with this plan. Anyway, many, many thanks in advance!
Mbob
Mon, 01/11/2021 - 06:59
is there a plan for the …
is there a plan for the "chair boxes" I´d love to build them :)