
On this day, I was very thankful to be a mom.
And an Aunty.
Because on this very long day, or should I say very long several days, not so much fun work happened at the Momplex.
And someone had to stay home and take care of the little girls.
Be comforted, honey. Most times, I'd rather be working up on the Momplex than taking on the endless cycle of dishes, dinner, loosing the desert battle, and then dishes all over again.
Yes, in my house, dishes seem to come before and after cooking.
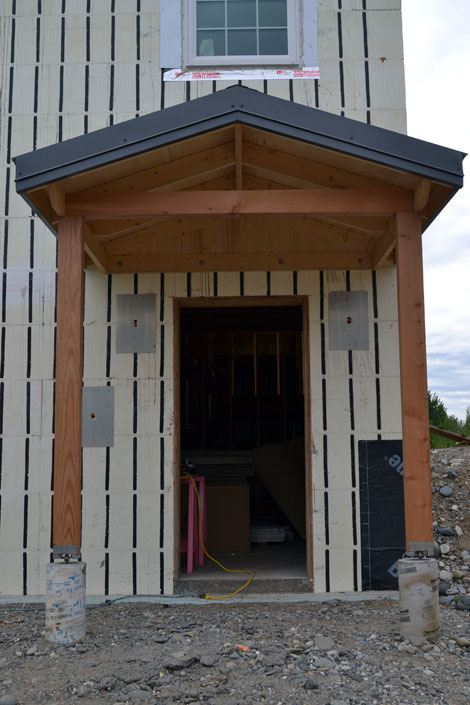
But after seeing what goes into adding exterior stuff to an ICF home ... I'll take the dishes.
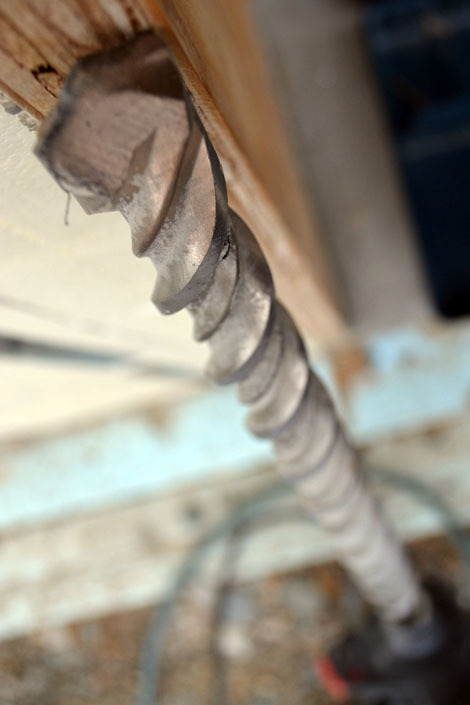
It starts with a really long masonry bit.
And then you drill a hole through 6" of concrete, crossing your fingers hoping you don't hit rebar.
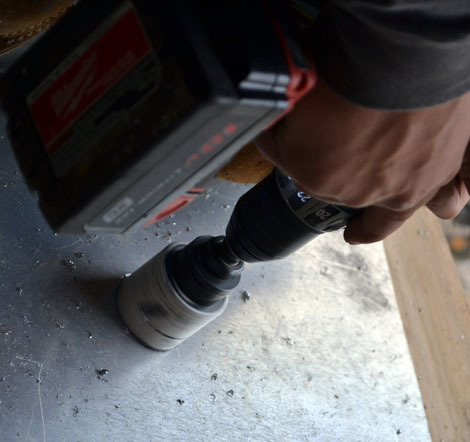
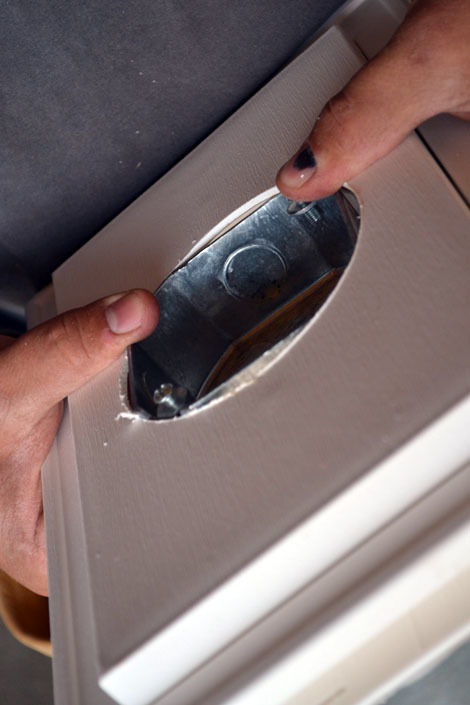
And then you take a piece of metal and drill a hole in it too.
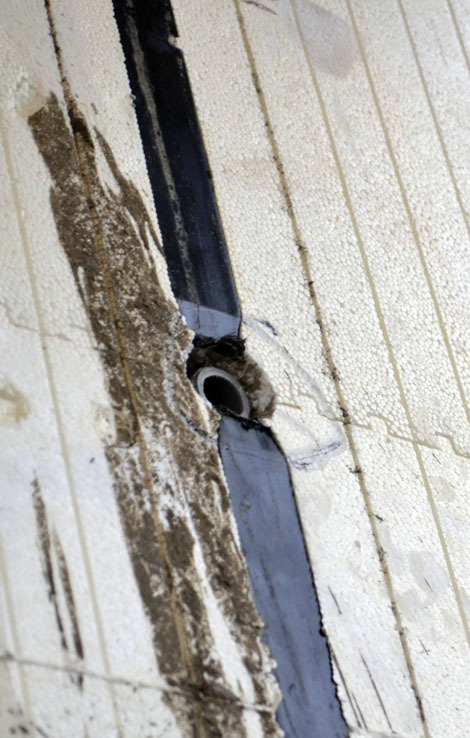
The metal goes over the hole in the concrete.
The hole in the concrete is for the electrical wire to pass through. The metal plate supports the fixture box because we want more than just two screws to hold exterior lights up.
And this is done for every single exterior light, outlet, faucet, dryer vent, furnace vent, HVAC vent, and fan vent in the Momplex. You can do the math, then multiply it by two. There were alot of holes drilled through alot of concrete while I may or may not have been at home watching Tangled with three girls resisting naps.

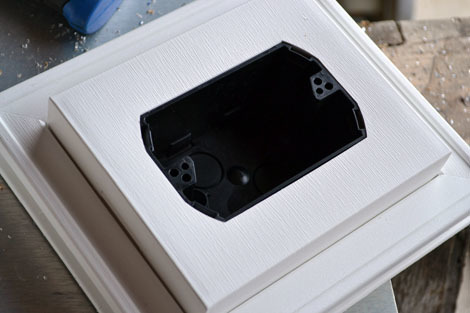
Once the holes are drilled and the base plates are up, it's time to take on the actual fixture boxes. We've chosen an metal version of vinyl siding, and will be using vinyl fixture boxes for the installation.
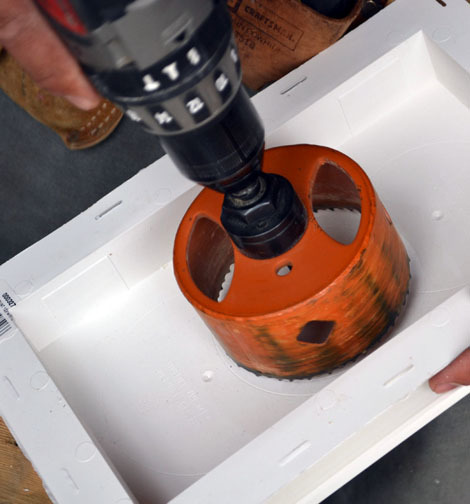
For the light fixtures, you drill a giant hole in the center.
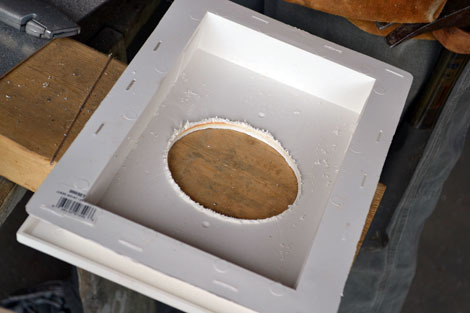
And if it doesn't look pretty
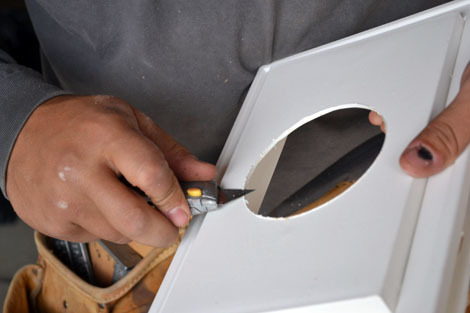
You trim it clean.
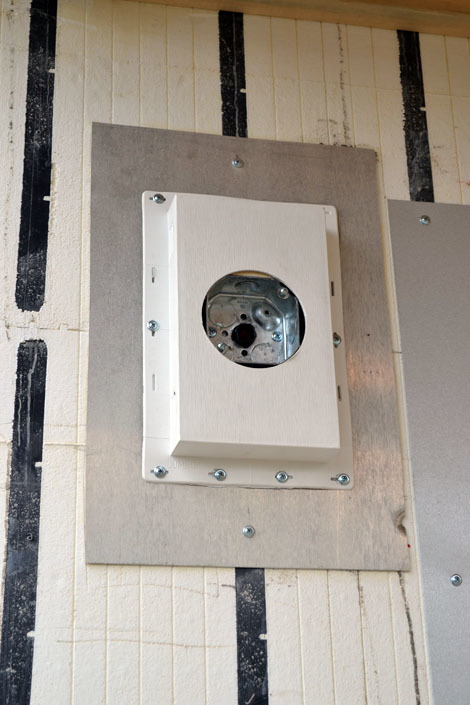
And then you fit the light fixture box in it.
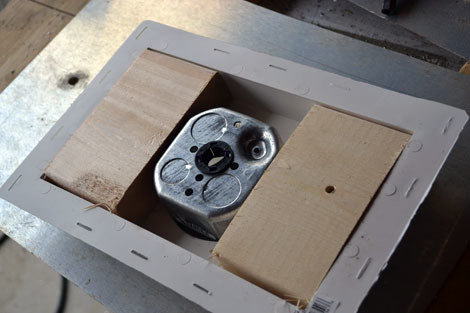
And block the back side to support the fixture box. Probably unnecessary, but we not only are only building our Mom's one house (that they have to share!), we are only doing this once.
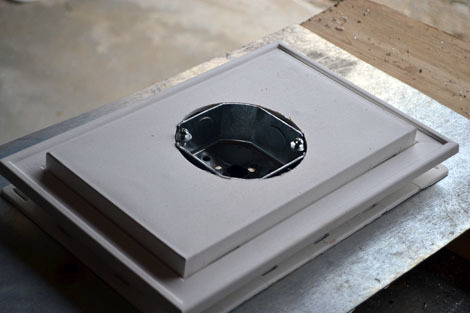
Over the box is a trim piece that will cover the siding and make the box look pretty.
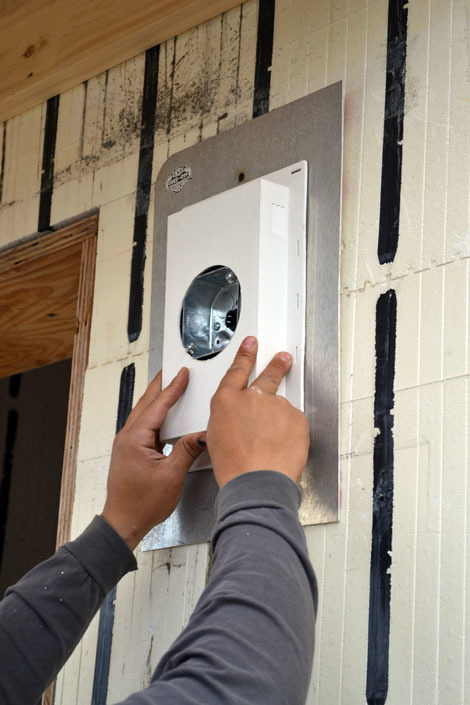
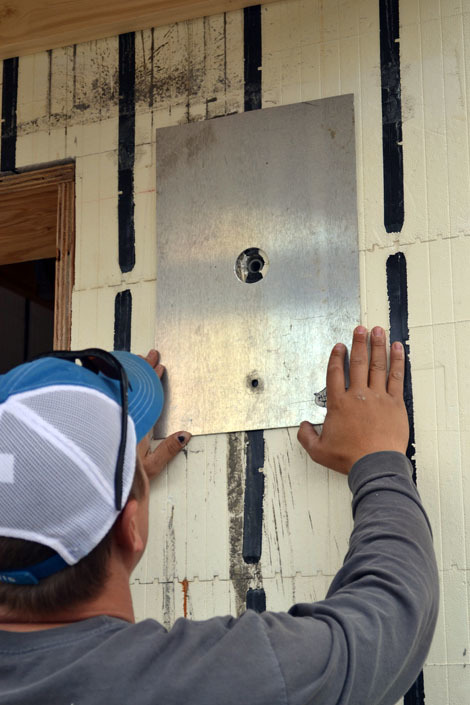
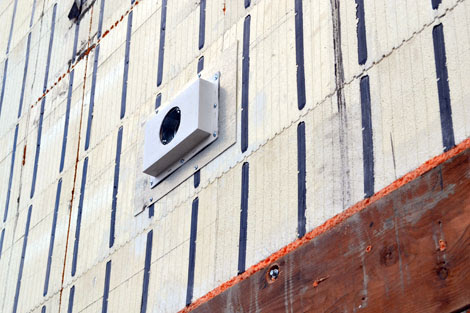
The fixture box gets fit over the metal plate and the hole in the wall and screwed in place.
One down. So many more to go!
The exterior receptacle outlet boxes are much easier. You still have to drill the hole in the concrete, but the fixture box includes the outlet box.
Thank you smart people that design this stuff.
There's floodlights over the garages.

There's a dryer vent for each unit.

This was a very long and difficult process, but we know the Moms will enjoy having exterior stuff for years to come.
Thanks for following along! We can't wait to start putting siding up!
Comments
birdsandsoap
Thu, 08/02/2012 - 22:42
more movie, less dishes!
svc22111 (not verified)
Thu, 08/02/2012 - 23:16
What is the one at middle
kimbera (not verified)
Fri, 08/03/2012 - 06:05
Looks amazing. I love
BJ D
Fri, 08/03/2012 - 06:26
Drilling concrete
Corey O. (not verified)
Fri, 10/26/2012 - 08:49
could this have been done sooner?
Corey O. (not verified)
Fri, 10/26/2012 - 08:53
could this have been done sooner?
Corey O. (not verified)
Fri, 10/26/2012 - 08:54
could this have been done sooner?