

Build your own fake fireplace mantle with free DIY plans from Ana-White.com!
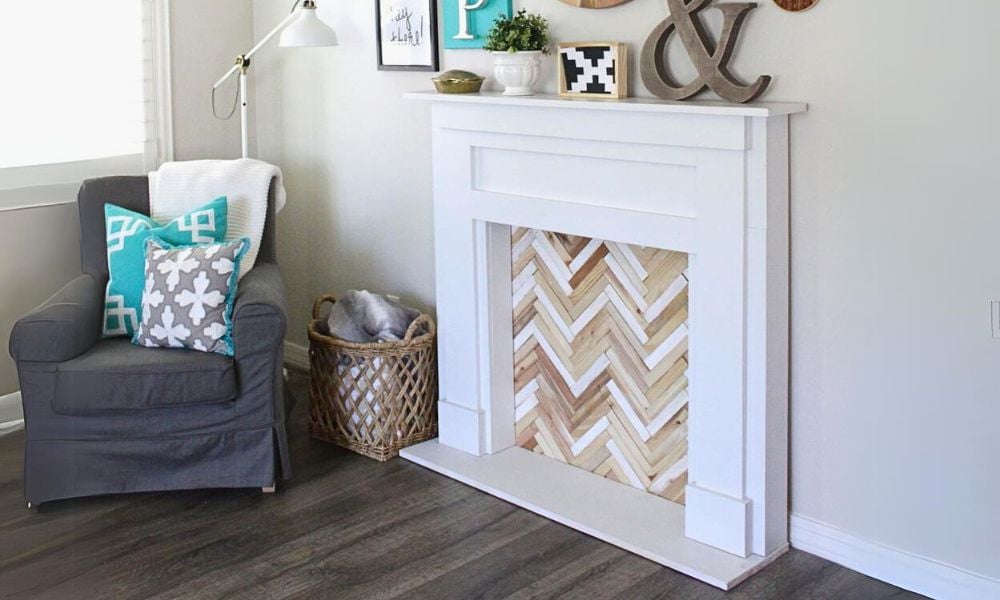
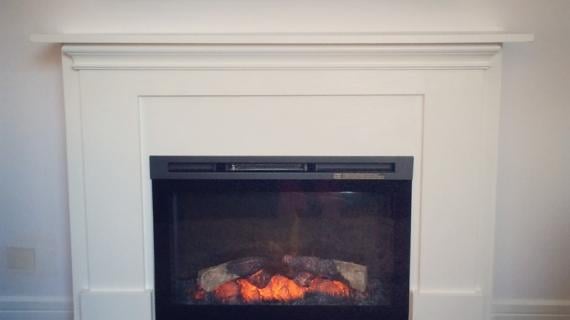
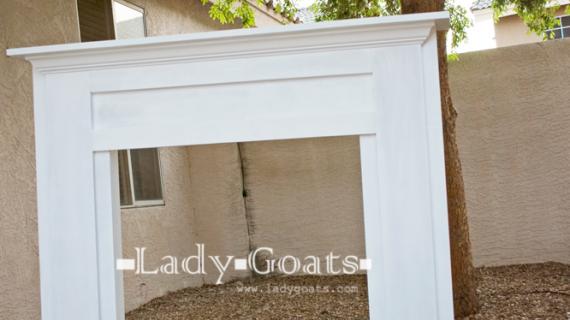
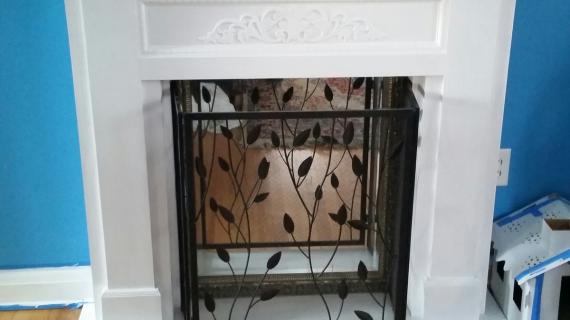
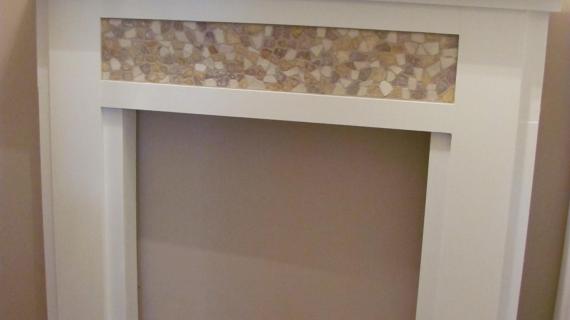
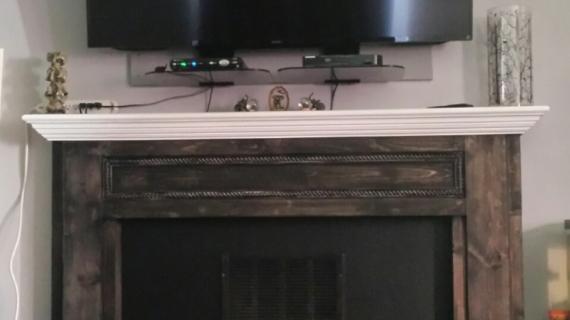
This fake fireplace is beautiful with layered boards for interest. You can add a back to make it even more beautiful. This is a beginner project with step by step plans and diagrams to help you build it.
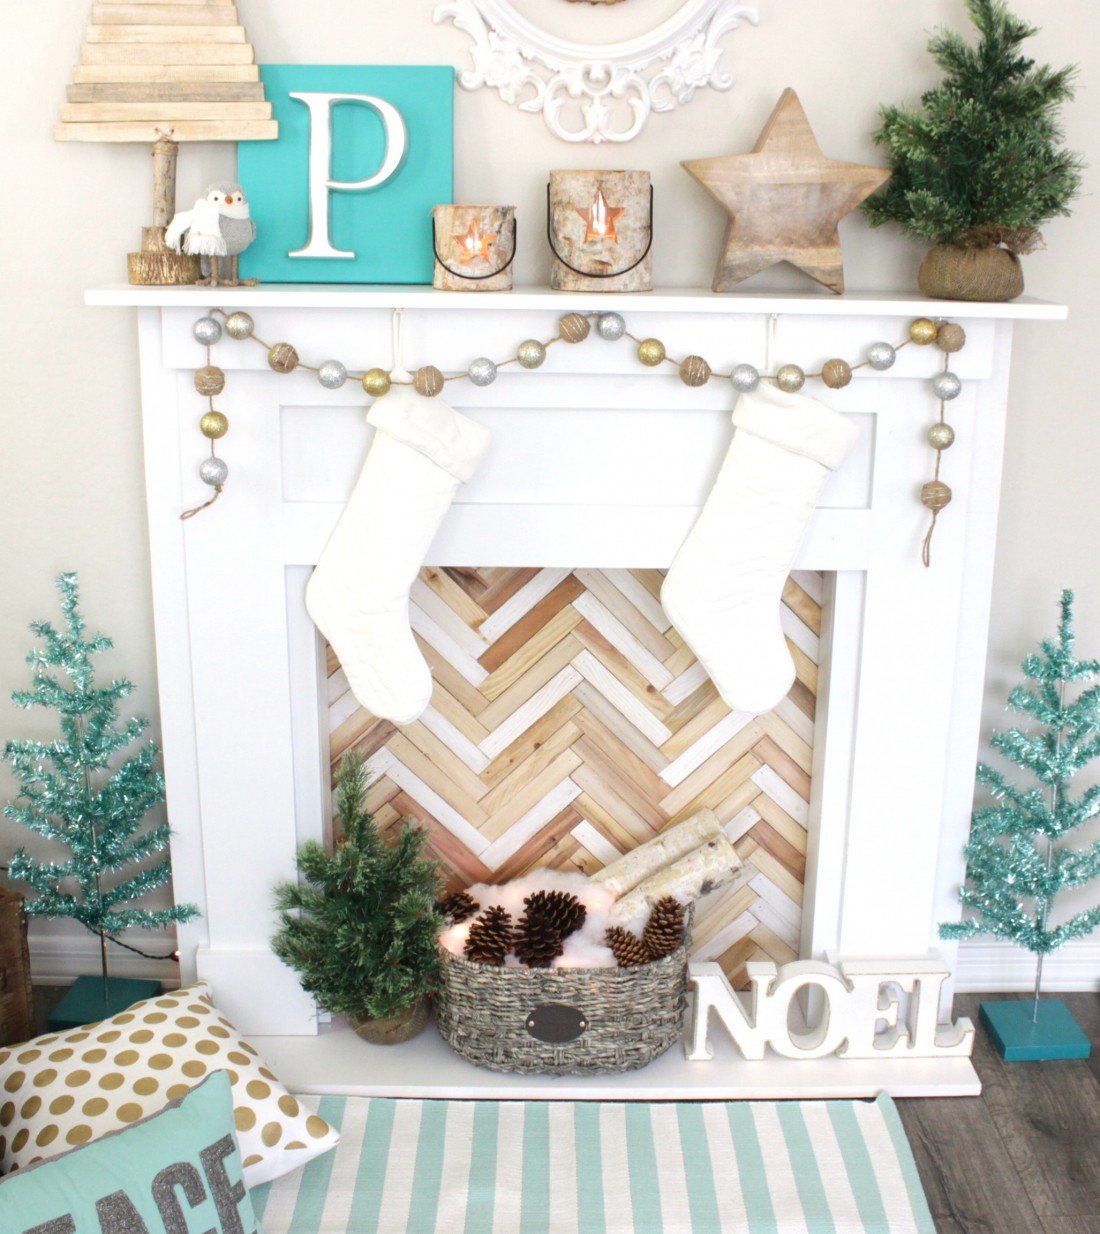
Photo Credit: Petite Party Studio
Why We Built this Fake Fireplace Mantle
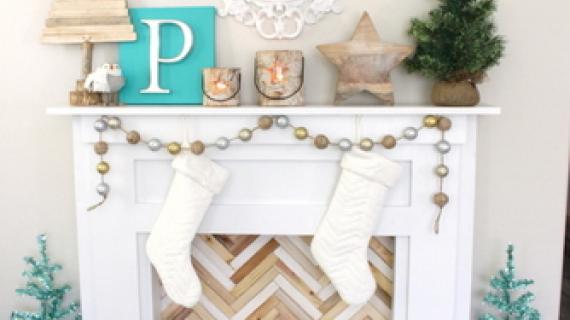
Like many of you, I live in a house without a mantle. And each year, finding a spot to hang the stockings is a challenge. So when my friend Mimi from the Blue Roof Cabin wrote me, asking to draw plans up for her much loved faux mantle, I had to say YES!!!
Mimi built this mantle out of 1x boards, and reached out to me to share the plans with you so we can all have a beautiful mantle this Holiday season.
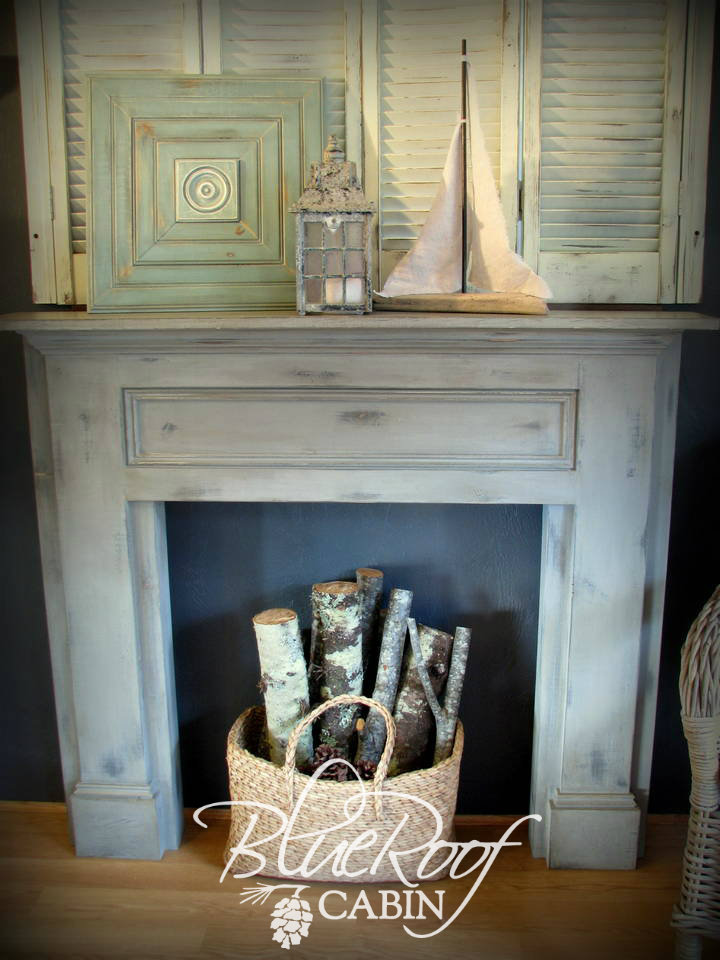
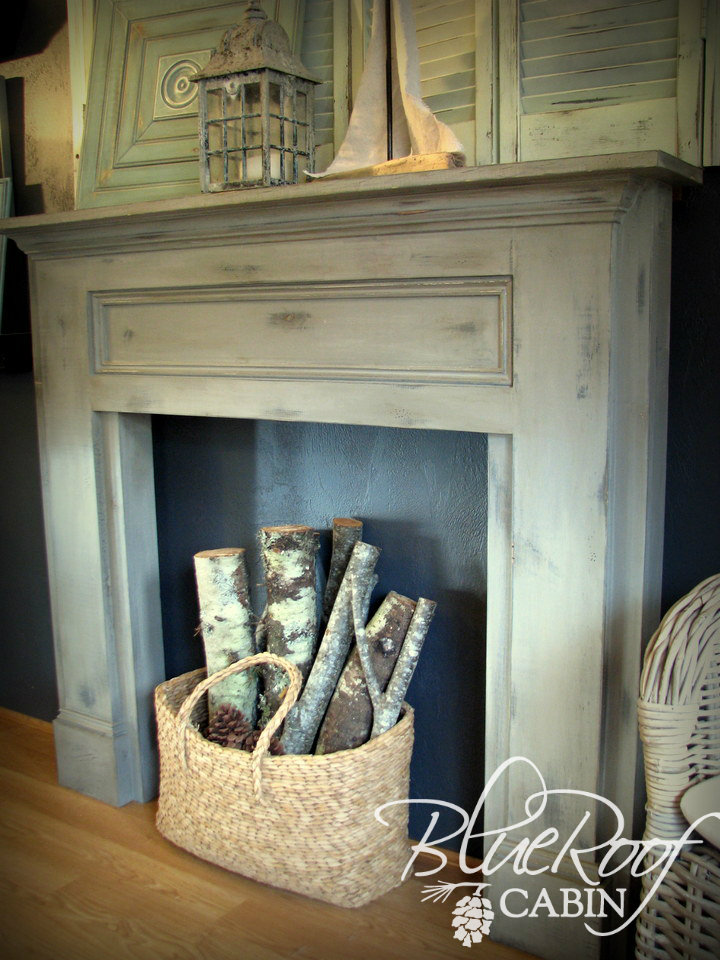
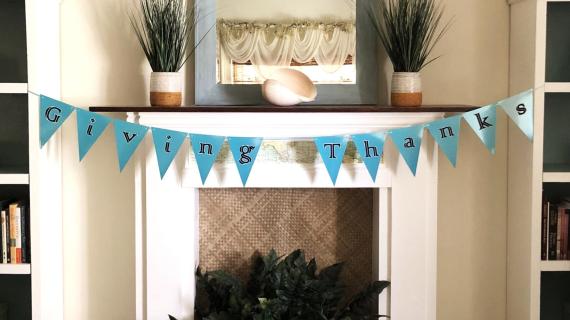
More Photos of the Building Process and Painting
Mimi took step by step photos of building her mantle, and also shared the details on this so beautiful finish - so please take a second and stop over and visit Mimi. PS - Mimi has lots more projects that I think you will love too!
Free Plans to Build Your Own Fake Fireplace Mantle
Here's the free plans to build this fake fireplace. Please share a photo when you are done, we love seeing (and sharing!) your projects!
Good luck building! I hope if you build this mantle, you'll take a second to come back and share the photos with us!
Preparation
- 1 - 1x12 @ 8 feet long
- 1 - 1x10 @ 6 feet long
- 1 - 1x8 @ 6 feet long
- 1 - 1x6 @ 10 feet long
- 1 - 1x4 @ 4 feet long
- 3 - 1x3 @ 8 feet long
- 1 - 6' long stick small crown moulding
- 1 - 8' long stick edge moulding (for inset square - see last step)
- Optional 1 1/4" pocket hole screws
- 1 - 1x12 @ 48"
- 2 - 1x10 @ 32 3/4"
- 2 - 1x6 @ 44"
- 4 - 1x3 @ 44"
- 1 - 1x4 @ 33 1/4"
- 1 - 1x3 @ 33 1/4"
- 1 - 1x8 @ 51"
- 4 - 1x6 @ 3/4"
- 2 - 1x6 @ 7"
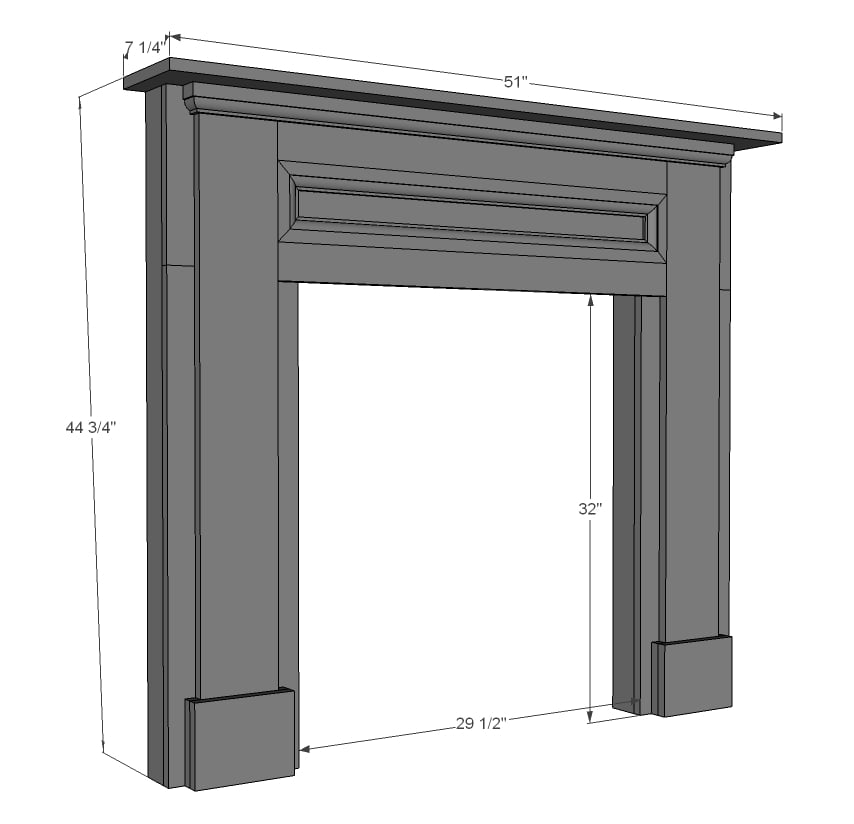
This plan assumes the following 1x12 is 11 1/4" wide 1x10 is 9 1/4" wide 1x8 is 7 1/4" wide 1x6 is 5 1/2" wide 1x4 is 3 1/2" wide 1x3 is 2 1/2" wide All are assumed 3/4" thick.
Please read through the entire plan and all comments before beginning this project. It is also advisable to review the Getting Started Section. Take all necessary precautions to build safely and smartly. Work on a clean level surface, free of imperfections or debris. Always use straight boards. Check for square after each step. Always predrill holes before attaching with screws. Use glue with finish nails for a stronger hold. Wipe excess glue off bare wood for stained projects, as dried glue will not take stain. Be safe, have fun, and ask for help if you need it. Good luck!
Instructions
Step 1

Lay out the top board and legs. If you have a pocket hole jig, you can attach together on the back side as well.
Step 2

Then add the front decorative pieces. NOTE: If you have a PH jig, see step 4 first.
Step 3

Then to give the mantle depth, add the 1x3s to the back. You can also block between the 1x3s with 1x3s @ 7 3/4" long.
Step 4

Now we'll add the front decorative pieces. You will want to lay your crown moulding on to adjust where the 1x4 is attached so 2 1/2" to match the 1x3 is revealed on the front.
Step 5

Step 6

I recommend just gluing these guys on. Nails will split out.
Step 7

But you can nail these on.
Step 8

Cut moulding to fit, mitering around the outside corners.
Step 9

And then if you desire, cut moulding to fit inset and glue in place.
It is always recommended to apply a test coat on a hidden area or scrap piece to ensure color evenness and adhesion. Use primer or wood conditioner as needed.


Comments
Sandy L (not verified)
Mon, 09/17/2012 - 11:55
I love the new look on your
I love the new look on your site Ana! This is such a great idea. We use a freestanding bookshelf to hand stockings from...I think we'll have a mantle this year instead!
Vicki Bucy (not verified)
Mon, 09/17/2012 - 13:21
PDF and Mantel
Love the mantel piece. On my list to make. Just so you know, the pdf version did not work for me. Perhaps you should try it.
Thanks.
Stanley Pearse (not verified)
Mon, 09/17/2012 - 13:25
Fireplace Mantel / PDF Issues
Hey Anna,
Hope all is coming along on the Momplex.....tried opening the PDF for the fireplace mantel and received the following error message:
TCPDF ERROR: [Image] Unable to get image: /usr/share/nginx/ana-white.com/sites/default/files/alaska-mountains-fall.jpg%20
What I am planing on doing is build this on the side of our house as another outside gathering area. Back in 2004 I walking into work at San Francisco State and saw a homeowner outside whose home was to be featured on HGTV. Any hoot, this homeowner build a faux fireplace mantel on the side of his home where he had a cafe table set up with some chairs. Thought I would duplicate that.
jmartin44
Mon, 09/17/2012 - 13:32
Securing to the wall
Does anyone have ideas on how to safely secure this to a wall?
Robohead
Mon, 09/17/2012 - 16:38
If you go to Mimi's site in
If you go to Mimi's site in the link that Ana gave, she address's how to mount it to the wall as well. She created a cleat by ripping a 1x4 at a 45 degree angle down the middle. Attaching one side to the mantle itself and one side to the wall. Then just slide the mantle onto the wall mounted cleat and it stays put. It's a pretty neat way to mount it with no screws showing. Mimi's site has pics as well.
Stanley Pearse (not verified)
Tue, 09/18/2012 - 12:10
Faux Fireplace Mantel / Mounting
Look at step # 3....attach blocks to the wall that will fit within legs and the upper mantel area...from there there side nail the mantel to the blocks...
In reply to Securing to the wall by jmartin44
matencio
Sat, 03/04/2017 - 06:50
Attaching to the wall
I own a Victorian with four fireplaces. They are mounted with a screw directly to the wall on the sides. There is an extran piece added to the legs that extends out about 3/4". My fireplaces are made of mohogany and very exotic. Instead of using the sticks on the back to give it depth, use wider sticks that will work a flanges. Pre-drill these so the won't split when you mount them.
Leo817 (not verified)
Mon, 09/17/2012 - 13:40
PDF of frieplace mantle
the link to the PDF has as error
Ana White
Mon, 09/17/2012 - 14:33
PDF Issues
Hi everyone, we are aware of the PDF issues and are working on trying to fix. Seems we did fix and then the PDF is again broken - I apologize for the inconvenience. Please know that it is very important to me that the plans are accessible as possible for you.
Thanks so much for the positive feedback on the Mimi's Mantle plans!
UlrikeDG
Mon, 09/17/2012 - 18:19
Wow, look at the lovely new
Wow, look at the lovely new blog format!
ssl4847 (not verified)
Tue, 09/18/2012 - 07:52
Mantel to use over real fireplace?
Hi, Everyone!
I have a brick fireplace that has no mantle. Needs some "jazzing up". See any reason this mantle would not work over a wood burning fireplace? Changes that would need to be made? Thanks!
piefairy
Tue, 09/18/2012 - 10:27
another amazing fireplace!
great to see another faux fireplace from ana! this one is very elegant, but i have to say, i have a soft spot for the first one she designed (http://ana-white.com/2010/12/fireplace-anywhere) and its gentle arch. my request for a fireplace to bring some soul into our apartment was the motivation behind those plans, and i was so grateful to see her actually take it on! while it's neither the first nor only piece of furniture that i've built, it's the one i'm most proud of -- with good reason, i think! =) http://doctorsterry.com/2011/11/08/success/
tracysmith
Wed, 09/19/2012 - 21:45
I have a sealed gas
I have a sealed gas fireplace, will this be safe to use as a surround, does anyone know?
BeingHome
Sat, 02/23/2013 - 18:27
Fireplace Mantel & Surround for Gas Fireplace
Hello, Tracy! I am new here and saw your comment. I have a gas sealed fireplace and built a fireplace mantel and surround. I do have tile around the gas fireplace and then the mantel and surround. No problems.
I recently posted the building process and a link back to my blog for more specific details. Hope this helps if you still have not built your own fireplace mantel / surround. :)
http://beinghome2012.blogspot.com/2012/10/building-fireplace-mantel.html
Julie
aliabubu72
Fri, 09/21/2012 - 10:06
I love this...very cool.
I love this...very cool.
Home builder (not verified)
Tue, 10/23/2012 - 16:53
I just love the design. but
I just love the design. but what do you mean "fill all holes" @ the finishing part? I'm not sure what you mean by it... Should it look like it's been carved out of one gigantic piece of wood...??? I just don't get it.
trinavera
Wed, 01/02/2013 - 23:30
I'm ready to make this
I would need to make it a corner mantle, how would I adjust the plan to do that?
Alisonwunderland
Fri, 08/02/2013 - 14:20
PDF
I'm having trouble bringing up the PDF. Is there another link to it or is it still broken?
Thanks!
leotimes5
Sat, 10/01/2016 - 05:05
PDF needed
I'm also having trouble with the PDF and would like to know how to get a PDF version of these instructions?
warriortwo
Thu, 09/29/2016 - 20:51
What is this little piece?
What is this little piece? I don't see it on the cut list.
In reply to What is this little piece? by warriortwo
warriortwo
Thu, 09/29/2016 - 23:25
LOL--I found it!
Never mind, I found it. :)
leotimes5
Sat, 10/01/2016 - 04:54
Would like PDF with instructions!
Is it possible to get the PDF instructions for building this great faux mantel? Either on this website or email a PDF to me?
In reply to Would like PDF with instructions! by leotimes5
Ana White
Sat, 10/01/2016 - 17:00
Thanks for your patience with
Thanks for your patience with the site, here's the printer friendly version
http://www.ana-white.com/print/6982
Lucy2222
Thu, 11/24/2016 - 16:18
Is there a video??
Is there a video tutorial for this faux fireplace?