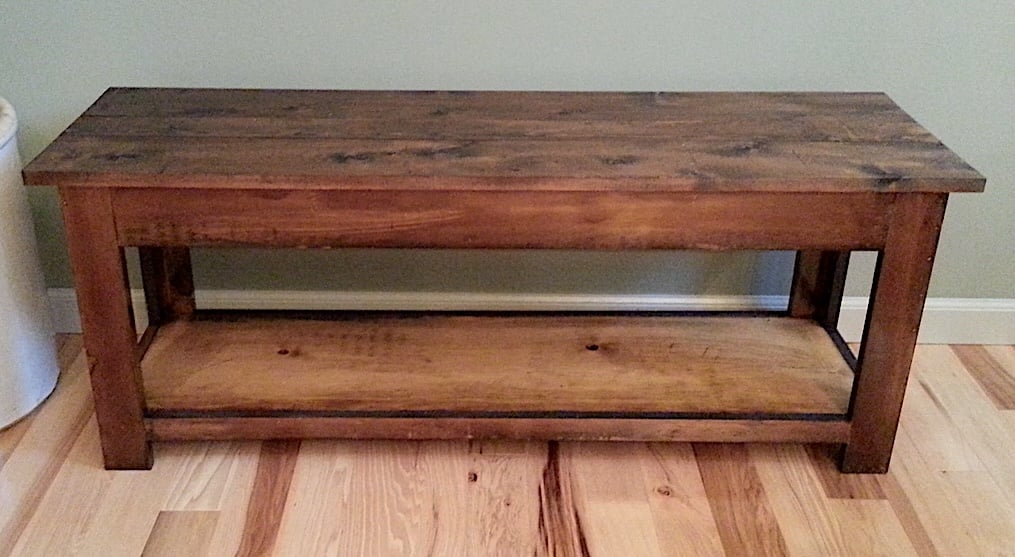


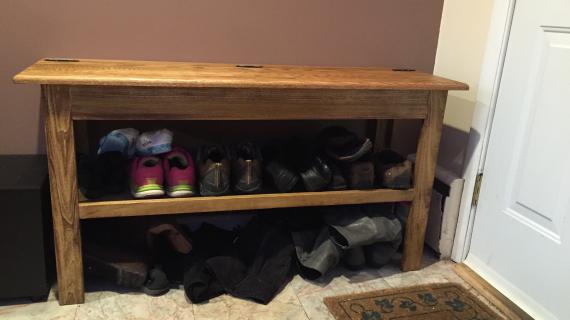
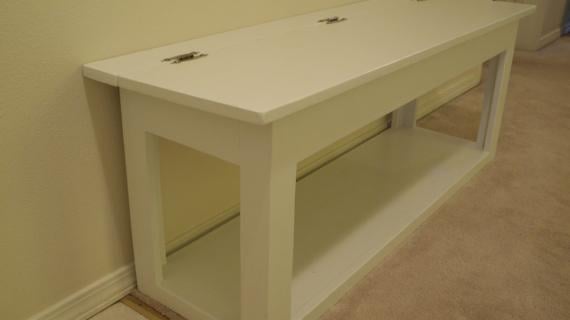
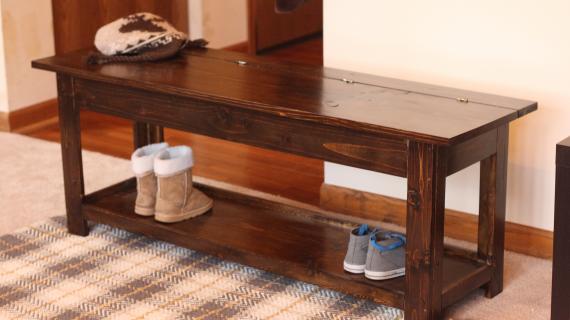
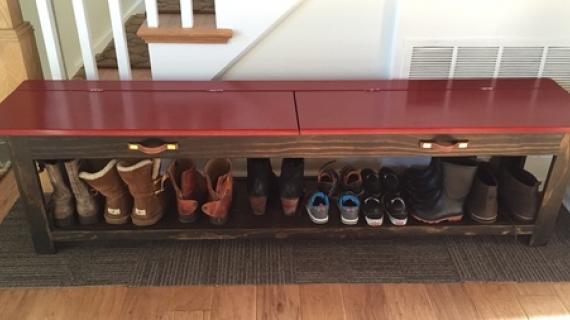
How to build a storage bench with flip top and shelf. Perfect for the entryway with lots of room for shoes, and a hidden storage area for accessories.
I built my bench almost 20 years ago, and we are still using it today!
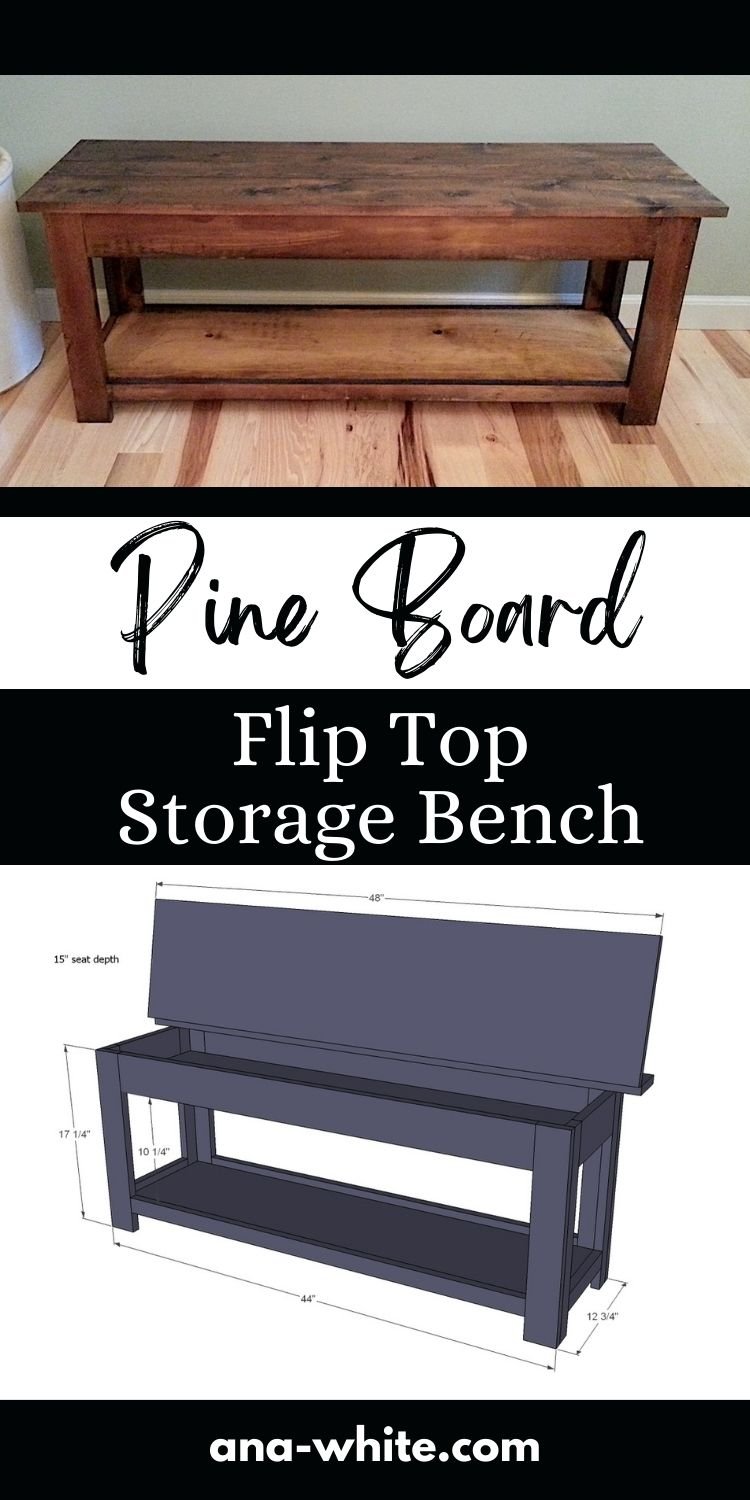
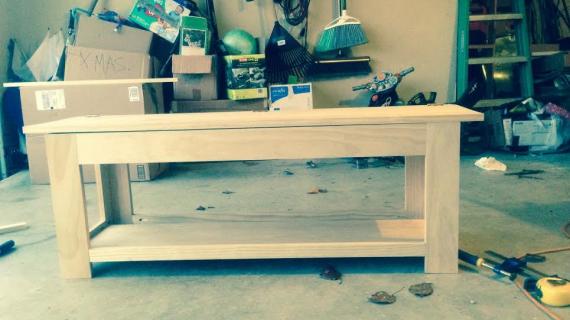
This bench is built using 1x boards, to keep costs down, construction easy, and the pine wood is beautiful and full of character. Free plans from Ana-White.com.

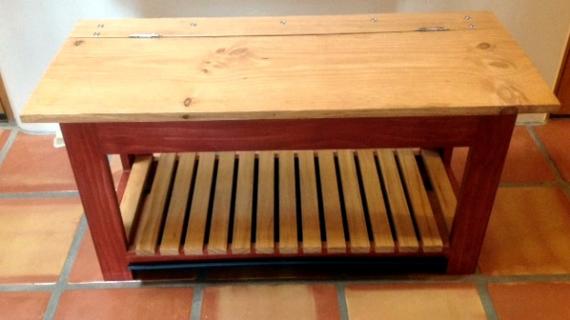
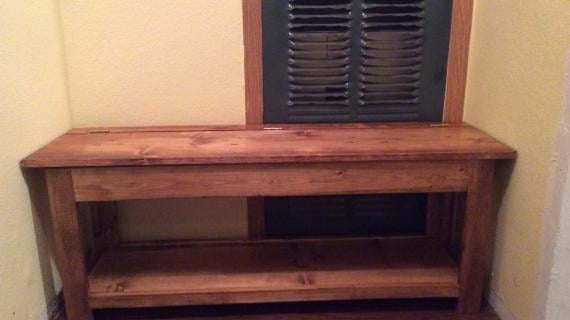
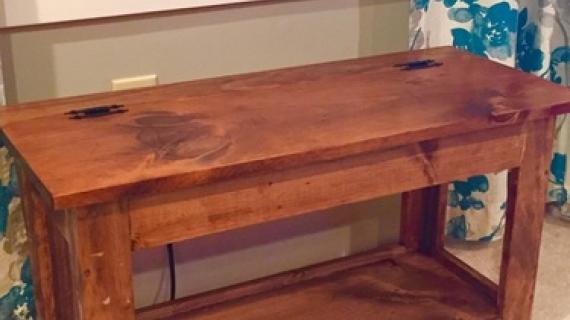
 Reader submitted photo by BLUDEVIL35
Pin For Later!
Preparation
- 1 - 1x12 @ 12 feet long
- 1 - 1x4 @ 12 feet long
- 2 - 1x2 @ 8 feet long
- 1 - 1x3 @ 8 feet long
- 4 - 1x3 @ 17 1/4"
- 2 - 1x4@ 38 3/4"
- 2 - 1X2 @ 38 3/4"
- 2 - 1X2 @ 17 1/4"
- 2 - 1X4 @ 8 1/4"
- 2 - 1X2 @ 8 1/4"
- 2 - 1X12 @ 42 1/2"
- 1 - 1x4 @ 48"
- 1 - 1x12 @ 48"


Please read through the entire plan and all comments before beginning this project. It is also advisable to review the Getting Started Section. Take all necessary precautions to build safely and smartly. Work on a clean level surface, free of imperfections or debris. Always use straight boards. Check for square after each step. Always predrill holes before attaching with screws. Use glue with finish nails for a stronger hold. Wipe excess glue off bare wood for stained projects, as dried glue will not take stain. Be safe, have fun, and ask for help if you need it. Good luck!
Instructions
Step 1

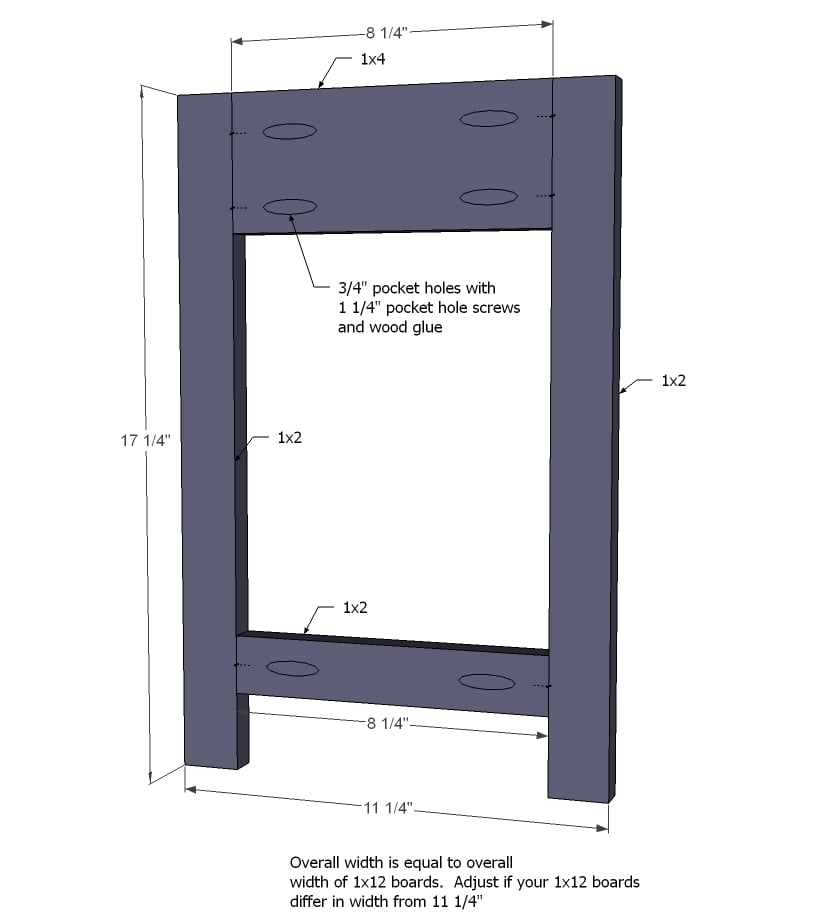
When I built my bench way back when, I did not even know about pocket holes. But you’ll find building this bench much easier with pocket hole construction. All you will need to do is make two frames for the front and back as shown in diagram.
Step 2
And then make two frames for sides with the 1x2 legs instead.
Step 3

Then just attach the four frames together, hiding pocket holes to insides.
Step 4
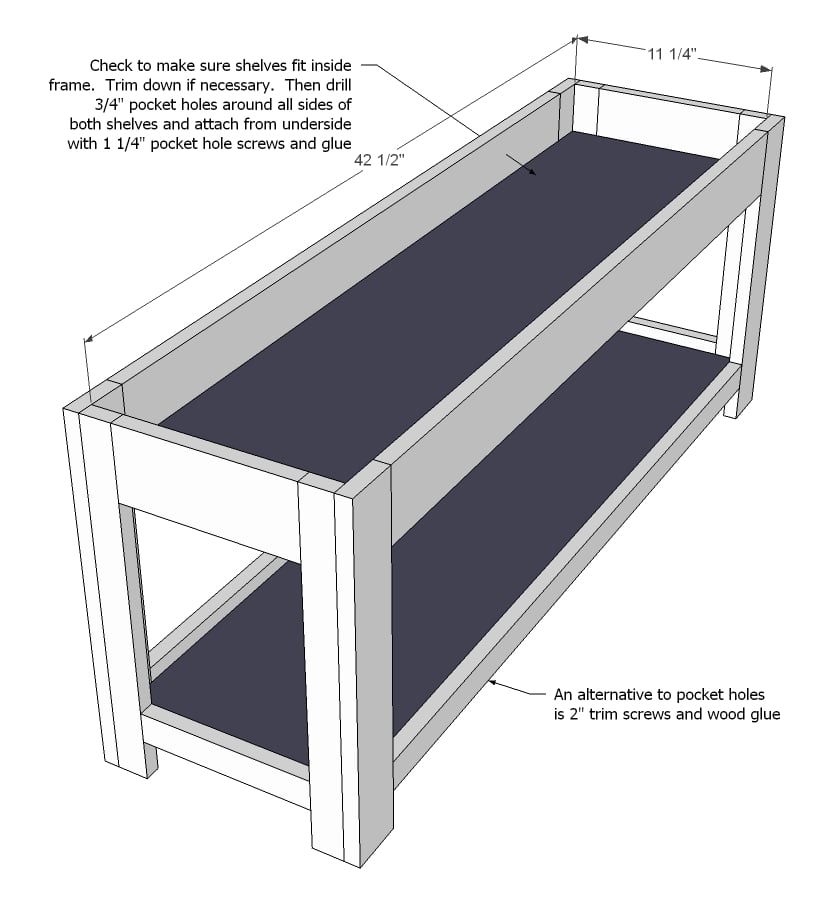
Test fit the shelves inside the frame. You want snug, not tight. If you need to, you can trim down shelves. Once the shelves fit right, drill 3/4” pocket holes around all sides and fit into place. Attach with 1 1/4” pocket hole screws and glue.
Step 5
Step 6
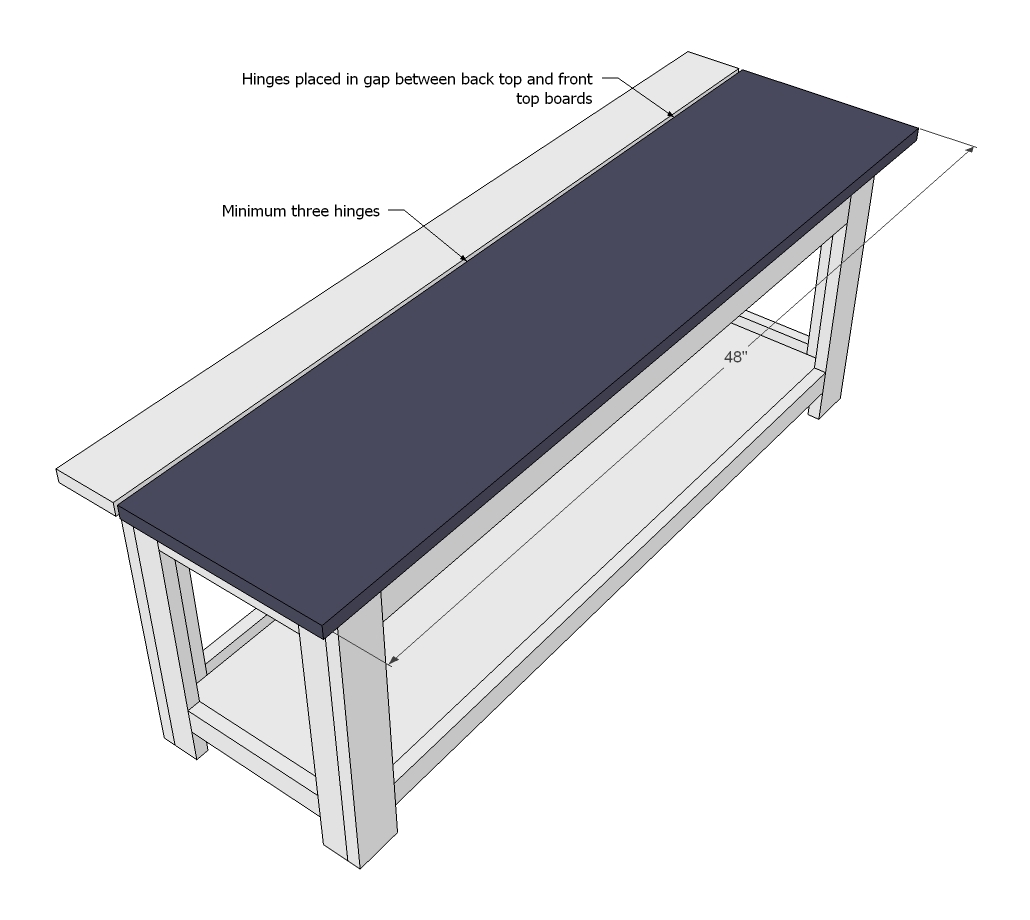
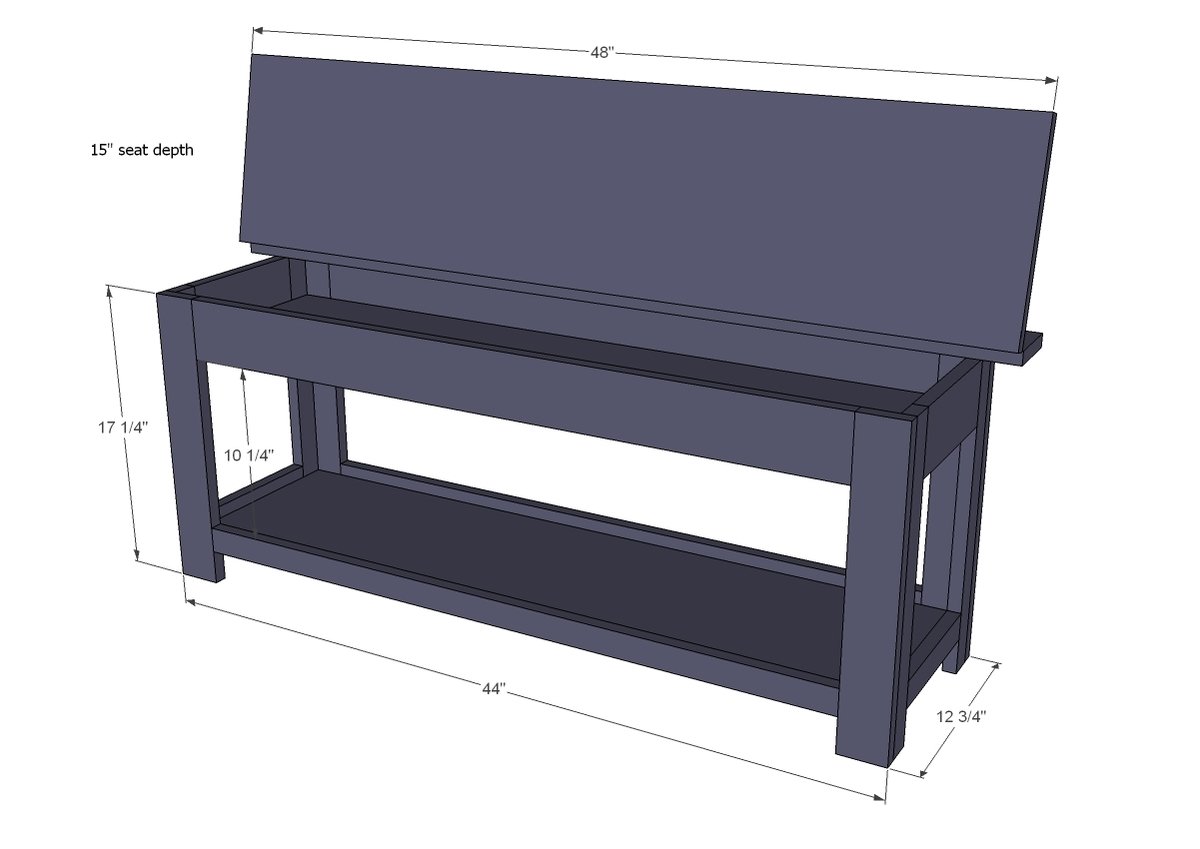
The top front is just hinged to the top back with narrow profile hinges, installed inside the gap in between the top boards. The easiest way to do this is to position the bench top pieces as if the bench was fully open, and on the exposed inside edges, screw on hinges. Test to make sure bench closes well and adjust if necessary.
It is always recommended to apply a test coat on a hidden area or scrap piece to ensure color evenness and adhesion. Use primer or wood conditioner as needed.


Comments
Maira (not verified)
Thu, 10/18/2012 - 18:23
Ana, is the bench in the
Ana, is the bench in the picture 48" wide? The plan calls for 48" wide, but the picture looks longer than that. I want a long bench like what you have in the pic. Thanks.
In reply to Ana, is the bench in the by Maira (not verified)
Ana White
Fri, 10/19/2012 - 12:14
Bench Width
Hi Maira, my bench is actually about 5 feet long. I shortened the plans up a little because I wanted to get all of the boards on a 12 1x12. To modify the plans, just add 12" to all of the horizontal boards. We have not structural problems at the 5 foot length, with adults able to sit on the bench without sagging or any issues. Best luck building it! Ana
storchinsky
Thu, 10/18/2012 - 20:49
Congratulations on the book
Congratulations on the book and on making it through the tour! My husband travels a lot for work (he's a Cdn. military chaplain), and he often got frustrated when our girls didn't have much to say when he called. As they get older it has gotten better. We don't usually think of talking on the phone as a skill that our kids need to learn, but it does take some practice, especially when they aren't used to talking to you that way!
And while he has been away a lot, I haven't been away from them for longer than 3 nights. Eleven would be hard even now & my girls are 10 and 7!
I also wanted to say a huge thanks for all you do. I have been following you blog for several years now and in the last year have finally started building. I love it, and would never have considered doing it without your plans and the inspiration I get from the blog and other builders here. My collection of Ana White furniture is growing, and whenever anyone asks me about how I started doing this I tell them that there was this stay-at-home mom up in Alaska who decided to build her own furniture and show others how. She even posts plans for free! How amazing is that? It's not an exageration to say that you have changed the way that I look at my home, and what I put into it. I am no longer limited to what I can find or afford, and can customize things to suit my space. I now have a great new creative hobby that I love. I get a thrill every time I sit on a chair or sleep in a bed that I made! I truly can't thank you enough.
I hope your book does fabulously well and can't wait to see what you have in store for us next!
Sherry
In reply to Congratulations on the book by storchinsky
Ana White
Fri, 10/19/2012 - 12:30
Hi Sherry! Thank you so much
Hi Sherry! Thank you so much for the encouragement and inspiration! When something is handmade, it means so much more, especially when you make it for you family! I agree! I can't help but be thankful after this trip that I have been able to be with my child all these years - a blessing for sure! We met up with her at the airport last night, and we were fighting over who gets to hold her, sit next to her, hug her! Thank you for the lovely comment! Ana
Christa/Dakota… (not verified)
Fri, 10/19/2012 - 07:32
Ana! I haven't commented yet
Ana!
I haven't commented yet on how excited I am about your book and how excited I am FOR YOU! You deserve it! And it is terribly hard to leave the little one. At that age they def are awfully busy for the phone! Hopefully someday you make it closer to me, but I live in the sticks so it will probably be on book tour #3 or something. haha.
Anyway, I too am interested in the bench and am halfway through building the cubbies on pg 33. I noticed the plans were a bit older for the bench so thanks for the update! Can't wait to make it this weekend! :)
THank you thank you thank you! You rock X1000.
In reply to Ana! I haven't commented yet by Christa/Dakota… (not verified)
Ana White
Fri, 10/19/2012 - 12:37
Hi Christa! Thank you so
Hi Christa! Thank you so much! Wish we could have done more dates, maybe next time! I am so glad the bench plans are useful to you! Thanks again! Ana
Nita (not verified)
Fri, 10/19/2012 - 08:01
Hello Ana Just wanted to tell
Hello Ana
Just wanted to tell you that your book arrived for me, in the UK, today! Like a kid in a candy shop, I can't decide which plan I want, or need, first?! To say I am excited is not an understatement and want to say Thank you for inspiring and giving me confidence through your blog to go out and achieve what IS possible. Nita UK
In reply to Hello Ana Just wanted to tell by Nita (not verified)
Ana White
Fri, 10/19/2012 - 12:20
YAY!!! Thank you so much for
YAY!!! Thank you so much for ordering the book! Hope to see a project from you soon!
dmcarwin
Fri, 10/19/2012 - 08:58
Yea!
I just finished my first project from your book! I still have to paint...then I will do my brag post. So I was flipping through your book, again, and this bench caught my eye, and I was determined to find it on your blog today...and here it is all updated and ready for me to print! Yeah hoo! Thanks Ana!
I am so happy you get to go home soon to your little one, Kids are the purest blessings! You made me cry.
In reply to Yea! by dmcarwin
Ana White
Fri, 10/19/2012 - 12:18
Hi Mindi! Yay! I am so glad
Hi Mindi! Yay! I am so glad you've built a project from the book - can't wait to see!!!! Glad the bench plans are useful to you!
This trip has really made me see how blessed we truly are to have a child. We are so thankful! She was quite happy to see us!!!
Ana
angeleyes
Fri, 10/19/2012 - 18:12
congrats
congrats on your book and going on tour without your daughter for 11 days. It must have been hard! Even though your are a mom, you still have to nurture your mind and your soul by following your own dreams and your own path even if that entails being away from your daughter for a time. By doing so it will only make your relationship with your daughter stronger. You have inspired so many with your gift and dedication, and in the process; inadvertently taught valuable life lessons to her. She has a great remodel and even though may have been sadden by (and you - her absence) your absence will one day exhibit your characteristics and may just inspire more individuals just you have done. Congrats!
btw thanks for the plans may just have to make this for our front hall.
Kristi R (not verified)
Sat, 10/20/2012 - 10:25
I love this bench! I have
I love this bench! I have been on a search for a new piano bench that had storage for our music sheets. I just couldn't find something worth what price people were putting on them. I just need to bring the length of this down some and we will have our new piano bench! Anther great build!
ValerieMcClintick
Sun, 10/21/2012 - 00:05
Thanks!
Just made the bench this afternoon, turned out great and am using it as a fireside bench.
Thanks for all the free plans, I'm enjoying all the new ones in your book too!
Blessings,
Valerie
Jackie Bramel (not verified)
Mon, 10/22/2012 - 07:57
Thank you!
Thank you so much Ana for these plans, finished the build yesterday and will post pics once I stain. It looks great and can't thank you enough for redrawing them! It was such a wonderful experience meeting you in Chicago! You're so sweet & patient!
Jackie
~Sara~ (not verified)
Tue, 10/23/2012 - 09:38
Type of Wood
Congrats on the book, the tour and your success overall!!!
I was just wondering what type of wood would work for this bench. Would Pine Softwood?
I am soooo new at this type of thing and just trying to get my husband on board so I can buy all of the needed things.
Jessica F (not verified)
Fri, 11/02/2012 - 19:37
Ana, where do you get your
Ana, where do you get your narrow profile hinges from? I looked at Lowes, but they didn't seem to have anything like that. Thanks!
Jessica F (not verified)
Fri, 11/02/2012 - 19:44
Ana, where do you get your
Ana, where do you get your narrow profile hinges from? I looked at Lowes, but they didn't seem to have anything like that. Thanks!
Carly (not verified)
Fri, 11/09/2012 - 07:17
Bench for your modified square farmhouse table
Hi Ana,
I am wanting to build 2 storage benches that would fit underneath your modified 8 person square farmhouse table. Would this plan work for that? If not, could I modify it to make it work?
Stebbit (not verified)
Thu, 11/29/2012 - 22:57
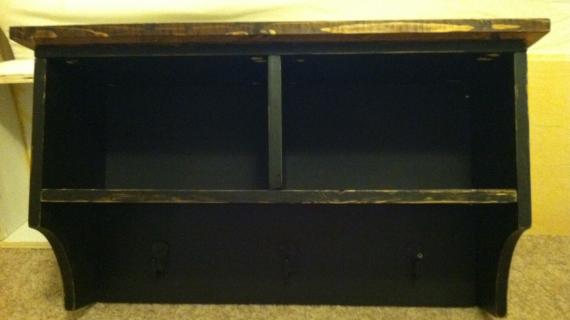
Plans for Wall Cabinet?
Ana,
I build this bench and it turned out great. Thanks! I'm trying to find some plans for the wall cabinet shown above the bench in your picture. Are those plans available?
AmyKoopman (not verified)
Fri, 11/30/2012 - 09:42
first build!
okay. One Miss Jen Woodhouse (of the House of Wood) directed me here. And I know it's ballsy - this doesn't look like a beginner project - but methinks this is going to be my first one. Here goes nothin'! I'll post some pictures when it's done...that is, IF it's photoworthy. If not...well, I'll have some scrap wood to work with when I start over, right?
Eeeeee!
Gary (not verified)
Thu, 01/03/2013 - 05:41
Edges
Ana, how did you go about finishes the edges? Roundover bit set shallow or something? We have several pieces of a brand name furniture that is a "attic" farmhouse styling so I'm looking at replicating the distressed finish to an extent. Plus something that will withstand a 7 year and 3 year old!
BrandyK (not verified)
Thu, 01/03/2013 - 11:07
Please help. I just spent
Please help. I just spent about 2 hours trying to figure out a cut list to make the bench a 5' bench like mentioned above. I added the 12" to all the length boards, but I'm unable to figure out how to make them fit in the smallest # of boards possible. I'm also trying to add the height to be 24" so I made each height board 23.25". But my brain just won't let me go from there. Is there a website or a program that helps this? Or is just the ol' calculator? Also, on the cut list you've got 2 - 1x2 @ 17 1/4 should there be 4 of these? if not, where am I coming up with my other 2 sides? are they a different width board? Thanks for your help!
In reply to Please help. I just spent by BrandyK (not verified)
Angela J.
Wed, 01/30/2013 - 00:11
Same thing
I am trying to figure that out too. I am just going to have more cut. Just in case. Unless Anna sets us straight soon :)
BrandyK (not verified)
Thu, 01/03/2013 - 11:11
Please help. I just spent
Please help. I just spent about 2 hours trying to figure out a cut list to make the bench a 5' bench like mentioned above. I added the 12" to all the length boards, but I'm unable to figure out how to make them fit in the smallest # of boards possible. I'm also trying to add the height to be 24" so I made each height board 23.25". But my brain just won't let me go from there. Is there a website or a program that helps this? Or is just the ol' calculator? Also, on the cut list you've got 2 - 1x2 @ 17 1/4 should there be 4 of these? if not, where am I coming up with my other 2 sides? are they a different width board? Thanks for your help!
Elisha (not verified)
Tue, 01/08/2013 - 09:10
Storage shelf plans?
Ana, love the flip top bench plans. We have something similar in our breezeway. With three kids it's so helpful to have a place to sit and store all of our shoes. I love the shelf you have shown above the bench. Do you have plans for that? Need to build a storage/organizational space for all those coats, mitt, toques we seem to collect on our four season location.
Angela J.
Wed, 01/30/2013 - 00:15
Going to Attempt this
So I am building this bench with side storage, the bench will be 40" long but the supports will be 57" apart. If this makes sense should I add a 3rd support piece like the end pieces to the bench to make sure it is sturdy? or does anyone have any suggestions? Buying my supplies tomorrow. Thanks for any help :)
elinol
Mon, 05/20/2013 - 02:53
amaZing
I am so much excited after reading your blog. Your blog is very much innovative and much helpful for any industry as well as for person. click here
zhiabintang
Mon, 05/20/2013 - 05:18
Thank you so much Ana for
Thank you so much Ana for these plans, finished the build yesterday and will post pics once I stain. It looks great and can't thank you enough for redrawing them! It was such a wonderful experience meeting you in Chicago! You're so sweet & patient! Hostingpangeran Web Hosting Murah Berkualitas berita terbaru bromo tour
Eric Anderson
Fri, 01/08/2016 - 16:00
SketchUp file?
Is the SketchUp (or whatever CAD program you used) file available for this?
Thanks!
Eric
In reply to SketchUp file? by Eric Anderson
Ana White
Sat, 01/09/2016 - 07:30
Hi Eric,
Hi Eric,
We're unable to share those, thanks for your understanding!
Rhys M
Sat, 02/04/2017 - 08:45
Cut list
Hi Ana,
I believe the cut list should show 4 - 1X2 @ 17 1/4", as opposed to 2 as is currently written.
Rhys
Gronodon
Mon, 07/27/2020 - 13:22
Musical Bench
Will update once done, but I just finished the frame and it looks fantastic! For musicians turning this into a piano bench, just be wary that this plan is quite large and you may consider shortening the width in order for it to function as a more traditional piano bench. For mine, any width piece that I put down I shortened by seven inches, so instead of a 48" lid the top lid is now 41", and so on for all width-based pieces.
jvisgait
Sat, 11/07/2020 - 23:49
3/4" pocket hole
Hi Ana -
I'm going to try to build your Flip Top Bench - it will be my first pocket hole attempt. Can you explain what you mean by a 3/4" pocket hole (I don't have a Kreg jig - yet. It's on my wishlist...) Thanks!
Jim