
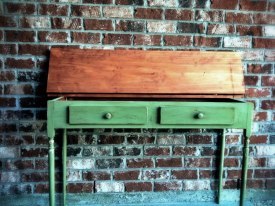
My wife had seen this post by Ana & thought it'd be great for a writing desk that had storage for her laptop so she'd be able to keep an eye out for the kiddo.
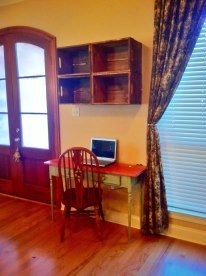
So I decided to use Ana's plans for the storage crates (without the casters) & mount those to the wall for cubbie storage.
I used "white wood" from the local Depot for this piece. However using the common boards will prove to be more cost effective for when you leave your Kreg Jig set at 1/2 inch like myself. :-(
The directions are straight forward, but. clamping & placing screws for the pocket holes were a bit more tricky. Make sure you have ample clamps on hand before attempting this.
Now, you can make the legs as Ana suggests, but if you want "fancy" turned legs are another option. $16.00 per at my local Depot., but. I found stair balusters at $3.00 per & used my miter saw to get them to the proper length per the plans & the same method used to knock off the dowel at the top of them in order to keep it flat.
Finially had it cut, assembled & sanded in 3 hours time. Hence me overlooking the Kreg Jig depth. ( nail gun saved me). You may also want to dry fit everything together. I found out I cut my side aprons too long (3/4 inch) & my inner base was off. Easily solved with scrap wood, glue, nail gun & LOTS of wood filler. Which was sanded & I can't even see the mess up.
Finishing was fun & easy. My color had already been decided via my boss (wife) as it was a fun green color from a Hoosier Cabinet & Matching cupboard I repair & refinished for my daughter's room 2 years ago. As well as the balusters came with a coat of white paint on them already. I sanded the whole project (sans the legs) with 120 then 220 grit paper on my mouse sander & my random orbit. The mouse is able to get the interrior as to where my 5 inch random orbit can't fit. But you could hand sand as well, I'm just lazy.
Once it was all sanded I rubbed down with some denaturated alcohol & old t-shirts I cut up long ago & stored in soft drink fridge packs. You can never have enough of either! I like to use the denaturated alcohol because it evaporates quickly. . .and I like the smell.
I painted the aprons down & let dry. Meanwhile I started staining the portions I could as to not mess up the paint. Once It dried I stained the remaining portions & got the sandpaper out again.
I wouldn't recommend using the power sanders but I did only on the legs due to the prefinished paint that was on them. I wanted to get the wood showing but around the edge of that I wanted to see the white paint & then the green. Careful not to hit the stained the areas!
Once that's done I used my same wipe down technique as after sanding & prepair to glaze. USE GLOVES FOR THE NEXT STEP!
Now you can get latex free or latex medical looking gloves. Just stop that. GO GET MEDICAL GLOVES. I've worked in my profession for 16 years, medical exam gloves & the gloves you get at the hardware store tear up. Grab some BarrierMax brand if you can. You'll be able to rebuild a car engine without tearing.
Now you're ready to glaze & Brooke at KillerB was dead on in her posts on the glaze. Must read!
All in all I think it came out perfect & can't wait to do this again.
Rustoleum Choc. Glaze
Comments
dmcarwin
Wed, 10/24/2012 - 09:00
BEAUTIFUL!
You did a great job!
In reply to BEAUTIFUL! by dmcarwin
JL Hurst
Wed, 10/24/2012 - 09:54
Thanks a bunch!
Thanks a bunch!
brookifer86
Wed, 10/24/2012 - 16:32
Fancy!
It looks awesome! And thanks for the shout out on glazing. I'm glad the tutorial helped! Love the color you picked. I also put mine together with nails, mostly because I'm lazy and it's less work ;)
In reply to Fancy! by brookifer86
JL Hurst
Sat, 10/27/2012 - 12:51
Thanks Brook,Had a blast
Thanks Brooke,
Had a blast doing this project. Thanks for your contribution.
Nailers may be lazy, but it's more fun ;-)