


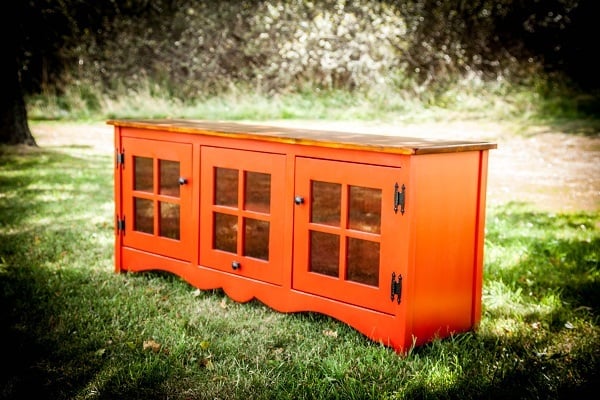
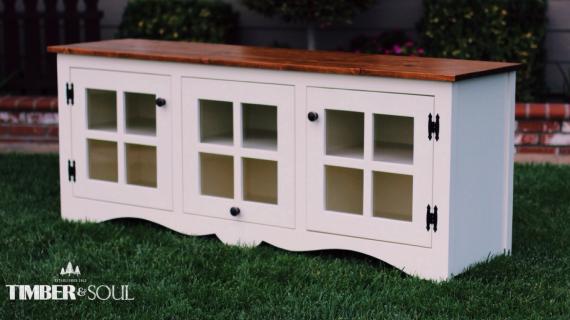
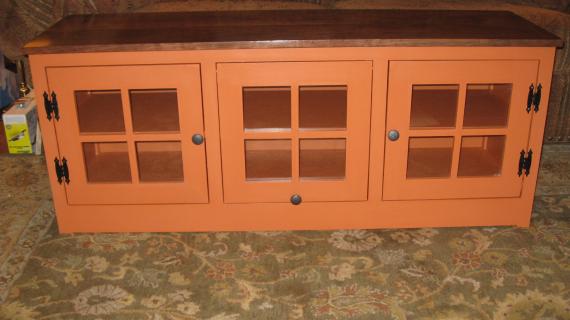
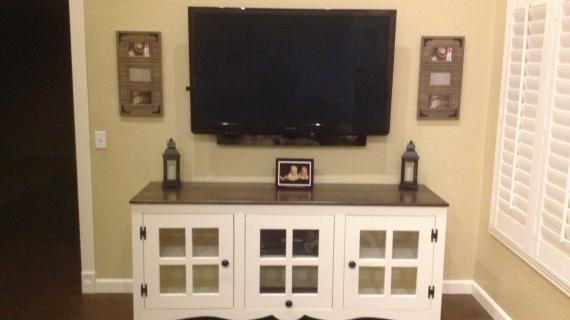
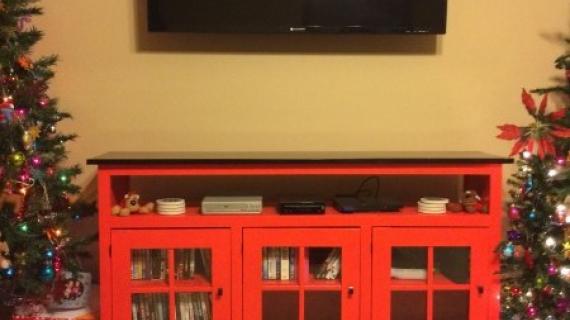
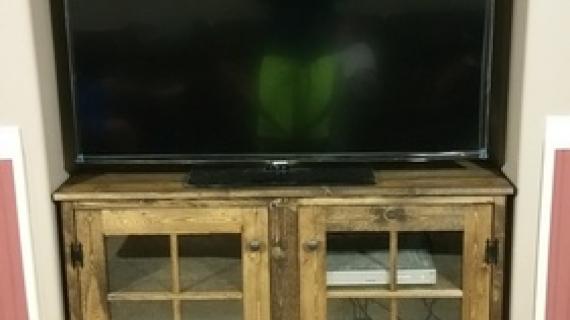
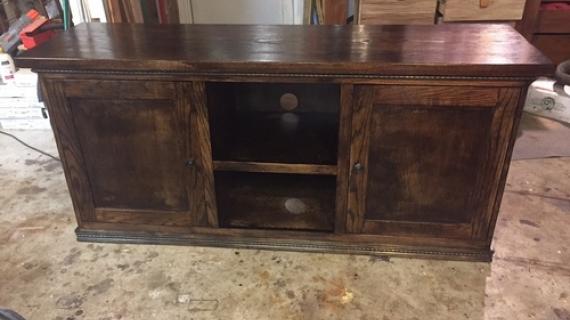
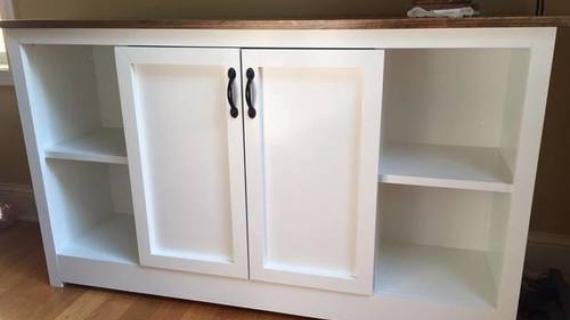
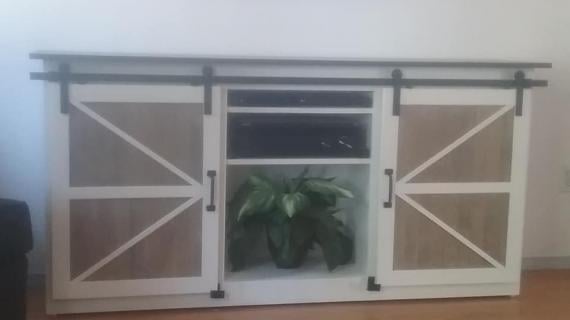
Free plans with video to make a Farmhouse Console or Media stand!


Preparation
2 - 1x12 @ 8 feet long
1 - 1x12 @ 6 feet long
3 - 1x2 @ 8 feet long
2 - 1x3 @ 8 feet long
1 - 1x1 moulding 8 feet long
2-3 sets of surface mount hinges
3 knobs
1 1/4" pocket hole screws
1 - 1x12 @ 52 1/2"
2 - 1x12 @ 21 1/4"
2 - 1x2 @ 51 3/4"
2 - 1x4 @ 51 3/4"
4 - 1x2 @ 21 3/4"
2 - 1x2 @ 16 1/4"
2 - 1x12 @ 17 3/4"
3 - 1x12 @ 17"
1 - 1/4" plywood 21 1/4" x 54 3/4"
1 - 1x12 @ 57 1/2"
1 - 1x3 @ 57 1/2"
DOORS
6 - 1x3 @ 16"
6 - 1x3 @ 11"
1x1 slats have 11" exposed overall per grid
1/4" plywood for back measures 51 3/4" x 21 1/4"


Please read through the entire plan and all comments before beginning this project. It is also advisable to review the Getting Started Section. Take all necessary precautions to build safely and smartly. Work on a clean level surface, free of imperfections or debris. Always use straight boards. Check for square after each step. Always predrill holes before attaching with screws. Use glue with finish nails for a stronger hold. Wipe excess glue off bare wood for stained projects, as dried glue will not take stain. Be safe, have fun, and ask for help if you need it. Good luck!
Instructions
Step 1
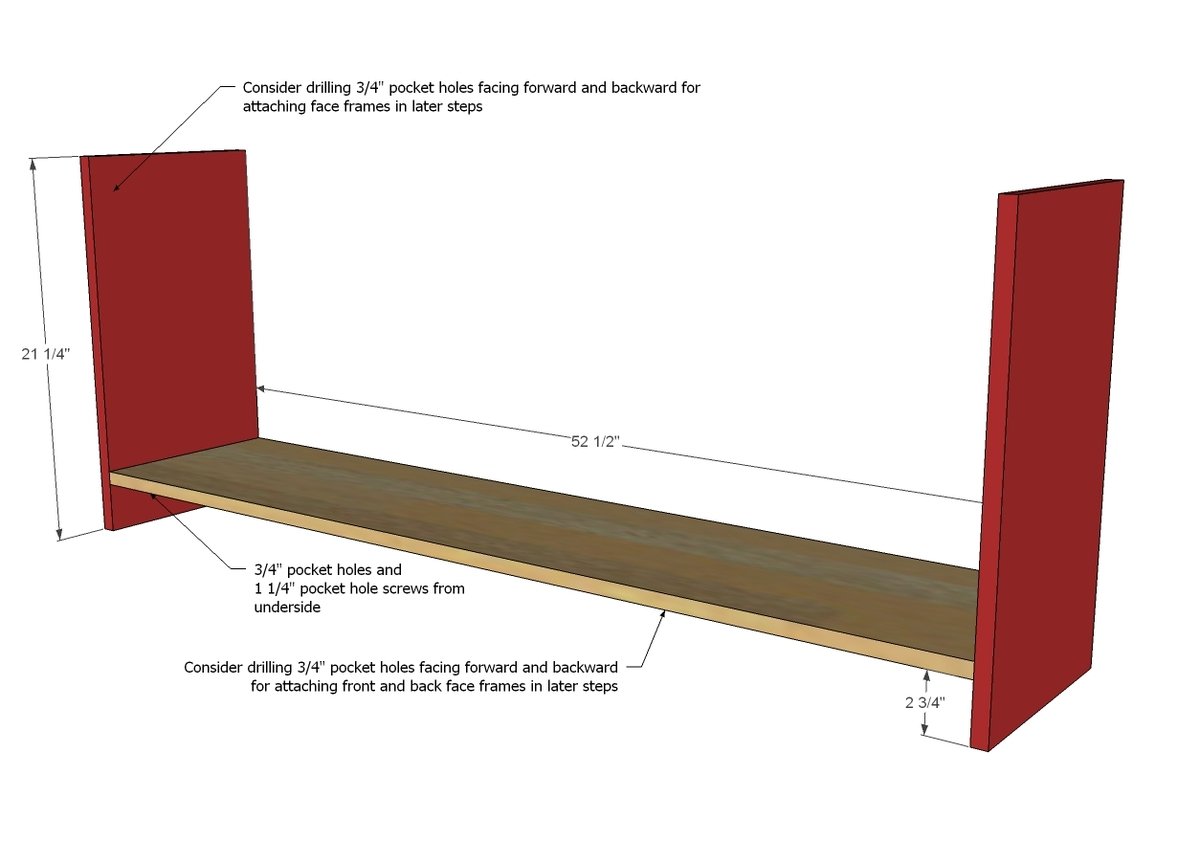
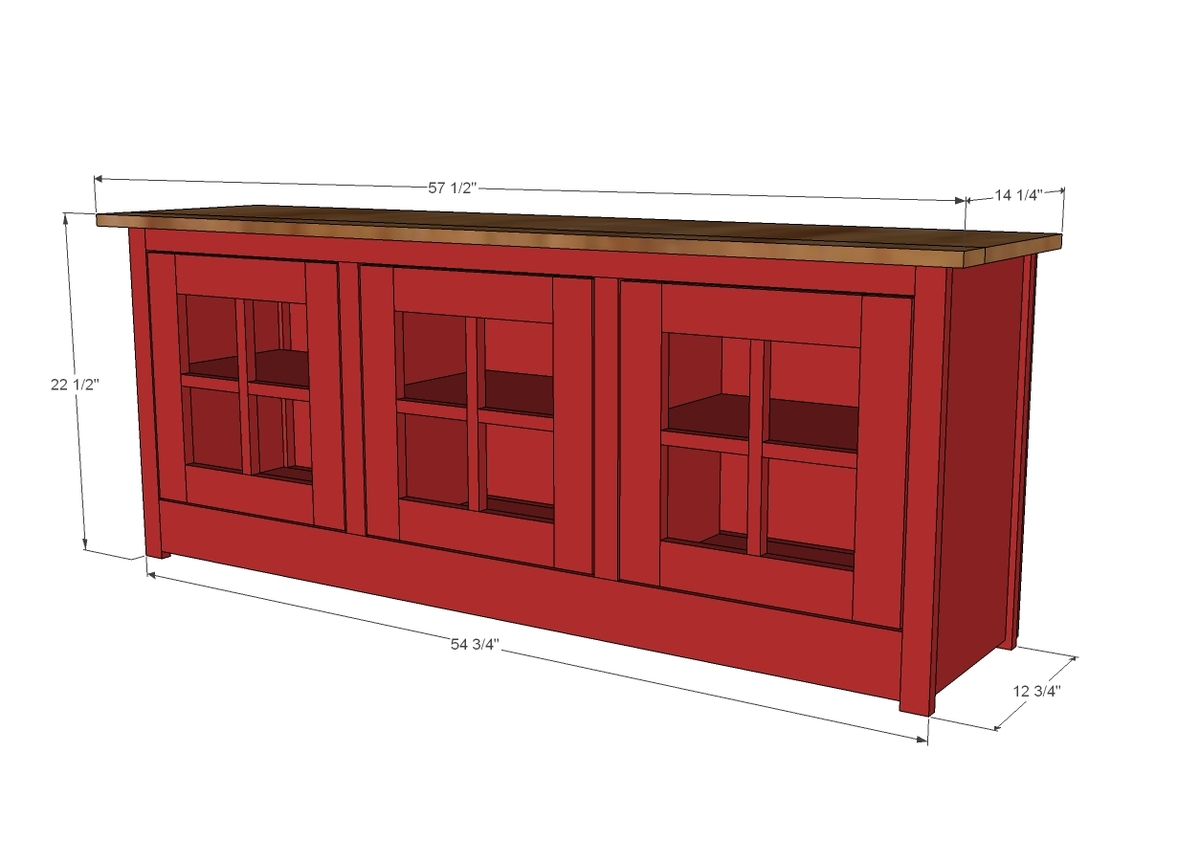
Start by building the basic box for the media console. To conserve wood, a top is not necessary. You'll just have to be extra attentive to make sure the face frames are attached square.
Step 2

Build your back face frame first, then attach to back.
TIP: Consider adding the two additional 1x2s as done on front face frame just to finish out shelf dividers.
Step 3
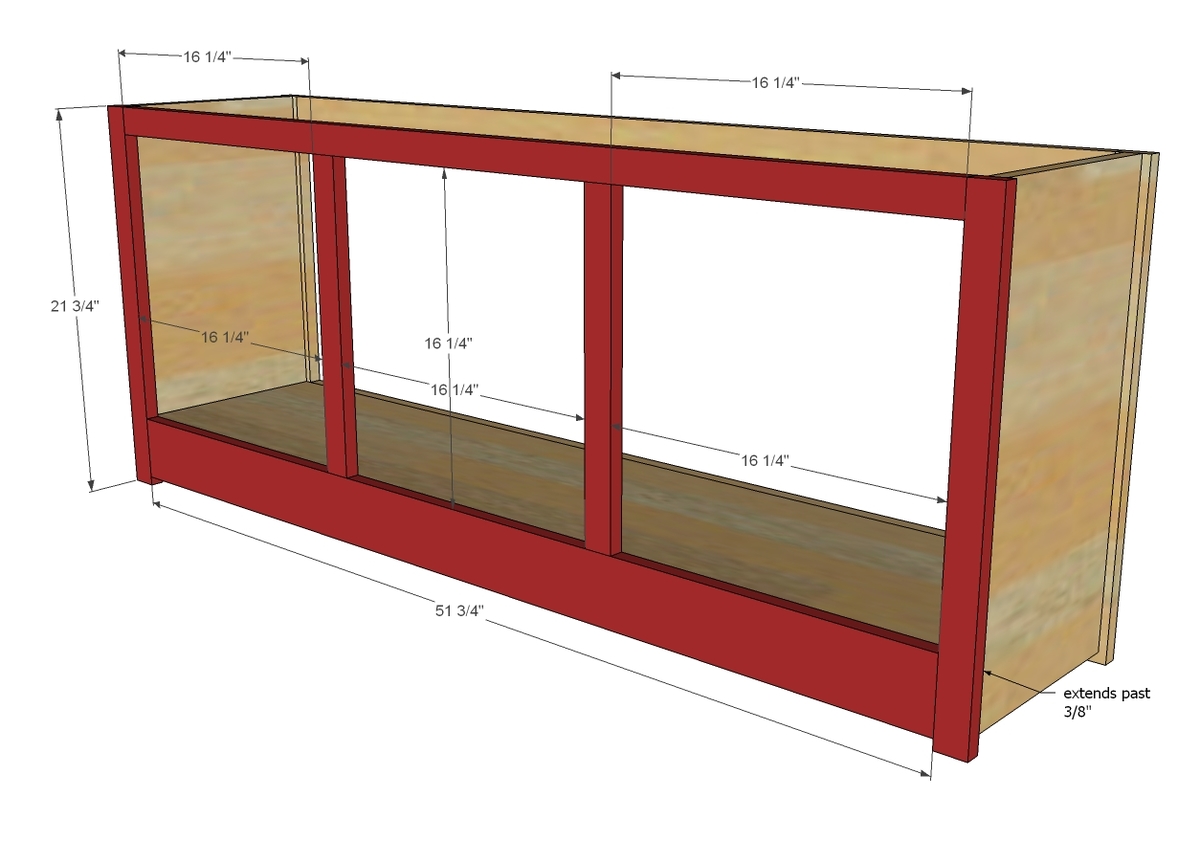
Build front face frame and attach to front. Note that both back and front face frames over extend the ends by 3/8".
Step 4
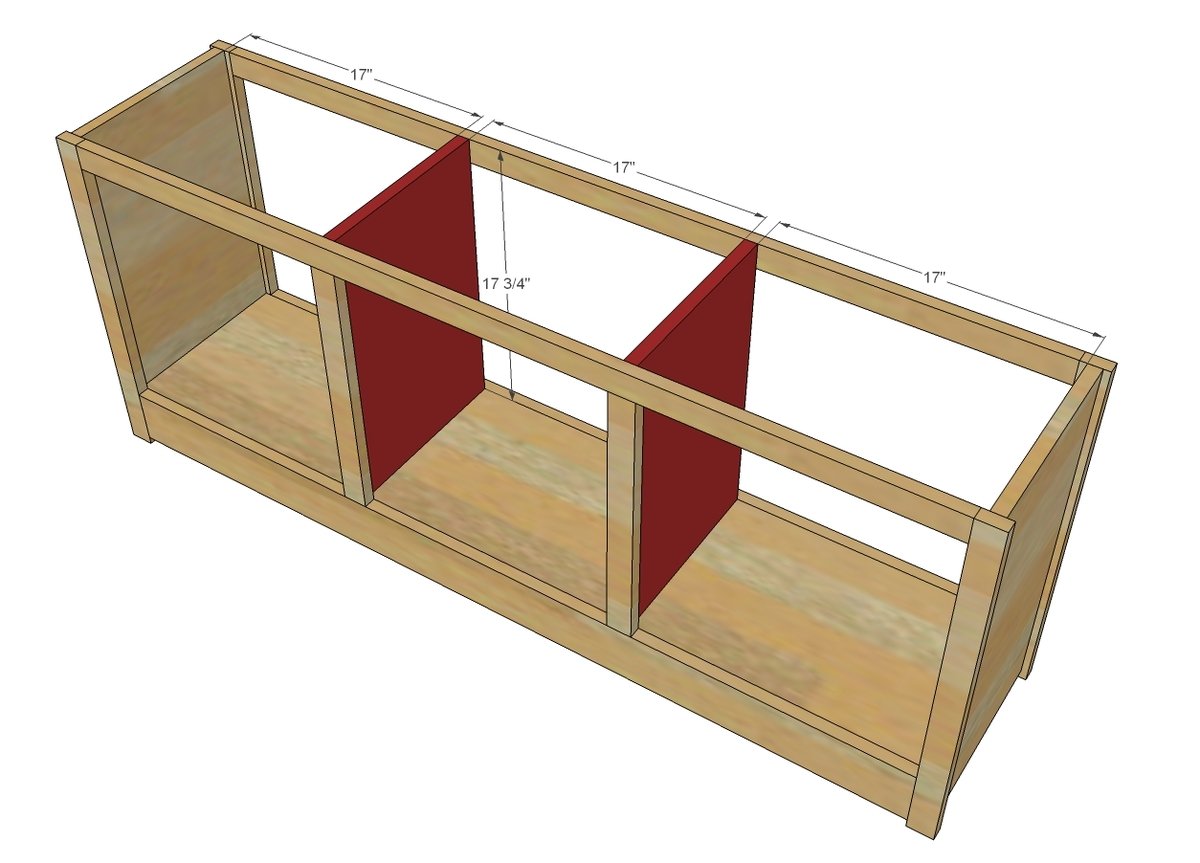
Place middle dividers in the cabinet and attach by drilling 3/4" pocket holes around bottom and side edges. Attach with glue and screws.
Step 5
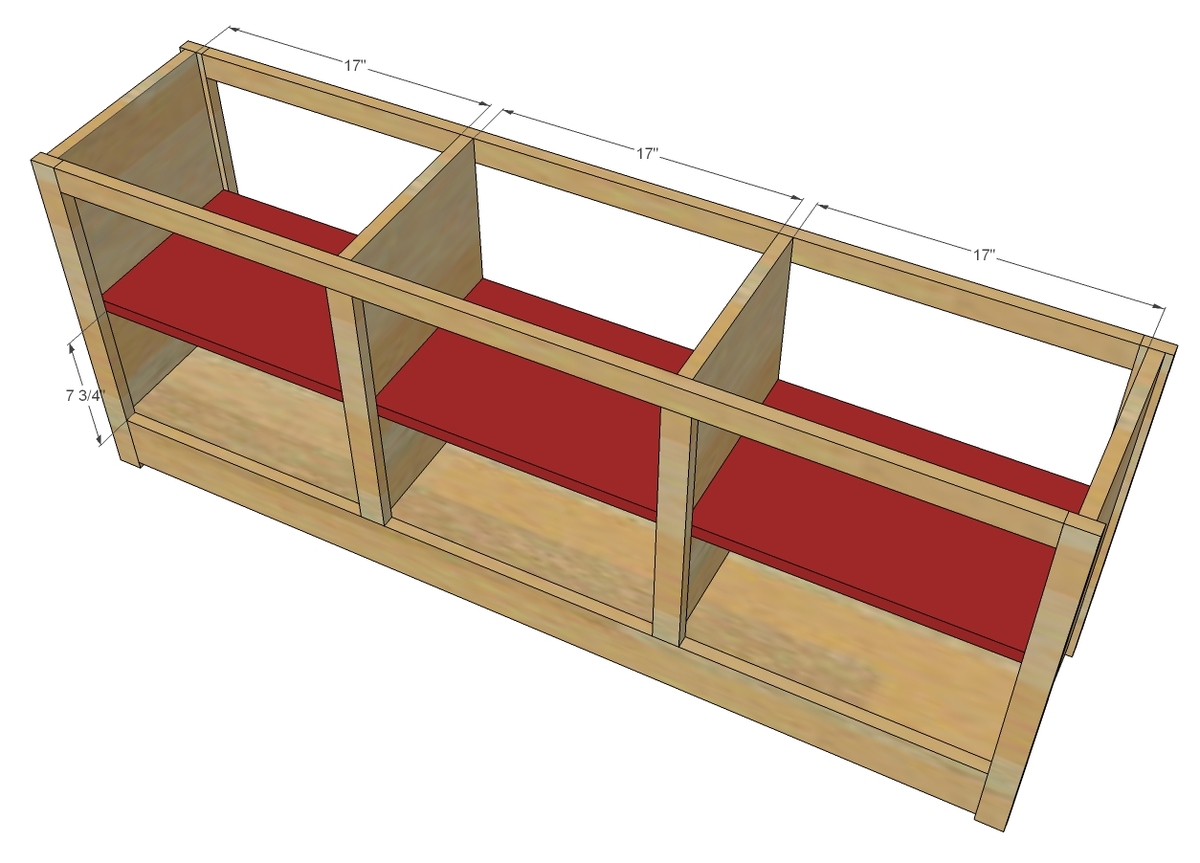
Step 6

Attach back.
Step 7
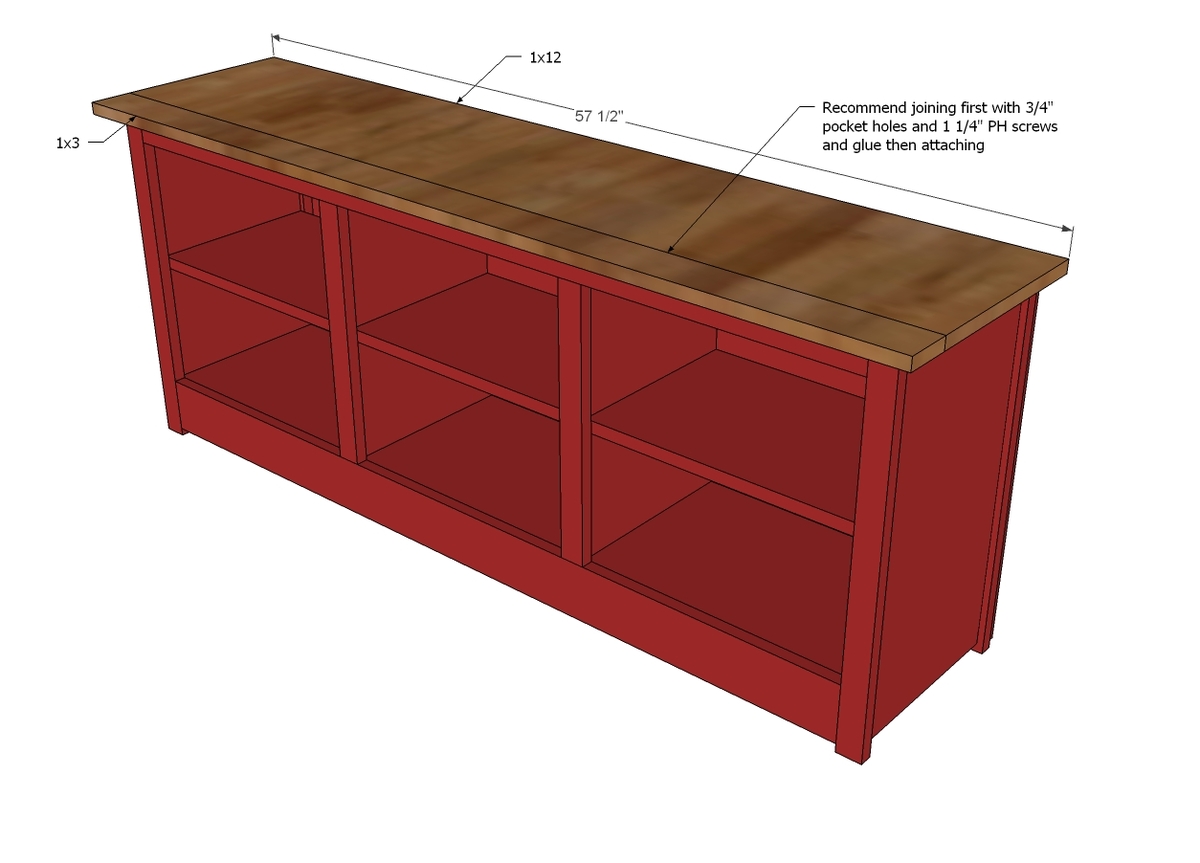
Build top first, then attach top to cabinet as shown here, with equal overhangs on ends and front.
Step 8
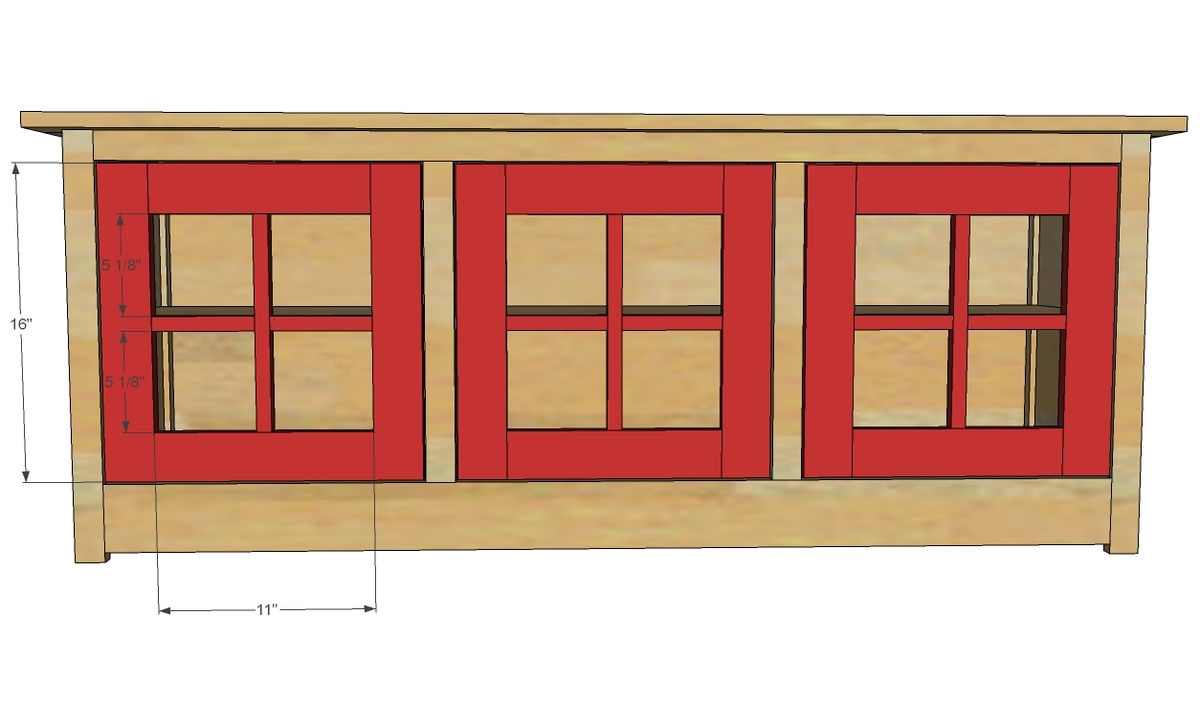
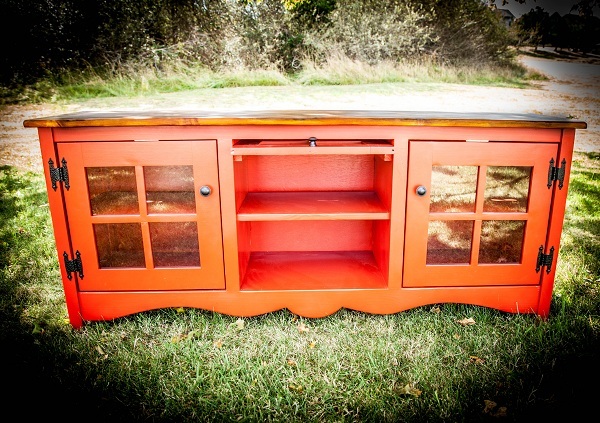
Build doors - must watch video on this!!!! - and attach with hinges to the front of the cabinet.
It is always recommended to apply a test coat on a hidden area or scrap piece to ensure color evenness and adhesion. Use primer or wood conditioner as needed.
Comments
birdsandsoap
Thu, 11/01/2012 - 15:01
Another Homerun!
Oh, this is awesome. I love the detail work on the bottom. And the sliding feature of the center door.
Now I'm jealous of your table saw.
Way to go, Patrick!
And Gabe too, I'm pretty sure if you followed me around and filmed me doing laundry and dishes all day, you could make it look like art.
Great job boys!
In reply to Another Homerun! by birdsandsoap
G.A. Gallant
Thu, 11/01/2012 - 19:36
Hey Thanks!
Thank you for the compliment. I loved being able to make these videos for Patrick to share. I'm happy you liked it :)
redhead_61
Thu, 11/01/2012 - 15:27
hmm
I am basically speechless. I want to come "intern" with you!
Anonymous Coward (not verified)
Thu, 11/01/2012 - 16:08
The video would be far more
The video would be far more useful if you exchanged that music for a voiceover explaining what you are doing and why.
clkodiak (not verified)
Thu, 11/01/2012 - 19:25
Very inspiring! I have
Very inspiring! I have several projects you have posted on my To-Do list! Hopefully one of these days I will get to them! Thanks so much for sharing!!!
brookifer86
Thu, 11/01/2012 - 19:33
Form over Function ;)
I think the video is perfect as is! It's not meant to be instructional, but motivational! It truly is watching a master at work. If I had someone video me building, it would involve a lot of swearing and shimming and banging stuff into place ;) I don't have nearly enough patience to pull off the beauty that Patrick does! Love love love it. Please keep up the amazing videos!
In reply to Form over Function ;) by brookifer86
G.A. Gallant
Thu, 11/01/2012 - 19:45
Nailed it
Thank you so much for the compliment. You nailed it right on the head. Motivational, not instructional. The purpose of the videos was to capture the love of the labor while also showing important building aspects.
We had a lot of fun making these. But, unfortunately this is the last video I will be making with Patrick as the Navy has thrown him across the country. Of course, when I finally learn how to film him building in such a confined space, he leaves me.....Just like a man to leave when things are going well :)
Thanks again!
In reply to Nailed it by G.A. Gallant
birdsandsoap
Thu, 11/01/2012 - 20:55
Haha!
Haha!
patrickhosey
Thu, 11/01/2012 - 21:50
Thanks
Thanks for all the nice words, I really appreciate them. I'm nowhere near a master though hah but I do thank you. Ah it's gonna be like Penn with no Teller soon. So sad.
Tony t (not verified)
Thu, 12/27/2012 - 07:41
Question about reveal on face frame
Great video and music. My question is on the face frame, it appears on the photos that there is a 1/4 in reveal on the face frame legs from the face frame top and bottom. If so, did you plane those pieces to get that or am I just seeing things? Thanks for your time and look forward to if and when you guys produce another video. God bless
TT
Stefanye Thurmond (not verified)
Thu, 11/01/2012 - 22:32
Wow!
Beyond impressive!
little stuf
Fri, 11/02/2012 - 10:32
AMAZING! (as usual!)
You guys are so very talented! I am inspired by you both! Beautiful work!
dev (not verified)
Fri, 11/02/2012 - 13:49
How do the hinges work for
How do the hinges work for that middle door?
Jenni (not verified)
Fri, 11/02/2012 - 13:54
flip up door hardware
Hi, I am super curious about the flip up the cabinet door. I was trying to put one on a cabinet I made, but I was unable to find reasonably priced "flipper" hardware. What did you use?
Love the video and your handywork!
Patrick Hosey (not verified)
Fri, 11/02/2012 - 19:46
Middle Door
The middle door is what's called a Barrister door. I had to do a lot of research on how to do this. There actually is no hardware. Basically there are grooves cut on both sides of the door. Those grooves pivot and slide on two wooden dowels that are attached to the face frame. Then when the door slides back, it rests on two square dowels attached to the interior of the cabinet.
To find out more just google barrister bookcase, or barrister door. Try and find as much as you can.
tracysmith
Sat, 11/03/2012 - 01:24
Another amazing job!
Patrick, you ARE amazing!!! I'm so sad to hear that you and your vidographer are going to be split up! Will you try to continue to post videos with someone else? (Gasp, did I just suggest you cheat on Gabe?) All I"m sayin' is it would be a shame to miss out on more projects from the Patrick Hosey Workshop!!!! Love love love those doors! Very nicely built and very intimidating for me to consider trying! Maybe someday as I build up my experience ;-) Great job guys!!!
exuma_momma
Sat, 11/03/2012 - 13:17
WOW WOW WOW!!!!
You make this all look so simple :) Love your work space and this amazing video. If you ever want to come to the Bahamas and put on a little workshop and show me how to do some of these things.... I've got a place you can stay and I'll show you around our little island! Really, seeing it all in action with you and Ana just shows me all the cool stuff I can learn with this hobby :)
In reply to WOW WOW WOW!!!! by exuma_momma
patrickhosey
Sat, 11/03/2012 - 18:38
dang
Dang the Bahamas. That would be amazing.
In reply to dang by patrickhosey
exuma_momma
Sat, 11/03/2012 - 18:41
I'm totally serious! We have
I'm totally serious! We have access to an apartment you and your family could stay in. In exchange for some tips and woodworking help :)
woodworker1216
Sun, 11/04/2012 - 12:55
cutlist vs drawings
There are two different numbers for the depth of cab one shows 12-3/4 and another in cutlist shows 16-1/4 what is correct
In reply to cutlist vs drawings by woodworker1216
patrickhosey
Sun, 11/04/2012 - 18:02
ahhh
I see what you're talking about. The 16 1/4 is the space between the doors. It just looks like the width of the cabinet because of how faint the drawing is. Look at it again closer. It's an illusion hah.
In reply to ahhh by patrickhosey
woodworker1216
Mon, 11/05/2012 - 15:18
cutlist
I did look closer this time and seen where i mistook the line.Thanks
Laurel (not verified)
Mon, 11/05/2012 - 08:56
beautiful
Can I come and use your wood shop while you are away? Great video, beautiful cabinet and thank you for your service to our country!
Brook @ BeingBrook (not verified)
Tue, 11/06/2012 - 14:19
Amazing!
Love the video! Total tool envy and you keep stuff so clean as you work. Beautiful job on the build and the video!
Kristian (not verified)
Thu, 11/08/2012 - 10:25
CABINET COLOR
WOULD YOU BE ABLE TO TELL ME THE COLOR THAT YOU PAINTED IT?
Patrick Hosey (not verified)
Thu, 11/08/2012 - 13:11
Color
Rustoleum Painters Touch Satin Papryka Spray Paint
Will (not verified)
Mon, 12/03/2012 - 08:12
Awesome! Could you please
Awesome! Could you please tell me what kind of wood you're using? Thanks!!
Patrick Hosey (not verified)
Tue, 12/11/2012 - 07:17
I used white pine from Home
I used white pine from Home Depot.
songnverse (not verified)
Tue, 12/11/2012 - 05:55
this is EXACTLY the piece I
this is EXACTLY the piece I am looking for...but I can't build it..off to the thrift
vintage kisses
Wed, 12/19/2012 - 18:05
Perfect aesthetic
Very nice piece - love the paint and the glass on doors ;)
momonapua2003
Thu, 06/20/2013 - 19:36
Hinges
May I ask where you got the hinges from? And the name? Thanks
spenbeau
Sat, 11/14/2020 - 06:01
Video
How can I find the video on making the doors?
briancoops
Sun, 02/13/2022 - 06:27
I can't seem to find the…
I can't seem to find the video for making the doors :(