

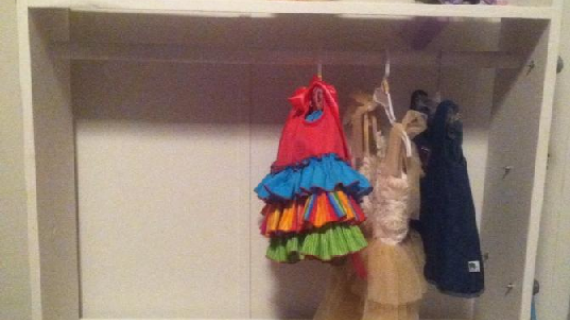
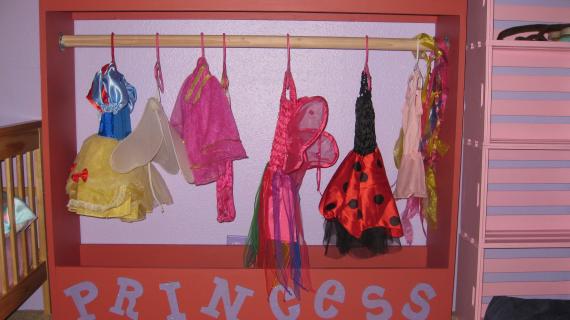
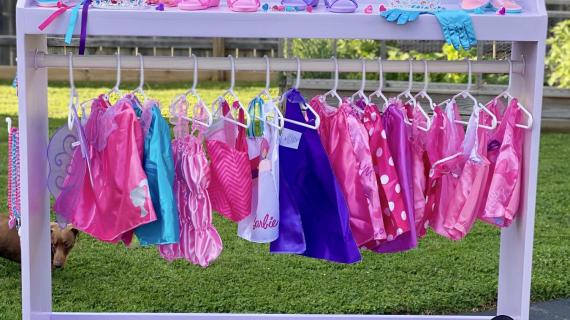
No cuts required to build this dress up center! Free easy DIY plans from Ana-White.com

Preparation
- 4 - 1x12 @ 48”
- 2 - 1x10 @ 48”
- 1 - 1x6 @ 48”
- 2 - 1x2 @ 48”
- 4 - Caster Wheels with screws for attaching
- 1 - 1 1/4” closet rod
- 2 closet rod pockets
- 2" Trim screws or 1-1/4" brad nails for building
- Wood glue
No cuts required!!!!


Please read through the entire plan and all comments before beginning this project. It is also advisable to review the Getting Started Section. Take all necessary precautions to build safely and smartly. Work on a clean level surface, free of imperfections or debris. Always use straight boards. Check for square after each step. Always predrill holes before attaching with screws. Use glue with finish nails for a stronger hold. Wipe excess glue off bare wood for stained projects, as dried glue will not take stain. Be safe, have fun, and ask for help if you need it. Good luck!
Instructions
Step 1
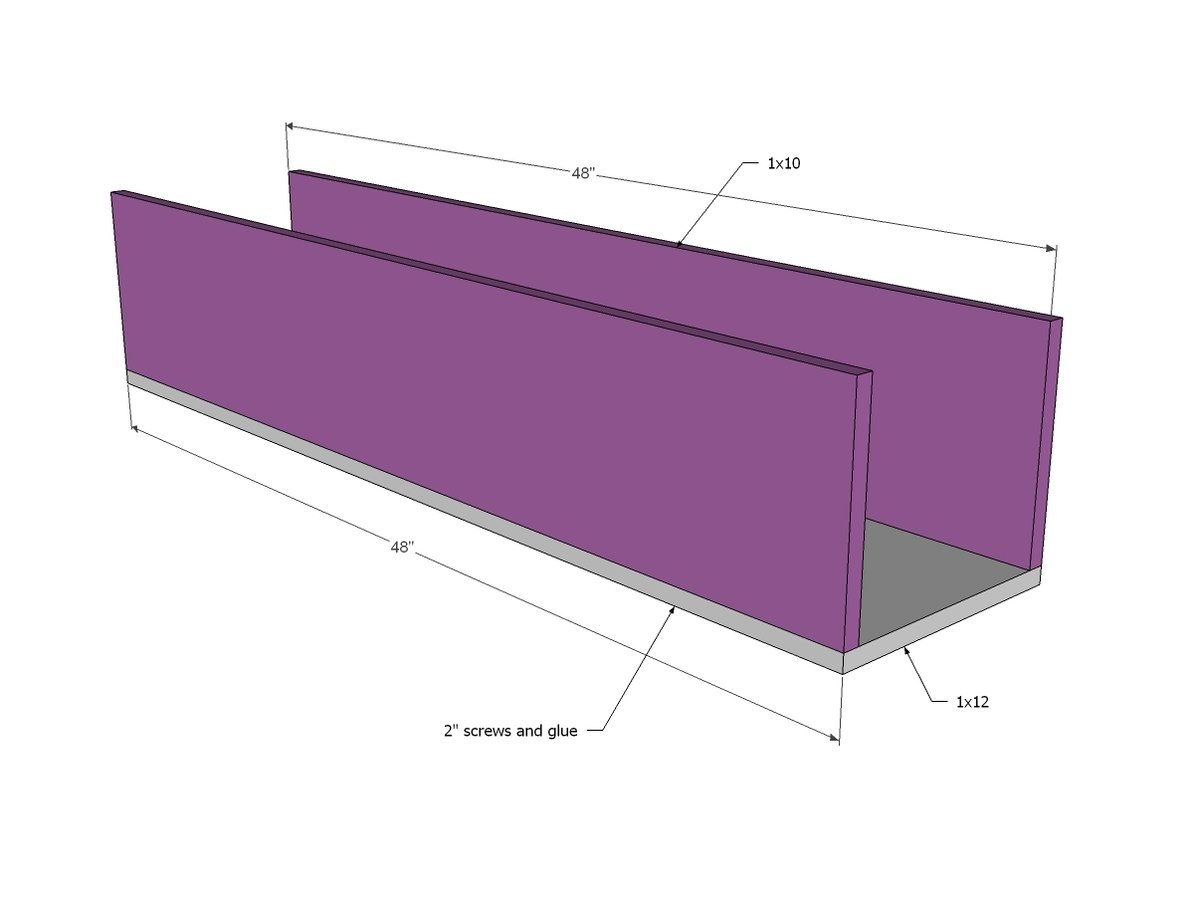
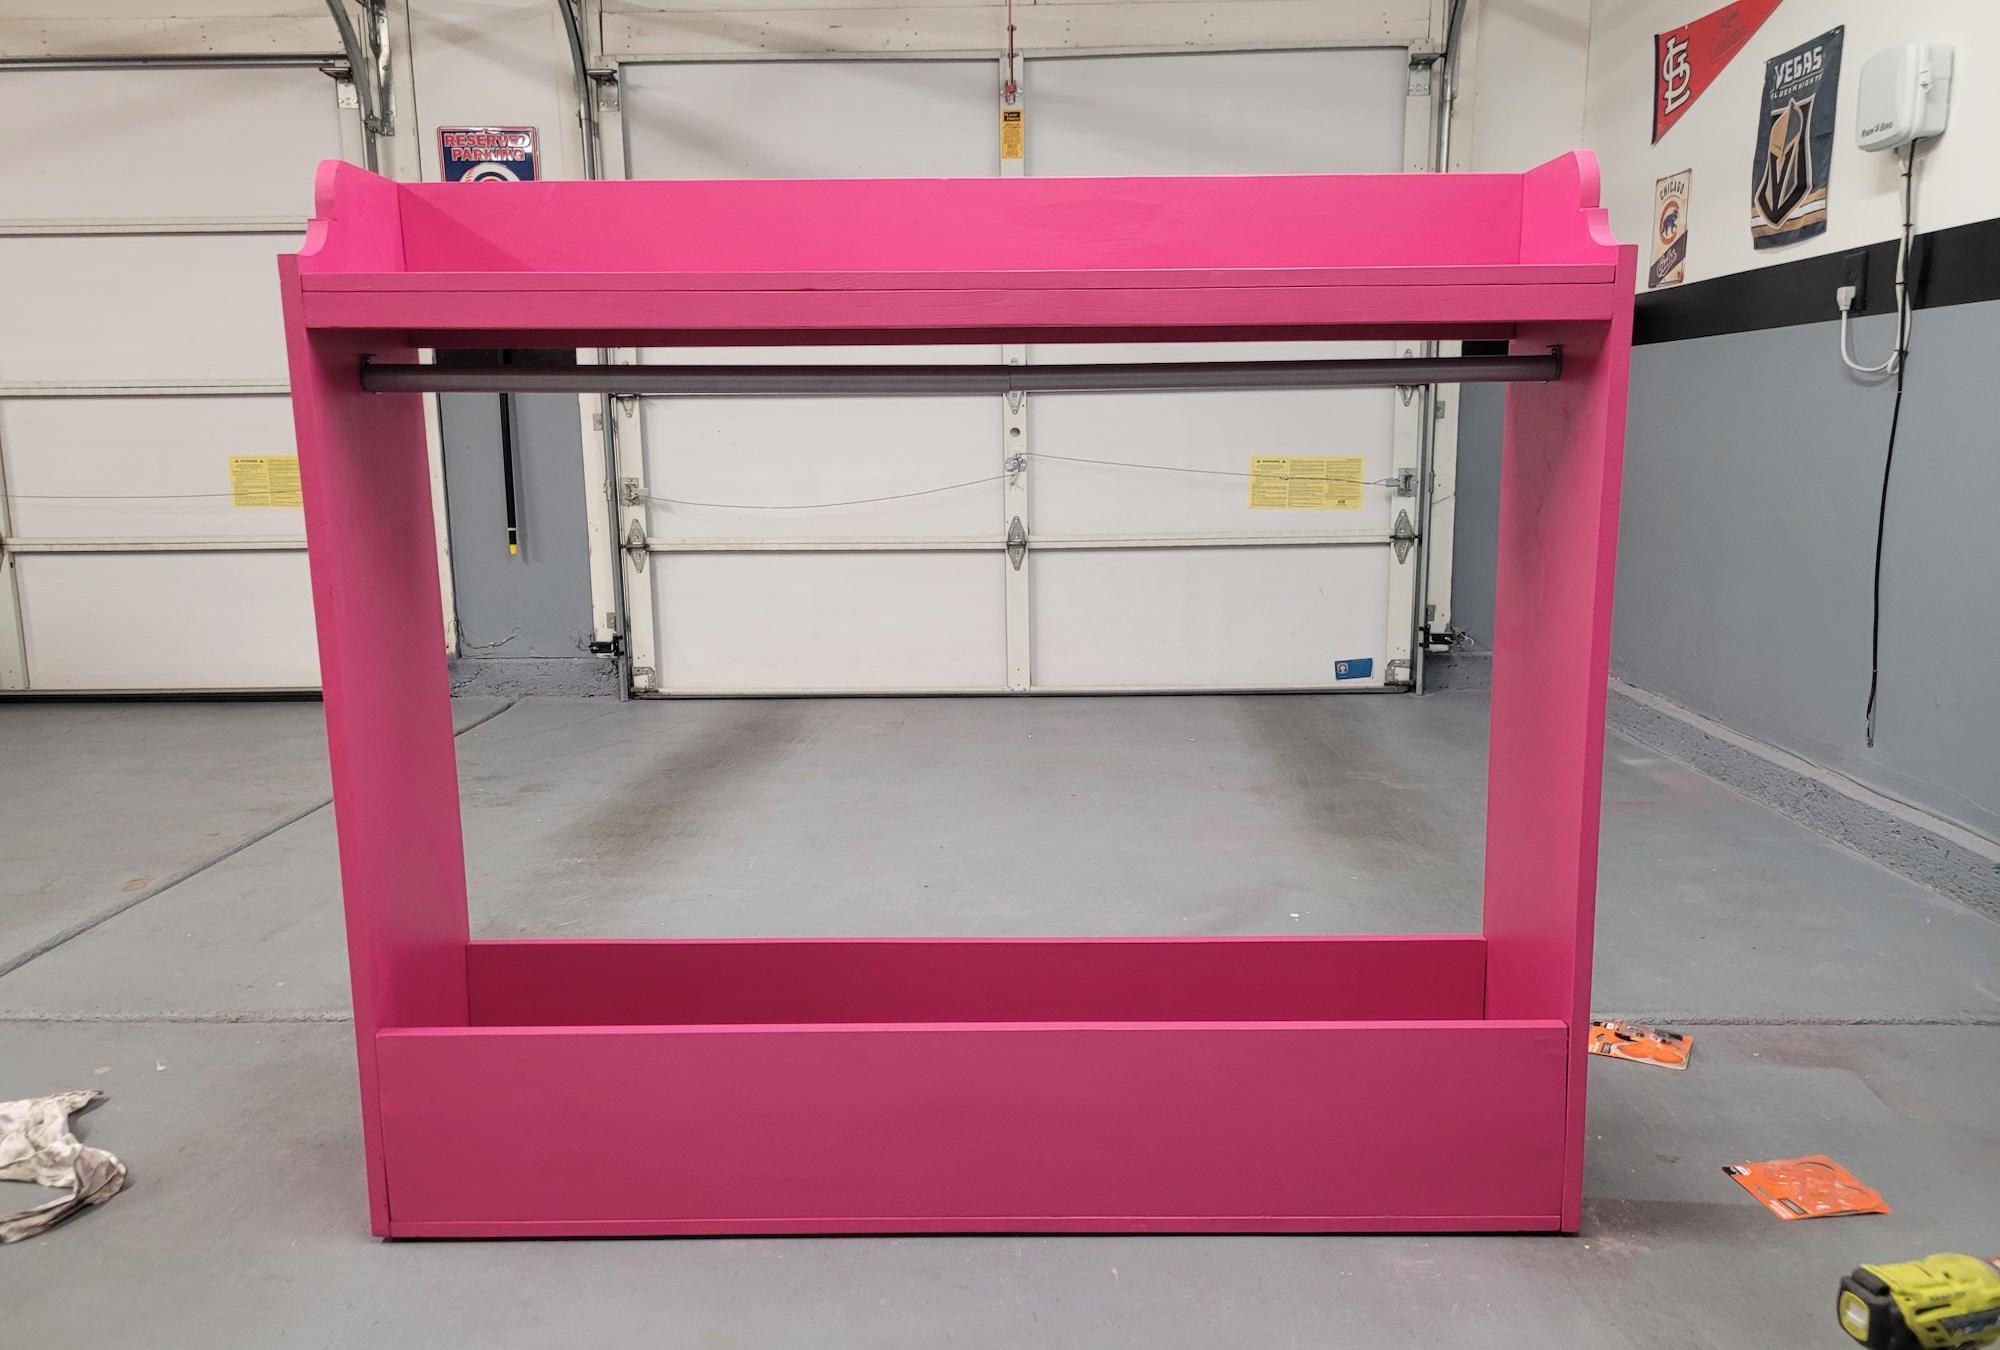
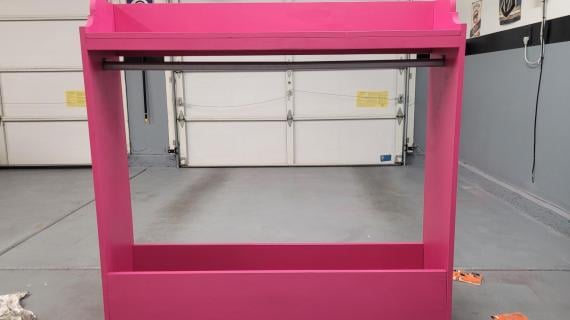
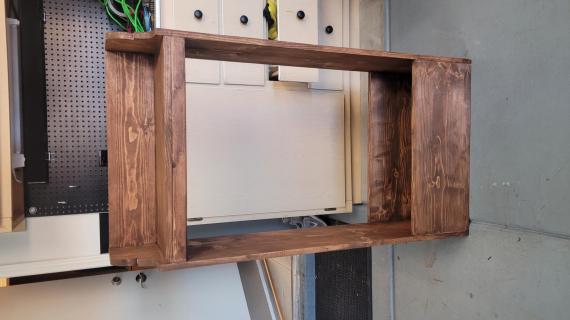
Attach bottom to the sides. This will create a compartment in the bottom for shoes and accessories.
Step 2

This is optional if you want to use a jigsaw to cut out the top of the sides - it’s totally up to you!
Step 3

Attach sides to the bottom compartment with screws.
Step 4
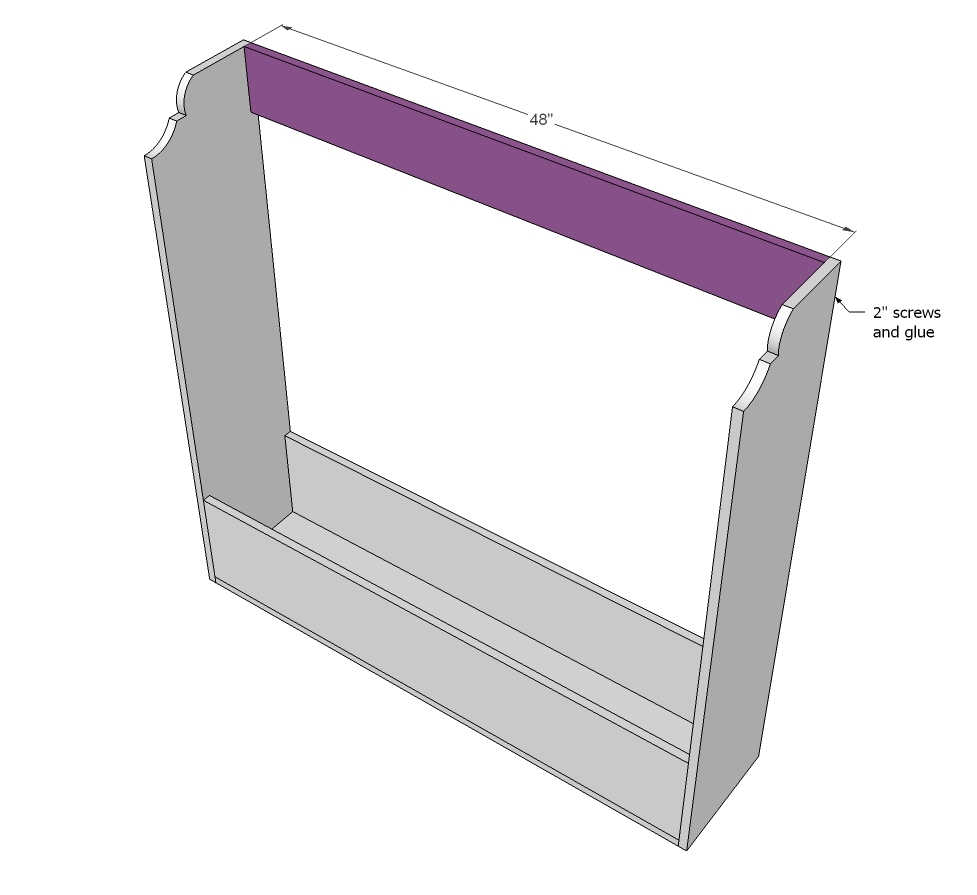
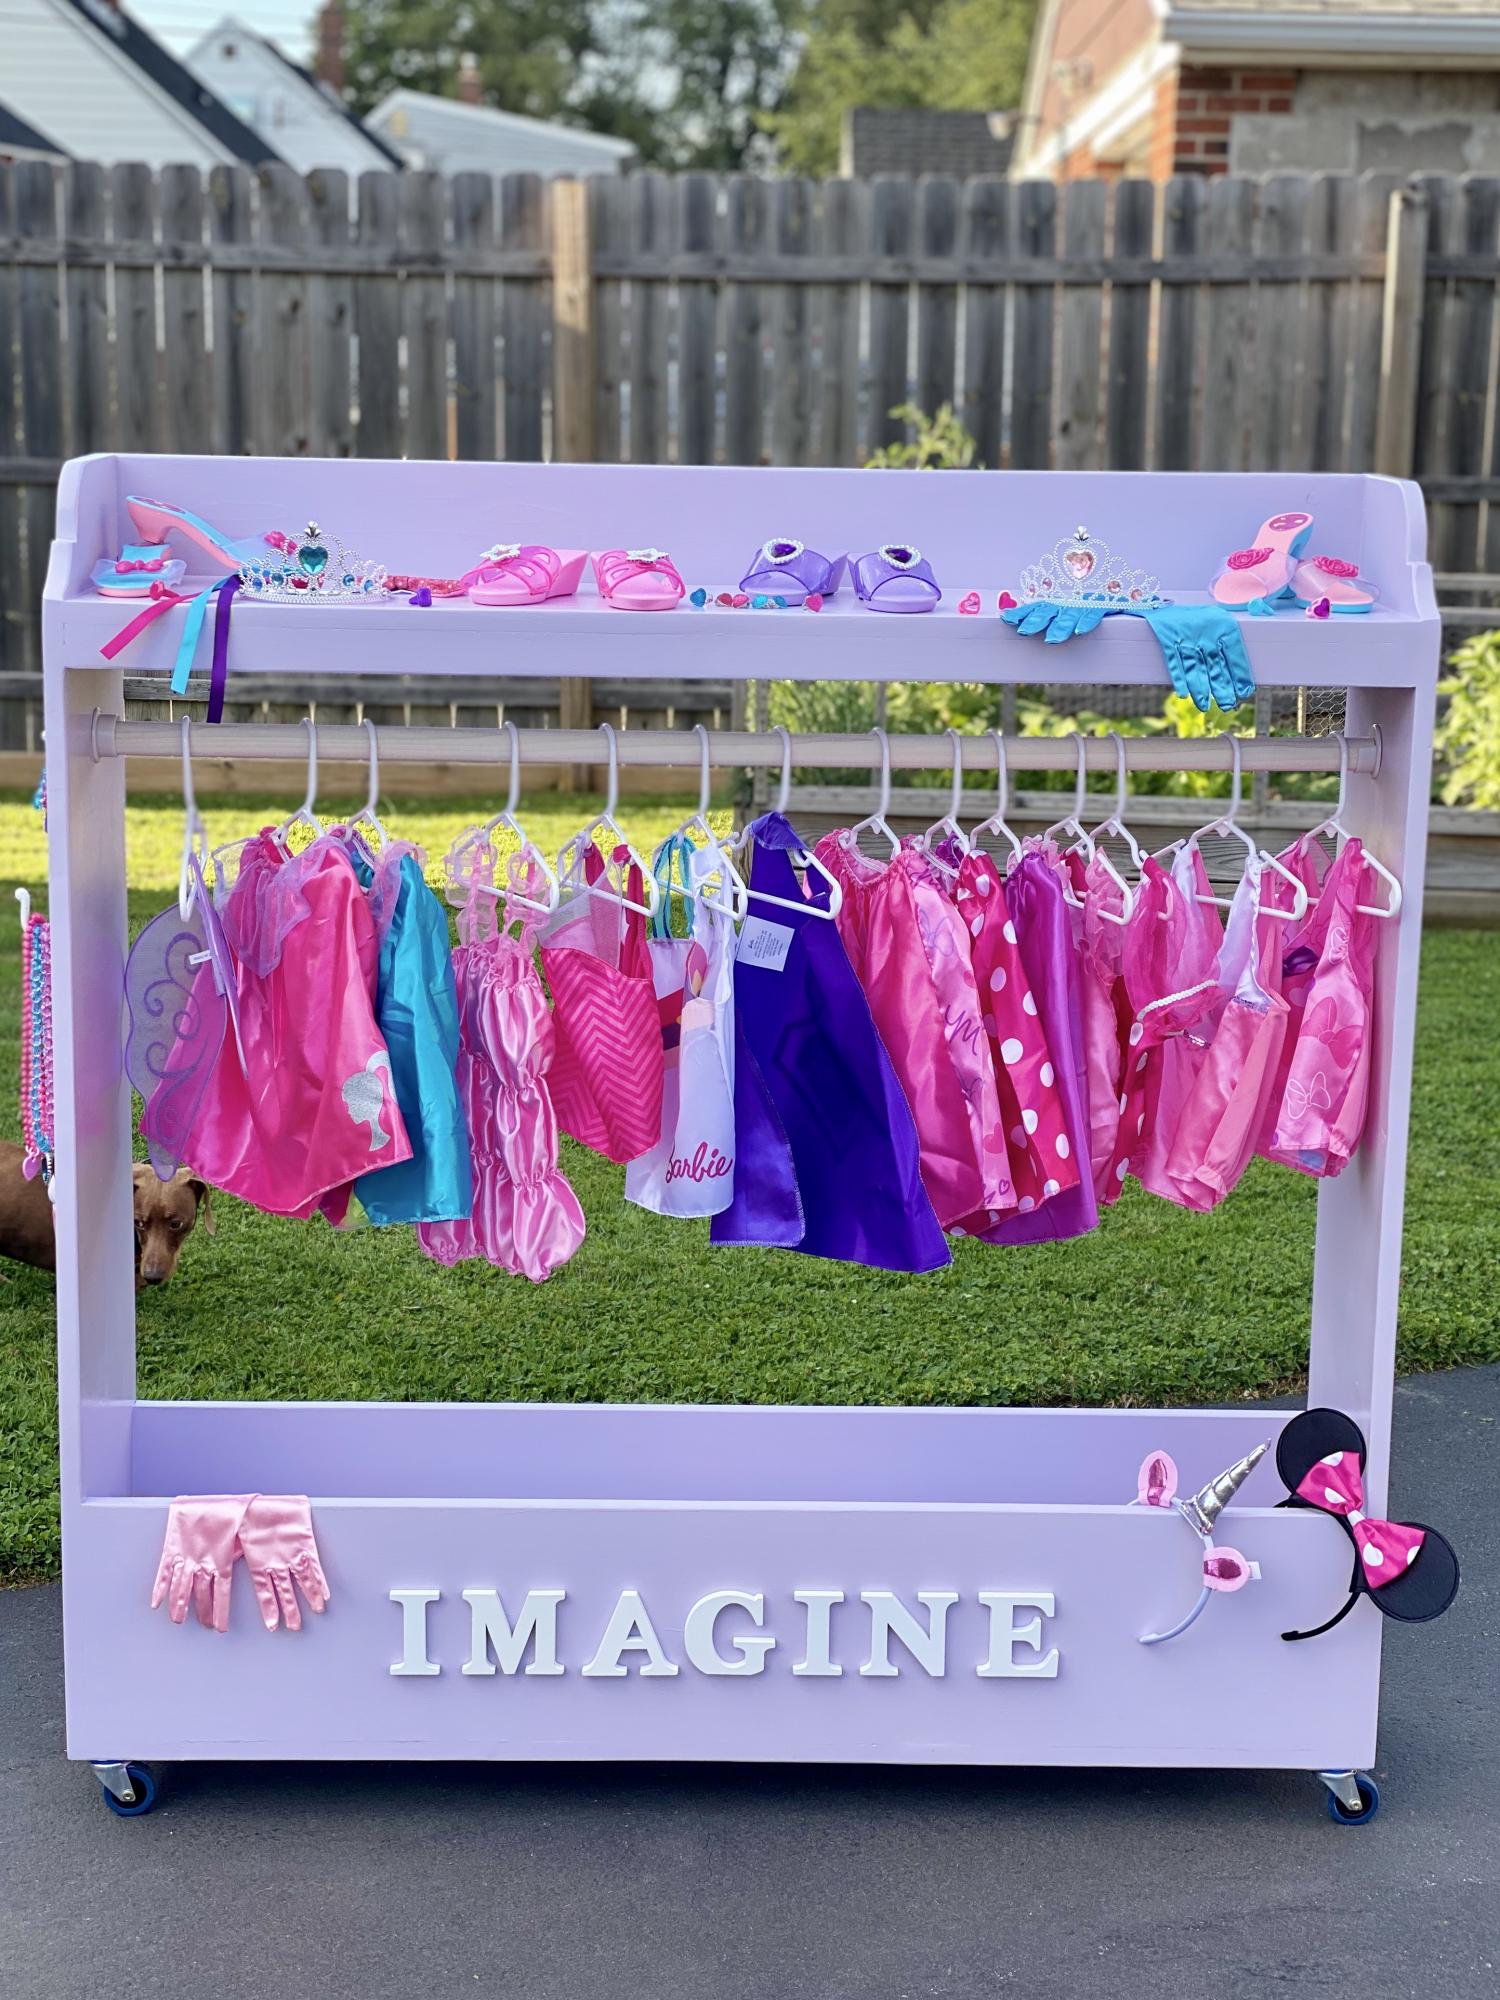
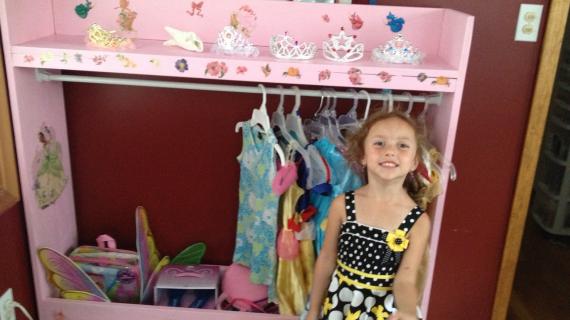
Now the back - this will provide a back for the top shelf so little shoes and hats and crowns stay on the top shelf. Just screw to the sides.
Step 5

Step 6
Just because it’s DIY doesn’t mean you shouldn’t make something nice! These aren’t absolutely necessary, but at $1 for both, these little boards called 1x2s will strengthen up your shelves and give your project a finishing tough. Just screw or nail to the top shelf and ends.
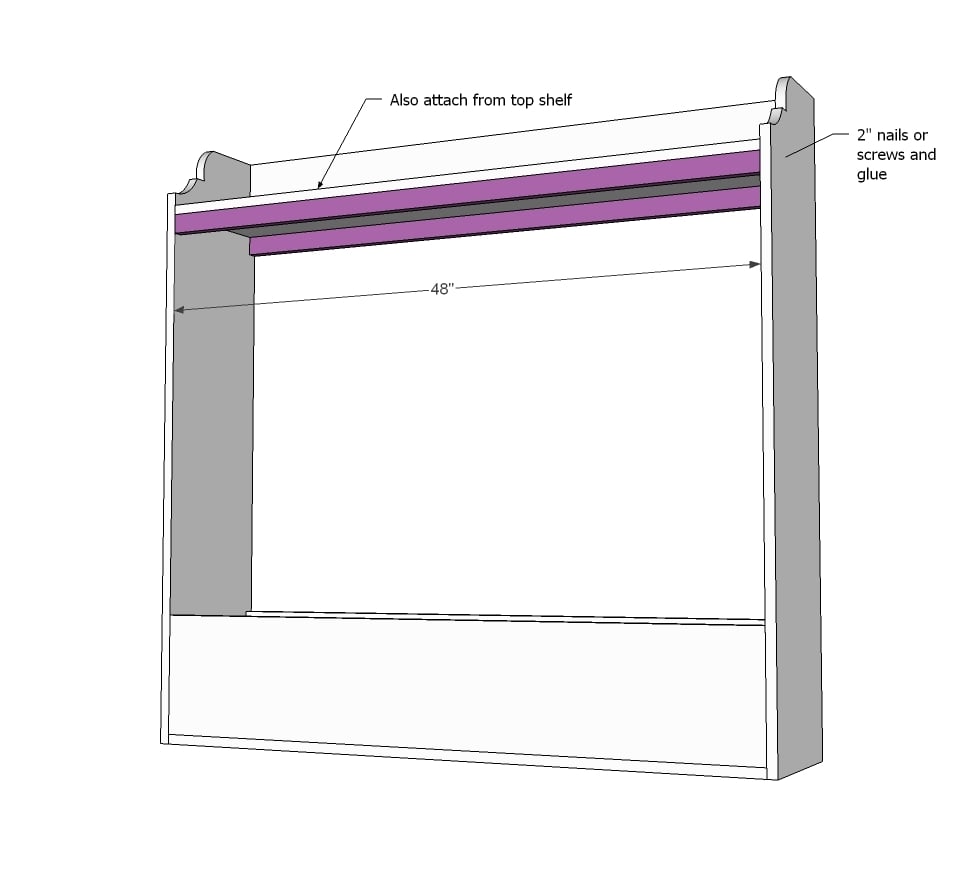
Step 7

You could use a shower curtain rod here, but I just went ahead and got some closet rod pockets and a closet rod that was already the right length - 48”! So all I have to do is attach the closet rod pockets inside the dress up center and put the closet rod in!
Step 8
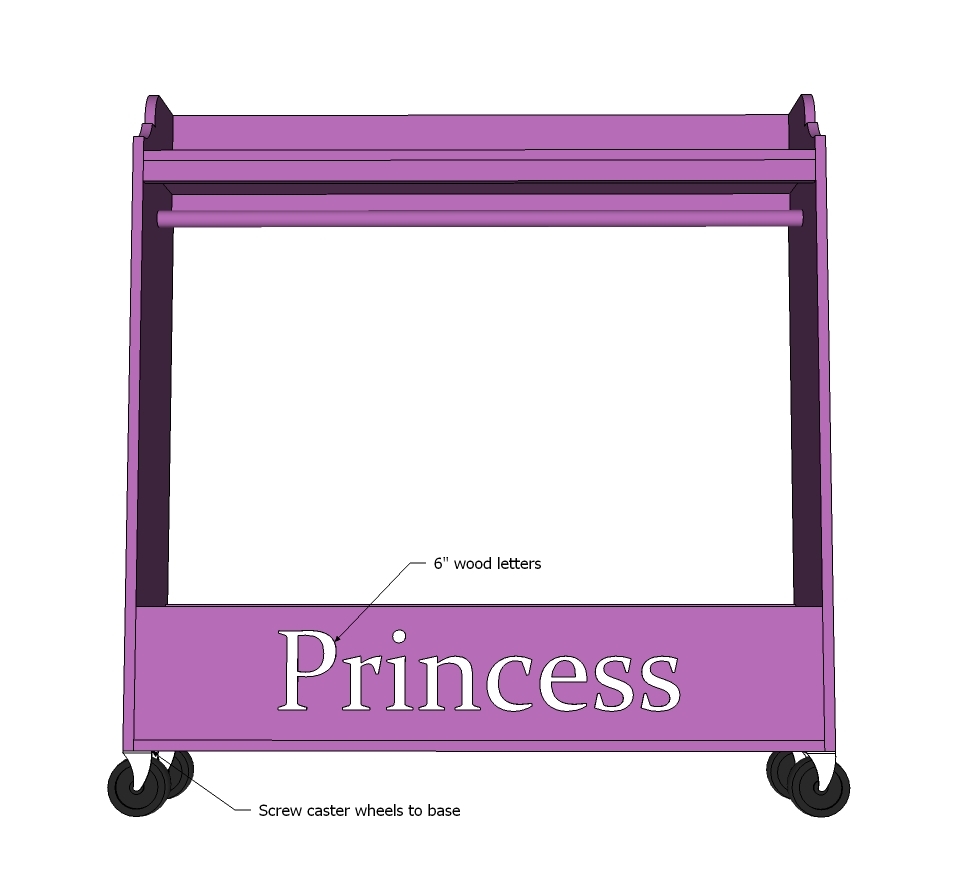
Now just add the caster wheels and personalize the dress up center so your little one knows it was made just for them! And that’s it - we are done!!!!
It is always recommended to apply a test coat on a hidden area or scrap piece to ensure color evenness and adhesion. Use primer or wood conditioner as needed.


Comments
dmcarwin
Wed, 12/05/2012 - 14:47
Super cute!
This is so cute! I love the letters on the bottom! So glad you got to go to sunny California! I would love to watch the show!
Maxie Sykes (not verified)
Wed, 12/05/2012 - 21:50
Love the dresser, creating
Love the dresser, creating this project without any cut wow you are really a pro.... :)
Jake
Thu, 12/06/2012 - 07:19
No Cuts???
I think you would want to trim off and square up the ends of each board, especially if you bought it at Big Blue or Big Orange. Lots of sanding before assembly also.
spiceylg
Thu, 12/06/2012 - 07:41
Wow
I can't even fathom temperatures that cold. It was once 30 degrees below here in MI shortly after I moved here and I wanted to leave immediately. Now it's starting to get in the 30s and hitting the 20s at night and that's cold enough for me! I don't know how you all have been functioning in the Momplex without heat thus far! I'd be on the first plane to sunny California as well! Thanx for all that you do! Cute build!
Mary Falkner (not verified)
Thu, 12/06/2012 - 08:24
Letters
Ana,
Do you make your own letters that you put on this project and the toybox for Grace, if not where do you get them?
Ana White
Thu, 12/06/2012 - 08:41
Dress Up Center
Thanks everyone! I hope you get a chance to watch - really was super fast and easy to make. The jigsaw cuts at the top sides really made a big difference too - but not necessary! Don't forget superheros would love this too!
The letters are from the craft store and just glued on. I don't know if you can see, but it's actually a very royal glittery gold paint! Fit for a princess for sure!
Hope you love the segment!
Ana
mamawallas (not verified)
Thu, 12/06/2012 - 13:03
LOVE!
I was just thinking about finding something like this to buy, but I stumbled onto this on Pinterest and will be making one instead! Thank you for offering the easy to follow directions for free! :)
Emilyfrazier (not verified)
Fri, 12/07/2012 - 05:51
I love this. I am thinking if
I love this. I am thinking if I make this with bigger boards I can hang clothes up in my basement. Thanks Ana for all of your plans.
Milca (not verified)
Sun, 12/09/2012 - 20:12
exactly what I had in mind for my girls!
I was in the process of modifying the other dress-up plans but making it a little taller to accomodate for tall 6yo (but still usable for my 2yo). Other than the beautiful jigsaw touch, its essentially was I was attempting to make! You have just made it easier for me now to finish :) Hopefully it can be done on time for a 24th nighttime delivery. Might let the paint dry overnight... lol Thanks Ana for sharing.