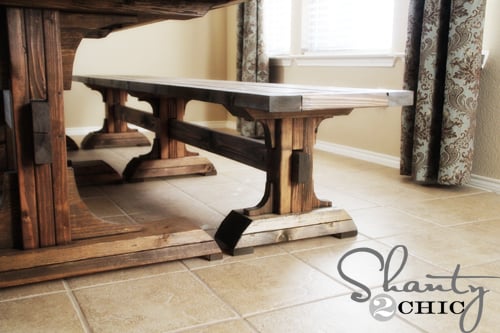


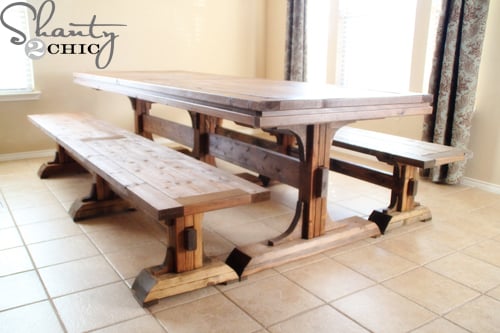
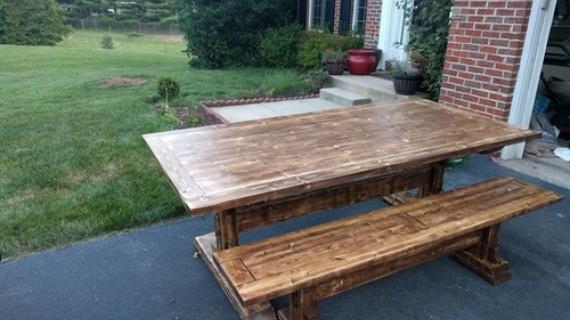
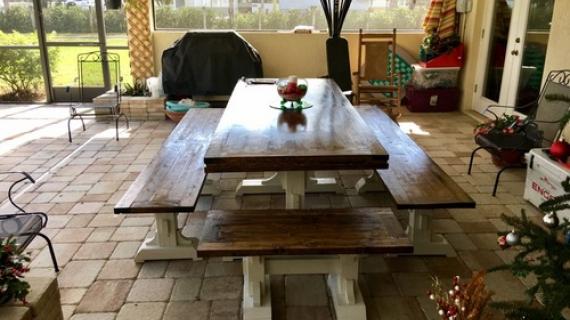
This goregous DIY farmhouse bench matches our Triple Pedestal Farmhouse Table plans. Plans include free step by step diagrams, shopping list and cut list.


I collaborated with Ashley from Shanty2Chic to create the free plans for you.
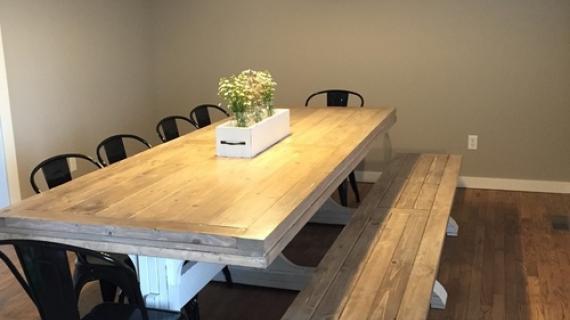
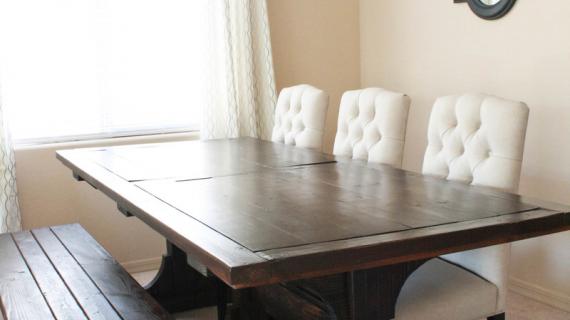
I LOVE my new dining set! Thanks to Ana's awesome plans and a little elbow grease, I have a gorgeous 9 ft. dining table and benches for only $215! The benches are perfect for our family and we have plenty of room to have guests over and still fit comfortably! My kids love that they have room to spread out and do their homework and artwork and I love that I don't have to worry about them ruining an expensive piece of furniture! This set just proves that you don't need to pay expensive retail prices to have beautiful, well-built furniture in your home! Thank you Ana:)
If you want to see lots more pictures and details on the finish and build, please head on over to Shanty2Chic. And of course, we have you covered with the free plans, just scroll down!
Preparation
- 3 - 2x4 @ 8 feet long
- 2 - 2x4 @ 9 feet long (try 9’ studs or 10 footers)
- 2 - 2x6 @ 8 feet long
- 1 - 1x3 @ 4 feet long
- 3 - 1x4 OR 2x4 @ 8 feet long (for the bench top)
- 2” brad nails
- 2 1/2” and 3” self tapping wood screws
- Wood glue
- Pocket hole screws for the top: 2 1/2” for 2x4s or 1 1/4” for 1x4s
LEGS
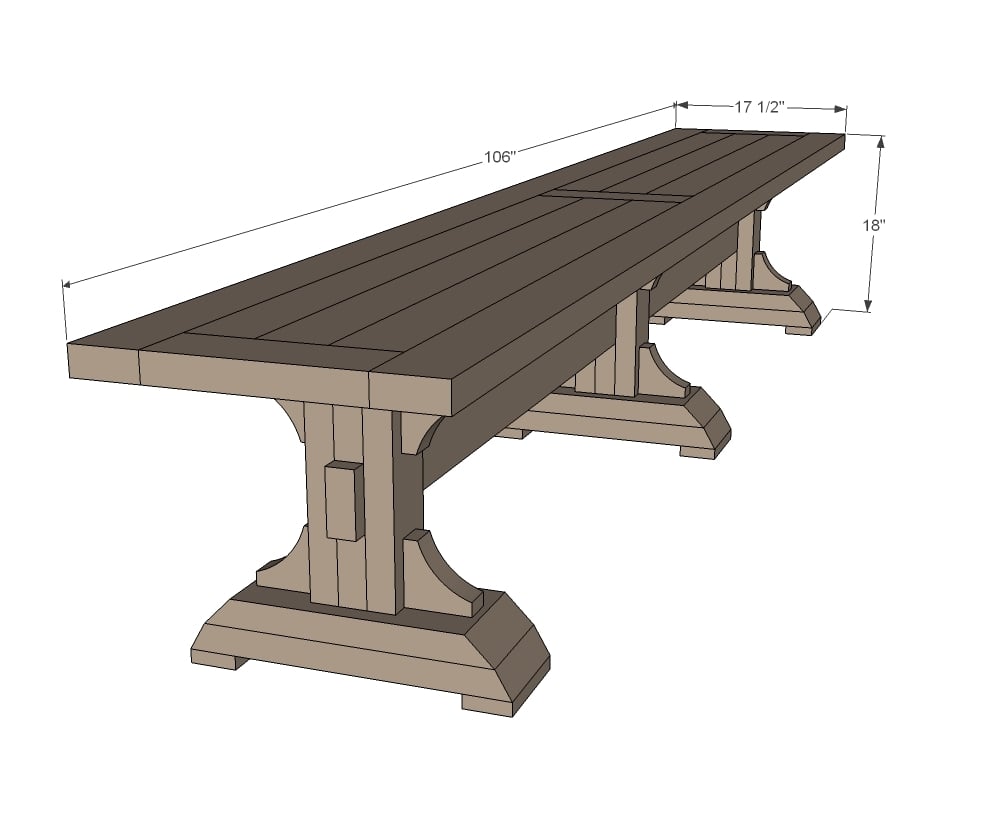
- 6 - 2x4 @ 11 1/4”
- 6 - 2x4 @ 3 7/8”
- 6 - 2x6 @ 15 1/4” (both ends beveled at 45 degrees off square longest point, not parallel)
- 12 - 2x4 @ 3 1/2” (cut in arch shape)
- 3 - 2x6 @ 17” (both ends beveled at 30 degrees off square longest point not parallel)
- 6 - 1x3 @ 5 1/2” STRETCHER
- 1 - 2x4 @ 90 1/2”
TOP
- 2 - 2x4 @ 106”
- 3 - 2x4 @ 10 1/2”
- 6 - 1x4 or 2x4 @ 47 3/4”


Please read through the entire plan and all comments before beginning this project. It is also advisable to review the Getting Started Section. Take all necessary precautions to build safely and smartly. Work on a clean level surface, free of imperfections or debris. Always use straight boards. Check for square after each step. Always predrill holes before attaching with screws. Use glue with finish nails for a stronger hold. Wipe excess glue off bare wood for stained projects, as dried glue will not take stain. Be safe, have fun, and ask for help if you need it. Good luck!
Instructions
Step 1

Lets start in the center and work our way outward. You'll be building three pedestal bases per each bench. For these, glue and nails will do the trick.
Make sure you can get your stretcher in the center opening.
Step 2

Now add the top and bottom.
Step 3

Cut out with jigsaw and sand until smooth. Attach with glue and nails. NOTE: These could potentially be attached before step 1 from the insides - it's up to you.
Step 4

Now add the bottom to the pedestals.
Step 5

Nail and glue the feet to the bottom of the bench. The feet will help the bench rest on "points" instead of rocking. We also recommend felt pads to protect your floors.
Step 6

Thread through center stretcher and attach pedestals to center stretcher.
Step 7

Build top first with pocket holes.
Step 8

Attach pedestal bases to the top and you are done with one bench!
It is always recommended to apply a test coat on a hidden area or scrap piece to ensure color evenness and adhesion. Use primer or wood conditioner as needed.


Comments
Lea J (not verified)
Mon, 01/14/2013 - 12:00
Dinning table & Bench
Beautiful & Sturdy ~~~ wish I would have had this when all my 7 children where growing up.
randy fitzgerald (not verified)
Mon, 01/14/2013 - 12:05
pdf version
love this plan but i can't seem to get the pdf file,, all i get is computer garbage... please help.. i need to build this
Adrienne (not verified)
Mon, 01/14/2013 - 14:54
Planing boards?
The instructions never mention planing the 2x4s or any of the other boards that don't come totally square. Do you (or anyone else that builds!) plane your 2x4s or use them as-is with the slight angled/rounded edges on the corners? The boards in the pictures always look totally square, but it is hard to tell without close-up shots!
Daphness85
Sun, 03/16/2014 - 11:35
First time build
We love this table and plan to build it ASAP but wondering - what's the best way to make it 36x96" to accommodate our space?