

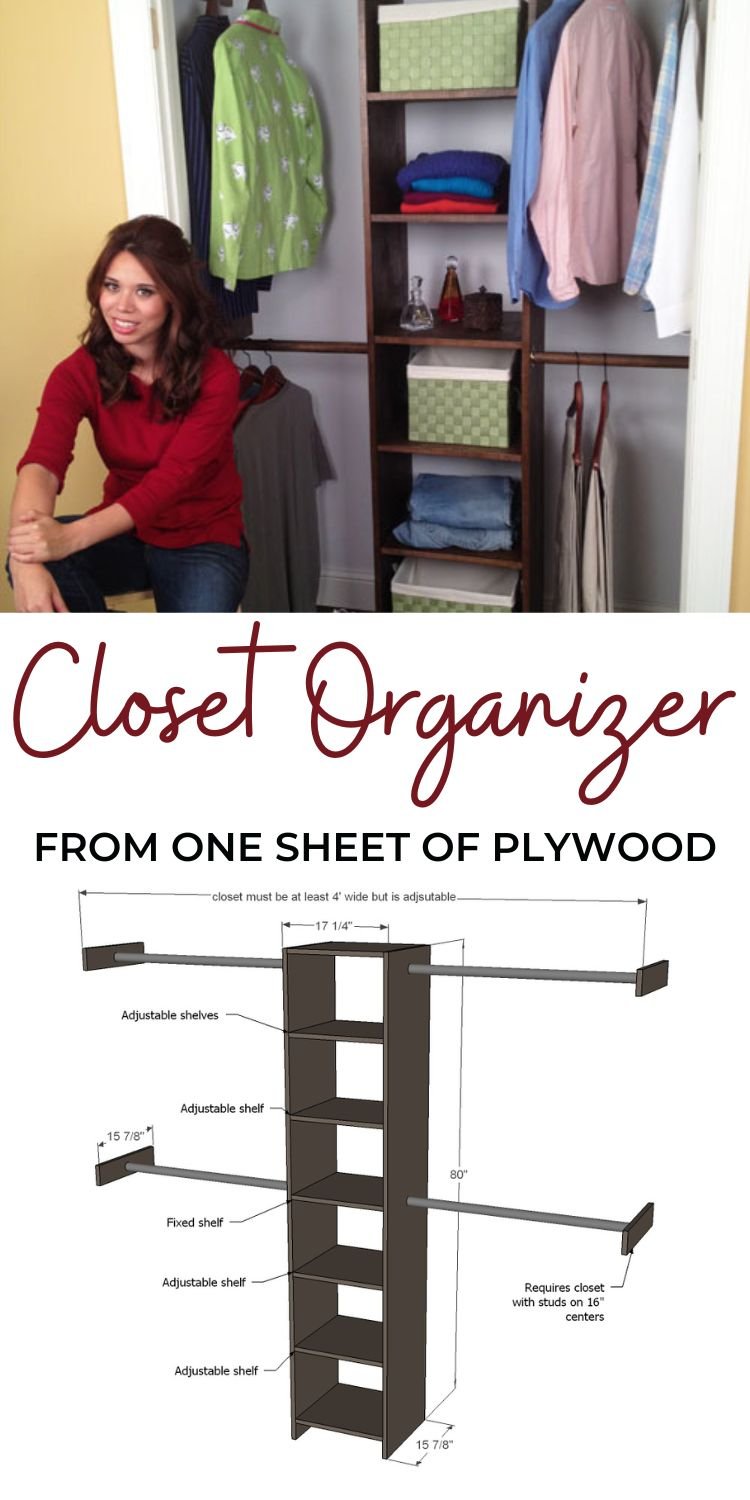
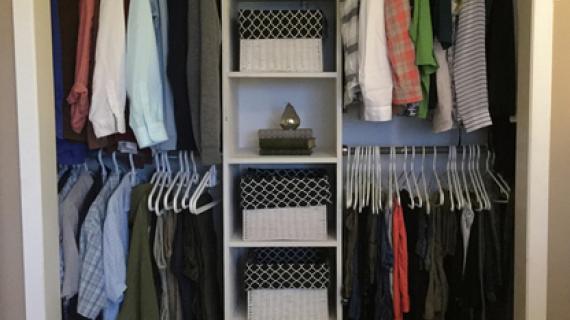
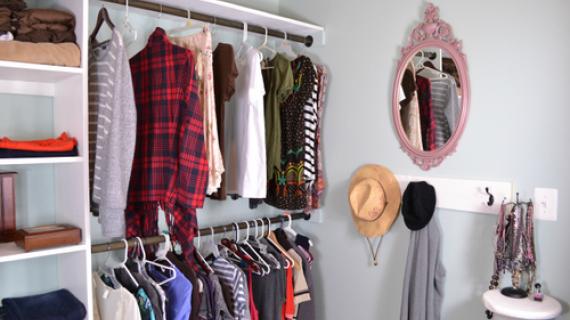
Free plans to DIY a closet organizer system from one sheet of plywood. Video tutorial and step by step instructions from Ana-White.com
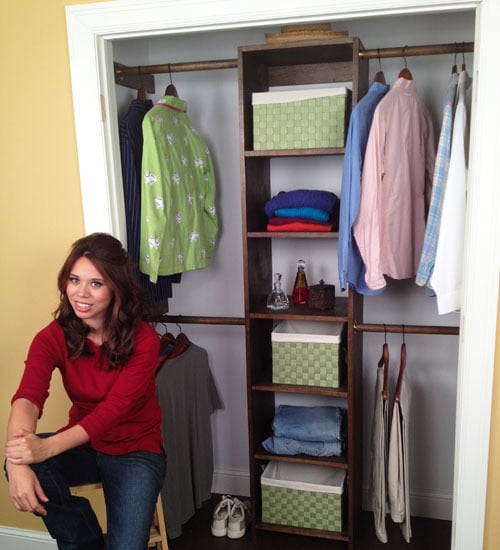
This closet is made from one sheet of plywood!

Wondering how to make a closet organizer system from one sheet of plywood? Check out this quick video for the step by step.
And of course, the diagrams and cut list follow if you are needing to organize some closet space on a budget!
Pin For Later!
Preparation
- 1 sheet ¾” plywood ripped into strips 15 7/8” wide, referred to as 1x16 boards throughout plan
- Wood glue
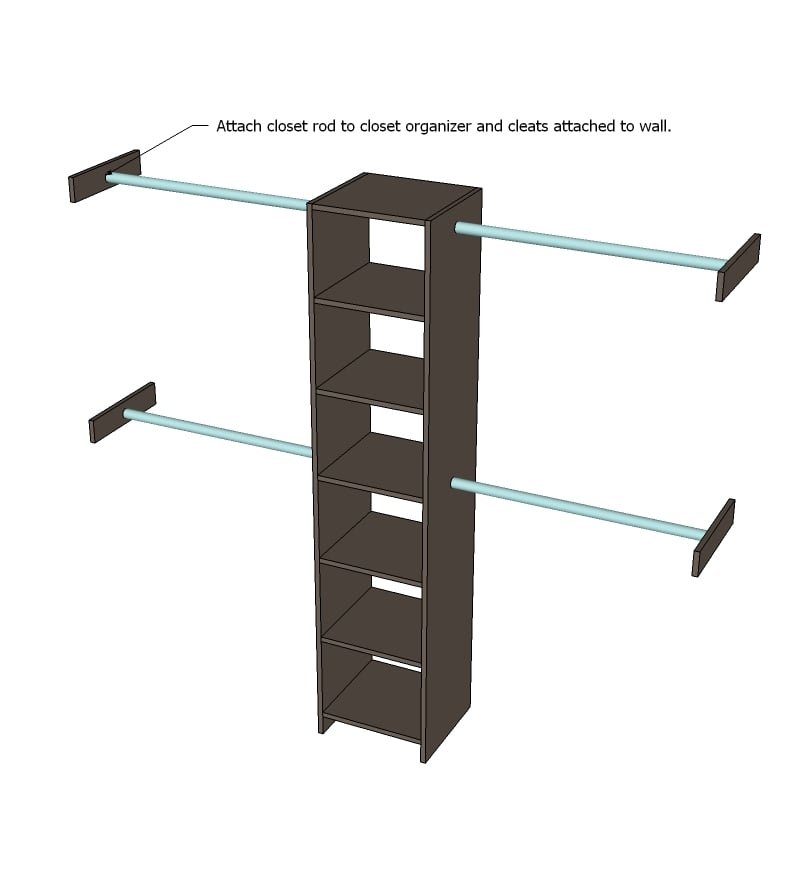
- 4 closet rod sockets
- 4 wood closet rods in lengths needed for closet
- 2” wood trim screws
- 3” wood screws
- Optional shelf pins for adjustable shelves
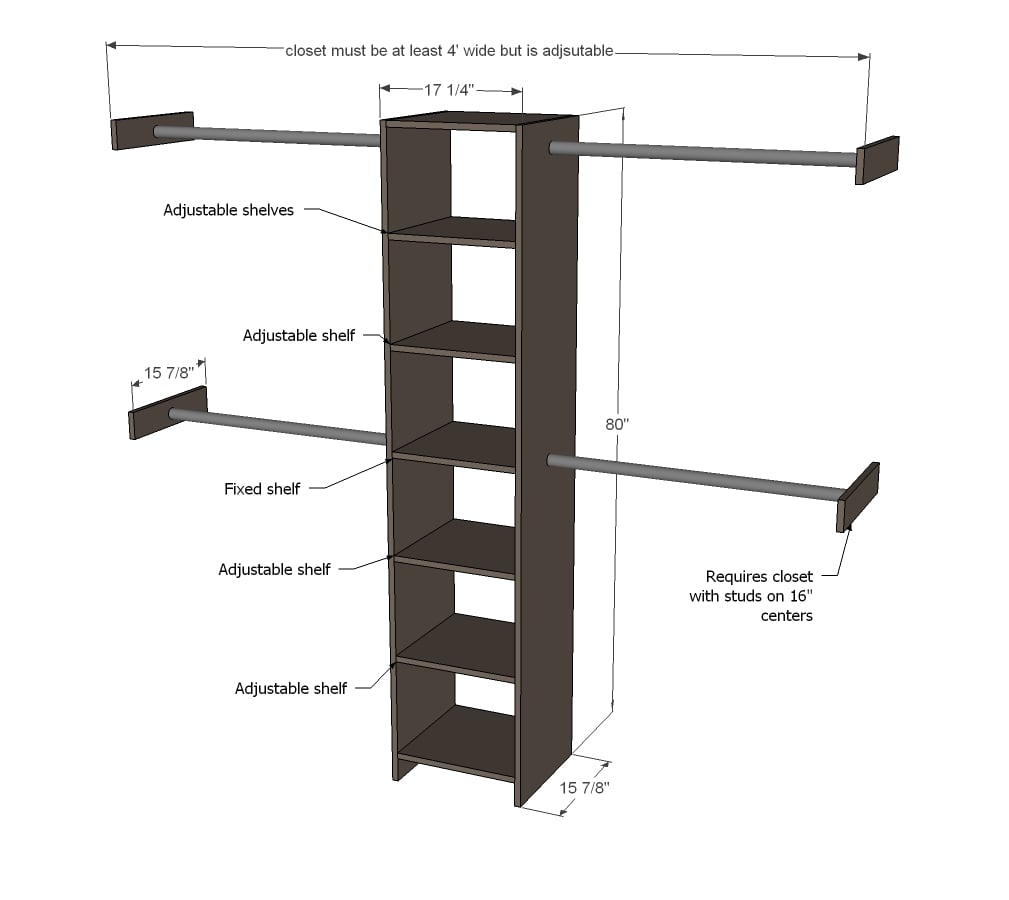
- 2 – 1x16 @ 80” long (sides)
- 7 – 1x16 @ 15 ¾” (shelves)
- 5 – 1x16 @ 3” (wall cleats)


Please read through the entire plan and all comments before beginning this project. It is also advisable to review the Getting Started Section. Take all necessary precautions to build safely and smartly. Work on a clean level surface, free of imperfections or debris. Always use straight boards. Check for square after each step. Always predrill holes before attaching with screws. Use glue with finish nails for a stronger hold. Wipe excess glue off bare wood for stained projects, as dried glue will not take stain. Be safe, have fun, and ask for help if you need it. Good luck!
Instructions
Step 1
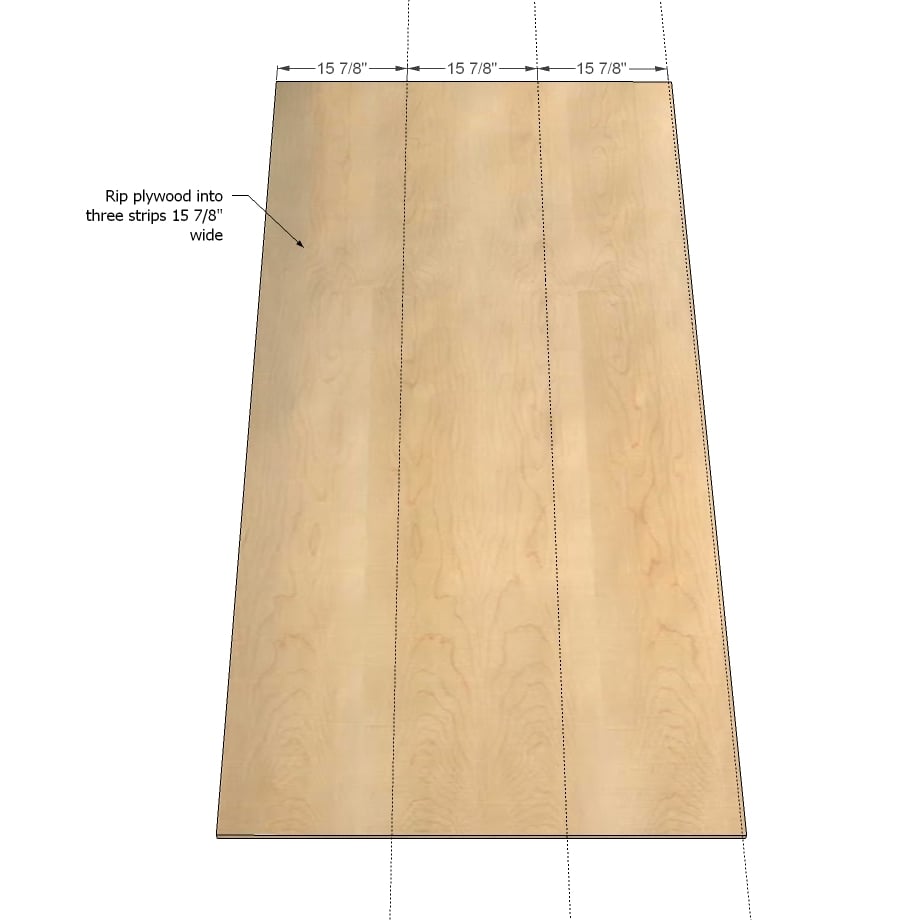
Either have your hardware store rip your plywood into three easy to manage strips 8 feet long x 15 7/8” wide or use a table saw to rip plywood into strips 15 7/8” wide. These strips will be referred to as 1x16s in this plan. Then follow the cut list using a circular saw to cut 1x16s to needed sizes.
Step 2
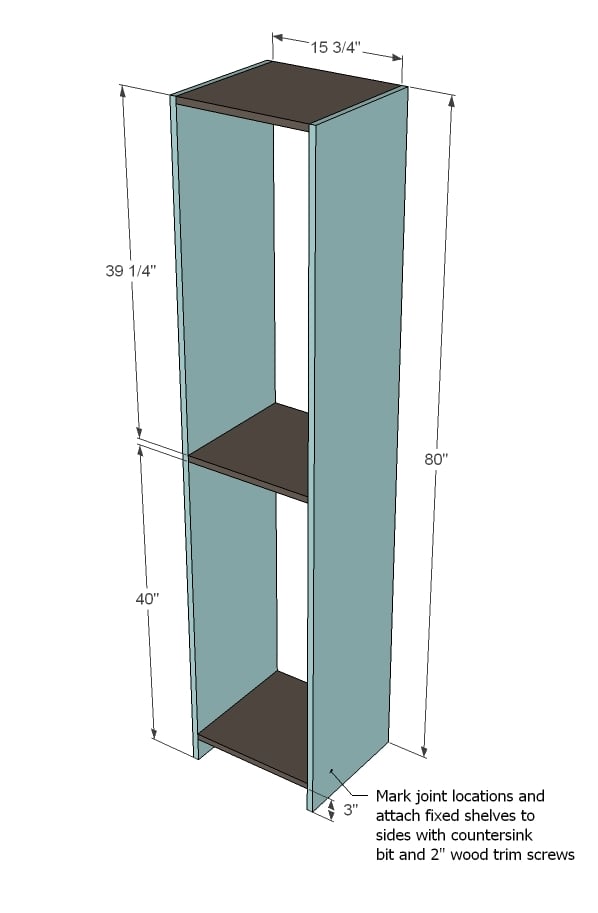
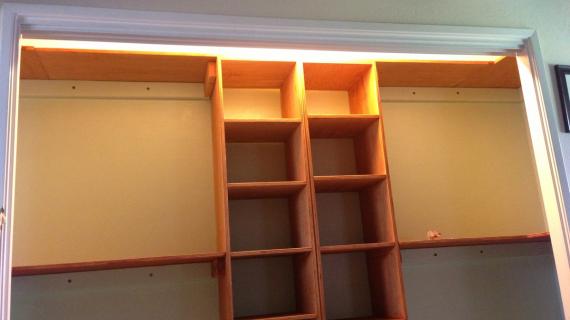
Mark joint locations on insides and outsides with measuring tape and square. Predrill holes with a countersink bit. Apply glue at joint and attach shelves to sides. Attach one cleat to top inside of closet, screwing through outsides and top to secure. When installing the closet, you can secure closet to wall by screwing through this cleat into a stud in the wall.
Step 3
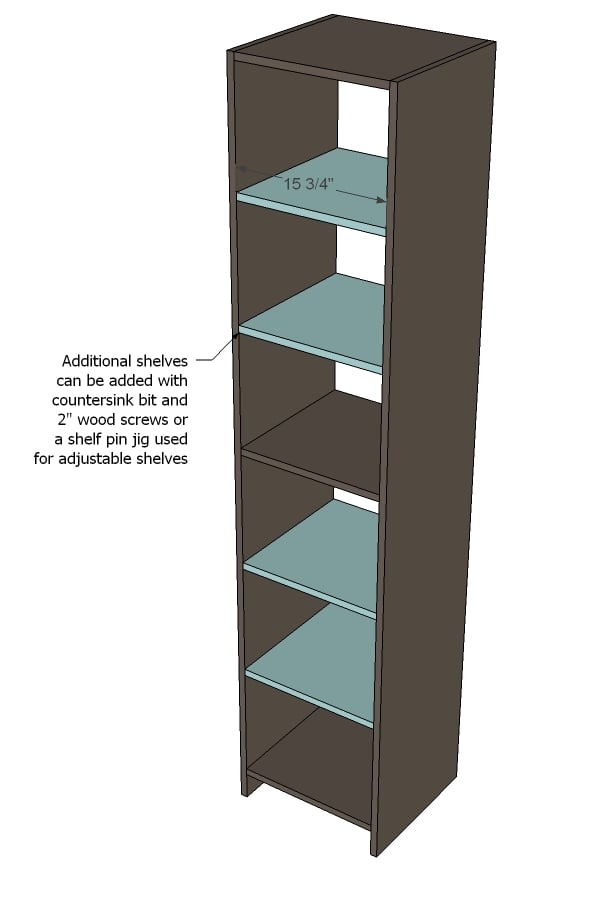
Additional shelves can be added same as main shelf OR a Shelf pin jig used to add adjustable shelves. If you go the shelf pin/adjustable shelf route, I recommend cutting the shelves down 1/4" so they fit inside easily.
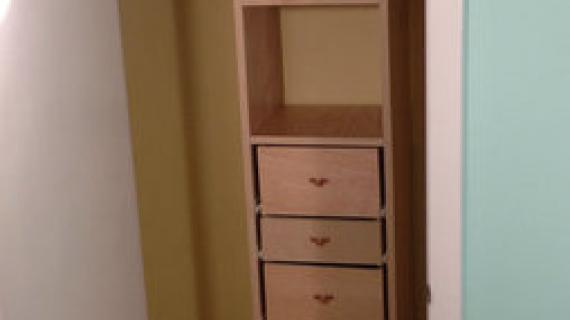
Step 4
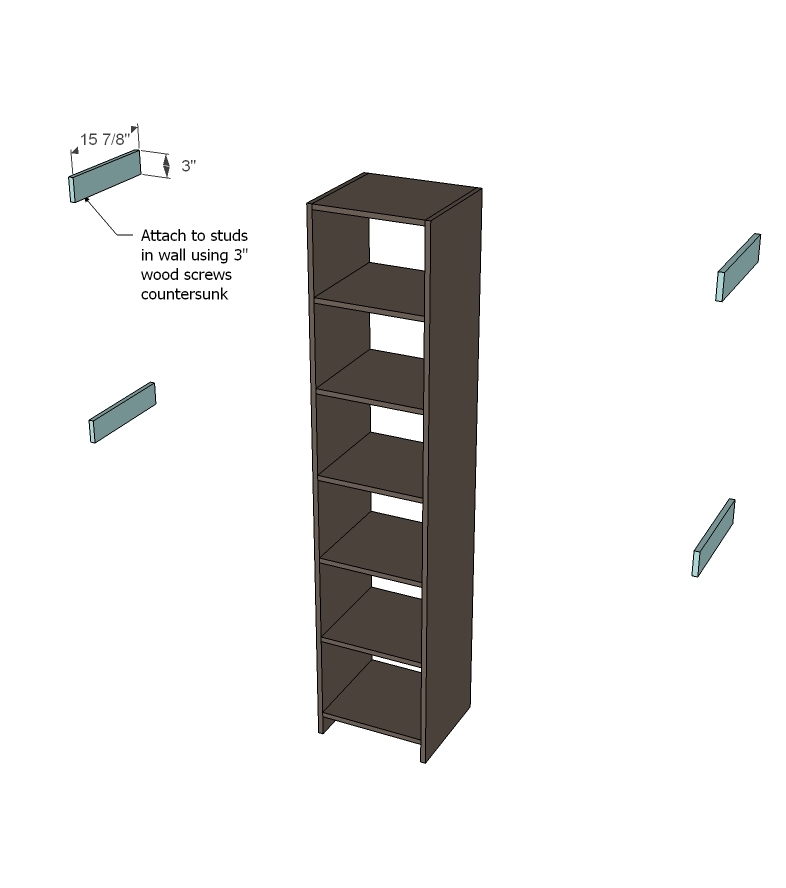
Locate studs in walls and mark. Attach wall cleats to wall using countersink bit and 3” screws, screwing into studs. NOTES: If closet has a baseboard, use a jigsaw to cut notch out of back of closet system for baseboard.
Step 5
It is always recommended to apply a test coat on a hidden area or scrap piece to ensure color evenness and adhesion. Use primer or wood conditioner as needed.
Comments
whitney_smith
Mon, 03/25/2013 - 10:54
Thank you!
The peg board trick is genius! We are getting ready to move and will have to start from square one with everything, including closets.
Jasi
Mon, 03/25/2013 - 19:35
Very Cool- add stop block!
I love this and it's perfect timing as I'm looking for a closet organizer. But if I can suggest- when you're drilling those holes for the pegs on the inside of the closet with the pegboard as your guide please use a stop block- a small piece of wood with a hole for the drill bit, exactly the right height to stop the drill from going too deep into the wood. You can make one easily with scraps. Thanks again, Ana.
Tsu Dho Nimh
Wed, 07/25/2018 - 18:45
No plywood required :)
My "cut list" would be ONE bookcase ... and if necessary, 1x whatever boards to reinforce the sides where the rod holders screw in.