

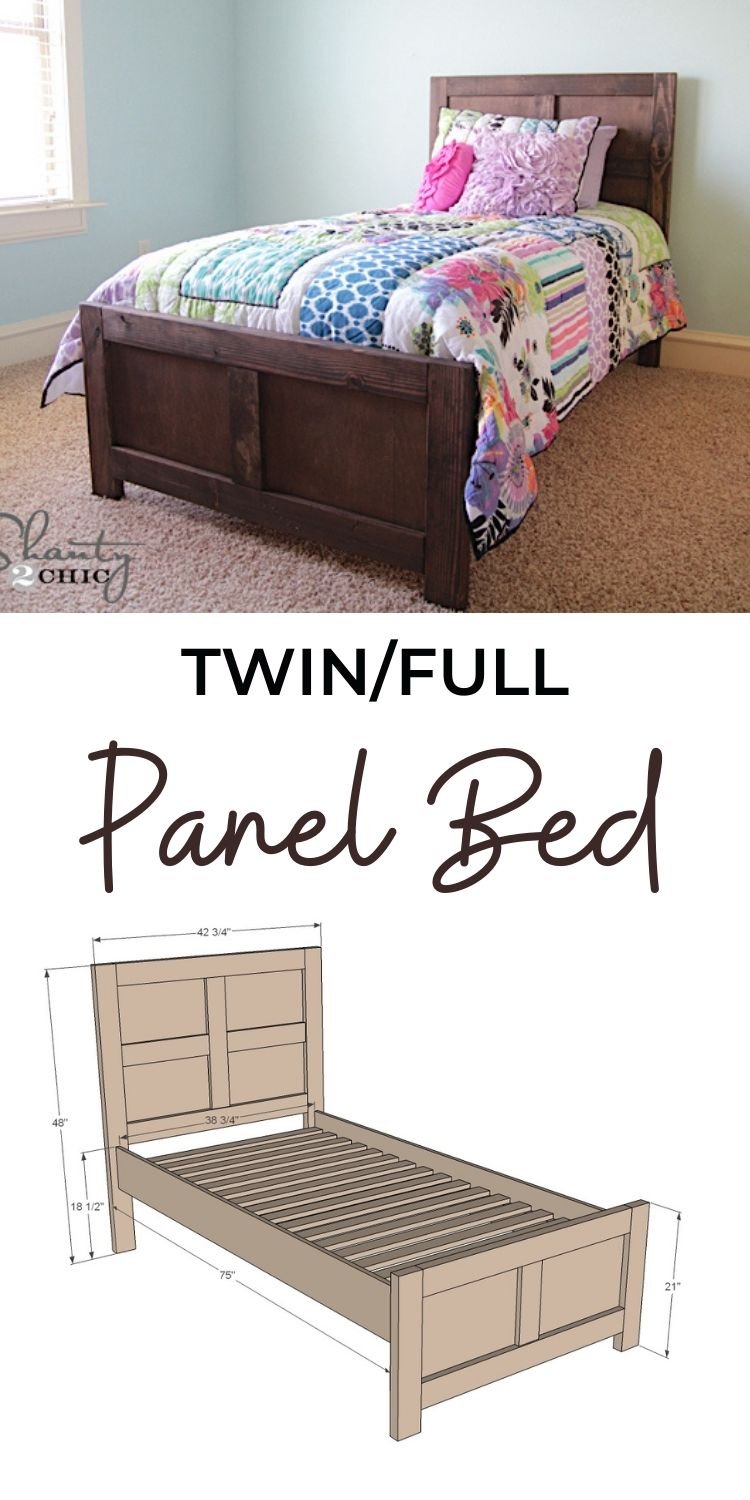
Free plans to build a wood bed inspired by Pottery Barn Kids Emmett Bed for just $70! Step by step plans from Ana-White.com
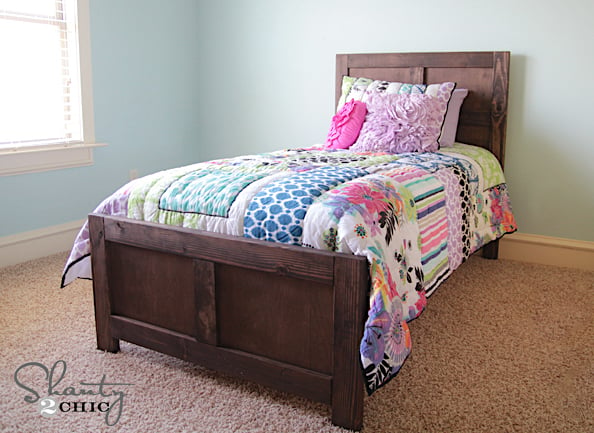
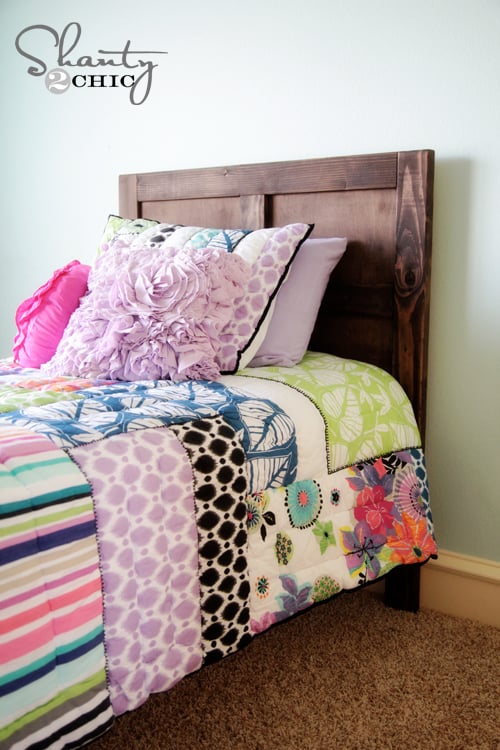
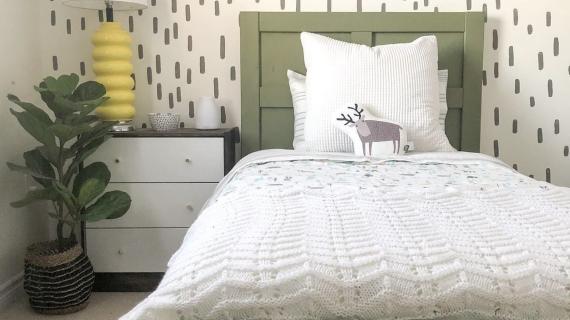
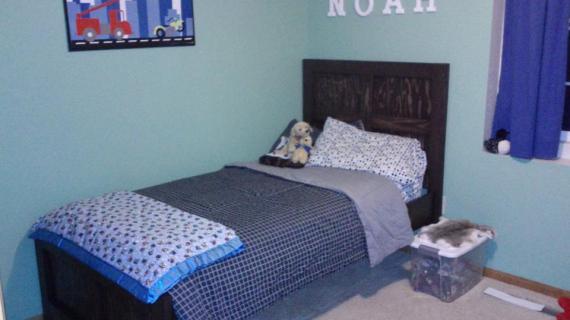
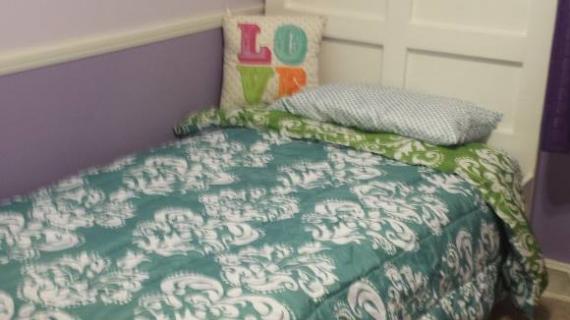
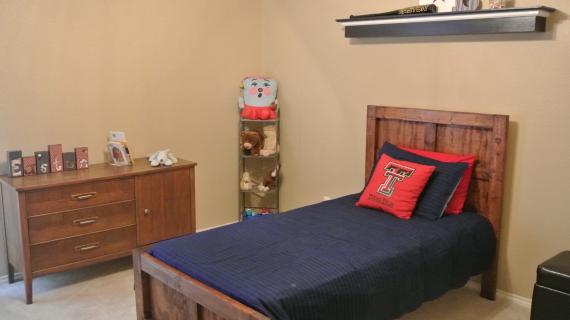
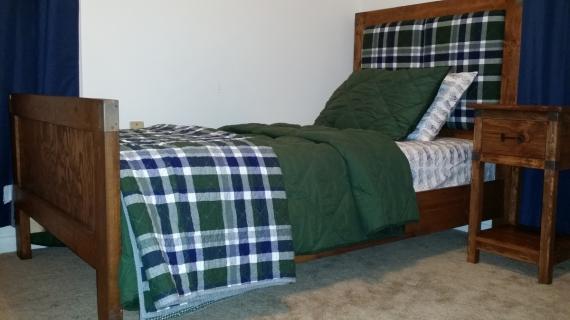
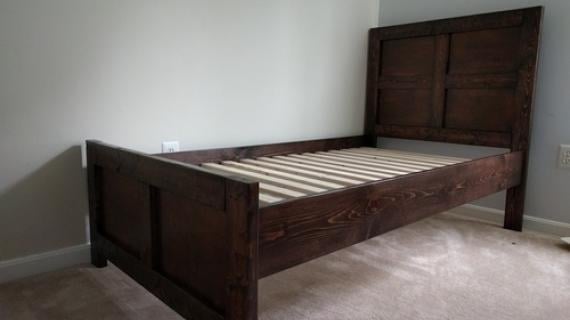
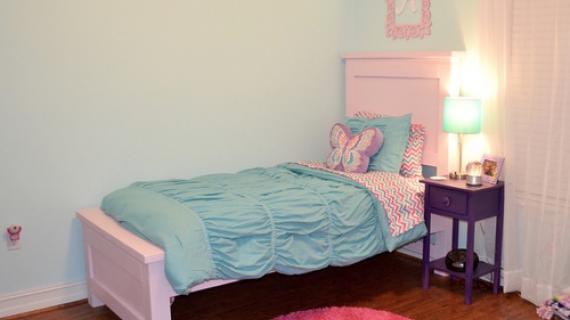
This beautiful bed features a simple panel design, that goes with most room decors! It's built using solid wood, so you can paint or stain it any color. We LOVE this clean lined design, we love the larger footboard to keep bedding in place, we LOVE everything about this bed!
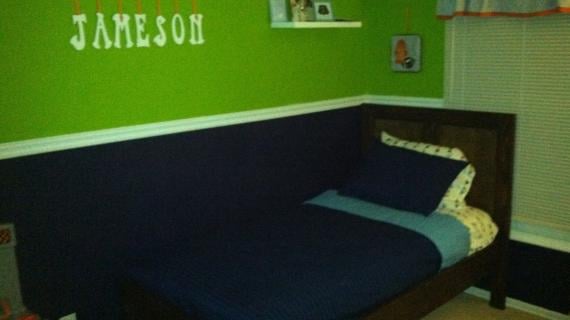
Plans in TWIN and FULL sizes.

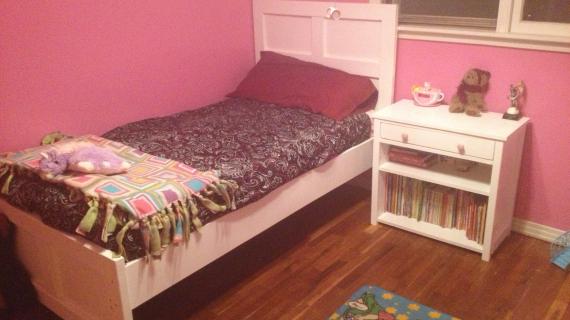
Built by Whitney from Shanty2Chic - Here's from Whitney:
I finally bit the bullet and moved my baby out of her crib. I wanted something cute and transitional and this bed fits the bill. The lumber cost is under $70 which makes it fit my other bill as well ;-) Can't wait to make the trundle to go under it! Thanks for teaming up with me on this one Ana!
Build Post: For more photos and building details, please stop over and read Whitney's post over at Shanty2Chic as well!
Pin For Later!
Preparation
Shopping List for Twin Size
- 5 - 2x4 @ 8 feet long
- 1 - 1x4 @ 8 feet long
- 1 - 4'x4' sheet of 1/2" thick hardwood or sanded plywood
- 2 - 1x8 @ 8 feet long
- 1x3 slats or other slat material
- 1" and 1 1/4" pocket hole screws
- 1" brad nails
- 2-1/2" self tapping star bit screws or bed brackets for attaching side rails to headboard/footboard
- 120 grit sandpaper
- wood glue
- wood filler
- Paint or stain
Shopping List for Full Size
- 6 - 2x4 @ 8 feet long
- 1 - 1x4 @ 8 feet long
- 1 - 4'x4' sheet of 1/2" thick hardwood or sanded plywood
- 2 - 1x8 @ 8 feet long
- 1x3 slats or other slat material, 7 @ 10 feet long
- 1" and 1 1/4" pocket hole screws
- 1" brad nails
- 2-1/2" self tapping star bit screws or bed brackets for attaching side rails to headboard/footboard
- 120 grit sandpaper
- wood glue
- wood filler
- Paint or stain
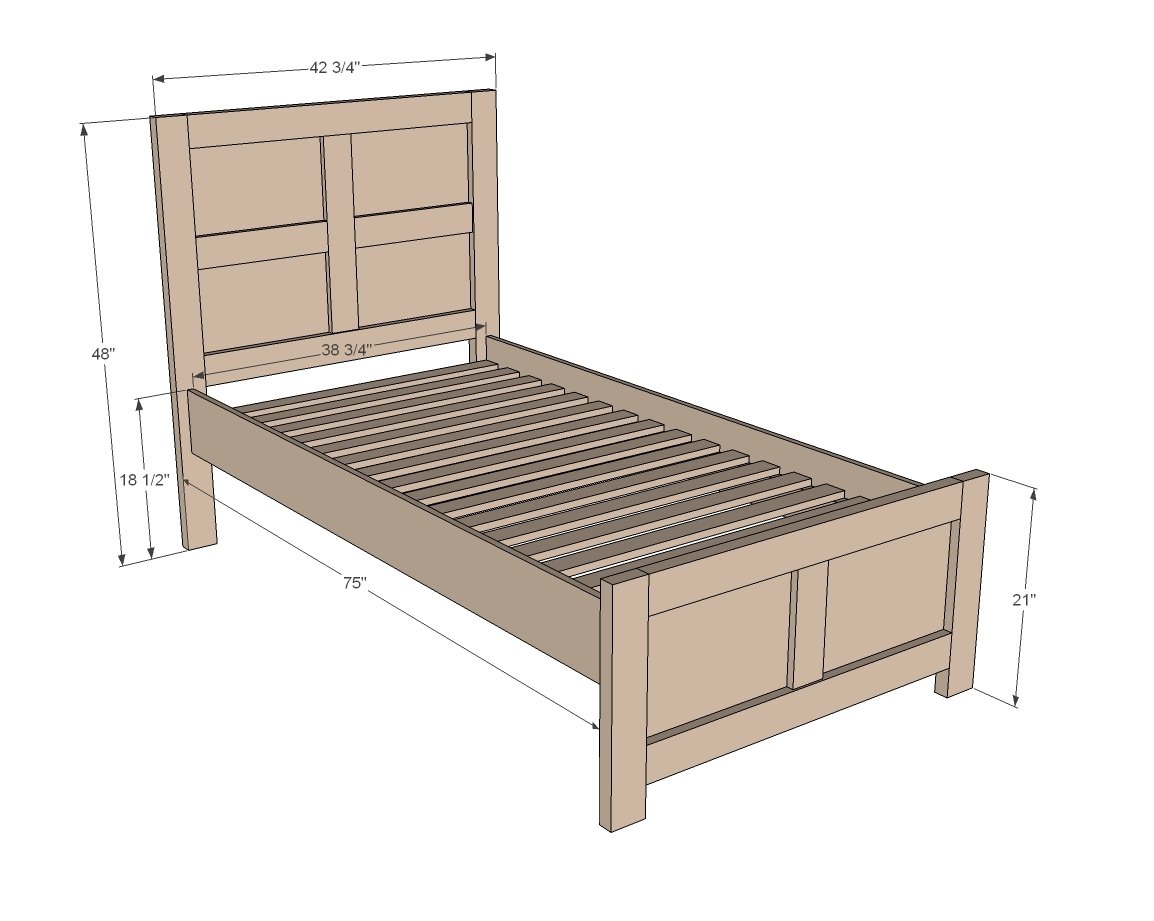
Cut List for Twin Size
- 2 - 2x4 @ 48" - headboard frame legs
- 4 - 2x4 @ 35 3/4" - headboard and footboard frame rails
- 1 - 1x4 @ 22 1/2" - headboard vertical trim
- 2 - 1x4 @ 16 1/8" - headboard horizontal trim
- 1 - 1/2" plywood @ 35 3/4" x 22 1/2" - headboard panel
- 2 - 2x4 @ 21" - footboard legs
- 1 - 1x4 @ 11" - footboard vertical trim
- 1 - 1/2" plywood @ 35 3/4" x 11" - footboard panel
- 2 - 2x4 @ 75" - siderail cleats
- 2 - 1x8 @ 75" - siderail trim
- 14 - 1x3 slats @ 38 3/4" or other slat materials
Cut List for Full Size
- 2 - 2x4 @ 48" - headboard frame legs
- 4 - 2x4 @ 48" - headboard and footboard frame rails
- 1 - 1x4 @ 22 1/2" - headboard vertical trim
- 2 - 1x4 @ 22-3/8" - headboard horizontal trim - measure and cut to fit
- 1 - 1/2" plywood @ 48" x 22-1/2" - headboard panel
- 2 - 2x4 @ 21" - footboard legs
- 1 - 1x4 @ 11" - footboard vertical trim
- 1 - 1/2" plywood @ 48" x 11" - footboard panel
- 2 - 2x4 @ 75" - siderail cleats
- 2 - 1x8 @ 75" - siderail trim
- 14 - 1x3 slats @ 53-1/2" or other slat materials - measure and cut to fit


Please read through the entire plan and all comments before beginning this project. It is also advisable to review the Getting Started Section. Take all necessary precautions to build safely and smartly. Work on a clean level surface, free of imperfections or debris. Always use straight boards. Check for square after each step. Always predrill holes before attaching with screws. Use glue with finish nails for a stronger hold. Wipe excess glue off bare wood for stained projects, as dried glue will not take stain. Be safe, have fun, and ask for help if you need it. Good luck!
Instructions
Step 1

For the headboard, build the outside frame using 1 1/2" pocket hole setting and 2 1/2" pocket hole screws. 2 screws are recommended per joint. Glue is also recommended.
Step 2

Next, add the center piece. We choose to inset this one a tiny bit just for interest, but it's really up to you here. You'll need to attach here with 3/4" pocket hole setting and 1 1/4" pocket holes.
Step 3

Add the remaining two pieces to make up the decorative pieces in the headboard.
Step 4

Drill 1/2" pocket holes (set for 1/2" thick stock) around the sides of the 1/2" plywood. Then attach with 1" pocket hole screws from back side. Also use 1" nails to attach to center boards with glue.
Step 5

Step 6

Now connect the headboards and footboards together with the 2x4 inner side rails. Bolts, 3" screws or bed brackets here. You could also use pocket hole, but remember, these are the main joints that hold the weight of the bed, so you want to make sure this joint is strong. Also, if you have a box spring, you can adjust the width to accommodate the box spring exactly. Just remember that the box spring sits on top of the bed rails.
For full size, attach inset from the outside, by 3/4", so once the 1x8 is attached in step 7, the outside edge of the 1x8 matches the outside edges of the bed legs.
Step 7

Attach decorative side rails to the inner side rail. You can also attach these to headboard and footboard for added strength.
Step 8

Check with your mattress on slat recommendations. When in doubt, add more slats than needed. For heavier loads, 2x4s could be used. Attach slats to the inner side rails.
It is always recommended to apply a test coat on a hidden area or scrap piece to ensure color evenness and adhesion. Use primer or wood conditioner as needed.

Comments
dmcarwin
Mon, 03/18/2013 - 10:57
Sa-weet!
This is just PERFECT! I have have been debating on making some new beds for some of my kids....Thank you Ana for the plans and Whitney great job as usual! Love it!
Pinky
Mon, 09/16/2013 - 05:43
Small suggestion
This bed went together great! My little girl is in LOVE. Now I just have to mix some princess purple stain and we're set. The only thing I would suggest is to fasten the cross pieces to the ply with glue and nails after screwing the ply to the 2x4s rather than Kreg Jigging them because they are more for show than structure and 1x3s like to split. I also used 2x8s instead of 1x8s for a little more strength. Otherwise, it is such a nice bed now my 7 year old wants one to match. Thanks for the wonderful FREE plans.
LaceyLinton
Sat, 01/11/2014 - 16:18
Trundle
Could you tell me how the height of the bed could be adjusted to allow for an 8-10 inch trundle underneath?
Thanks!
vpihoney
Tue, 03/11/2014 - 07:46
Attaching rails
So, how did everyone attach their rails?
apprentice
Sat, 08/30/2014 - 08:41
Rail Fastners
I used rail fasteners from Rockler (approximately $11) to attach the rails. It makes assembly and dis-assembly very easy.
Luciana-
Sun, 02/07/2016 - 04:58
what ones
what rail fastners did you use?
apprentice
Sat, 08/30/2014 - 08:46
Thank you!
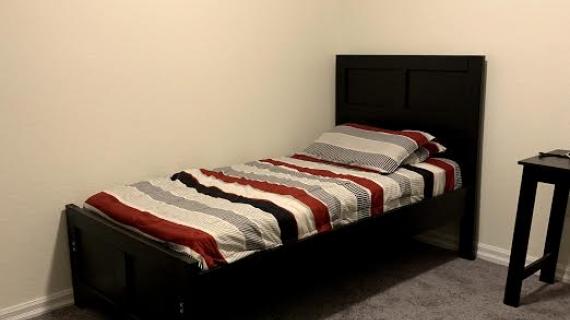
Put two beds together over a weekend and retired our bunk beds after 7 years of good use! What we sold the bunk beds on craigslist more than paid for the two twins we made using this plan. The only prior experience I had was assembling furniture that came in boxes.
Thank you for helping this amateur step up to the plate!
AbbyT
Mon, 09/01/2014 - 07:25
Trundle Bed?
Thank You! Can't wait to try this!! Did you ever add the trundle bed below? If so, would you share plans? I am replacing a trundle day bed, so in order to build it, I need a way to accommodate the second mattress.
Jeff C
Sun, 11/16/2014 - 12:38
Missing from the shopping list?
Maybe I'm misreading it, but step one calls for 2.5" pocket hole screws. Aren't these missing from the shopping list?
Ana White Admin
Thu, 01/21/2016 - 11:53
Missed it
Sorry we missed those on the list.
srlesky
Thu, 12/18/2014 - 20:23
sizes
Do you make this plan in any other size than twin?
Wallmans
Mon, 05/11/2015 - 08:18
Were there other plans other
Were there other plans other then a twin?!
t00court
Sat, 03/07/2015 - 22:03
Trundle??
Did anyone ever find the instructions to build a trundle bed to go underneath the Emme twin bed? I'm going to build this bed this weekend, and I would really appreciate having specific instructions to follow for the trundle. Thanks :)
j_folarin
Thu, 01/21/2016 - 10:44
Clarification, please..
So, I don't see an answer to whether or not 2 1/2" pocket hole screws are needed for this project.. They're not listed on the shopping list, but are mentioned in step 1! I'm really hoping to build two of these beds this weekend and would appreciate some clarification on this. Thanks!
DAFrancis
Sat, 08/06/2016 - 07:12
i love this bed
this bed is beautiful..i built one for each of my little girls but my wife has been driving me nuts to ask where you got the bed spread. she loves it and would like to try and get one.
tracydee
Thu, 08/03/2017 - 23:45
Trundle
Hey everyone loving this bed !! Anyone ever build the trundle and find plans ? Thx so much . Loving this sight !! Just started building and can't get enough !
jdakjreid
Thu, 07/23/2020 - 07:16
Full bed
Dimensions for full bed?