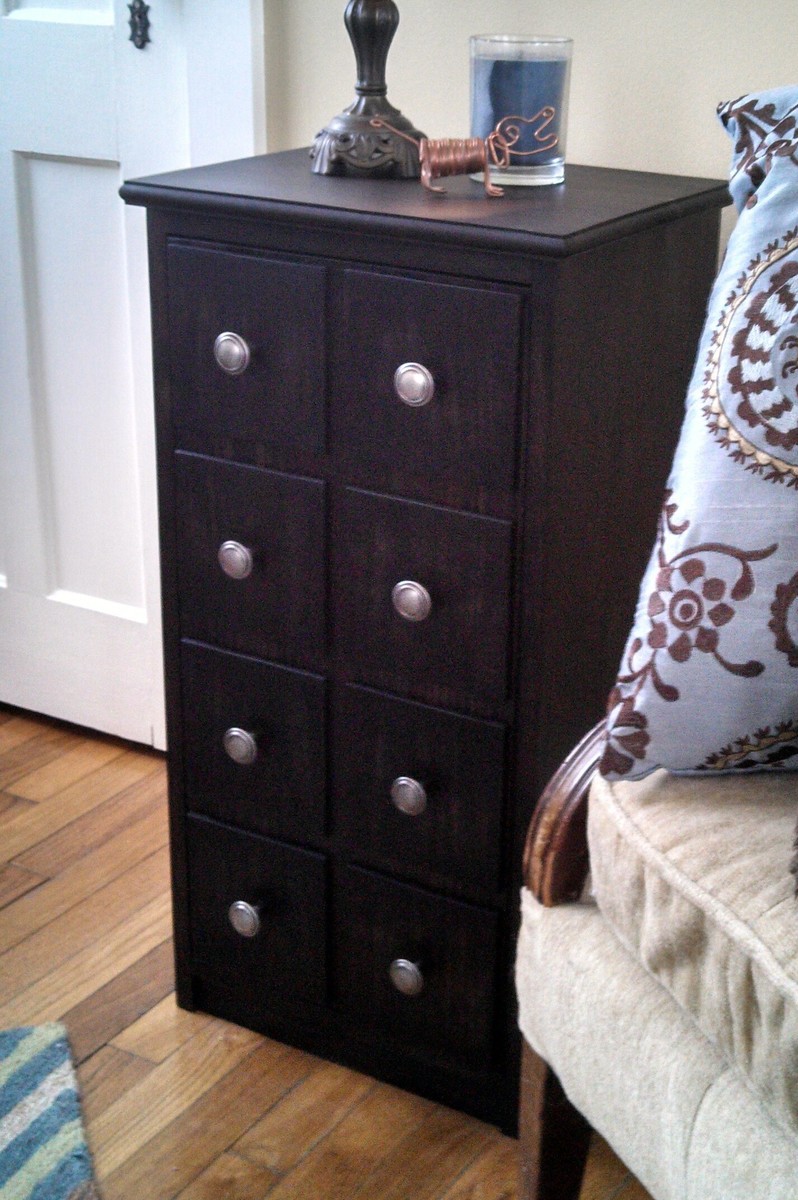


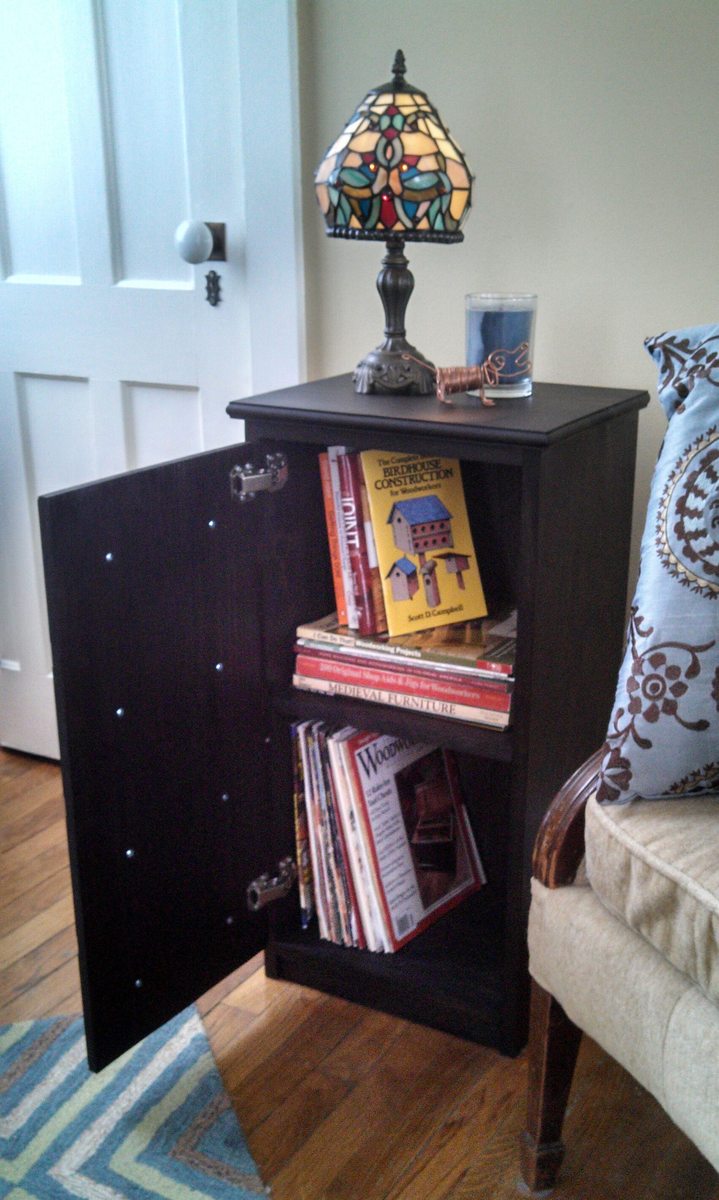
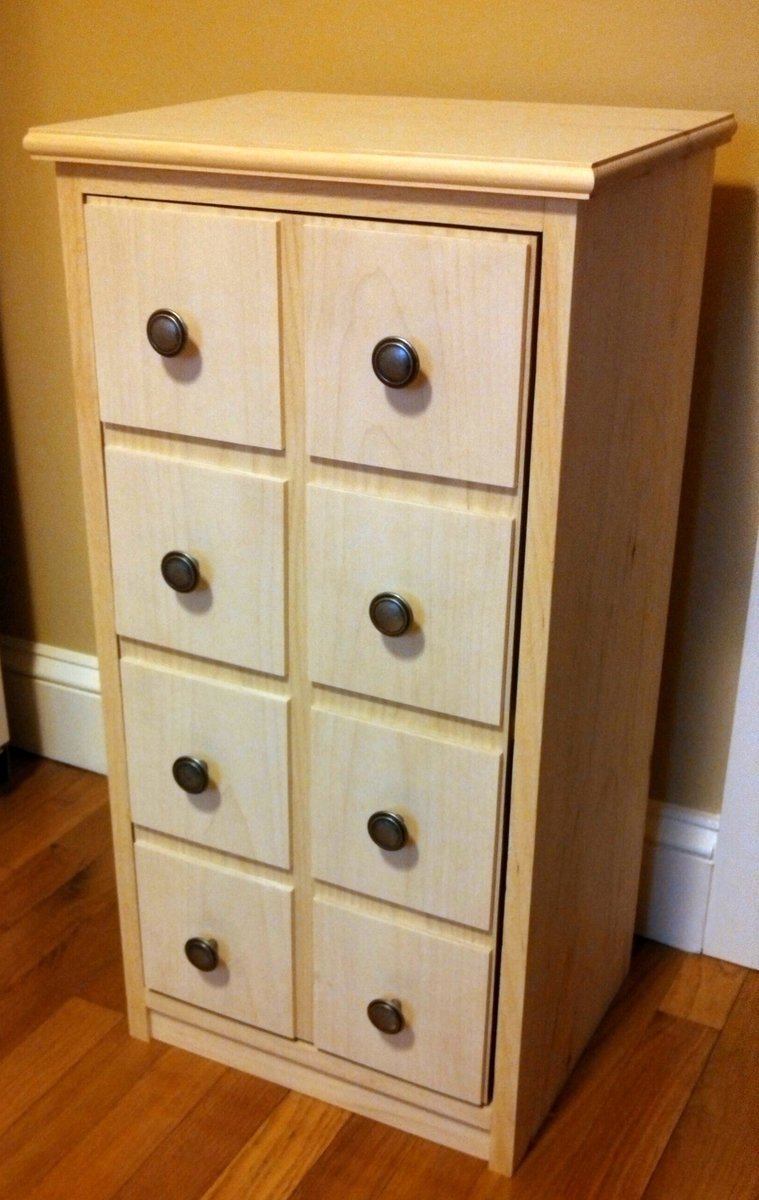
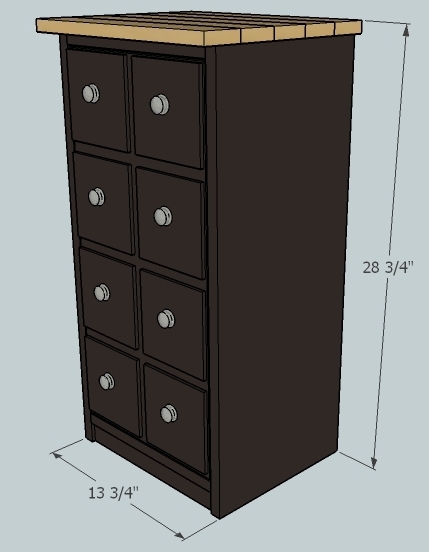
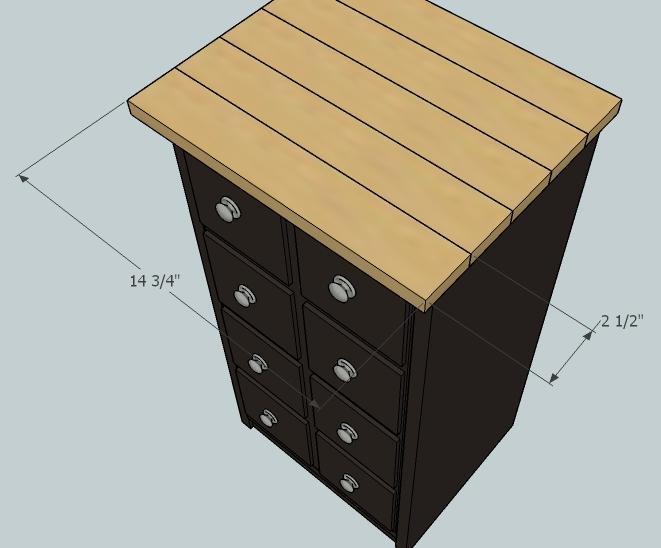
This project was a real problem solver... I needed a table next to the couch for a lamp, a place to set a drink, a place to store magazines and hide the TV remote. I always liked the look of the various apothecary plans here, so I decided to meld all of my needs into one piece! Here's what I came up with... a small Apothecary Cabinet, perfect for magazines, storing remotes and more. It has an antique style with a dark, modern finish.
Preparation
1 - 1x12x8
1 - 1x3x8
1 - 1x2x2
1 - 1/2" 24" x 48" plywood
1 - 1/4" 1x6x4 (look in hobby section of Lowes)
2 sets Euro Style inset hinges
8 knobs
2 - 1x12 @ 28" (sides)
2 - 1x10⁻³/4" @ 12-1/4" (top and bottom shelves)
1 - 1x10⁻¹/4" @ 12-1/4" (middle shelf)
1 - 1x1-1/2" @ 1- 1/4" (bottom rail)
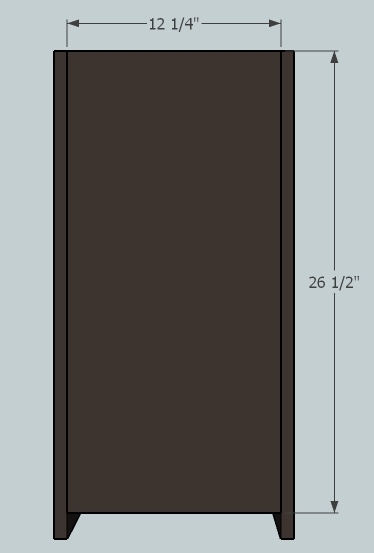
1 - 1/2" plywood 12-1/4" x 26-1/2" (back)
1 - 1/2" plywood 12" x 24-3/4" (door)
5 - 1x3 @ 14-3/4" (top)
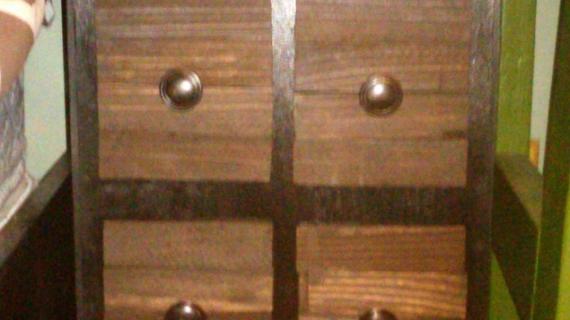
8 - 1/4" 1x6 @ 5-1/2" (drawer fronts)


Please read through the entire plan and all comments before beginning this project. It is also advisable to review the Getting Started Section. Take all necessary precautions to build safely and smartly. Work on a clean level surface, free of imperfections or debris. Always use straight boards. Check for square after each step. Always predrill holes before attaching with screws. Use glue with finish nails for a stronger hold. Wipe excess glue off bare wood for stained projects, as dried glue will not take stain. Be safe, have fun, and ask for help if you need it. Good luck!
Instructions
Step 1
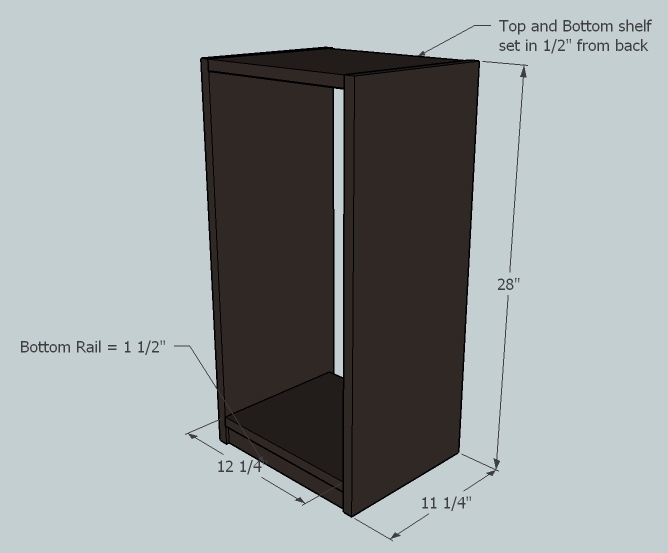
Cut side panels and bottom rail to length. Cut shelves to length and rip to width. Using pocket holes/screws attach the top and bottom shelves (save the middle shelf for step 3). Also attach bottom rail using pocket holes/screws.
Step 2
Cut the back panel to length and rip to width. Attach using 1 1/4" finish nails.
Step 3
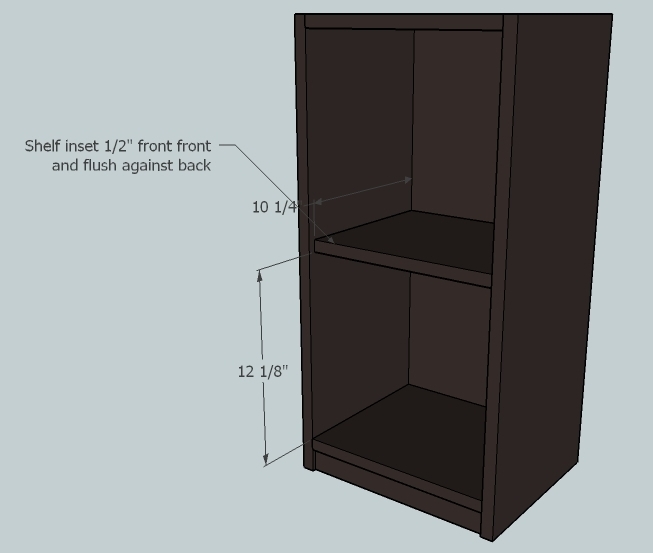
Cut two pieces of scrap 12 1/8". Use the scraps to support the middle shelf and attach shelf to sides using pocket screws.
Step 4
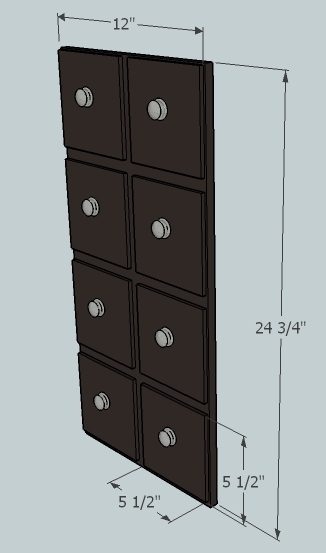
Double check the door measurements. The door should have 1/8" clearance on each side. Cut the door to length and rip to width. Cut 8 drawer fronts. Attach the drawer fronts using the the knobs. Attach the door using 2 sets Euro Style inset hinges hinges (follow the directions that come with the hinges to install).
Step 5
It is always recommended to apply a test coat on a hidden area or scrap piece to ensure color evenness and adhesion. Use primer or wood conditioner as needed.