

For as long as I can remember, I’ve always wanted to know the secret to an authentic Old World Distressed Chippy Paint Finish. I have spent hours examining antique and reproduction paint finishes, wondering why and how the paint decided to chip off and crackle in certain spots, wondering what I could do to create the same finish on my own DIY furniture.
Now I’ve done the crackle glaze and the glue trick – but the finish tended to end up looking too “even” – can I say that? Can a finish be too “even?” I think so when it comes to trying to replicate years of use, because use is never “even” – it’s like jeans – the knees go out first.
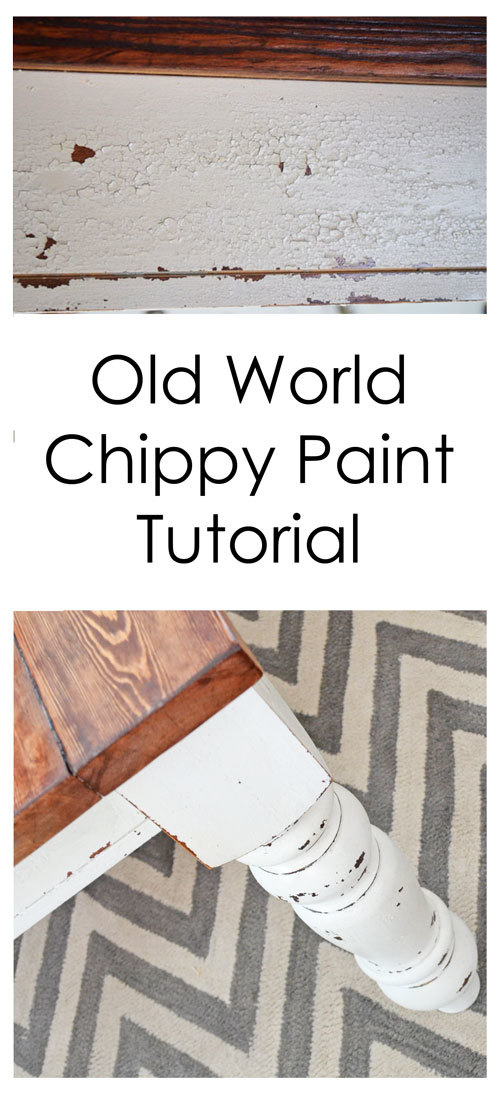
Over the last few weeks, I have been spending quite a bit of time in my garage, testing out different ways of achieving an authentic looking Old World Distressed Chippy Paint Finish, without having to wait a few generations. I’m very pleased – after many different attempts – to show you how I achieved this Old World Distressed Chippy Paint Finish on my sister’s new dining room table’s legs in the following tutorial.


Because quite a bit of stain will show through in a chippy paint finish, I worked with the folks over at Minwax to create the base stain color, and you can follow along on that tutorial here.
Project stained with Gel Stain
Milk Paint
Spray on Polycrylic
Sandpaper in Medium and Fine Grits
Milk Paint Application
How your milk paint reacts with your stain will depend on the type of stain that you used. I used gel stain with no finish or top coat before applying the milk paint and received these results. I suggest testing on the underside first - too much crackle and you should sand the stained surface lightly for better adhesion. Not enough crackle and the paint is sticking too well, so you may need a light top coat in between. Test, test, test!

Here's my base stained with the gel stain. I've allowed it to fully dry to the recommendation of the stain can.
For this table, I really wanted an Old World Finish, a finish that looks authentic and has tons of character. So I used authentic ingredients: Milk Paint.
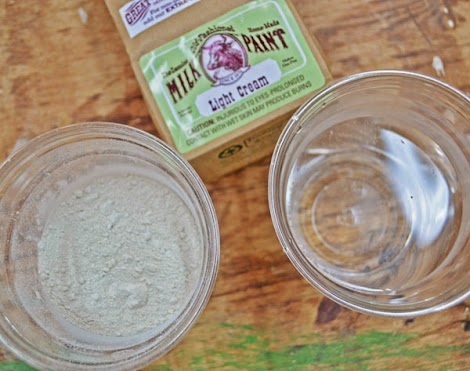
I start with two cups, one with the milk paint and one with an equal amount of warm water.
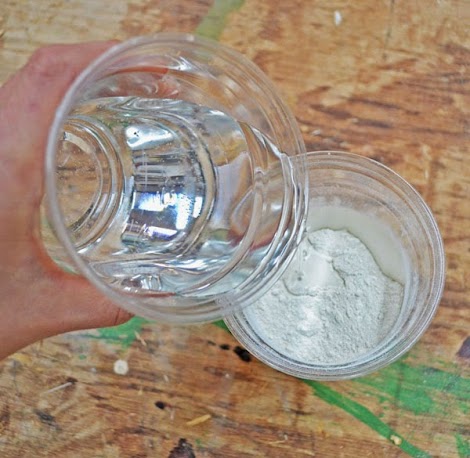
Then I slowly pour a little water in, stir, then add a little more water, stir – just like making powdered milk!
All milk paint is different (true story - you can make your own!) and some milk paint has lime added to it. If yours does, please wear a respirator to protect your lungs.

It’s even a little frothy like milk when mixed :)
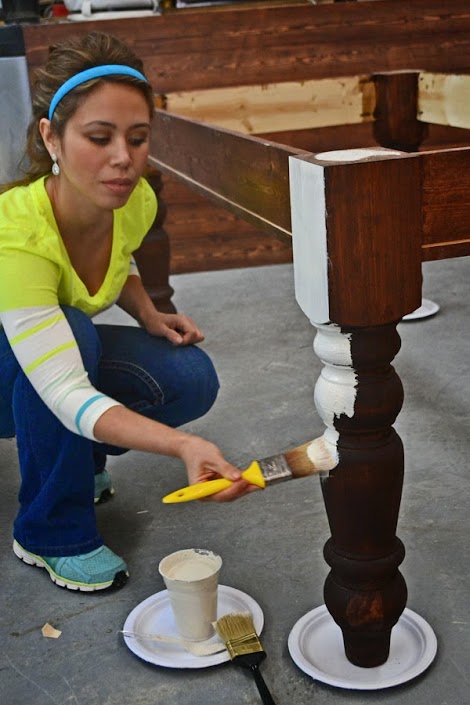
And then I just started brushing the milk paint over the stained legs.
The first coat went on a little thin. I'll admit I was feeling discouraged here ....
But the second coat filled fast and I barely needed any paint. You can see the one leg closest has two coats, everything else only has one coat.
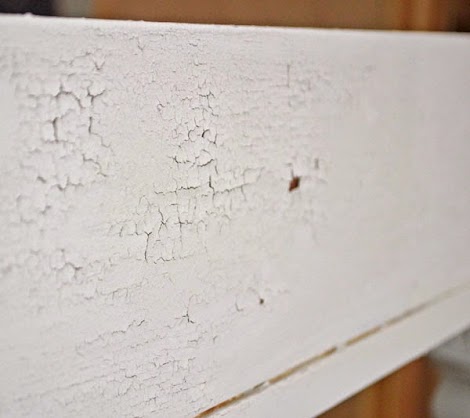
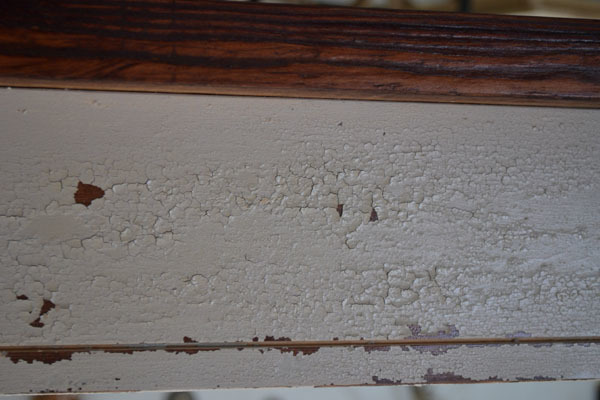
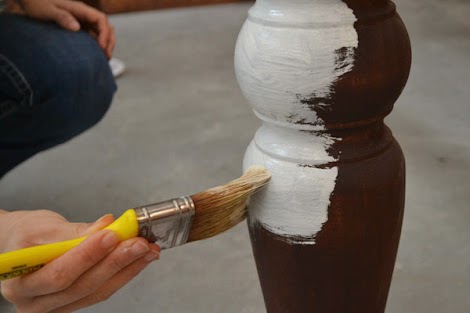
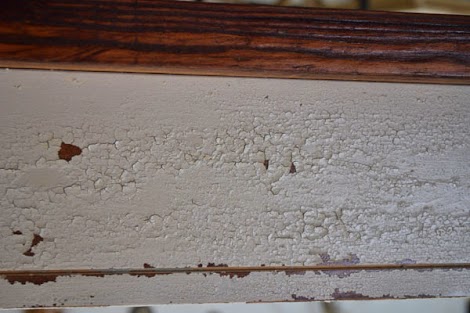
I’d love to take credit for the natural crackling and aging that occurred …. but it’s all the milk paint and the gel stain! The milk paint started chipping on it’s own!
Now I highly recommend testing out first a section just to make sure you are getting the effect that you want. Because the gel stain sits on the surface of the wood a little more so than just stain, I ended up having a lot more crackling and chipping than when just using wood finish as I did with the step stool. If you want less crackling or chipping, definitely sand the surface lightly with fine grit sandpaper to give the paint something more to grip to.

But for this table, this old world distressed paint finish was exactly what I was trying to achieve!
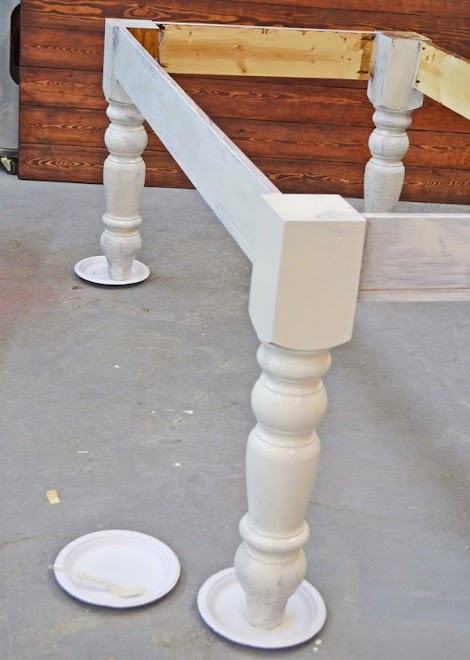
So I took a buffing pad and gently sanded the table, letting paint chip off naturally.
You can see the dark spots where the paint chipped off on the legs in the photo below.
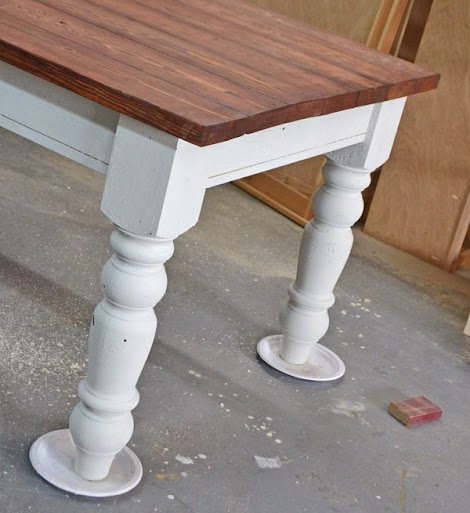
So beautiful with the stained top (I’ll be posting that tutorial as well very soon!)
Now how to protect so the paint doesn’t just keep coming off?
Protective Top Coat Application
To add a clear, protective top coat over the Old World Distressed Finish, I knew I couldn’t brush it on. That would end up in a mess of chippy paint everywhere! I ended up using a spray on polycrylic to seal the deal.
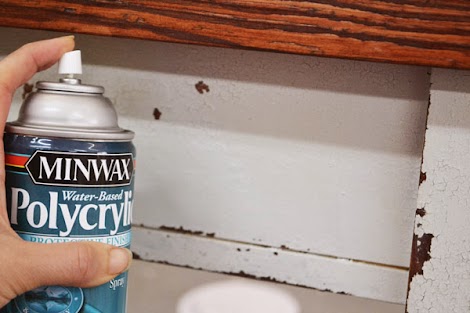
I choose water-based polycrylic for two reasons: It’s still too cold to work outside so I didn’t want to spray on an oil-based polyurethane indoors and polycrylic does not tend to yellow with time as polyurethane sometimes can on a white finish.
The first coat, I sprayed on pretty thin, and then I lightly sanded with a fine grit sanding block. Then I followed with yet another coat of polycrylic, more sanding, and a final coat.
I give you an Old World Distressed Chippy Paint finish … that won’t chip off!!!
Comments
tracysmith
Thu, 05/16/2013 - 11:08
Fantastic!!!!!!
birdsandsoap
Thu, 05/16/2013 - 13:00
I love that finish. I'm going
kayerhone
Fri, 05/31/2013 - 20:19
I indeed love the color of
skseibel
Sun, 06/30/2013 - 14:48
Great finish!
scottdykemaart
Mon, 10/28/2013 - 22:16
chipped paint finish
milkyways
Fri, 06/06/2014 - 02:35
I'm planing to redecorate my
janeharley
Tue, 10/21/2014 - 06:23
latex paint
Hi. Love the table. Would I get the same result if I used latex paint over the gel wax rather than milk paint?
elizhodge
Tue, 05/19/2015 - 09:49
Beautiful! What color gel
Beautiful! What color gel stain did you use before the milk paint?
Glendarie
Tue, 01/05/2016 - 10:13
Acrylic over oil
i understand why you chose to use an acrylic topcoat, but my understanding is that acrylic over oil will peel because oil continues to dry for a very long time. (This is from instructions about oil and acrylic painting on canvas.). Have you had an issue?
alliraerich
Mon, 01/25/2016 - 09:09
Legs
Hi Ana!
Where did you find the legs for this table? Thank you!
In reply to Legs by alliraerich
Ana White
Mon, 01/25/2016 - 13:30
Take a look at this post, the
Take a look at this post, the leg link is in the post
http://www.ana-white.com/2013/05/plans/husky-farmhouse-table
MDTerps343
Mon, 02/15/2016 - 06:28
Milk Paint Not Chipping Off
I was wondering how you got the milk paint to "bubble up" and chip? I tested it on a scrap piece of 2x4 (which is what the aprons are made out of) and I used gel stain and the exact same milk paint you used in your tutorial. I got it to crackle, but was unable to get to bubble up and chip away. When I used a fine grit (220) sandpaper to try and get some chips to flake off, it actually just smoothed it out. Did you lay the gel stain on heavy or did you mix the milk paint to be a little thicker?

Angelina5
Sun, 02/04/2018 - 07:46
Varnished wood to Chippy finish
I have some pieces that have varnish on them. Do I need to sand that off or strip?