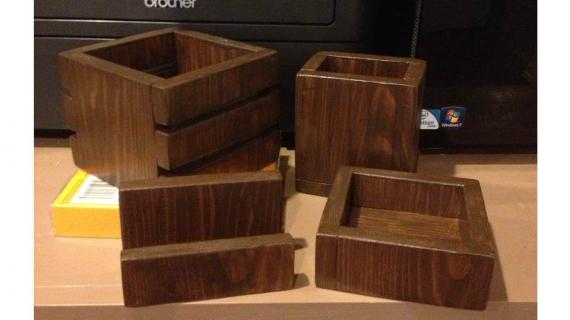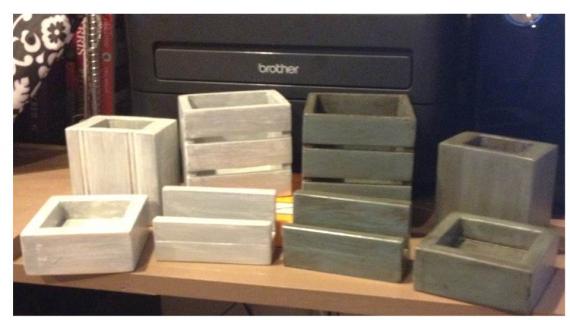
Build a 1-board Cedar Desk Accessory Set.

Preparation
1 cedar fence picket, 1/2" x 5 1/2" x 6'
wood glue
1" finish nails
Finishing materials for desired finish
Cut List from ½” x 5 ½” Cedar Fence Picket
Pencil Cup:
2 pc @ 3 ½”, then cut to 3 ½” (front/back, then cut remaining
part down to 1 5/8” for sides)
1 pc @ 3 ½”, then cut to 2 5/8” (bottom, cut to fit, should be
~2 5/8” x 3 ½”)
Total board length needed (includes blade widths): 10 7/8”
Business Card Holder:
1 pc @ 1 ¼”, then cut to 4” (front, 1 ¼” x 4”)
1 pc @ 1”, then cut to 4” (bottom, 1” x 4”)
1 pc @ 2 ¼”, then cut to 4” (back, 2 ¼” x 4”)
Total board length needed (includes blade widths): 4 7/8”
Mini Desktop Crate:
3 pc @ 3 ½” then cut to 3 ½” wide
6 pc @ 1” then cut to 4 ½” wide (cut to length after step 1b)
Total board length needed (includes blade widths): 17 5/8”
Paper Clip Tray:
2 pc @ 1 ½”, then cut to 4” (front/back, 1 ½” x 4”)
2 pc @ 1 ½”, then cut to 3” (sides, 1 ½” x 3”)
1 pc @ 3”, then cut to 3” (bottom, 3” x 3”)
Total board length needed (includes blade widths): 9 5/8”
Sand boards before cutting.
Measure each piece, then cut, then measure the next piece. Don’t mark them all at once, because the blade takes 1/8” for each cut, and there will be a lot of cuts on this board.
Cut Lists for each piece show the parts to cut as you build, to get the best fit.
Please read through the entire plan and all comments before beginning this project. It is also advisable to review the Getting Started Section. Take all necessary precautions to build safely and smartly. Work on a clean level surface, free of imperfections or debris. Always use straight boards. Check for square after each step. Always predrill holes before attaching with screws. Use glue with finish nails for a stronger hold. Wipe excess glue off bare wood for stained projects, as dried glue will not take stain. Be safe, have fun, and ask for help if you need it. Good luck!
Tips:
Sand pieces before assembly.
Try finishing pieces before assembly, to make final finishing easier.
Instructions
It is always recommended to apply a test coat on a hidden area or scrap piece to ensure color evenness and adhesion. Use primer or wood conditioner as needed.


Comments
sgilly
Mon, 08/19/2013 - 08:54
Thank you
This would be a great "guy" gift. Thanks for posting.
JoanneS
Mon, 08/19/2013 - 17:40
Thanks Sue!
Thank you very much for your nice comment! You're right, the walnut stain does make it really nice for a guy's desk. I'm getting ready to post the inspiration pieces that I made from my scrap wood. Those are for the girls at work, and have a more feminine touch on the painted finish. The finish really makes the difference! :)
JoanneS
Sat, 08/24/2013 - 05:09
.pdf copy of plan attached
Update 8/24/13: A .pdf copy of the full plan has been attached, just below the General Instructions section.
yurra-bazain
Tue, 08/27/2013 - 16:52
Love these!
=D I added a link to these plans from my humble little blog. I hope someone will find it and will be inspired to make some for themselves or someone that could use them! Thank you for sharing these plans!
In reply to Love these! by yurra-bazain
JoanneS
Tue, 08/27/2013 - 17:11
Thank you!
Thank you so much! I've been "linked", that is sooo cool!