


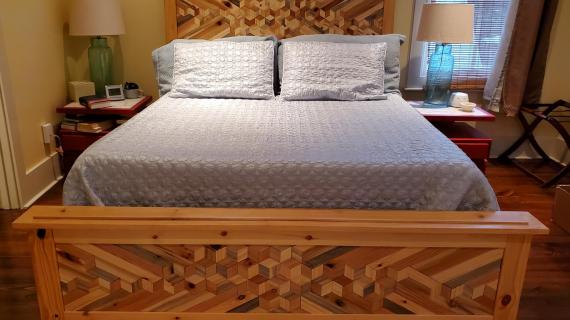
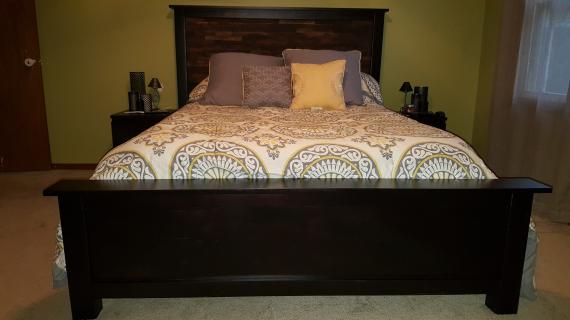
DIY Wood Shim bed plans - Queen. From Ana-White.com
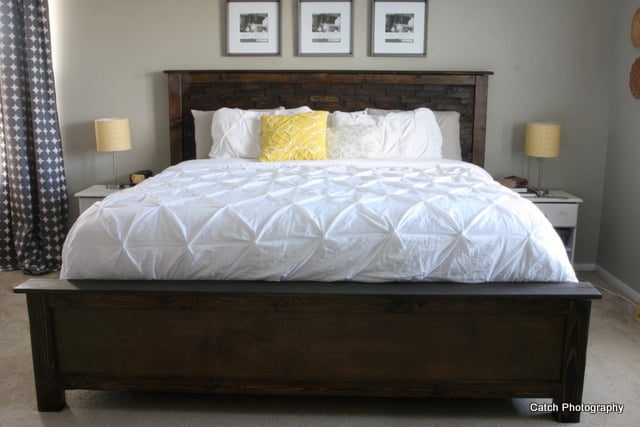


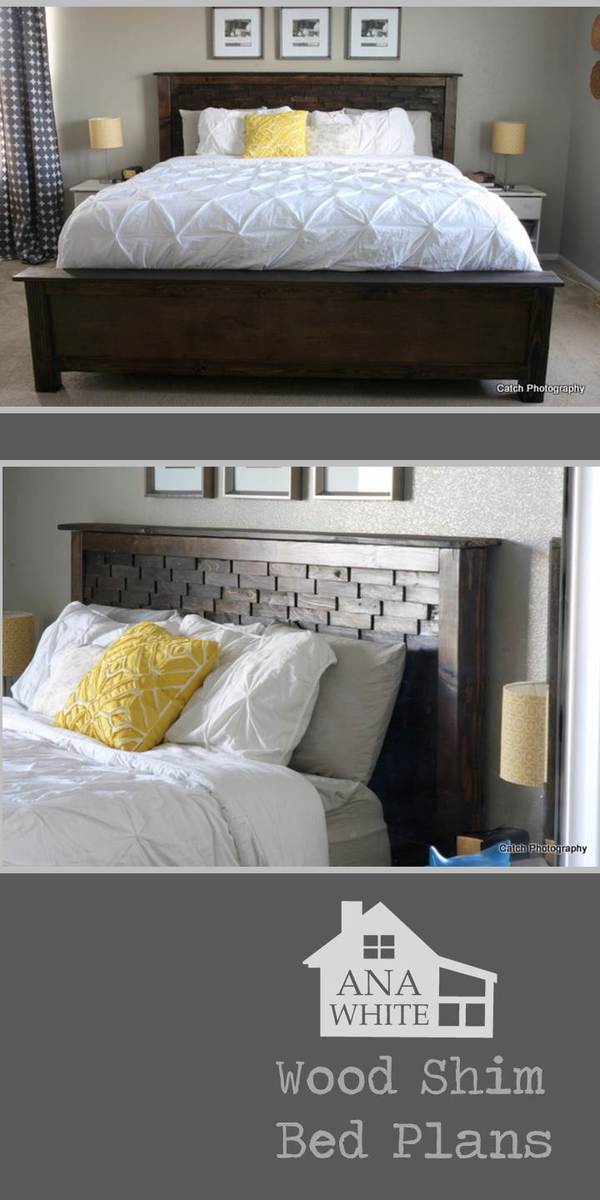
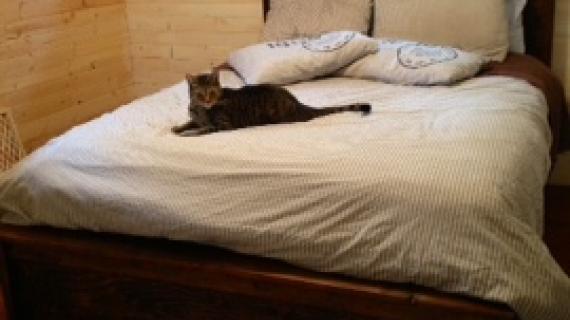
Thank you so much for the positve feedback on Rebecca's Wood Shim Bed!

Since a few of you asked - thought I'd get you a queen sized plan too!

Those plans are below!
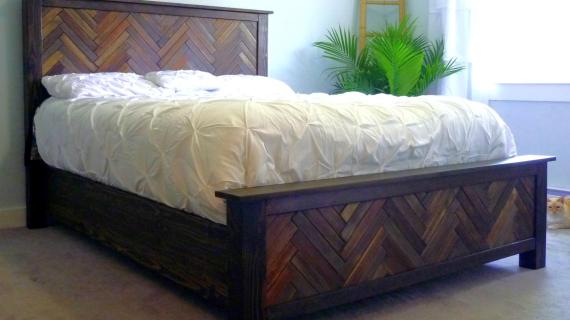
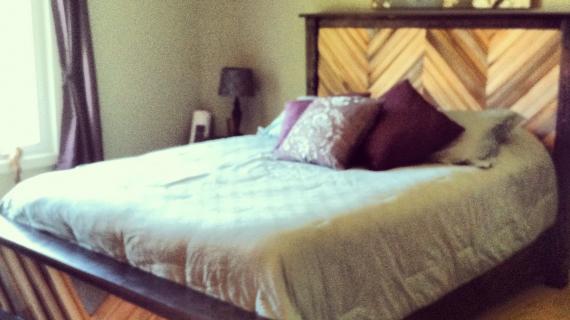
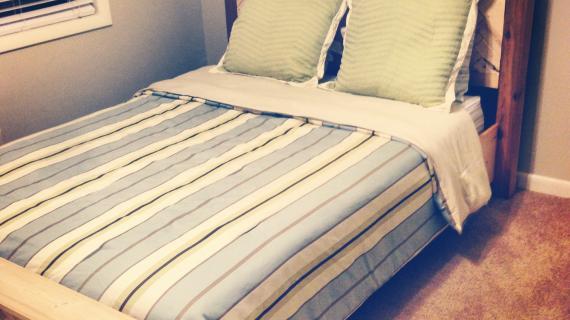
And if wood shims aren't your thing ....

Why not try going in a chevron direction?
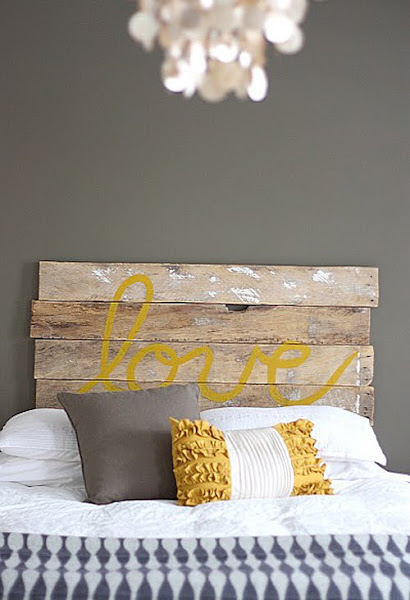
source: HouseTweaking
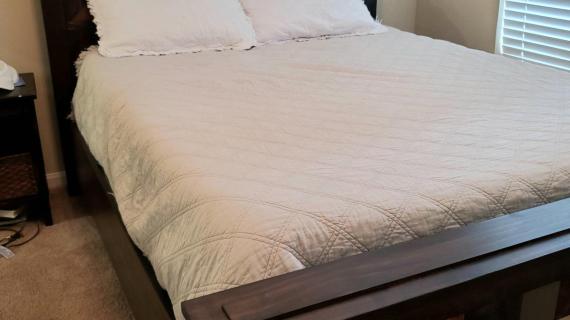
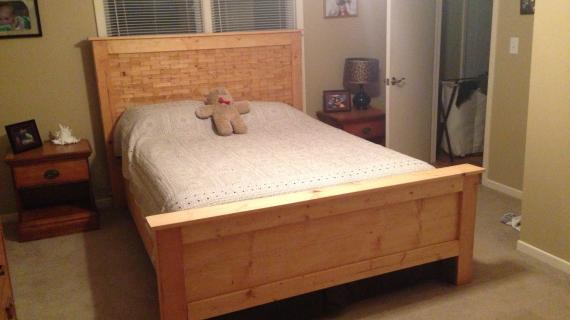
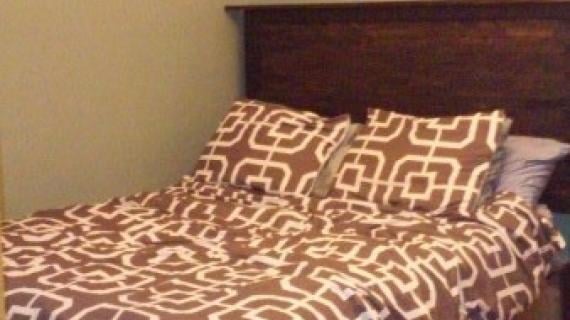
Or if straight cuts are more your thing, what about filling the open panel with old fence boards and adding some script?
With this bed, there's so many possibilities!
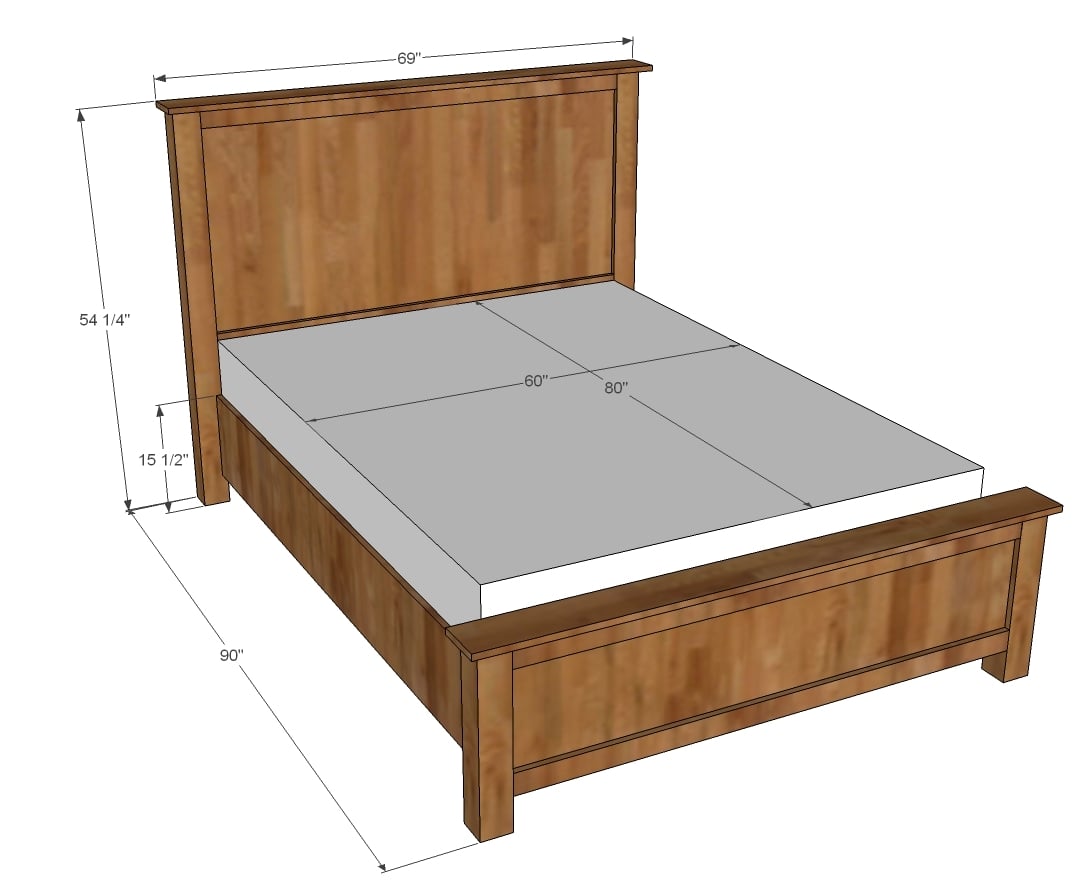
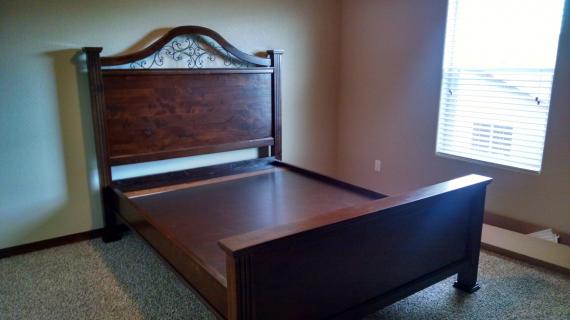
Now you just gotta build it! Plans follow!
XO Ana
Preparation
1 - sheet 3/4" plywood
4 - 1x3 @ 8 feet long
2 - 4x4 @ 8 feet long
2 - 1x6 @ 6 feet long
2 - 1x12 @ 8 feet long
2 - 2x4 @ 8 feet long
3 - 2x4 @ 10 feet long
Recommend 1 1/4" pocket hole screws but could use long lag screws (at least 4")
Recommend 2 1/2" pocket hole screws for building frame but could use 3" wood screws
Also need 1 1/4" finish nails, 3" or longer screws for attaching frame to legs, 2" screws for attachin siderails and frame to footboard, small trim screws for attaching headers, and small nails (depending on shim size) for attaching shims to panels.
1 - 3/4" plywood 60" x 32" (headboard panel)
1 - 3/4" plywood 60" x 16" (footboard panel)
4 - 1x3 @ 60" (panel trim)
2 - 4x4 @ 53 1/2" (headboard legs)
2 - 4x4 @ 20" (footboard legs)
2 - 1x6 @ 69" (headers)
2 - 1x12 @ 83" (siderails)
FRAME
2 - 2x4 @ 88 1/2"
6 - 2x4 @ 57" (CUT FROM 10' 2X4S)


Please read through the entire plan and all comments before beginning this project. It is also advisable to review the Getting Started Section. Take all necessary precautions to build safely and smartly. Work on a clean level surface, free of imperfections or debris. Always use straight boards. Check for square after each step. Always predrill holes before attaching with screws. Use glue with finish nails for a stronger hold. Wipe excess glue off bare wood for stained projects, as dried glue will not take stain. Be safe, have fun, and ask for help if you need it. Good luck!
Instructions
Step 1
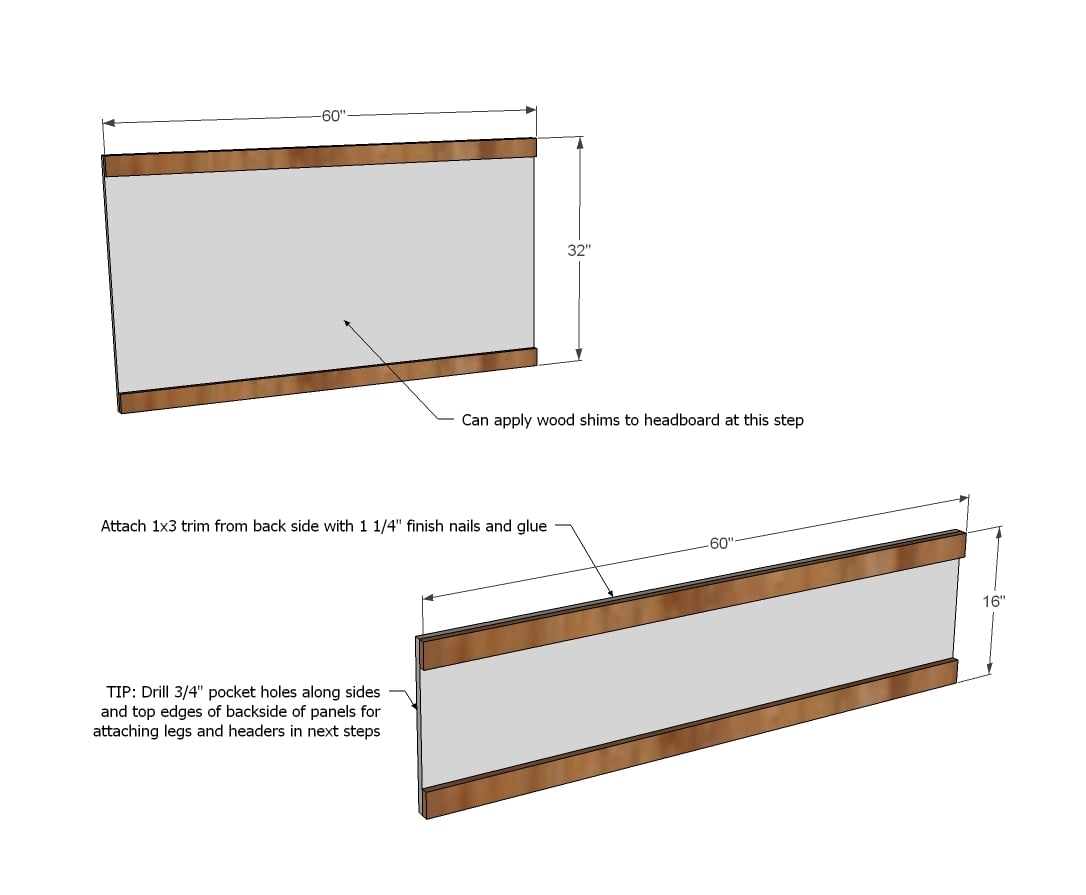
Take your full sheet of plywood and cut it down to 60" long x 48" wide. Then from this piece, cut into a 32" and 16" wide pieces. These are your panels.
If you have a Kreg Jig, drill 3/4" pocket holes along side and top edges of both panels for later attaching legs and headers.
Attach the 1x3s to the panels at the top and bottom with finish nails on back side and glue.
It may make more sense to you to attach the wood shim art now while you can work on a flat surface - totally up to you.
Step 2
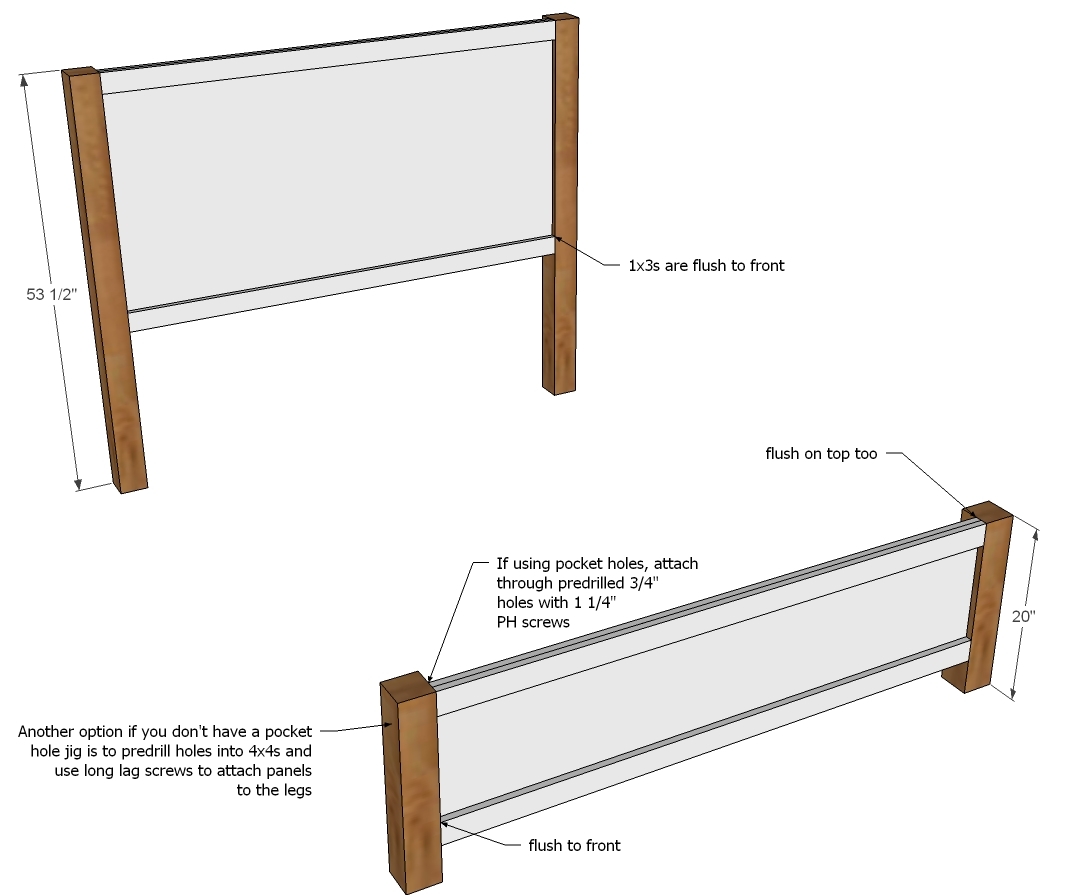
Next, attach legs.
If you aren't using pocket holes, the other option is predrilling holes through the legs and attaching with long lag screws (how long will depend on how deep you drill the holes. What I do is drill a hole a little larger than my screws size about half way through the legs. Then I take a second drill bit the size of my screw shaft and drill a second hole inside the first larger hole all the way through the legs into the panel. This prevents the wood from splitting while the larger hole hides the screw head.
Another option is to place 2x2 on the back side of the panels, and use them to attach the legs and the panels together. You could also use metal L brackets (small ones) to attach panels to legs.
Step 3
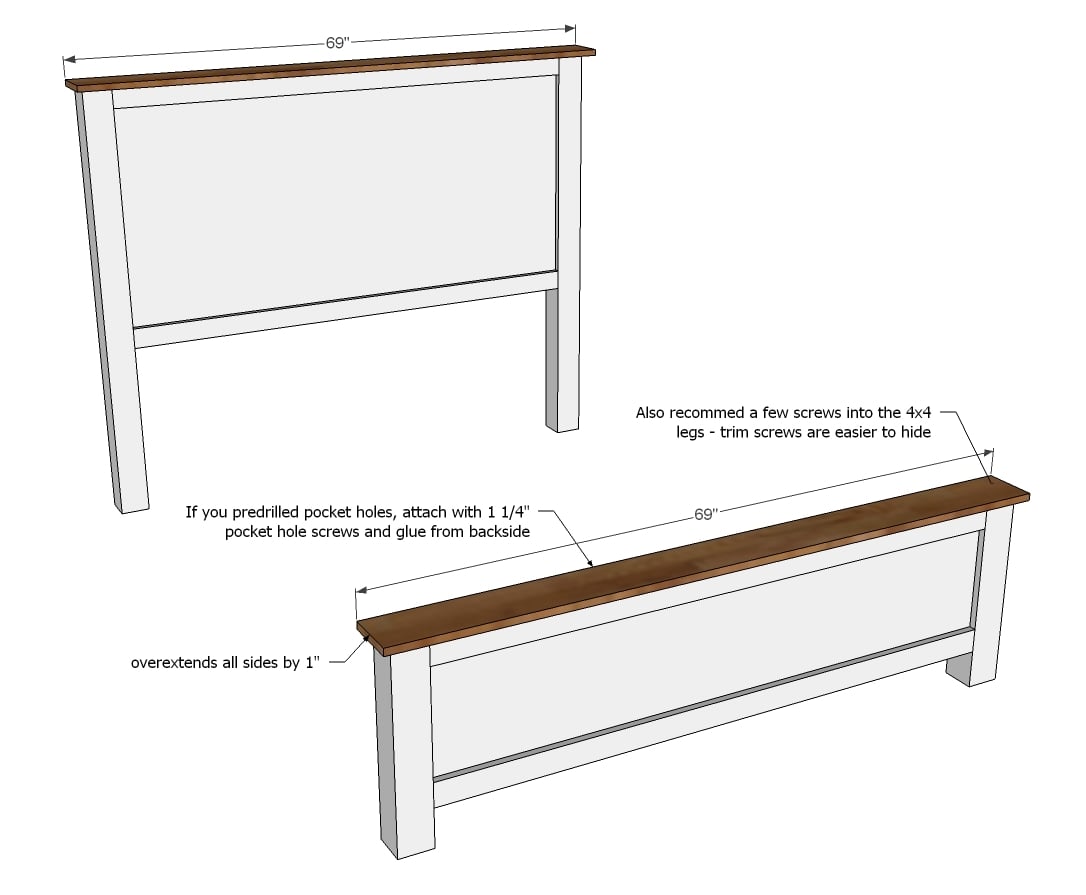
Attach headers to tops of headboard and footboard. You should definitely screw these as over time they could come up if you don't. I recommend a few trim screws into the 4x4 legs - those will be easy to hide because the trim screw head is so small.
Step 4
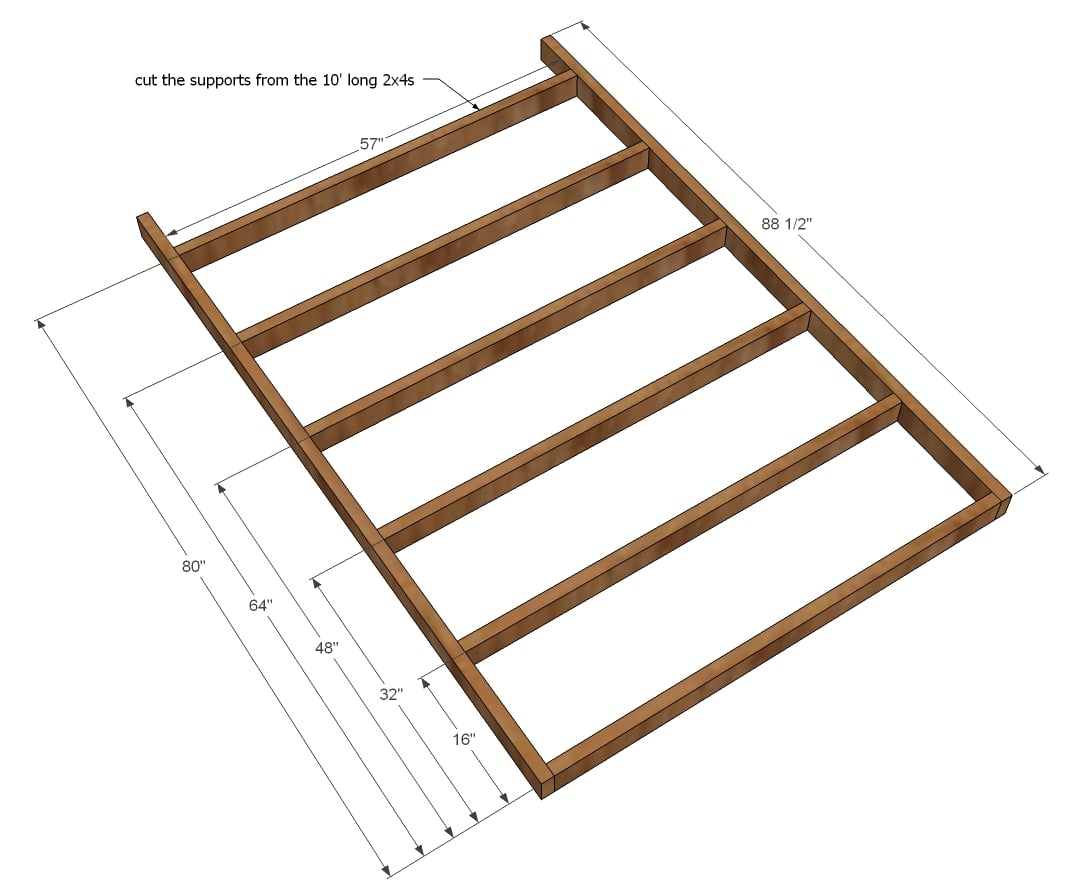
Next, build the frame - either using 1 1/2" pocket holes and 2 1/2" pocket hole screws, or you could use 3" wood screws countersunk.
Check for square.
Step 5
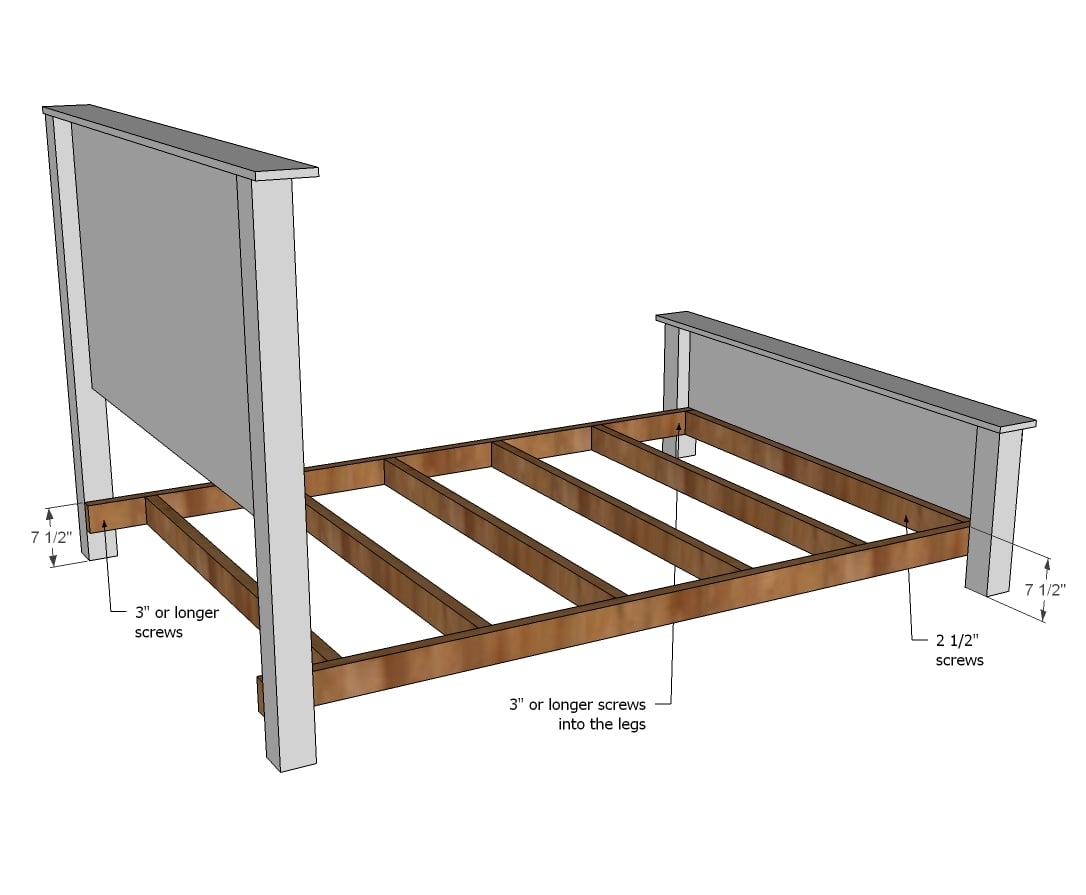
Step 6
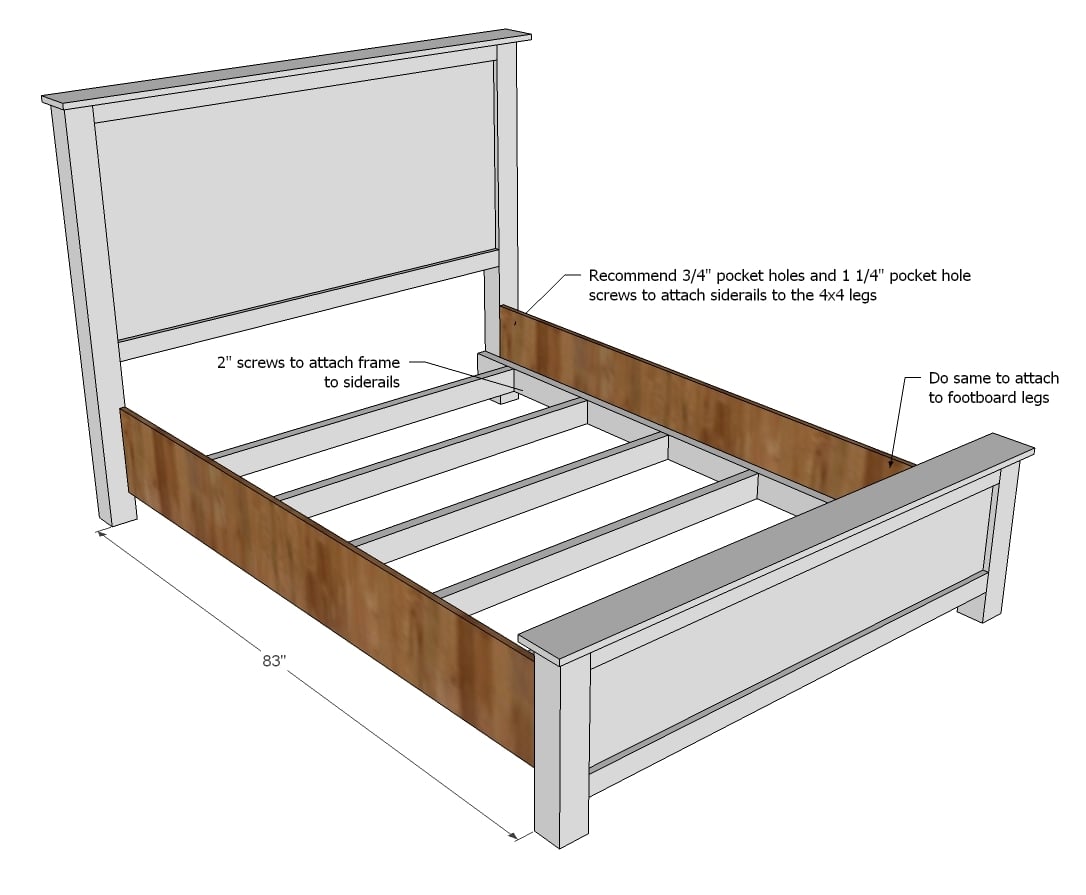
Attach side rails to the frame and 4x4 legs.
Step 7
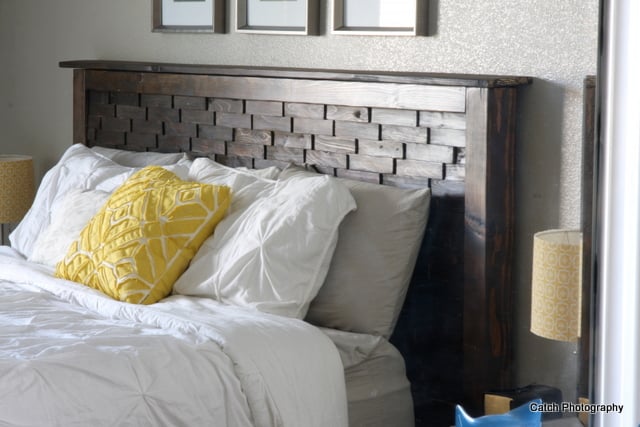
Apply the wood shims to the headboard and finish your bed!
You've made your bed!
It is always recommended to apply a test coat on a hidden area or scrap piece to ensure color evenness and adhesion. Use primer or wood conditioner as needed.
Comments
ffsangel1
Mon, 08/12/2013 - 12:20
Thank You...
Ana, you are without a doubt totally awesome! Thank You so much for modifying the plans to a Queen size. Now I won’t have to sweat if I got the changes right. Can’t wait to start this build!
Matthew Martin
Wed, 09/04/2013 - 21:04
Loved it, Built it
I saw this and had to build it. I modified it a tad but i loved every bit of it. Thanks so much for providing us with the plan to build it. Looks like i was the first to upload my brag posts.
kkellg
Wed, 11/13/2013 - 15:29
Shim instructions?
Hi, I love this bed and have some experience with woodworking. However, I don't see any instructions on the best way to attach the shims, finish, etc. Has anyone built this bed that can provide more detailed instructions. Becky doesn't really have them on her site either. Thanks so much! Can't wait to start. Karla
PS-Was oak used for this bed?
Matthew Martin
Wed, 11/13/2013 - 18:04
Hey Karla, I have built this
Hey Karla,
I have built this bed and my design is more of a checkerboard pattern verse the random pattern they used. If you click the example links up top one will say made by Matthew Martin. We used a golden Oak finish i think. We went with that because my wife doesnt think to highly of dark finished wood due to you cant see the grain.
However the method i used was to glue them with wood glue to the head board. This came to cause in issue in the header because it came down to the shims not being the correct height to fill the entire space. it was like a 1/2 shim height. so i had to cut down a 1x6 verse the 1x4s.
Either way to make the pattern i used i cut each shim 6 inches long. except for the side ends which were cut 6.25in to allow the blade thickness to be taken out.
I think the method they used they just kept moving the shims over inch by inch to make the more elaborate pattern. I hope this answered your question. If you need any more information i will try to answer them as much as possible.
In reply to Hey Karla, I have built this by Matthew Martin
kkellg
Fri, 11/15/2013 - 10:30
Thank you
Thank you very much, Matthew. This makes sense although I'm not in the throws of it yet but am off to buy my wood. Can't wait! Also, I'm only doing the headboard b/c the guest room it's going in would cause pain to guests to walk around that footboard, whacking themeselves in the process. 'Preciate the help. Karla
kkellg
Fri, 11/15/2013 - 10:35
Not sure I follow here
Matthew, Can you explain this further? New to this, so I don't quite follow.
"it was like a 1/2 shim height. so i had to cut down a 1x6 verse the 1x4s."
Thanks so much! Karla
Matthew Martin
Fri, 11/15/2013 - 10:41
Shims
On in short when I went to by the wood the only 1x3s they had were rounded, of course we wonted flat edges not rounded so I opted for 1x4s instead. Then when it came down to finishing the shims the last row of shims would not fit due to I only had .5 inches to work with vs a 1inch gap the size if the shims. So I had to take off the top and cut a 1x6 down to about a 1x5 to fit. If you get the proper wood you might not run into the issue I had at all. But I'm just letting you know what I ran into.
ncderemer
Tue, 10/28/2014 - 13:52
4x4 Posts
Hello!
I began this project in excitement many months ago and just finished the head board with the shims and am getting ready to attach it to the 4x4 posts. I attached my shims already with wood glue and it worked beautifully.
My headboard is so heavy though and I am wondering how many screws I should really be using to attach that thing to the posts so that it is really stable. I was going to screw a 1x3 on the back and then put a bunch of pockets holes in and then maybe add some L brackets too for good measure.
Any suggestions as to what worked best for other people? Is it better to just use long lag screws?
Thank you!
jward6004
Wed, 02/04/2015 - 15:35
Side Rails
Hello,
I'm hoping to modify this bed plan by borrowing from the design on my old sleigh bed. Does anyone know how to make side rails to fit this design with hook-on rails. The rail would hook-on into the head & foot boards on each side and allow this bed to be broken down into 4 pieces. I would have a small lip on the inside of the rail so that 2x4s could be laid down from one rail to the other as support.
jgbreeden
Thu, 02/05/2015 - 09:15
Metal brackets
You can get a set of keyhole bed brackets, where each corner has a piece with studs that screws to the leg, and a piece with keyhole shaped holes to attach to the side rails. You would glue and screw a 2x4 to a 1x2 for each side rail, which should give the strength needed and provide the surface for the cross slats (that will also raise the surface by the thickness of the slats, so adjust leg height if needed). The side rails will be closer to the outside edge of the legs, so you would want to want to reduce the width of the head and foot boards by about 5 or 6".
andrewrisse
Wed, 04/08/2015 - 12:39
Type of Stain
Hi-
What stain did you use? Thank you!
Dmakson17
Sun, 06/14/2015 - 14:10
Curiosity on frame height
It says in step 5 that the frame can be raised up at most 7 inches without the box spring. Is that because the strength will be compromised above 7"? I'm making this bed for a full size but I would like a 10" clearance underneath for storage. Should I re-enforce with 2x4 legs in the middle?
Lauren CF
Sun, 09/25/2016 - 10:34
Full size bed
Would I be able to get the cut list for a full size bed? What size do you recommend for the shims and how would you affix them?