Well, we got the memo.

Mother Nature has made it pretty clear - winter is coming.
And soon.

The leaves have changed to brilliant reds and yellows, and what's left of our wild Alaska blueberries are barely hanging on.

The mountains are not just snow capped any longer. They are snow covered.
Winter is on it's way, and it will be here until May.
And of course we didn't get everything done outside this summer that we had hoped for up at the Momplex.
There are stairs to build, railing to put up on decks, concrete aprons and sidewalks to pour, lawns to put in .... summers up here in Alaska are just too short to fit it all in.
And all these little things will get done, but they don't necessarily have to be done before Sewing Mom moves in.

But there is one thing last thing we do want to take care of before Mom moves in.

In Alaska, in the winter, we get days with just a few hours of daylight. And by daylight, we mean of course more of a dusky dawn than a bright sunny day.
Mom definitely needs exterior lighting installed around the entrances.

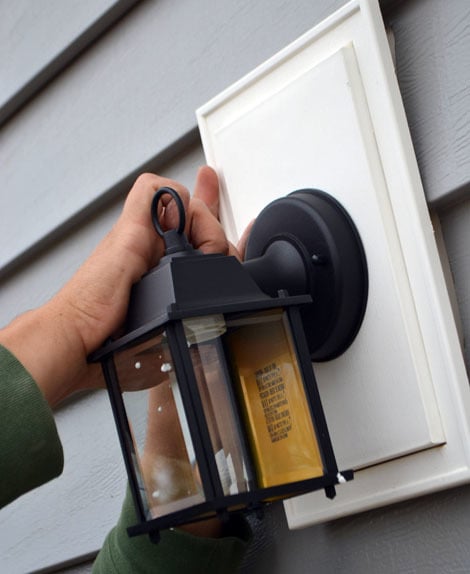
I picked up some of these lights from The Home Depot - about $10 a light. We'd have loved to splurge on expensive exterior lighting, but when there's 10 lights to install, the cost of lighting multiplies pretty fast. And I'm such a fan of simplicity, and really loved these lights.

We've already run the electrical to the boxes,

So we just removed the wire nuts from the wires.
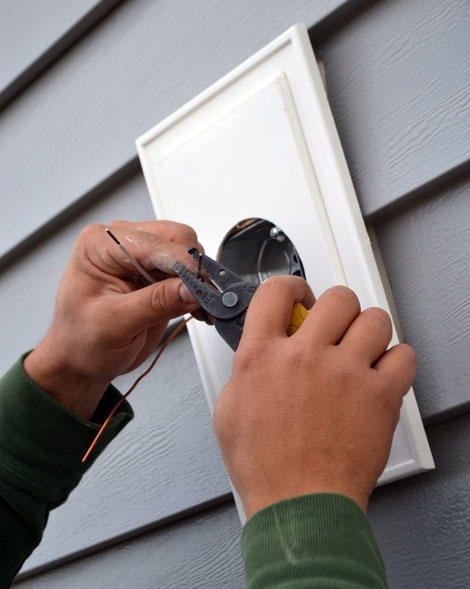
And then stripped the hot and neutrel wires back (these are the white and black wires).

On the light fixture itself, there's a brass mounting plate.

It get's removed,

And then attached to the exterior box.

Then the bare wires (the grounds) are tied into the green ground screw.

Then the white wire from the fixture is wire nutted to the white wire in the electrical box. The same is done for the black wire.

All hooked up!

The wires are neatly placed back in the electrical box,

And then the fixture itself is attached to the mounting bracket to complete the installation.
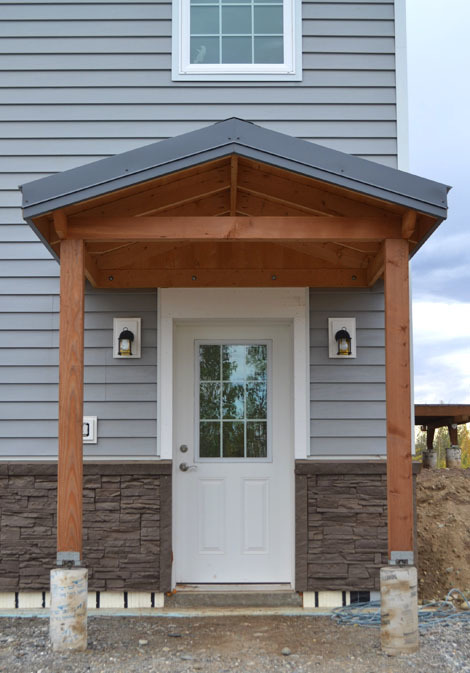
Ah, that looks so much better!!!
And that's it - the last of the exterior projects for this year up at the Momplex. We can move back inside and work on interior projects.
My fingers are sure happy to hear that!
And my toes.
And especially my belly.
It's getting pretty difficult to zip a jacket.
Comments
carnatnat
Thu, 09/19/2013 - 13:42
garage
bhoppy
Fri, 09/20/2013 - 05:33
Love the lights!
spiceylg
Fri, 09/20/2013 - 08:05
Getting closer!
cathryn
Sat, 09/21/2013 - 11:18
Classic Lights!
Val Manchuk
Mon, 09/23/2013 - 08:42
Portico