

How about a toolbox that looks good on the shelf, so you don't have to hide it at the back of a closet?
This wood toolbox is inspired by vintage wood toolboxes, and features a large, roomy compartment, it will hold up to use and store all your tools with style.
Free step by step plans from Ana-White, include detailed diagrams, shopping and cut list!


Build Post from Jaime Costiglio
Preparation
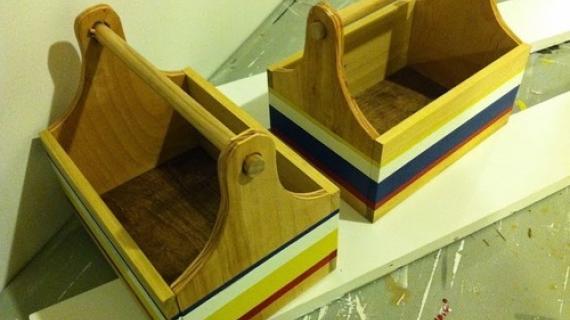
Construction with plywood as shown in photos and diagrams
- 12" x 32" of 1/2" plywood
- 13" x 8" of 1/4" plywood
- 1 - 3/4" dowel 14" long
- 3/16" dowels for handle stoppers
- 1 1/4" brad nails wood glue
Alternative 1x8 Construction
- 1 - 1x8 @ 6 feet long
- 1 - 3/4" dowel at 16" long
- 1-1/4" brad nails
- wood glue
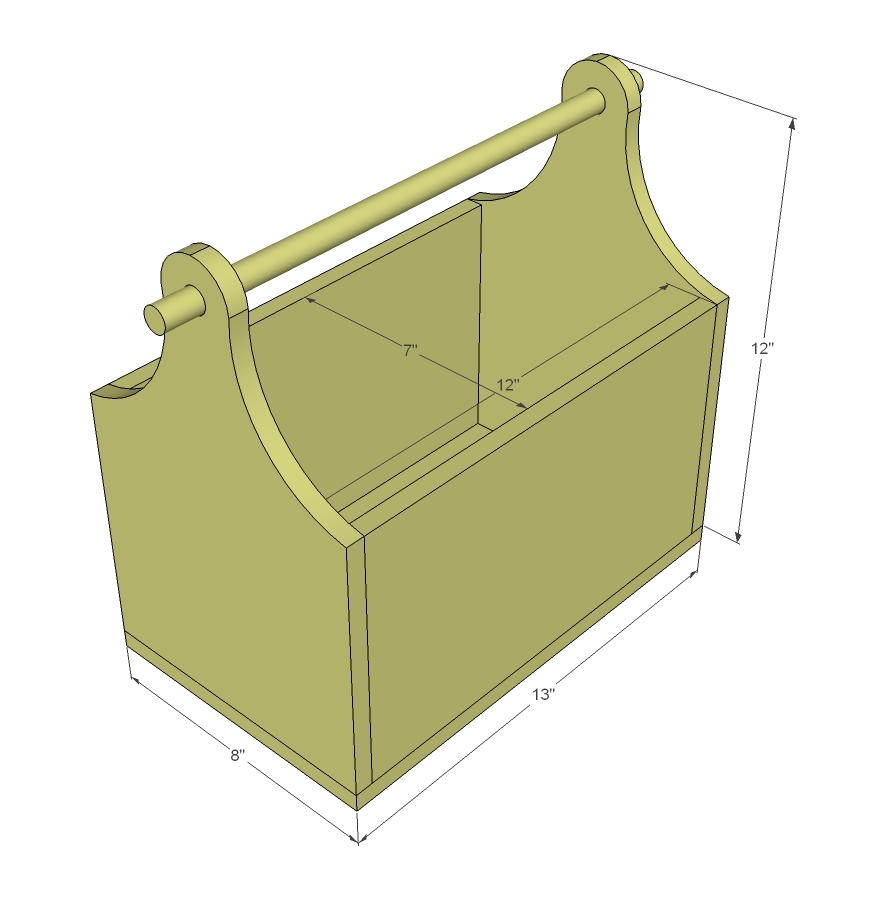
Cut List Using Plywood Pieces
- 2 - 1/2" plywood 12" x 7" (sides)
- 2 - 1/2" plywood 12" x 8" (ends)
- 1 - 1/4" plywood 13" x 8" (base)
- 1 - 3/4" dowel @ 14" (handle)
- 2 - 3/16" dowel @ 1 1/4" (handle stoppers)
Cut List Using 1x8 Boards
- 1 - 1x8 @ 13" - bottom
- 2 - 1x8 @ 12" - ends
- 2 - 1x8 @ 14-1/2" - sides
- 1 - 3/4" dowel @ 16" - handle (can also use a 1x2 cut to 13")


Instructions
Step 1

1x8 Construction option
Attach the bottom to the two ends with 1-1/4" brad nails and glue.
Then mark out the sides on the ends, and cut out the ends to allow for easy reaching inside the toolbox with a jigsaw.
Attach the sides with glue and 1-1/4" brad nails.
Use a wood dowel or 1x2 for the handle.
Step 2
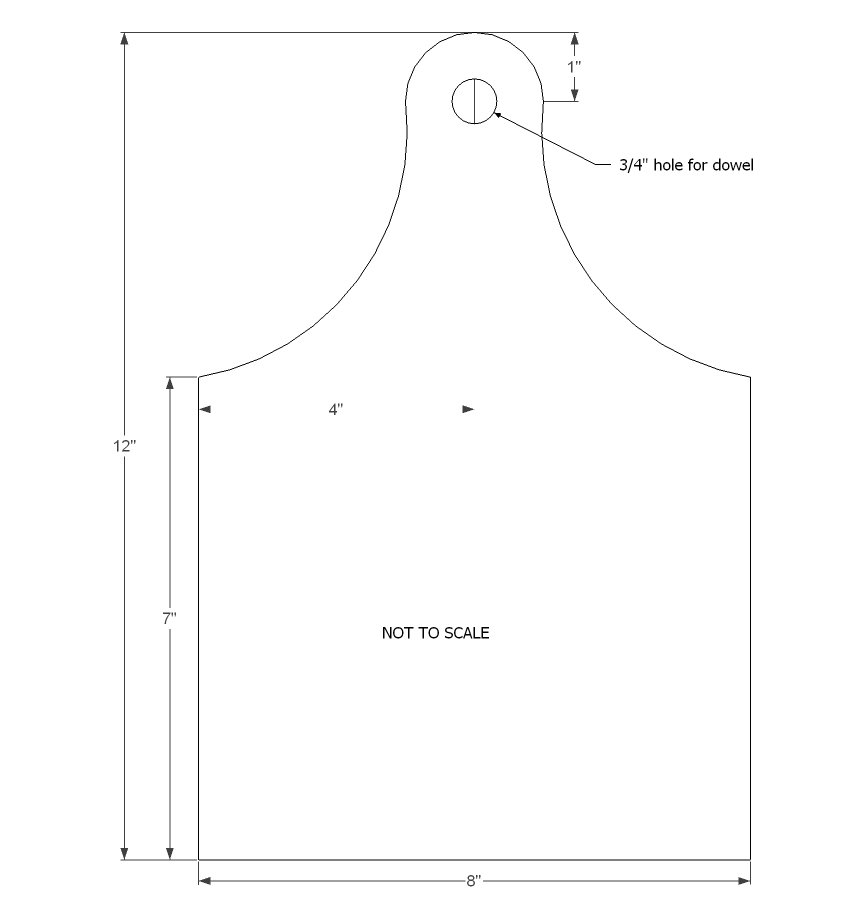
Once you get all your 1/2" plywood pieces cut, it's time to cut those ends into the trug shape. You'll need a spade bit to drill the hole for the handle, and then a round object to help you shape the curved sides like Jaime did here:

Once you get one end done, use it as a pattern to cut the other end.
Step 3
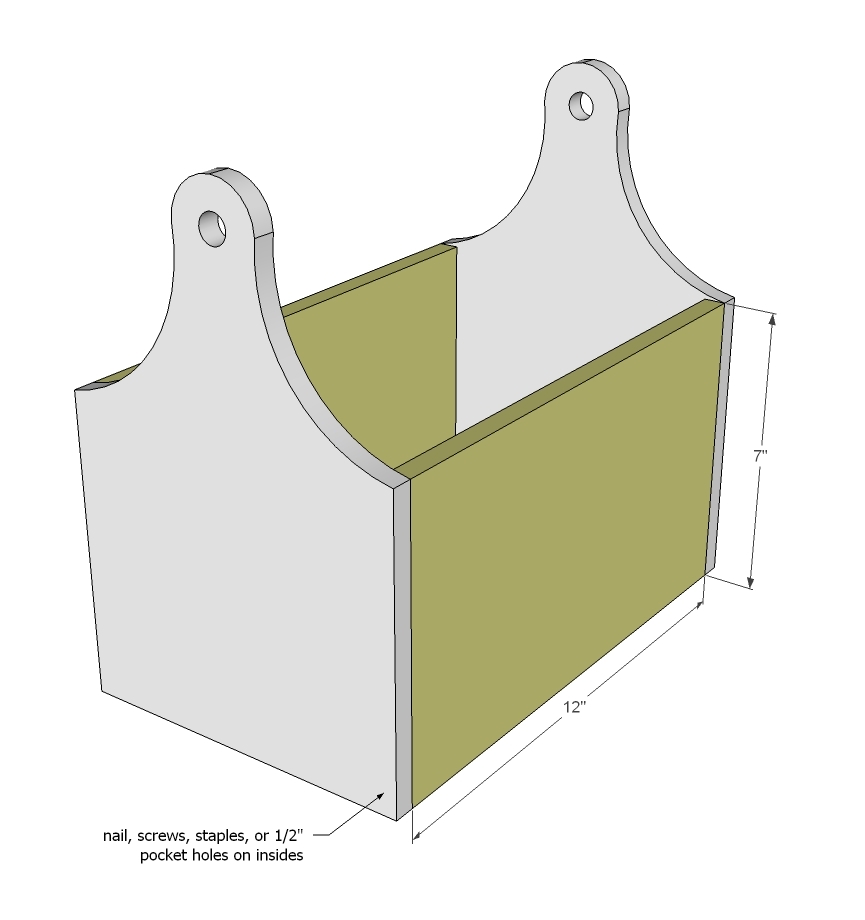
With the sides done, nail to the sides with 1 1/4" nails with glue.
Step 4
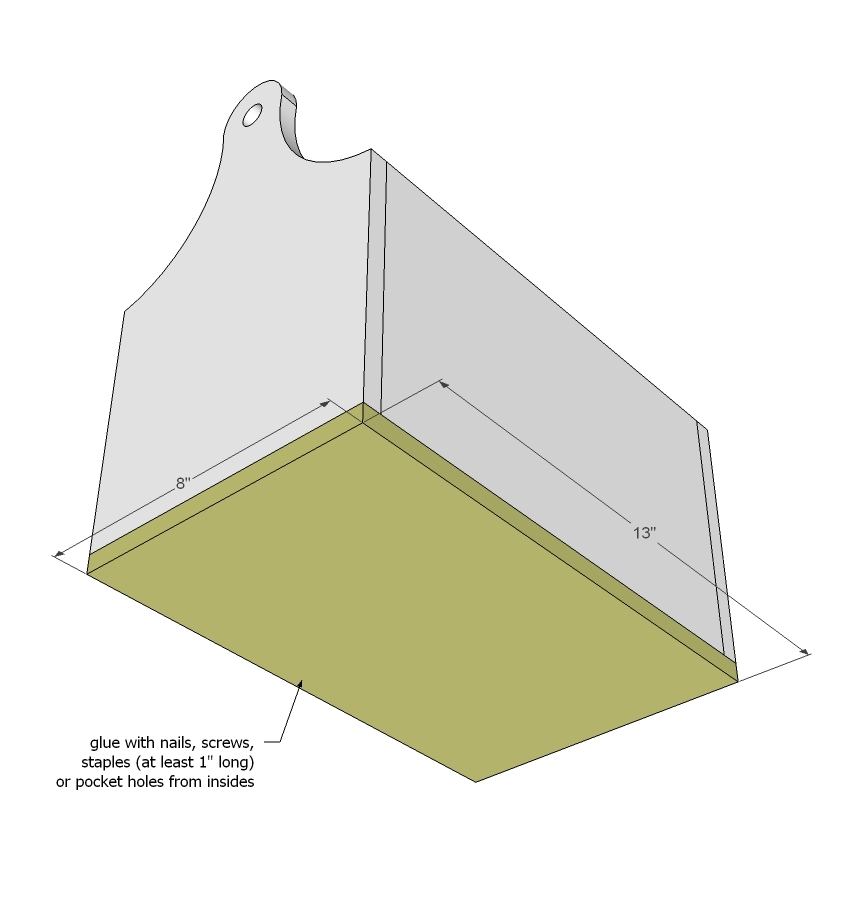
Then attach the bottom with glue and nails.
Step 5
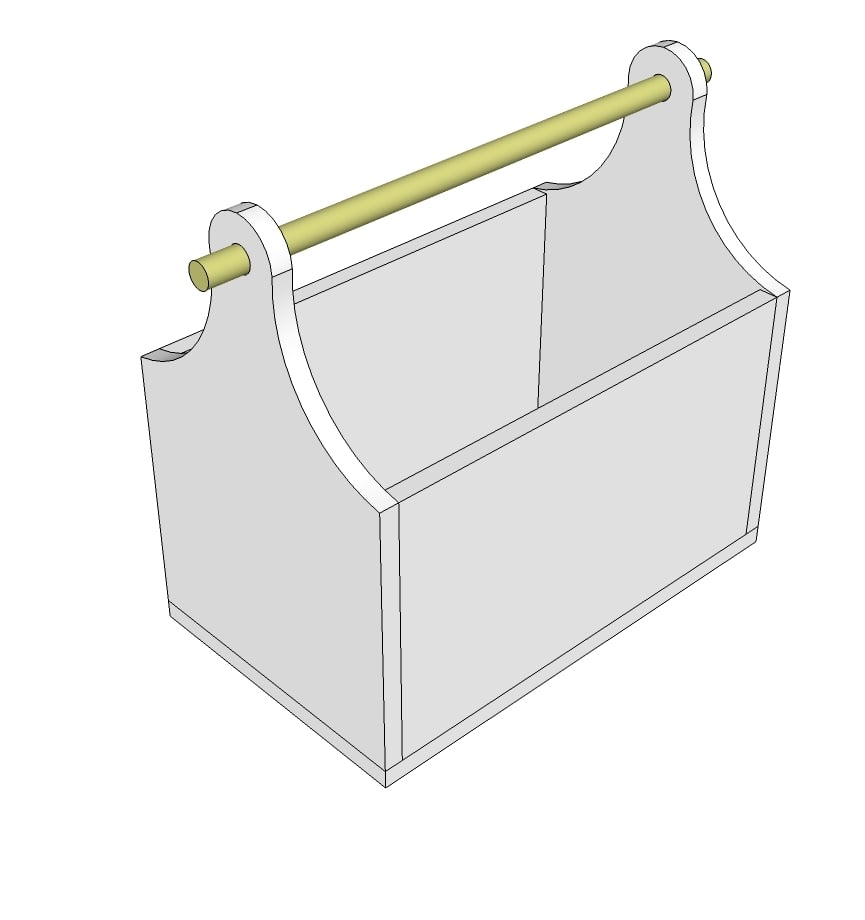
Then insert the wood dowel for the handle.

Jaime recommends adding smaller dowels to keep the handle in place as well.
It is always recommended to apply a test coat on a hidden area or scrap piece to ensure color evenness and adhesion. Use primer or wood conditioner as needed.
Comments
Jake
Sat, 10/26/2013 - 08:29
Danish Oil
Finish the project with Danish Oil and watch the plywood pop!!