

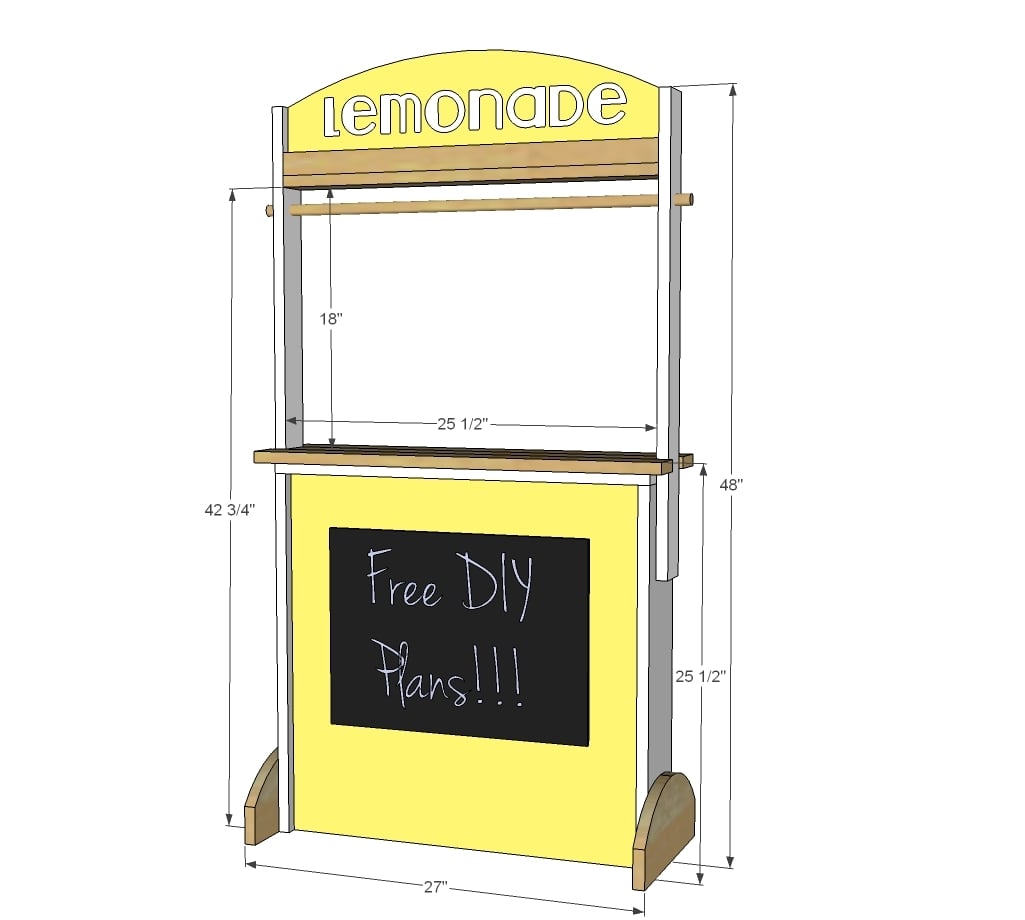
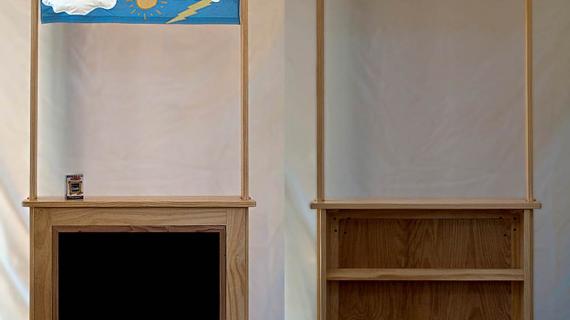
Build your own play stand with our free plans!
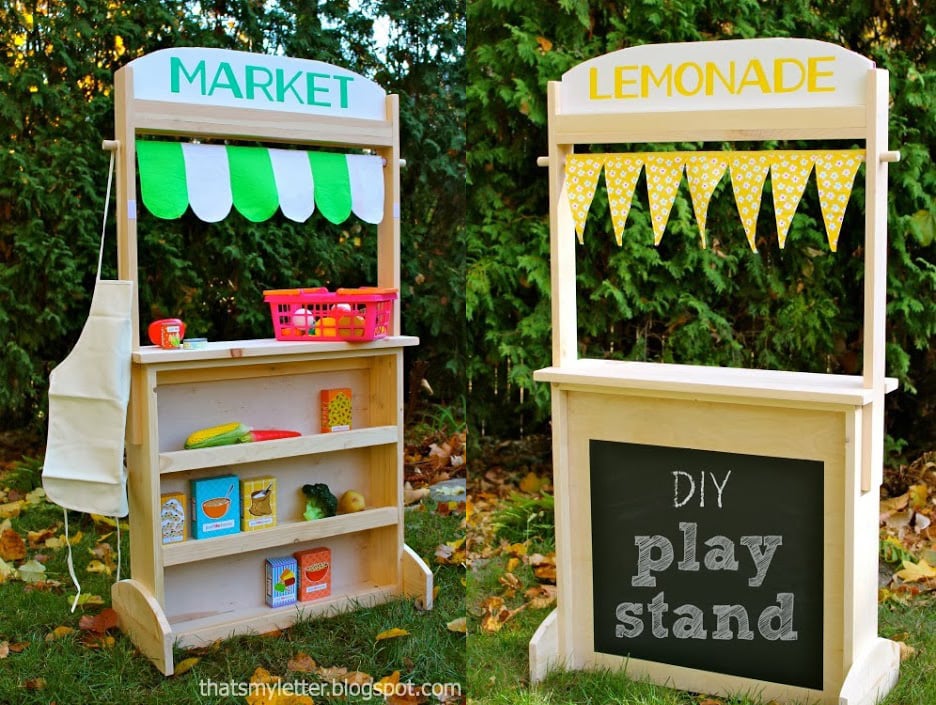
Your child will love this pretend play stand that becomes a play market, play post office, puppet theater, lemonade stand - or much more!
Built by Jaime Costiglio for Handbuilt Holiday
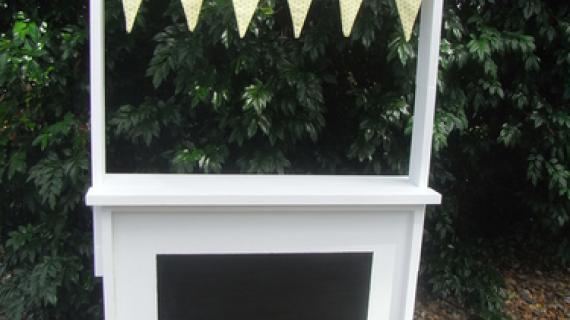
Here's an amazing way to inspire imagination and interactive play for your children - our play stand can be anything you want it to be!
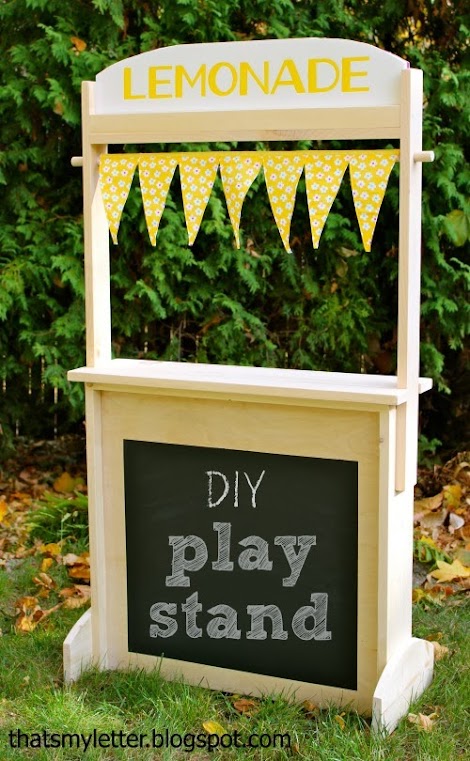
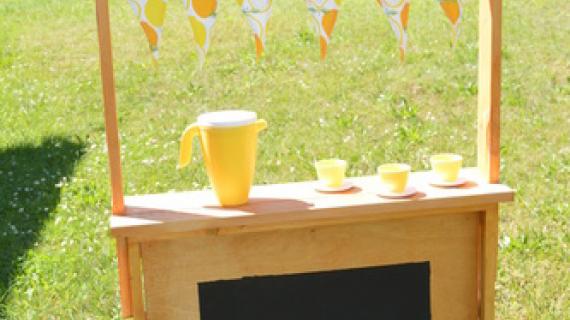
It's a lemonade stand ....
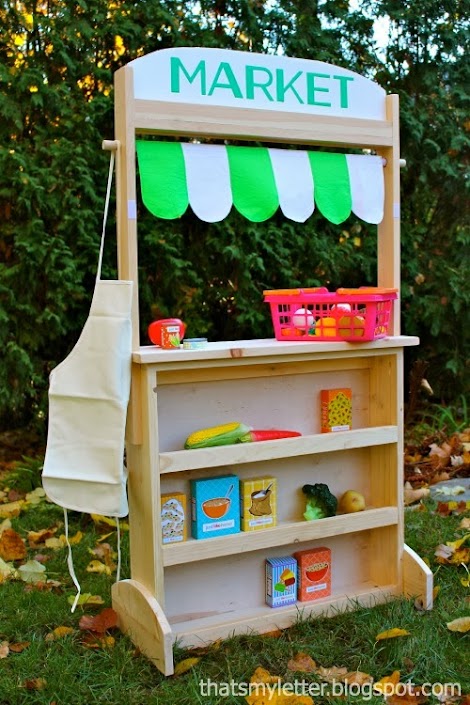
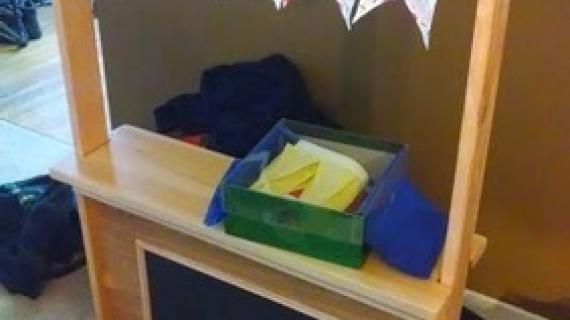
Its a market stand toy -
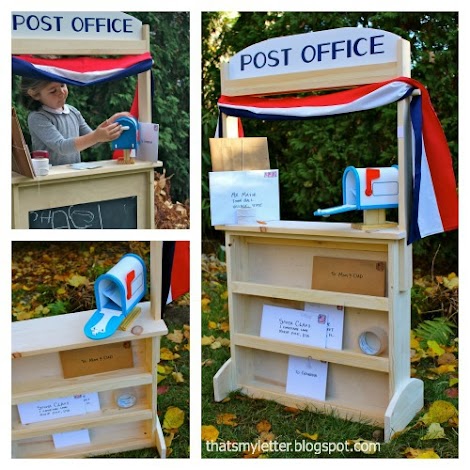
Or it could be a post office ...
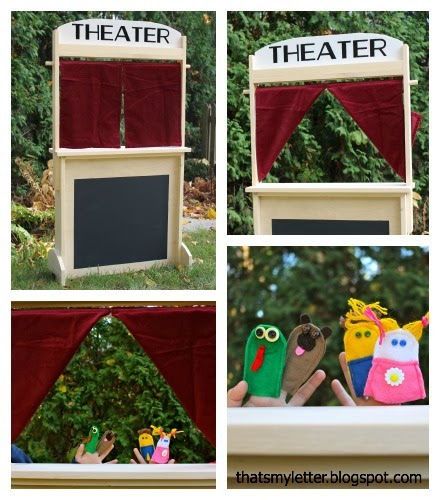
Or even a puppet theater (of course!)

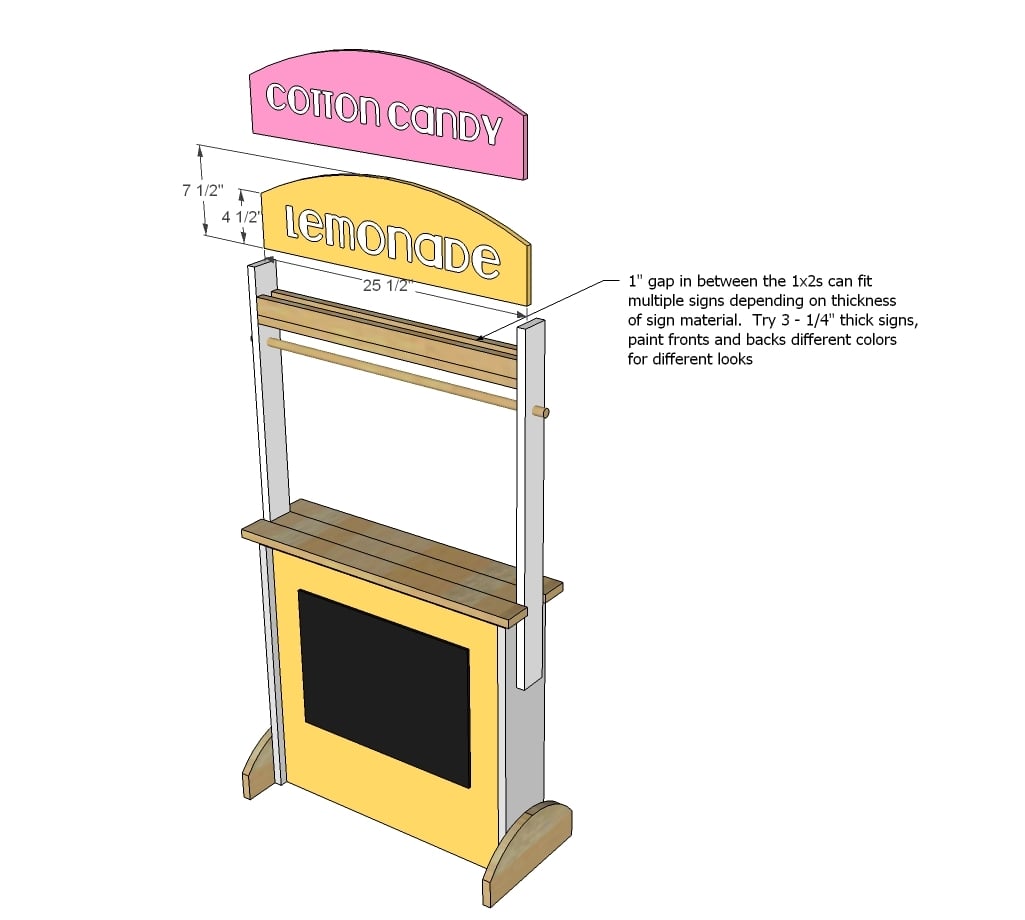
Just use foam board to make banners that slide in up top - so it's easy to store and change all the different options.
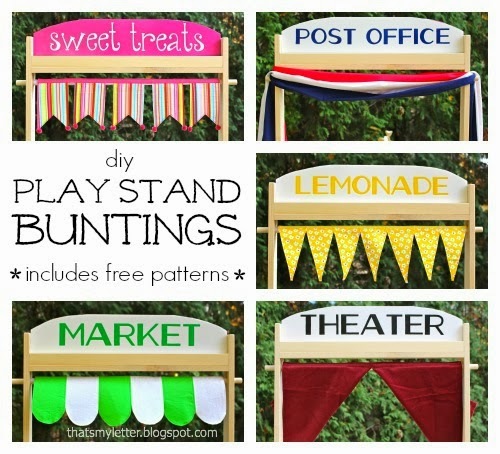
Tutorials and Patterns for Buntings / Signs
We are here to help you make all the buntings and signs too.
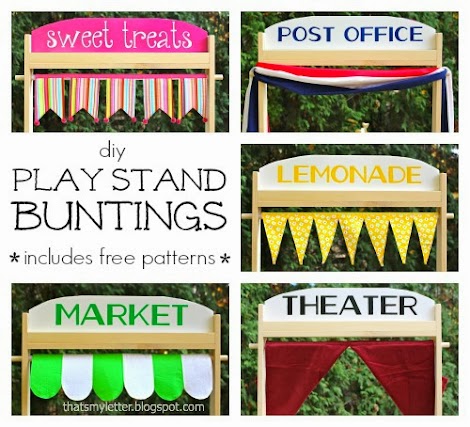
Jaime was so kind to make up patterns for each of these different themes (buntings, curtains and banners), and share the free patterns with you right here.
More Photos and Build Post
The plans follow for the play stand, but please take a second first to check out lots more information, photos, building details, and tips from Jaime at That's My Letter.
Preparation
- 1 - 1x6 @ 10 feet long
- 2 - 1x2 @ 8 feet long
- 1 - 1x4 @ 8 feet long
- 2 - 1x3 @ 8 feet long
- 1 - 1/4” plywood 24” x 24”
- 1 - 3/4” dowel 30” long
- Cardboard or foam board for signs
- 1 1/4” finish nails
- Chalk board paint or chalk board decal
BASE
- 2 - 1x6 @ 24”
- 1 - 1x6 @ 25 1/2”
- 4 - 1x2 @ 24”
- 3 - 1x4 @ 24”
- 1 - 1/4” plywood 24” x 24”
- 2 - 1x6 @ 12”
- 1 - 1x3 @ 25 1/2”
- 2 - 1x3 @ 27 1/2”
HUTCH
- 2 - 1x3 @ 30”
- 1 - 1x3 @ 25 1/2”
- 2 - 1x2 @ 25 1/2”
- 1 - 3/4” dowel @ 30”
- Thick cardboard or foam board for signs 7 1/2” x 25 1/2” (you want these to be lightweight to prevent falling hazard)


Please read through the entire plan and all comments before beginning this project. It is also advisable to review the Getting Started Section. Take all necessary precautions to build safely and smartly. Work on a clean level surface, free of imperfections or debris. Always use straight boards. Check for square after each step. Always predrill holes before attaching with screws. Use glue with finish nails for a stronger hold. Wipe excess glue off bare wood for stained projects, as dried glue will not take stain. Be safe, have fun, and ask for help if you need it. Good luck!
Instructions
Step 1
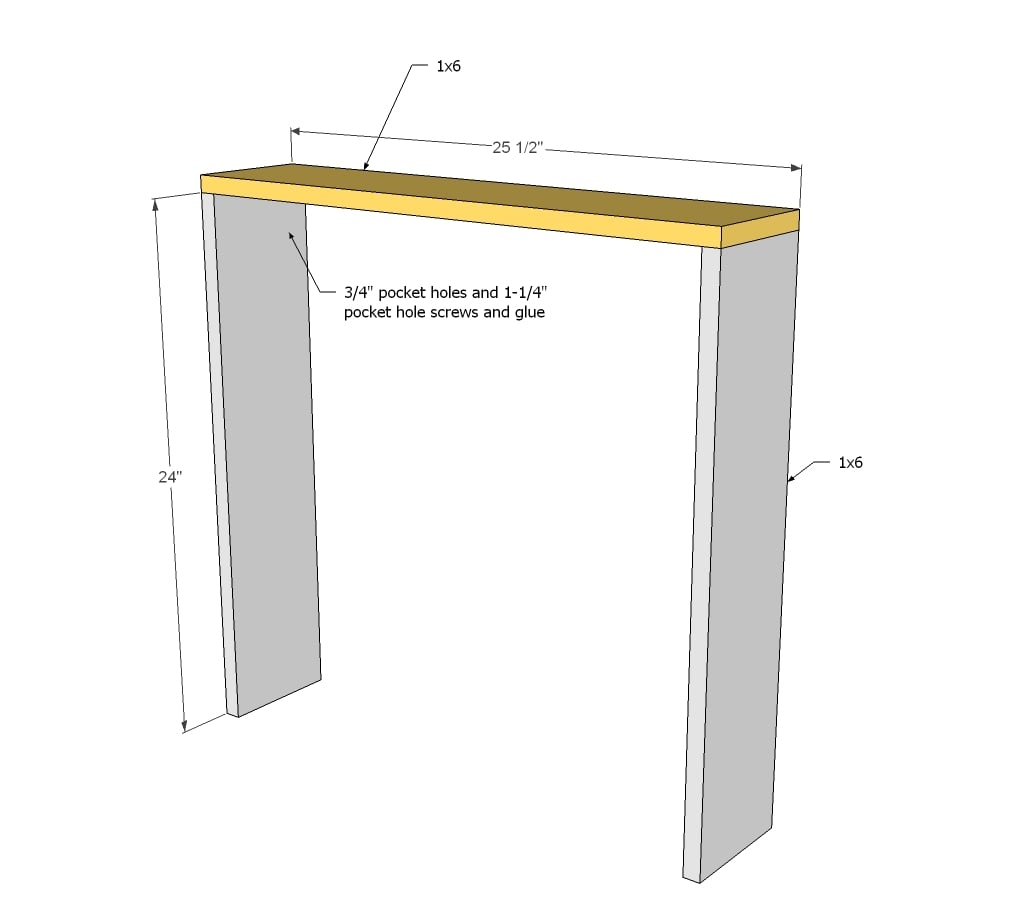
Start by making the basic box with the top and sides.
Step 2

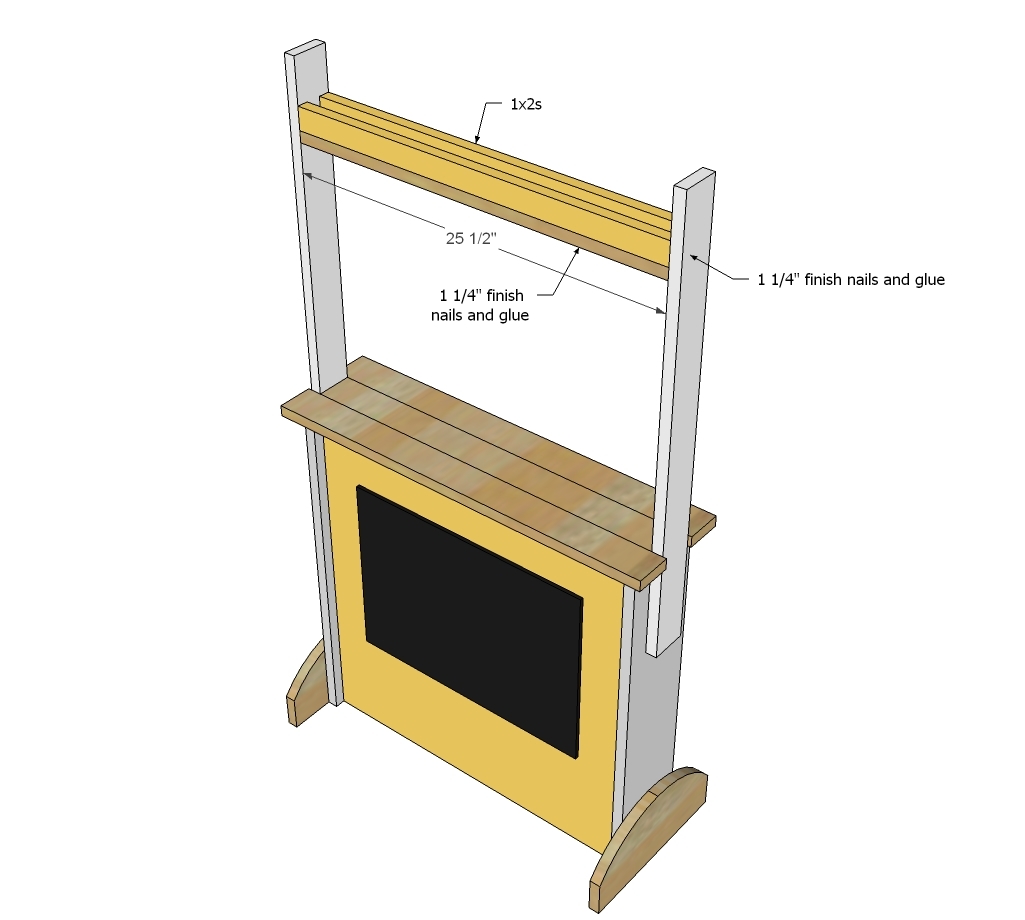
Add the rungs for the back shelves.
Step 3
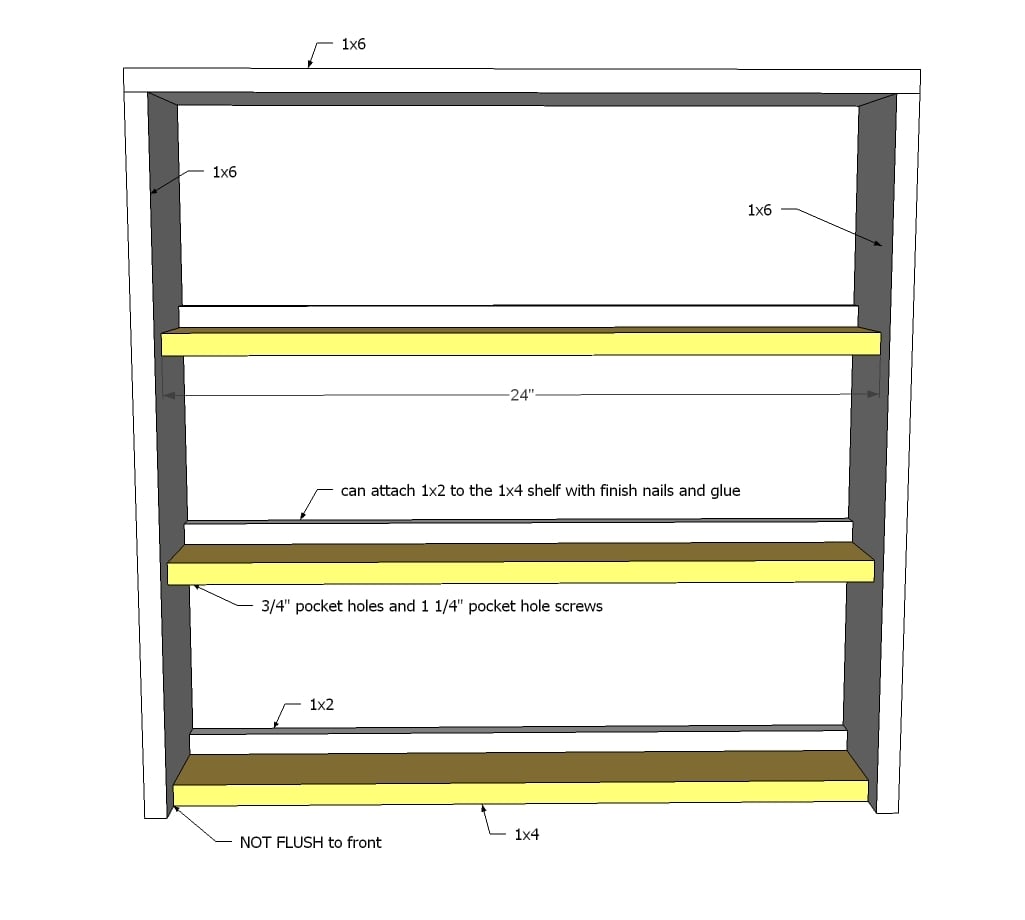
And then the back shelves themselves - notice they sit flush to the 1x2 rungs, but don't make it to the front of the 1x6 sides.
Step 4
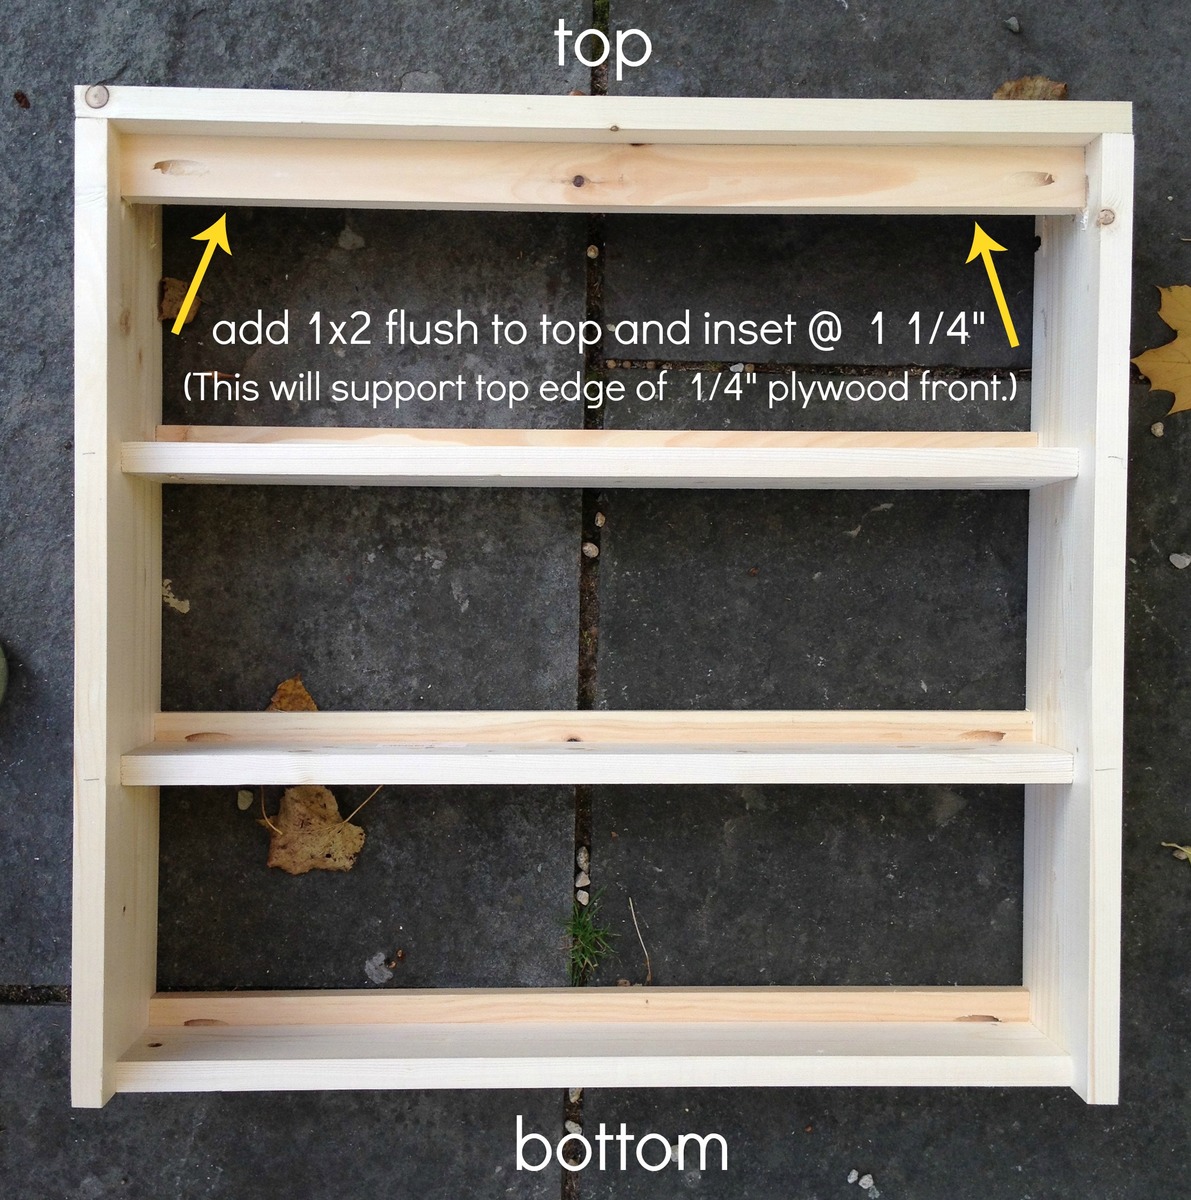
Jaime also recommends adding a fourth 1x2 at the top - flush with the 1x4 shelf backs - to give the plywood (next step) something to attach to at the top.
Step 5
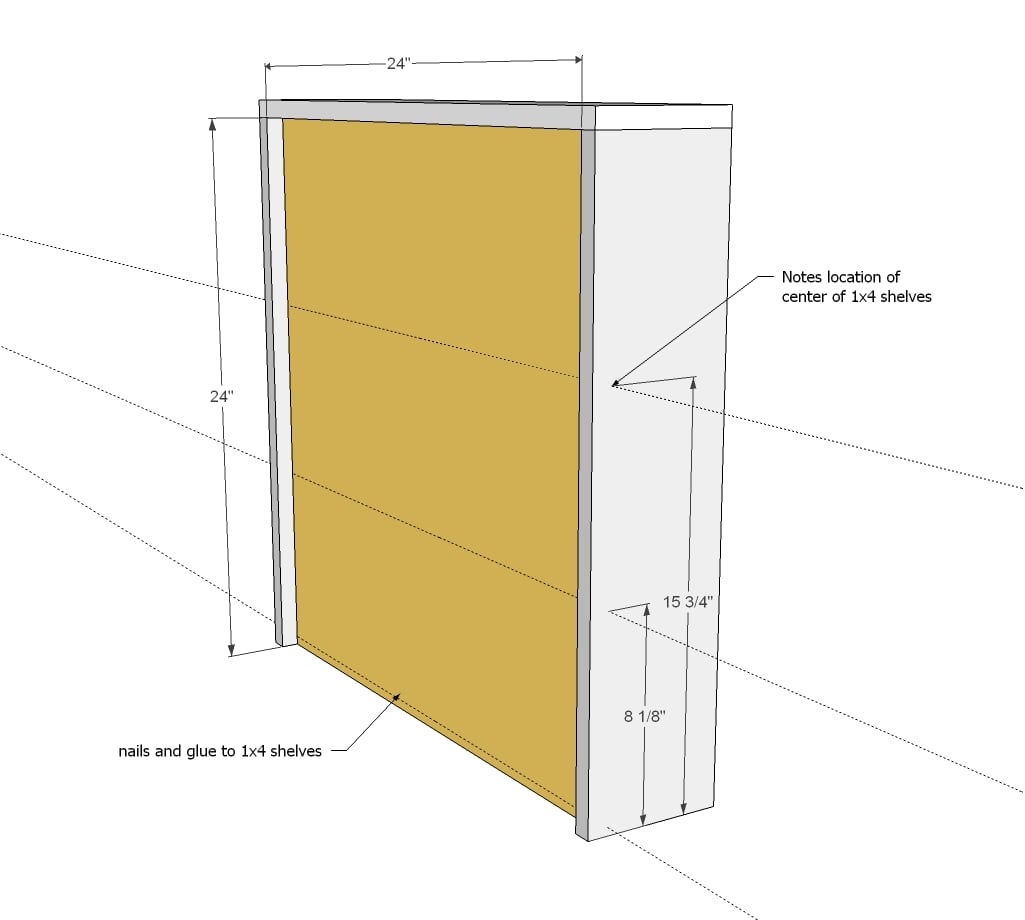
Attach with nails and glue to the 1x4s.
TIP: Mark location of 1x4s FIRST with a pencil on the sides, then place the plywood on top, and transfer the marks on top of the plywood.
Step 6
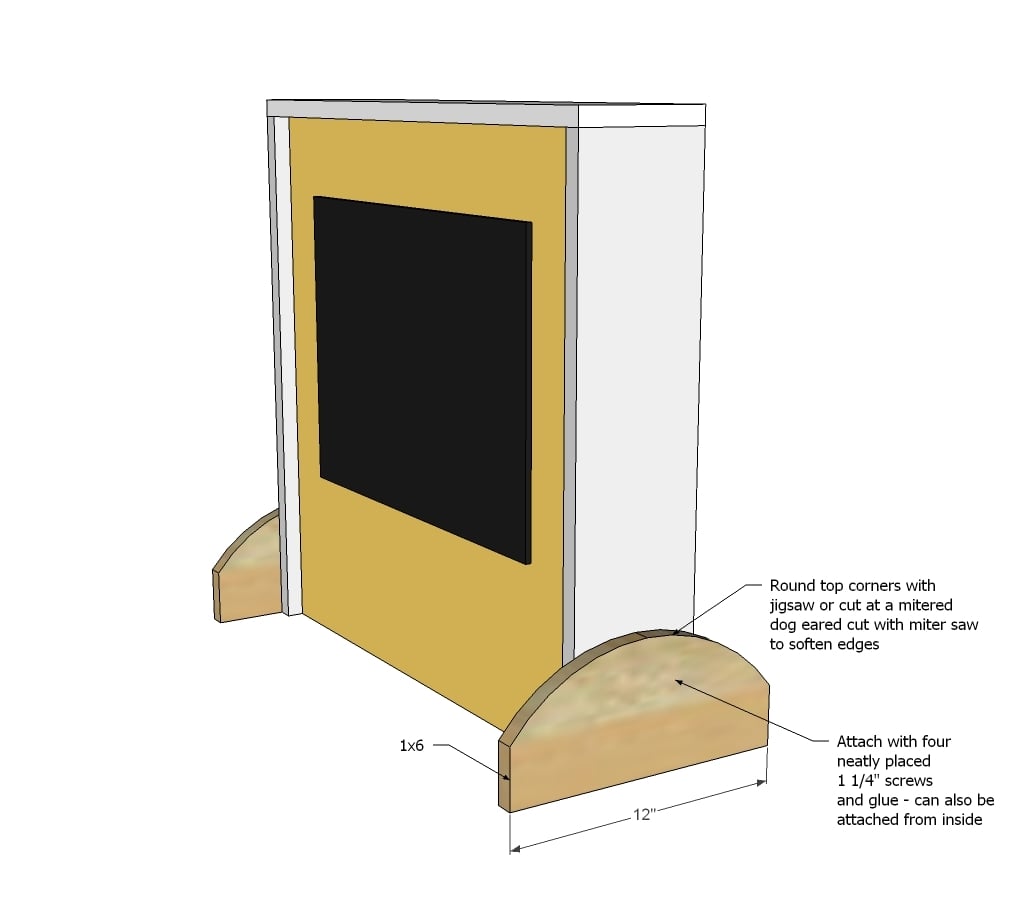
You'll need something to keep the play stand from tipping forward or backward - these guys will do the trick. NOTE: If you go higher, you may need to make these wider - use your best judgement here.
Step 7
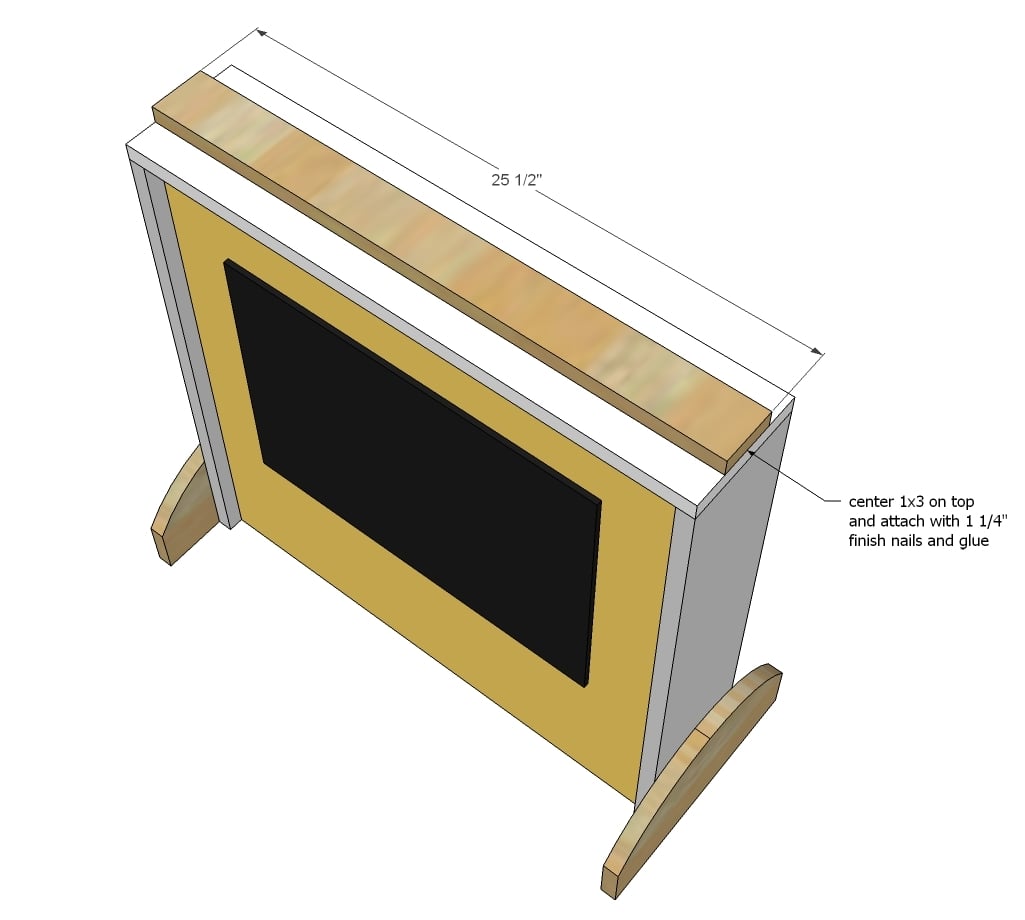
Now for the top - find the center, and attach the short 1x3 in the center.
Step 8
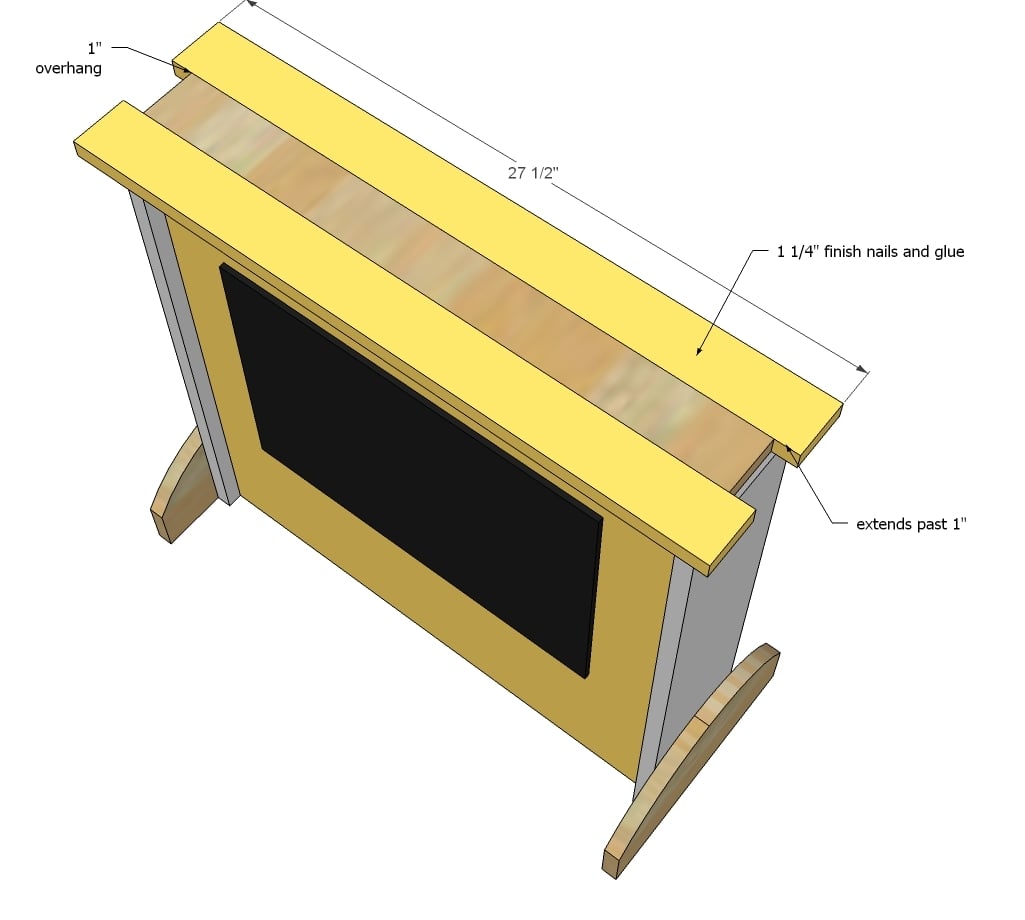
Then attach the longer 1x3s on either side, overextending equally.
Step 9
Now for the sides of the hutch top - those get attached in the notched area on the ends.
Step 10
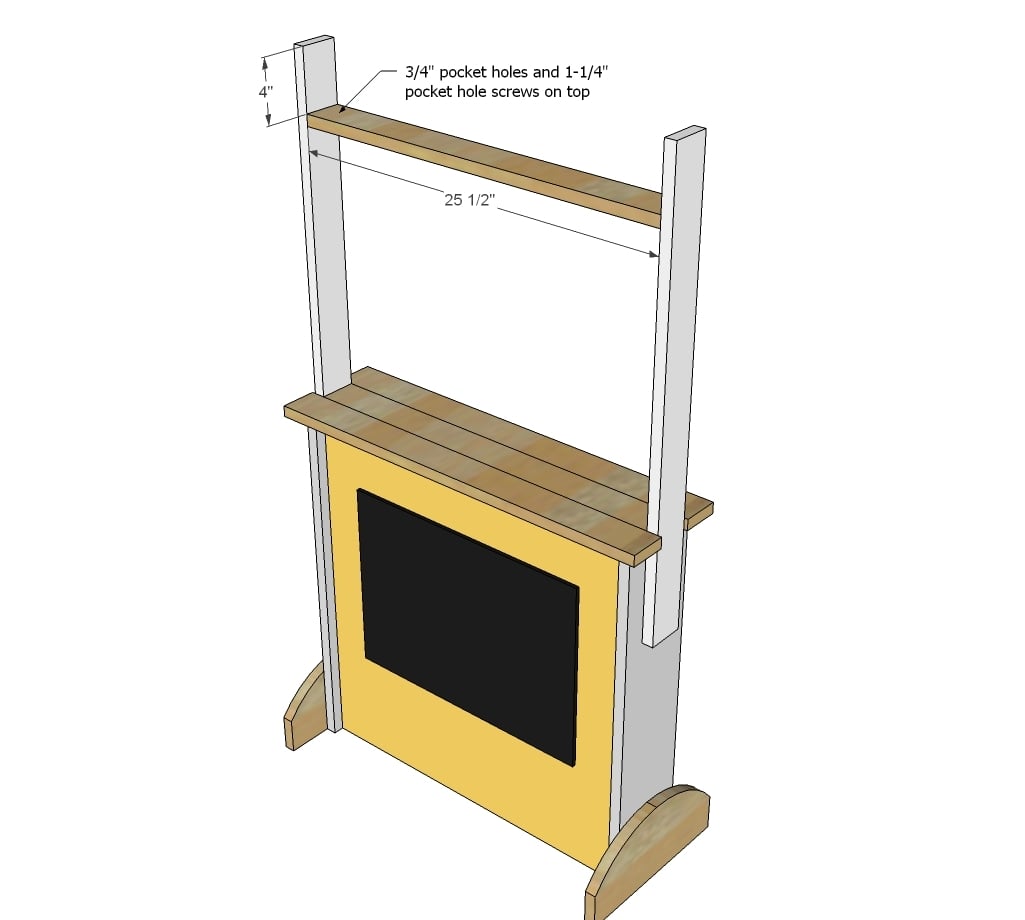
Next, attach the top shelf ...
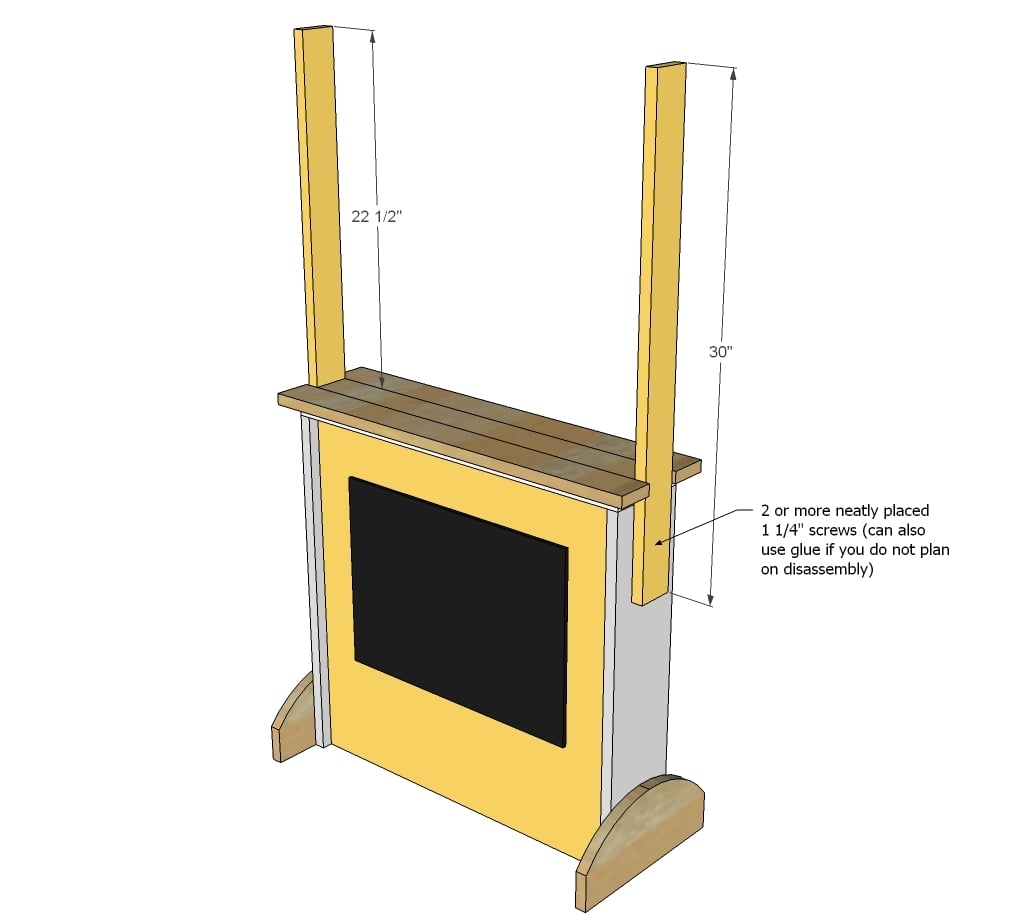
Step 11
And then the sides for holding the signs ...
Step 12
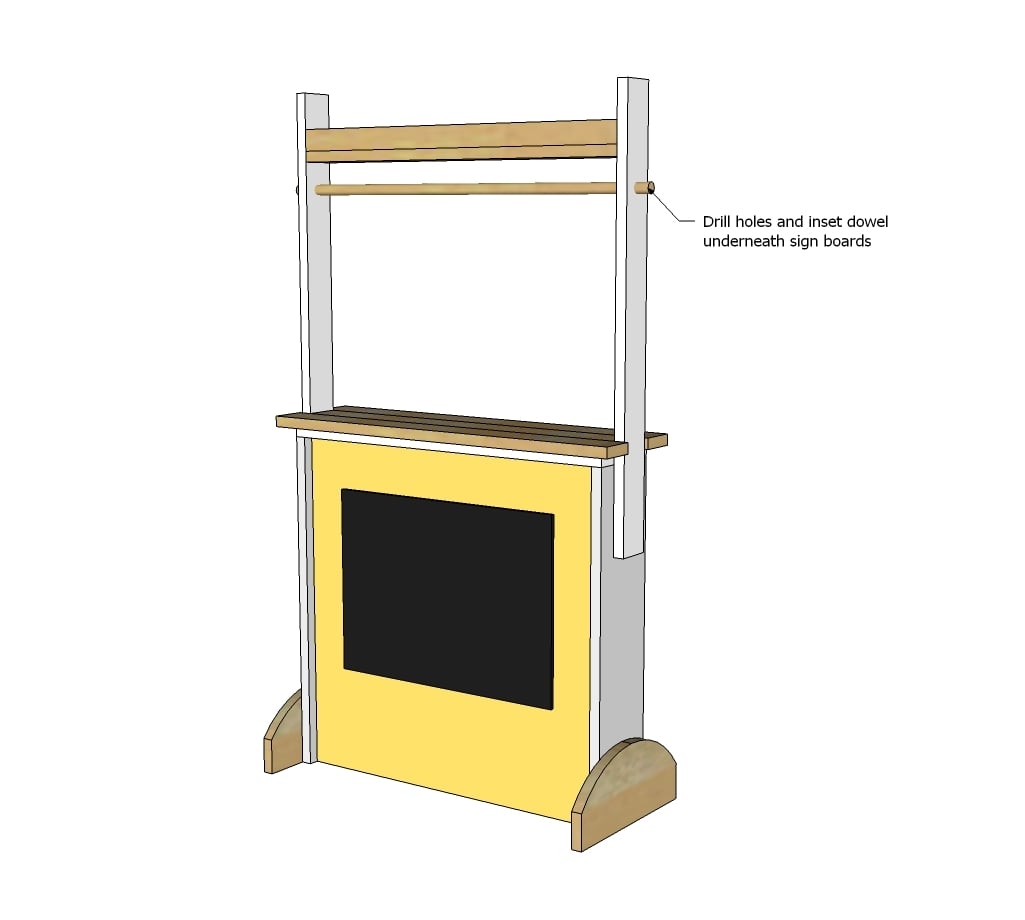
Then add the dowel ..
Step 13
And finally, it's time for the signs - I recommend lightweight foam board just to prevent any injury and because it's cheap and easy to work with and comes in a variety of colors.
Step 14
Jaime has free patterns for the buntings here - so check them out too!
It is always recommended to apply a test coat on a hidden area or scrap piece to ensure color evenness and adhesion. Use primer or wood conditioner as needed.


Comments
yurra-bazain
Tue, 11/12/2013 - 20:39
I love!
I love this and I absolutely need to build this for me (oh, and my daughter). Haha. =D We could have so much fun with it for years to come, instead of the cardboard playhouse I made a year or two ago that is slightly askew now. Then, we could turn around and use this as a bake sale / garage sale stand!
Kelli LaRue
Fri, 12/20/2013 - 12:12
Help?
How do you hide the screws? Lovely work btw :)
lbadger
Wed, 04/02/2014 - 07:05
Perfect solution!
I needed a shelf in our play area upstairs in front of a window. With a few modifications this little playstand/theater was the perfect solution. Submitting a brag post now! Thank you so much for the idea and the plans!
lbadger
Wed, 04/02/2014 - 07:05
Perfect solution!
I needed a shelf in our play area upstairs in front of a window. With a few modifications this little playstand/theater was the perfect solution. Submitting a brag post now! Thank you so much for the idea and the plans!