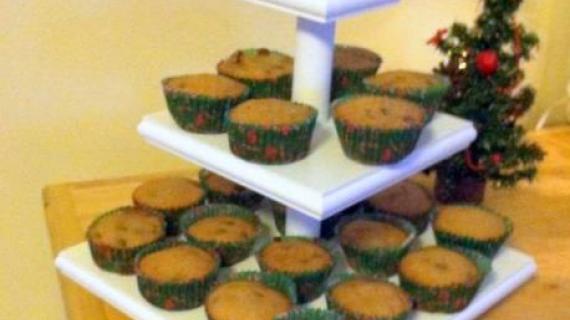
DIY cupcake or dessert stand - free plans from Ana-White.com
Happy Friday!!!
Delighted today to debut brand new gift plans for you!

As part of the ongoing Handmade Gift Series Jaime from That's My Letter and I are partnering on this Holiday season for you, we've thought you'd enjoy plans for a cupcake or dessert stand.

The intention of this project was to create a toy plan that your little tea party hostesses would love to have under the tree ...

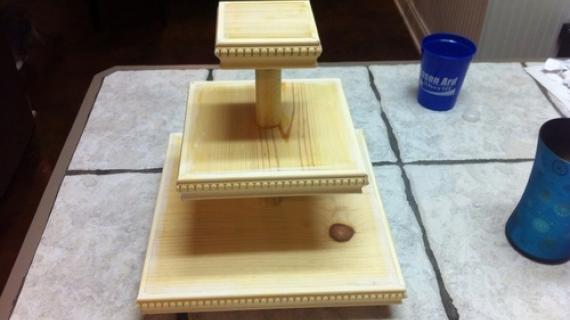
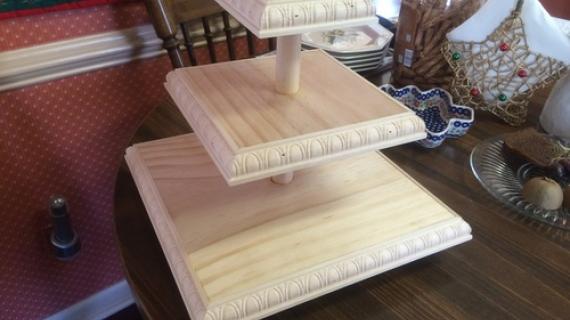
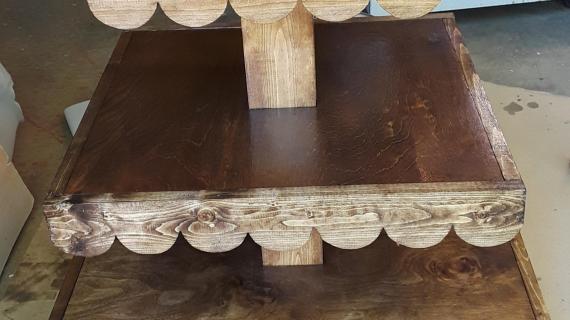
But Jaime put this project together in two different styles, and both are dessert table worthy for Mom too!

And Jaime also put together tutorials for felt cupcakes!!!
Check out the full tutorial here!
And of course, we've got you covered with the free step by step plans following, but please take a second to stop over and thank Jaime for her hard work and check out lots more photos and building/finishing details right here.
Thanks Jaime!
XO Ana

Preparation
1 - 2x6 @ 5 1/2"
1 - 1x12 @ 11 1/4"
1 - 1x8 @ 7 1/4"
1 - 1x4 @ 3 1/2"
1 - 1" dowel @ 10 1/2" long
about 12 feet of scalloped moulding (optional - check hobby/craft stores)
1 finial with screw already inserted (optional - check hobby/craft stores)
Glue or silicone
1" drill bit or spade bit
CUT LIST
1 - 2x6 @ 5 1/2"
1 - 1x12 @ 11 1/4" (cut to width of 1x12 to make a square)
1 - 1x8 @ 7 1/4" (cut to width of 1x8 to make a square)
1 - 1x4 @ 3 1/2" (cut to width of 1x4 to make a square)
1 - 1" dowel @ 10 1/2" long


Please read through the entire plan and all comments before beginning this project. It is also advisable to review the Getting Started Section. Take all necessary precautions to build safely and smartly. Work on a clean level surface, free of imperfections or debris. Always use straight boards. Check for square after each step. Always predrill holes before attaching with screws. Use glue with finish nails for a stronger hold. Wipe excess glue off bare wood for stained projects, as dried glue will not take stain. Be safe, have fun, and ask for help if you need it. Good luck!
Instructions
Step 1

Attach the 2x6 square base to the 1x12 bottom layer tray with glue and nails or screws (2" length).
Step 2

Drill holes through the bottom layer and into the 2x6 layer. Make sure the hole is drilled square so that the dowel doesn't sit crooked - this is very important.
Step 3

Insert dowel and glue securely in place.
Step 4

Place second layer on, glue in place.
Step 5

Step 6

Trim edges of shelves with scalloped trim. Corners need to be cut at 90 degree bevels.
Nail or staple and glue on.
It is always recommended to apply a test coat on a hidden area or scrap piece to ensure color evenness and adhesion. Use primer or wood conditioner as needed.