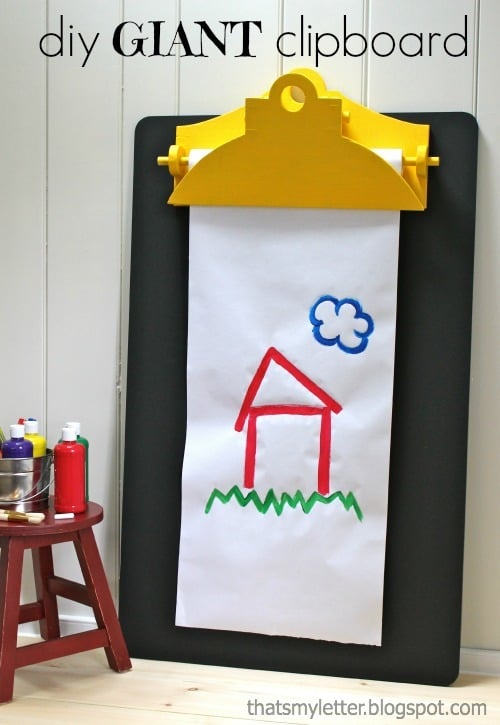


DIY a jumbo clipboard that you can make! Free plans from Ana-White.com


You know what day it is!!!
It's Friday!
And you know what that means!
We've got a present for you.
Well, let me rephrase that.
We've got a plan for a present that you can make!
Through Christmas, my friend Jaime from That's My Letter and I are teaming up to bring you a new gift plan each week - so you can handmake gifts and maybe save some $$$ too!

Today's special treat?
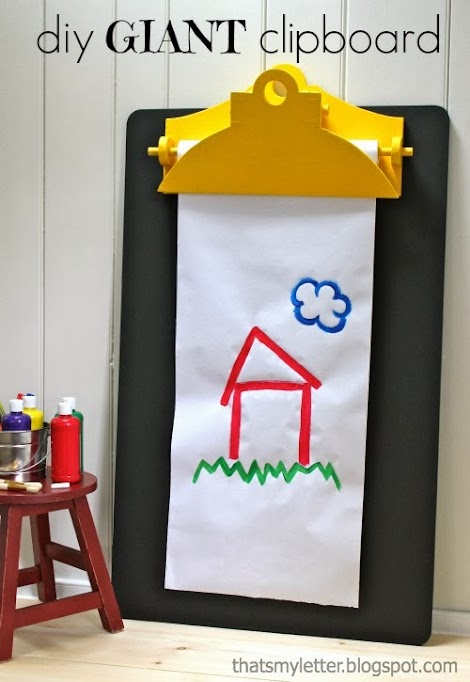
A giant, jumbo clipboard that you can DIY out of half a sheet of plywood!

And we do mean giant!

With a real working giant clip!!!
The free plans follow, of course!!!
But please take a second to go check out Jaime's building post right here for more details on how she built and finished this jumbo clipboard!
Thank you Jaime!
Have a great weekend!
XO Ana

Preparation
1 - 4x4 sheet of 1/2" thick plywood, particle board or MDF or other smooth sheet goods
1 - 36" dowel (1/2" to 3/4" thick is ideal - must have matching drill or spade bit)
1 - 1/2" plywood 22" x 12" (Back Plate)
1 - 1/2" plywood @ 22" x 11" (Front Plate)
4 - 1/2" plywood 2" x 3" (top dowel holder pieces)
2 - 1/2" plywood 2" x 2" (bottom dowel holder pieces)
back is 48" x 30


Please read through the entire plan and all comments before beginning this project. It is also advisable to review the Getting Started Section. Take all necessary precautions to build safely and smartly. Work on a clean level surface, free of imperfections or debris. Always use straight boards. Check for square after each step. Always predrill holes before attaching with screws. Use glue with finish nails for a stronger hold. Wipe excess glue off bare wood for stained projects, as dried glue will not take stain. Be safe, have fun, and ask for help if you need it. Good luck!
Instructions
Step 1

Take the larger piece of plywood for the back plate, and transfer the measurements from the diagram above on to it. Then draw arches and center point for whole and cut out carefully with a jigsaw. Sand edges smooth.
Step 2

To cut these small pieces, try first cutting a strip 2" wide by at least 16" long (20" is ideal). Then clamp one end to the table, and cut the arch shape out of the oppostie end overextending the table with a jigsaw. Drill the center hole. Then cut to length. This way you aren't trying to clamp a 2" long piece down and jigsaw it.'
An alternative is to use 1x3 boards like Jaime did here.
Then attach the pieces to the back plate - you can use glue and nails or screws from back side (use 1" screws) or 1/2" pocket holes and 1" pocket hole screws (from the front to attach).
Step 3

Then repeat the steps on the front plate piece as you did the back plate.
Step 4

And attach the top pieces as you did for the back plate.
Step 5

Step 6

Then attach the entire clipboard piece to the back plywood. You can also round corners of the back as well.
It is always recommended to apply a test coat on a hidden area or scrap piece to ensure color evenness and adhesion. Use primer or wood conditioner as needed.
Comments
spiceylg
Mon, 11/04/2013 - 01:51
Adorable!
Love this! So unique!