Build a play vanity with drawers and stair baluster legs! Plans from Ana-White.com


Happy Friday!!!
Well, we are getting closer and closer to the Holidays! Are you busy making toys?
This year, my friend Jaime from That's My Letter and I teamed up for a Holiday gift plan series.

Check out the previous projects we've posted:

And today, we are adding a brand new plan!!!

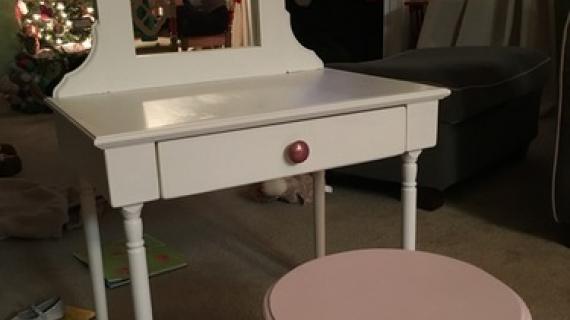
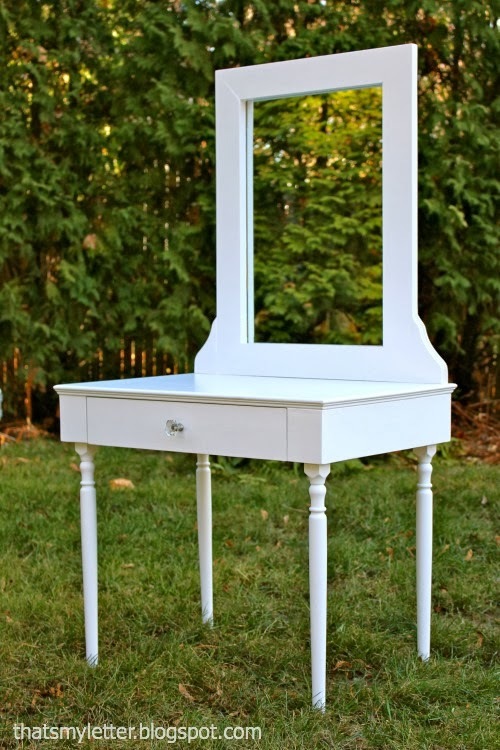
A play vanity with a real drawer on metal drawer slides!!!
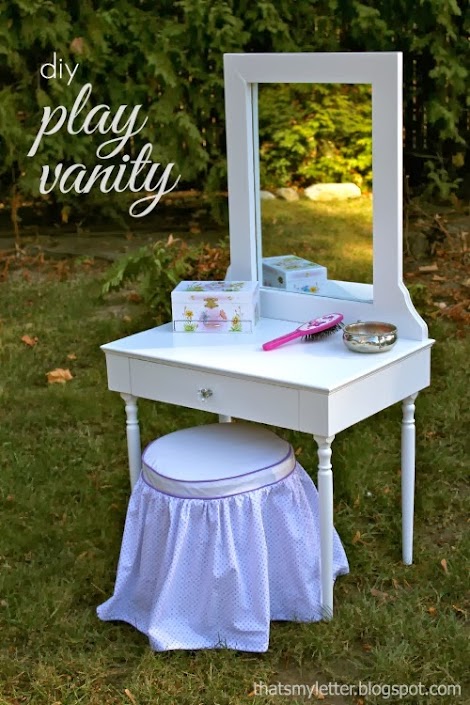
And you can also make that darling vanity stool too!
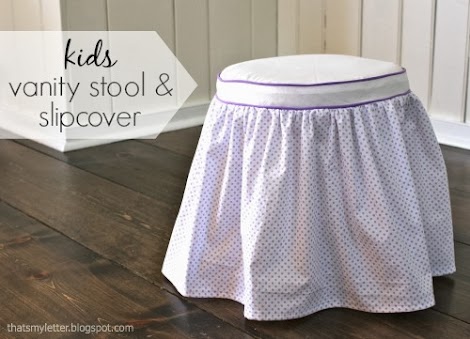
Jaime walks you step by step through how she sewed this stool cover and built this stool - so you can follow along and make one too! Check it out!!!
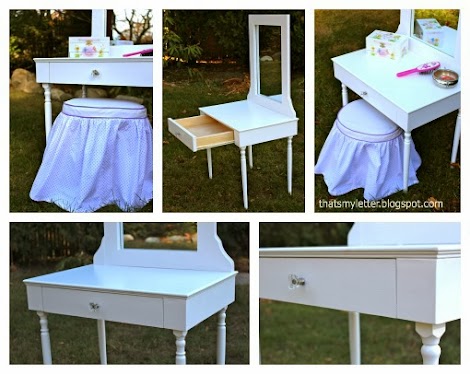
And of course, the plans for the vanity itself follow. But before we get to those, check out Jaime's building post, with lots more details on all those little details, how much she spent, and more photos!
Thanks Jaime!
Have a great weekend!
Happy Building!
XO Ana

Preparation
4 - Stair Balusters like these
2 - 14” drawer slides (Home depot has them)
Small mirror (12”-16” wide)
2 - small corbels (depending on mirror size)
1 knob or handle
1 - 1x4 @ 10 feet long
1 - 1x3 @ 6 feet long
1 - 3/4” panel or plywood @ 24” x 16”
1 - 1/4” plywood piece 14” x 17-1/2”
Nails and screws
4 - 1x4 @ 14-1/2”
2 - 1x4 @ 2-3/4”
1 - 1x4 @ 24”
1 - 3/4” panel or plywood @ 16” x 24”
4 - stair balusters cut at 20-1/2”
DRAWER - Cut to fit slides and opening!!!
2 - 1x3 @ 14”
2 - 1x3 @ 16”
1 - 1/4” plywood @ 17-1/2” x 14”
1 - 1x4 @ 18-1/4” (drawer face)
3/4” thick moulding for trimming out top


Please read through the entire plan and all comments before beginning this project. It is also advisable to review the Getting Started Section. Take all necessary precautions to build safely and smartly. Work on a clean level surface, free of imperfections or debris. Always use straight boards. Check for square after each step. Always predrill holes before attaching with screws. Use glue with finish nails for a stronger hold. Wipe excess glue off bare wood for stained projects, as dried glue will not take stain. Be safe, have fun, and ask for help if you need it. Good luck!
Instructions
Step 1

Use the 1x4s to build the base. Make sure the legs can fit in the spaces - otherwise, adjust the plans to fit your legs.
Step 2

Attach top - the easiest way is to attach with finish nails and glue from top, but 3/4" pocket holes would work pretty good from the underside too.
Step 3

Place the legs inside the base, and nail or screw to the base.
Step 4

Build your drawer to fit the opening and your slides. This is most likely 1" less in overall width of the inside opening (1/2" for drawer slides on each side is standard) but double check your drawer slides.
Step 5

Step 6

Trim out the top with an edge moulding - optional. This will finish your plywood edges and add a little extra fancy to the edges.
Step 7

Attach drawer face to drawer, leaving an 1/8" gap on each side.
Step 8

Depending on your mirror, you'll have to support it as you see fit. The corbels may need to be attached at an angle - especially if you have a taller mirror.
It is always recommended to apply a test coat on a hidden area or scrap piece to ensure color evenness and adhesion. Use primer or wood conditioner as needed.