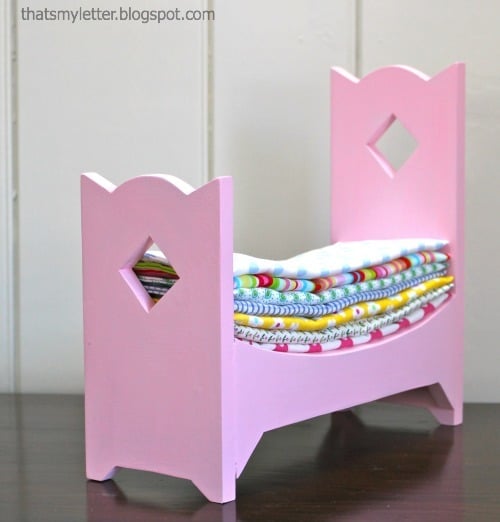


Build your own princess and the pea playset with free plans from Ana-White.com
Hi everyone!!! It's Friday - and you know what that means!!!
Time to put your elf hat on and head to the workshop - because we've got a brand new child's gift plan for you today!
Jaime from That's My Letter and I have been teaming up this Holiday season to bring you new gift plans each week.

You can check out all the previous plans here.
Today, we have a very fun little gift set that you can DIY!!!

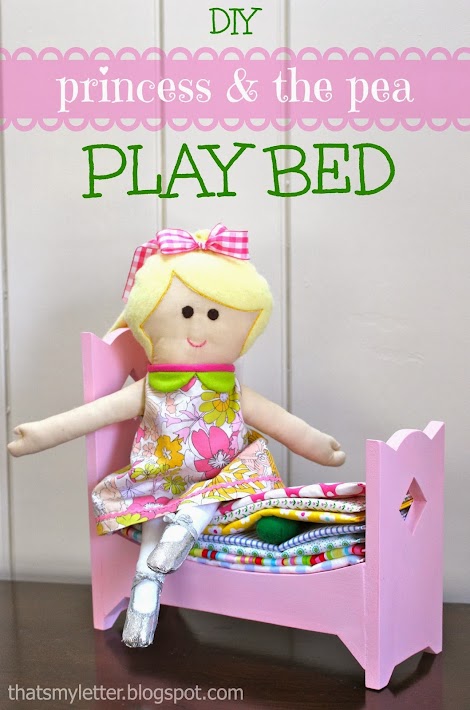
She's a true princess if she knows there's a pea under those mattresses!
Jaime has been kind enough to share easy sewing tutorials for the doll, pea, and the mattresses,

Isn't she darling?
And if you are sewing challenged (like me) - it would be fun to gift a doll making kit like this one that your little princess can make with you.

Easy-To-Do Princess Doll Making Kit
And of course, the doll bed is DIY ...

And of course we are sharing the free full DIY plans for you following for the princess bed -
But before we get to plans, head on over to check out lots more cute photos, tutorials for the mattress, pea and princess, and building tips and tricks from Jaime at That's My Letter.
Thank you Jaime!
Have a great weekend!
XO Ana
Preparation
1/2" plywood - you won't need much, about 2 square feet
1 - 1x4 @ 11" (could also use 1/2" plywood)
nails or staples and glue OR Hot Glue
spray primer and paint recommended
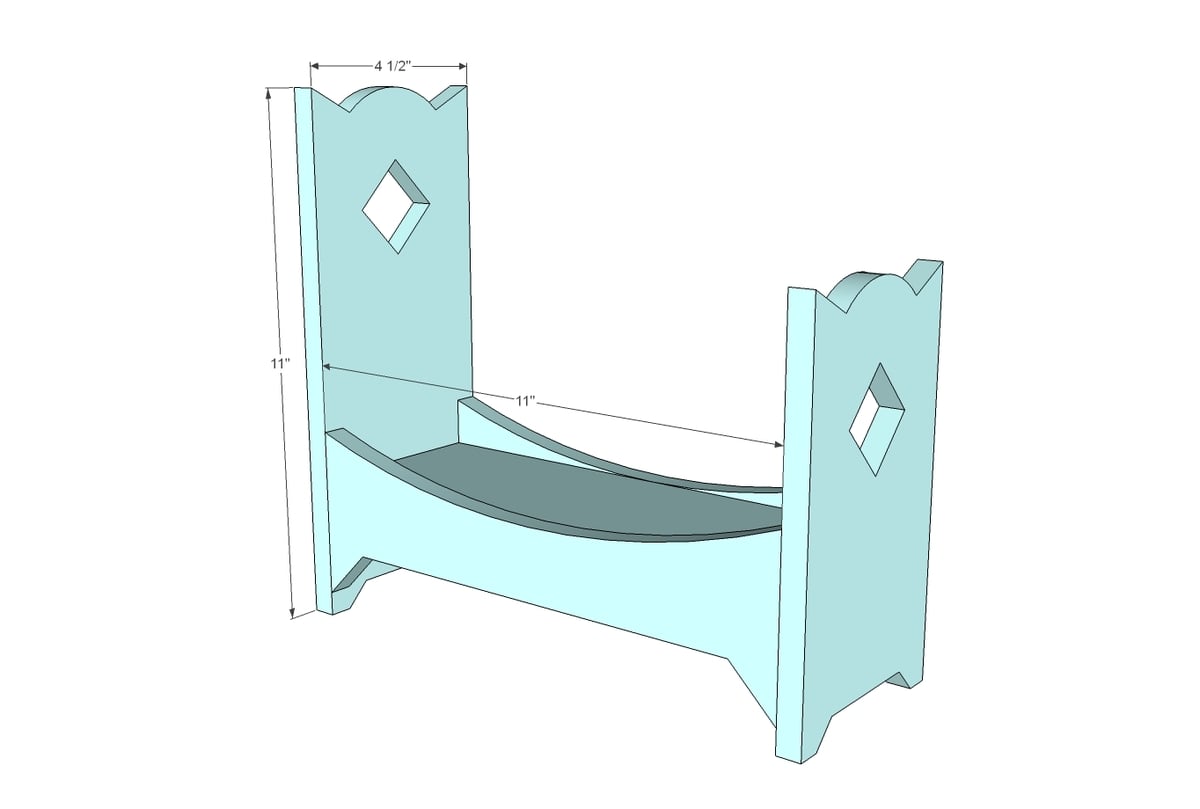
1 - 1/2" thick plywood or MDF @ 4-1/2" x 11" (headboard)
1 - 1/2" thick plywood or MDF @ 4-1/2" x 8" (footboard)
2 - 1/2" thick plywood or MDF @ 3-1/2" x 11" (siderails)
1 - 1x4 @ 11" OR 1/2" thick plywood @ 3-1/2" x 11" (the 1x4 would give you more to attach too so it's preferred)


Please read through the entire plan and all comments before beginning this project. It is also advisable to review the Getting Started Section. Take all necessary precautions to build safely and smartly. Work on a clean level surface, free of imperfections or debris. Always use straight boards. Check for square after each step. Always predrill holes before attaching with screws. Use glue with finish nails for a stronger hold. Wipe excess glue off bare wood for stained projects, as dried glue will not take stain. Be safe, have fun, and ask for help if you need it. Good luck!
Instructions
Step 1
Start with the rectangle pieces for the headboard and footboard. Mark and cut out with a jigsaw.
Step 2
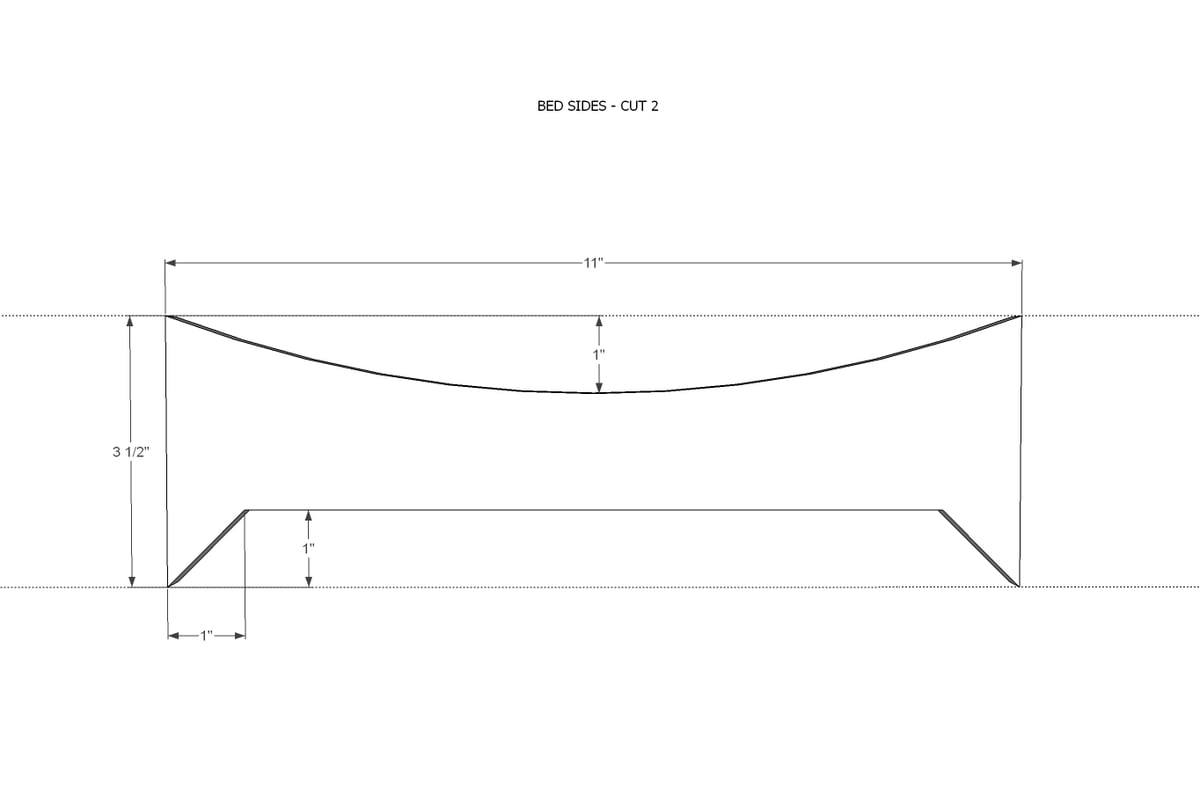
Do the same for the two siderails.
Step 3

Attach siderails to the 1x4 in the center with nails, staples or hot glue.
Step 4

Attach headboard and footboard to 1x4 and siderails.
Prime, paint and gift!
It is always recommended to apply a test coat on a hidden area or scrap piece to ensure color evenness and adhesion. Use primer or wood conditioner as needed.
Comments
carongirls
Tue, 12/31/2013 - 19:58
Jigsaw impaired
I made this bed but cutting the diamond shapes was a bear. I used mdf and will try again with pine to see if I can get a better cut. Mine just looks sloppy.
hollycase
Wed, 01/15/2014 - 08:29
fabricut fabric
very cute bed and adorable color, i will surely buy for my little toddler. I recently bought few fabrics on discount from http://www.fabriccarolina.com and they really have great collection of fabrics.