


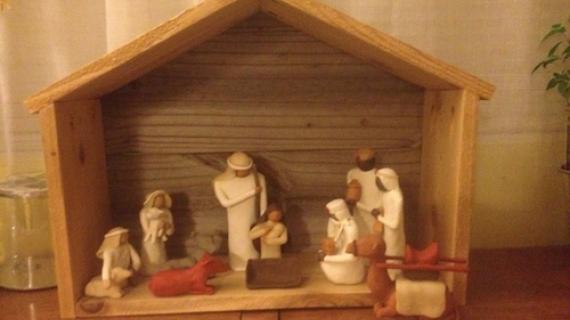
Build your own wood manager using fence pickets to celebrate Christmas. This simple beautiful wood display is the perfect backdrop for your Christmas figurines. Free step by step plans from Ana-White.com
Why We Built this Wood Manger for Nativity Scene
Jaime from That's My Letter and I have been teaming up to bring you a brand new gift plan every Friday until Christmas.
I'm really excited about today's plan - it's so simple and inexpensive ($3 in lumber!!!) to make, but so darling!!!
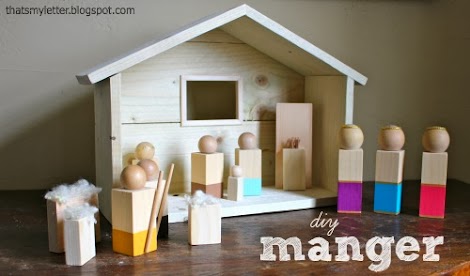
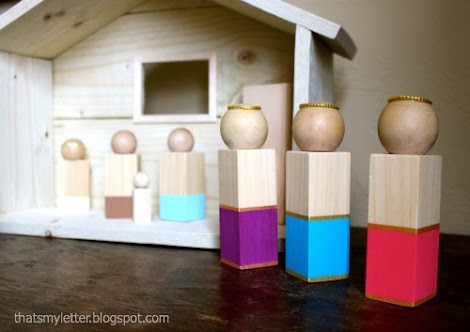
How to Build the Nativity Figures
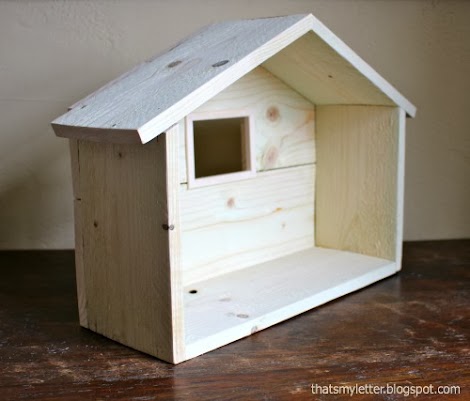
Build Post with Construction Photos
Take a second to check out Jaime's manger building post here - she's got lots of details on how she built this manger that you won't want to miss!
Preparation
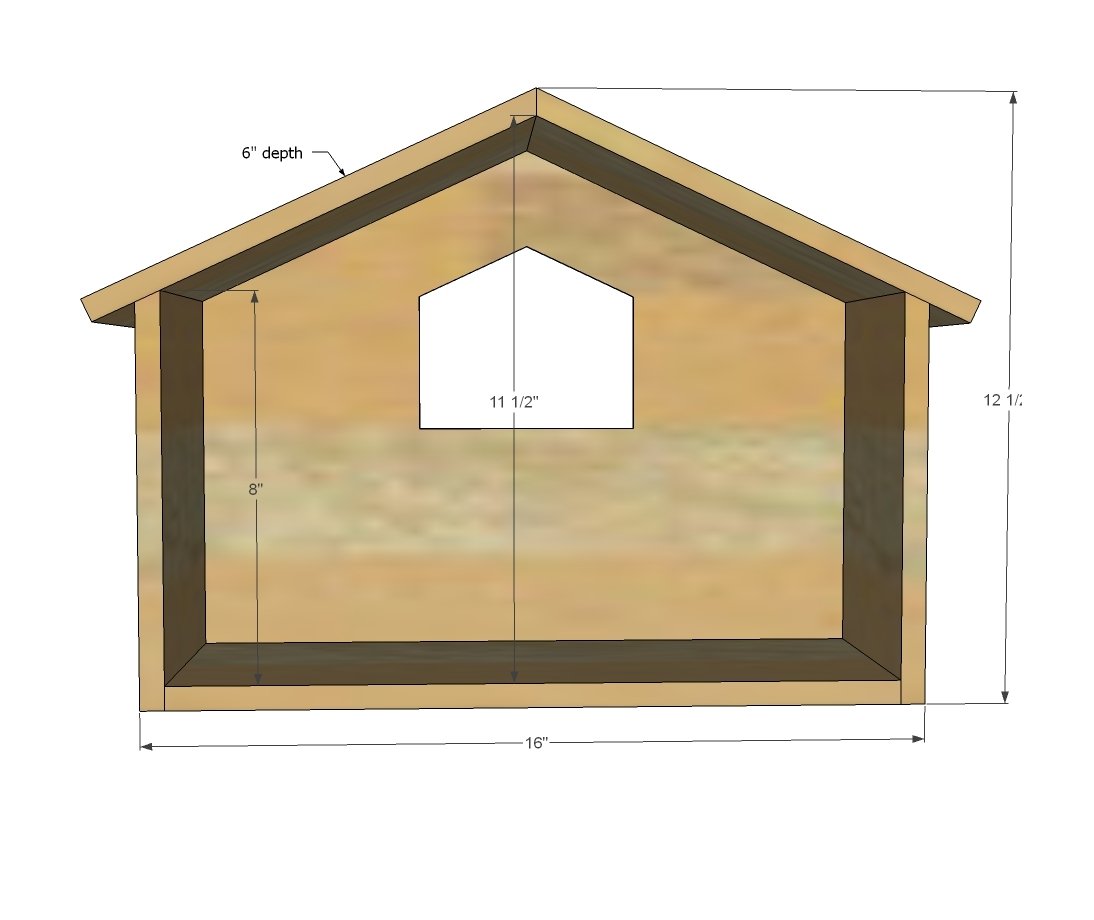
- 1 cedar fence picket measuring 5-1/2" wide x 1/2" thick x 72" long
- 1/4" scrap plywood for back OR cover back in cedar fence pickets
- Hot glue and glue gun for attaching
- Can also be nailed or stapled
CUT FROM FENCE PICKET:
- 1 @ 15" long (bottom)
- 2 @ 8-1/2" long - longest point measurement, top end BEVELED at 25 degrees off square (sides)
- 2 @ 10" long - longest point measurement, top end BEVELED at 25 degrees off square (roof)
- Cut back to fit


Please read through the entire plan and all comments before beginning this project. It is also advisable to review the Getting Started Section. Take all necessary precautions to build safely and smartly. Work on a clean level surface, free of imperfections or debris. Always use straight boards. Check for square after each step. Always predrill holes before attaching with screws. Use glue with finish nails for a stronger hold. Wipe excess glue off bare wood for stained projects, as dried glue will not take stain. Be safe, have fun, and ask for help if you need it. Good luck!
Instructions
Step 1

Attach sides to bottom, make sure the top angles are placed so the bevel is long point on inside.
Step 2

Mark the roof pieces one inch in from square cut end (to mark roof overhangs). Hot glue the two roof panels together, and then attach the two panels to the sides, lining up roof overhang marks with outside of sides. Glue and staple or nail to sides.
Step 3

For the back, trace the shape out on a piece of 1/4" plywood or other backer board material. You can also plank the back (like Jaime did here) with cedar fence pickets.

Cut a window out with a jigsaw. You can also check out how Jaime trimmed her window out here.
It is always recommended to apply a test coat on a hidden area or scrap piece to ensure color evenness and adhesion. Use primer or wood conditioner as needed.

Comments
Kesb
Tue, 12/10/2013 - 08:07
hand building
this is amazing and i don't need to be any professional carpenter to do this
sound !thanks
because i'm a painter so i have painted mysef
http://www.eurodecorating.co.uk